Rice Krispie Biscotti

I’ve been on a biscotti making kick lately, as you can tell. For some reason it’s the only thing I want to bake this year! I love that there’s so many varieties and flavor combinations you can do with biscotti.

I saw these cute little Rice Krispie biscotti on the blog, Dinners for a Year and Beyond while wandering through the blogosphere one day, I instantly knew I was going to make these for my granddaughter. This is a great holiday treat to make for kids, but then again, I know a few adults that wouldn’t pass these up either!
So easy to make and form, just dip them into your favorite chocolate, add sprinkles, nuts, mini chocolate chips or whatever else you like. Just think how creative you could be! Bag them up, tie some pretty ribbons on, and hand them out to your favorite kid. I ended up giving all these to my granddaughter, some for her, and some for her to pass out to her posse of friends.
HERE’S THE RECIPE:
Makes 20
40 Large Marshmallows
6 cups Rice Krispies
3 Tb. Butter
Chocolate For Melting
Sprinkles, Nuts, or Mini Chocolate chips
In a heavy pan, melt butter, add marshmallows, stir until they melt. Take pan off the heat and stir in your Rice Krispies, make sure they’re all coated. When it cools down a little and you can handle them, form 1/3 cup each into the shape of a biscotti. Cool on parchment paper. Repeat til finished.
Melt your favorite chocolate, dip, and add your sprinkles. Place back on parchment until chocolate has hardened and it’s safe to store them without smudging.


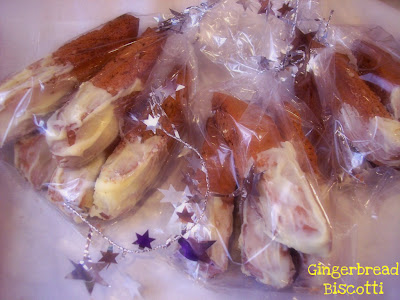
I’ve always had a weak spot for the gingerbread biscotti over at Starbucks, I always look forward to them each holiday season. Crunchy, spicy gingerbread dipped in white chocolate and studded with macadamia nuts. I attempted to make my own this year, not too bad for the first time, the gingerbread flavor was really good, but I didn’t have macadamia nuts so I used pecans. Mistake! Not the same, and I sort of skimped on the white chocolate because I didn’t have quite enough. But all in all they turned out great, I wrapped them up and gave them away to some happy people. Just a little more tweaking and I’m ready for batch #2 !!

Happy Baking!

Signature

Fig and Pistachio Biscotti

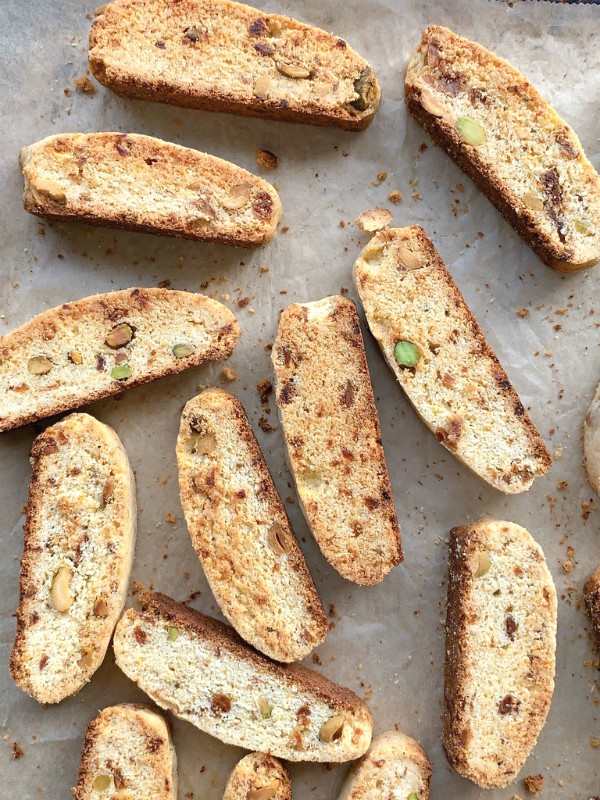
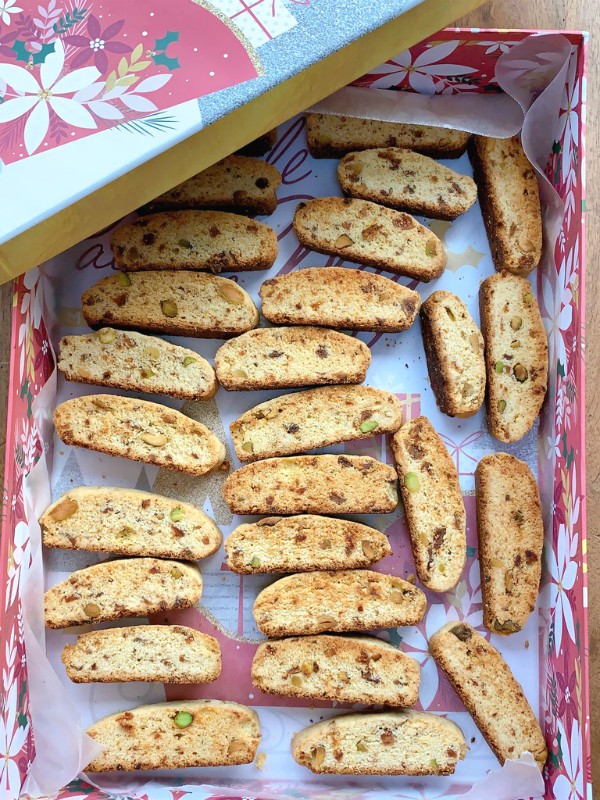
packaged biscottiIt’s that time of year again. and baking is in full force! Are you ready to bake some biscotti? I think you’ll love these fig and pistachio biscotti. The blending of fig with a hint of warm anise and orange makes this biscotti flavor such a winner, not to mention the pistachio nuts!
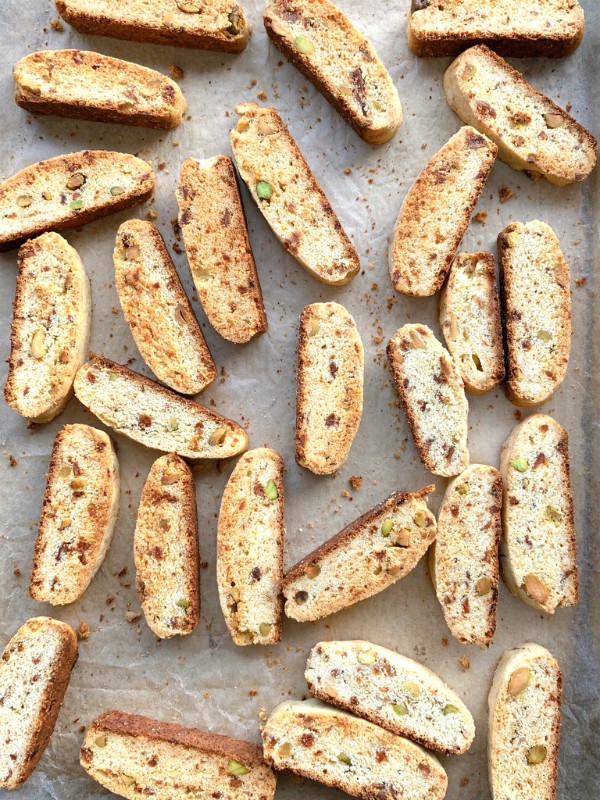
I would encourage you to double or triple the recipe so you can give them out as gifts to friends, family and neighbors.

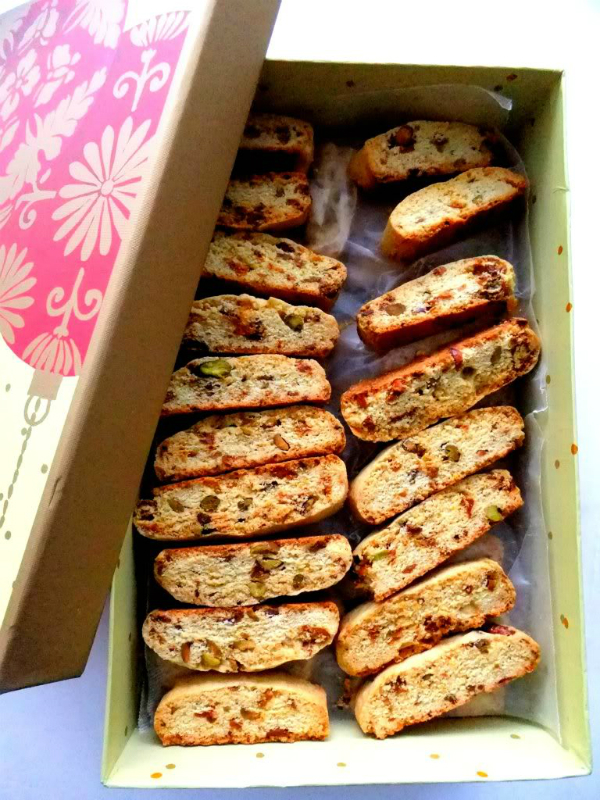
Biscotti keep very well so you can make them in advance. I like to store mine in boxes or cans with wax paper in between the layers.


baked biscotti
Biscotti are twice baked, crunchy and perfect for those that dip them into coffee, espresso or milk, I’m personally not a dipper, I prefer the crunch all the way!
You’ll love how your house smells when they’re baking, the aroma lingers for days!
chopped figs
Just be sure to pulse your dried figs in a food processor to resemble the size of small peas, and be sure to cut off the hard tips before doing that. Of course you can always chop them up by hand, if you have the patience.
dough log
I like to measure the logs with a ruler, 9×2 inches is what you’re aiming for, but if you like a bigger biscotti size, go for it!
baked biscotti logs
Out of the oven and cooling down!
cut biscotti
Twice baked and ready for ( sampling first) boxing up!
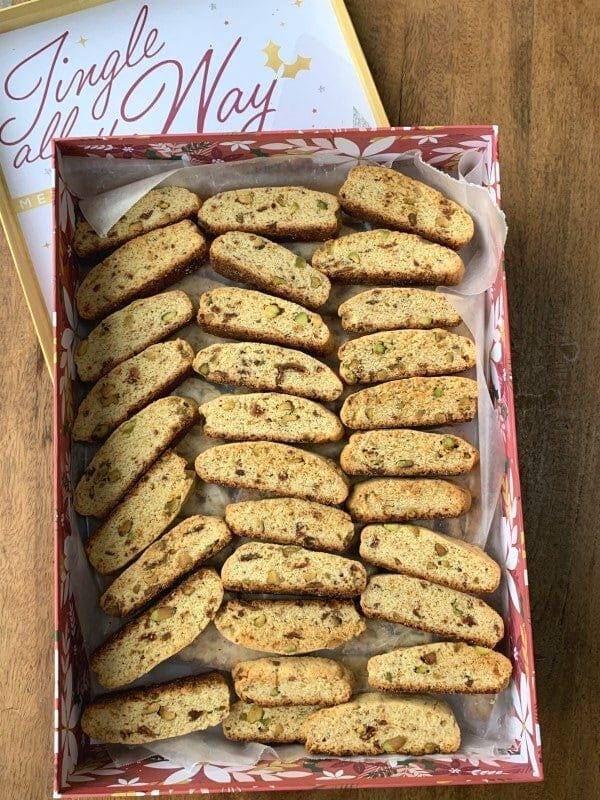
boxed biscotti
There are so many pretty holiday or special occasion boxes, I’m always on the search for them and keep them stashed away.

fig and pistachio biscottiedible gift
These smaller containers I thought would be perfect for a neighbor gift this year ( ordered them on QVC) they can keep the container and reusable bag.
I’ll be making my deliveries soon so they can enjoy!

Happy Baking!

4.5 from 2 reviews
Fig and Pistachio Biscotti
 
Author:
Ingredients
  • ½ cup dried figs like kalamata, measured after pulsed in food processor to the size of peas (remove tips of figs before pulsing as they are hard and inedible)
  • 2¼ cups of all purpose flour, unbleached
  • 1½ t. baking powder
  • ¼ t. salt
  • ½ cup unsalted butter, room temp
  • ¾ cup sugar
  • 2 large eggs
  • 1 t. vanilla
  • 1 t. anise extract (NOTE: if using anise oil only use ¼ t. or a tiny bit more if you like it)
  • 1 t. anise seeds
  • 1t. grated orange zest
  • ½ cup shelled pistachios, unsalted
Instructions
  1. Heat oven to 350F
  2. With your mixer beat butter and sugar on medium high until smooth, about 2 minutes.
  3. Add eggs, extract or oil, zest and anise seeds, beat til light and creamy.
  4. Combine dry ingredients in a small bowl and then incorporate into the butter mixture.
  5. Add figs and nuts on low speed til combined.
  6. Place all the finished dough from mixing bowl onto a parchment lined baking sheet.
  7. Form two 9x2 inch logs apart from each other and bake until lightly browned. Watch your oven, mine took less than 25 minutes.
  8. Remove pan from oven and let it cool for 20 minutes, otherwise they will crumble when cut.
  9. Using a serrated knife, take your time and slowly cut logs into ½ inch thick slices.
  10. Arrange biscotti on their sides on the baking sheet.
  11. Return to oven and bake until nicely golden, for around 5-6 minutes, then flip them over and do the other side, another 5-6 minutes or until it reaches the golden color you like. Ovens do vary.
  12. The longer the second bake the crispier they will be.
  13. Cool on rack.
  14. Makes somewhere around 40


Signature

Post Turkey Day Reflections 2009

I hope all of your tummy’s have recovered by now and you’re getting ready for a turkey cranberry cream cheese sandwich from all your leftovers, I know I am. I thought I’d share some highlights from our dinner yesterday.

This gorgeous appetizer came from my daughter via Whole Foods. What a way to start the party!

I decided to try and brine our turkey this year, dry brining appealed to me. I saw Martha do it on her show. 2/3 cup of kosher salt with a few crumbled bay leaves. Rub your turkey down from top to bottom and inside, place in an airtight bag 2 days prior to cooking. Rinse well before cooking.

The result was a super moist tender turkey, we all loved it. Dry brining is my new favorite thing!!

Outside we grilled an additional bone in turkey breast that was rubbed all over with a paste of olive oil, garlic, and fresh herbs. Great for that sandwich I’m about to make!

Ooops, I forgot my cranberries and rolls for the photo! I also made stuffing balls with different ingredient variations, great way to serve stuffing, nice portions, and they get crispy all over.

Giada’s lemon ricotta cookies.

This was brought over by a good friend of the family, a homemade Derby Pie, I woke up thinking about how good this pie tasted. Premium chocolate laced in a carmel pecan filling.

Truely decadent, and worth every bite!

In the midst of such a terrible recession with many people falling on hard times, it’s the simple things we’re all thankful for, family, friends, our health, and of course…. food!
Buon Appetito!

Signature

La Bomba, A Spicy Condimento

This condiment with a kick is great to have readily available in your frig at all times. Perfect when friends or family stop by and you need a quick appetizer or just something little to munch on. Other ways to use this spicy condiment is to toss it in with some pasta, slather it on your favorite sandwich, use it as a side, or a topping on pizza.

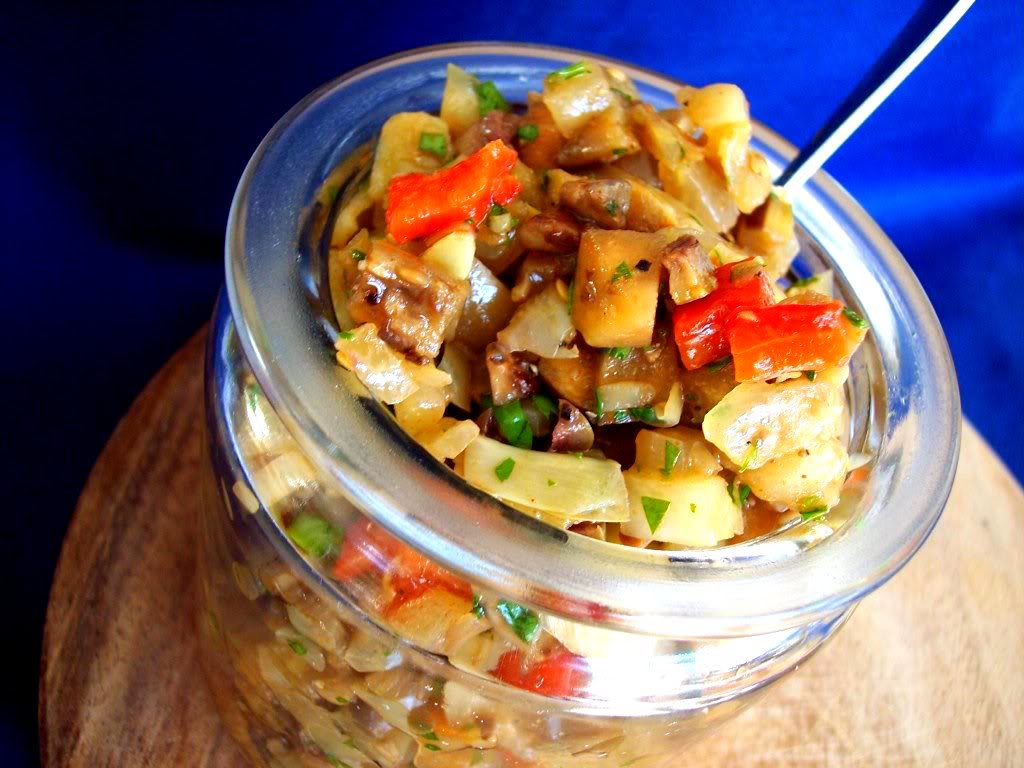
How can you go wrong with eggplant, fennel, roasted red peppers, onions, artichoke hearts, mushrooms and olives? The slight heat in the background is from a touch of cayenne and smoked paprika. The combination is so good together! The worse part of this recipe is that all your vegetables need to be finely diced, a little time consuming, but worth it. I would recommend making a large amount, why you might ask? Because this is another addicting little treat!
By the way, those pita chips I made go great with this!

This recipe comes from the book Earth to Table, I’m giving you the recipe from the book but I quadrupled mine and added more olive oil to the finished product, and a touch more heat.
Here’s the Ingredients:
2 tbsp extra virgin olive oil
2 cups eggplant, finely diced (1 medium-large)
1 ½ cups fennel root, finely diced (1 small or ½ large bulb)
¾ cup roasted red peppers, finely diced ( I roasted my own)
¾ cup white onion, finely diced (1 large)
½ cup green olives, drained, pitted and finely diced
½ cup artichoke hearts, finely diced (I used frozen, defrosted, and added more)
2)½ cup fresh cremini mushrooms, finely diced
3 large cloves garlic, minced
¼ tsp cayenne pepper
¼ tsp smoked paprika
2 tbsp sherry vinegar
Salt & freshly ground black pepper to taste
½ cup fresh flat leaf/Italian parsley, chopped
In a large skillet saute in the olive oil all veggies until slightly softened, then add your cayenne and smoked paprika. Cool down all your veggies on a large baking sheet. When cooled, place in a bowl and add the vinegar, salt and pepper to taste, adjust your heat and toss in your parsley. I drizzled in more olive oil before I place it all in an airtight container and refrigerated it. This will last a good week.
Also wonderful with a nice chunk of crusty bread, and don’t forget to pour a glass of cold wine along side it!
Have a nice weekend and Buon Appetito!!

Signature

Rosemary & Olive Oil Pita Chips with Tuscan White Bean Dip

This is a fantastic appetizer that you might want to bring to one of your upcoming holiday parties. It feeds a crowd, it won’t break the bank, it’s easy to do, and it tastes amazing! Another nice bonus is that the chips can be made way in advance.

I’m warning you these chips are addictive, you won’t want to move very far away from them. This is my friend Jean’s recipe, the first time she made this she could hardly pry us all away to move on to the next course, in fact, we would have been very happy to continue munching on these.

The pita chips are nice and crunchy and flavored with extra virgin olive oil, a hint of rosemary and kosher salt.

The best way to store them is in a cookie tin between sheets of wax paper. They will stay crunchy and delicious for up to 3 weeks! I would recommend to make a bunch, you’ll be glad you did, as they would be great with lots of other dips or condiments you might be making. In fact I have an upcoming post for another use for these, so stay tuned!

Here’s the recipe: (Thanks Jean!)
First thing you do is soak some dried rosemary ( not fresh) in a bowl of extra virgin olive oil, you’ll be using this mixture for brushing on the pita’s. Let it soak for a good hour or so.
**1 15oz can of drained and rinsed cannellini beans.
**1/4 cup of fresh Italian parsley
**2T fresh lemon juice along with and the grated lemon peel of one lemon
**1 garlic clove
**salt and pepper
**1/3 cup of olive oil
Put everything in a food processor and stream in the olive oil until nice and creamy. So easy!
For the pita chips, buy a bag of fresh pita’s, take each pita and cut them into long strips, you should get six to 8 strips per pita. Now snip off the tips to square them off, and separate. After separation you should have around 16 individual chips then per pita. ( see why I say it makes a ton!) Brush each strip with the rosemary olive oil mixture on the rough side of the pita, the inner side, place on a baking sheet, sprinkle with kosher salt and bake in a 400F oven for about 7-8 minutes, or until golden brown. Let them cool on a rack, then place them in your cookie tin for storage.
NOTE: I would suggest not to put any rosemary in the dip at all, just the parsley, otherwise it would be too overpowering, the freshness of the zest, lemon juice, parsley and garlic is a great compliment. Feel free to double, triple, or whatever the recipe. I made 8 bags of pita with 6 cans of beans for my son and DIL’s baby shower!!!
Buon Appetito!!
Signature

Apple Pear Crisp and Pocket Pies!

A warm and bubbly crisp pulled out of the oven is one of those classic comfort desserts that is hard to resist! A great alternative to a homemade apple pie, a crisp is something that can be whipped up in a moments time and before you know it the aroma of fresh baked fruit and cinnamon is enticing your senses!

I decided to use a combination of apples and pears, but feel free to use any kind of stone fruit or even berries. Here’s the recipe:
Recipe adapted from Bon Appetit
Topping:
1/2 cup all purpose flour
1/2 cup dark brown sugar
1/2 teaspoon cinnamon
1/4 teaspoon sea salt
1/2 cup (1 stick) chilled unsalted butter, cut into cubes
1 cup old-fashioned oats
1/2 cup of toasted sliced almonds
1/4 cup of diced crystallized ginger
Filling:
1/2 cup sugar
2 tablespoons cornstarch
1/2 teaspoon cinnamon
1/4 teaspoon sea salt
4 pound mixture of apples and pears (6 to 7 large), peeled, cored, cut into 1/2-inch cubes (about 6 cups)
For the Topping:
Whisk first 4 dry ingredients in medium bowl. Add butter. Working quickly so butter does not soften, rub with fingertips until moist clumps form. Stir in oats, almonds, and ginger. Chill while preparing filling.
For the Filling:
Preheat oven to 350F. Whisk first 4 dry ingredients in large bowl. Add apples and pears and toss, now transfer your fruit mixture to a buttered baking dish. Sprinkle the topping over pear and apple mixture.
Bake until topping is crisp and golden brown and juices are bubbling, about 50 minutes. Serve warm as is or along side a scoop of vanilla ice cream or some fresh whipped cream! Enjoy!
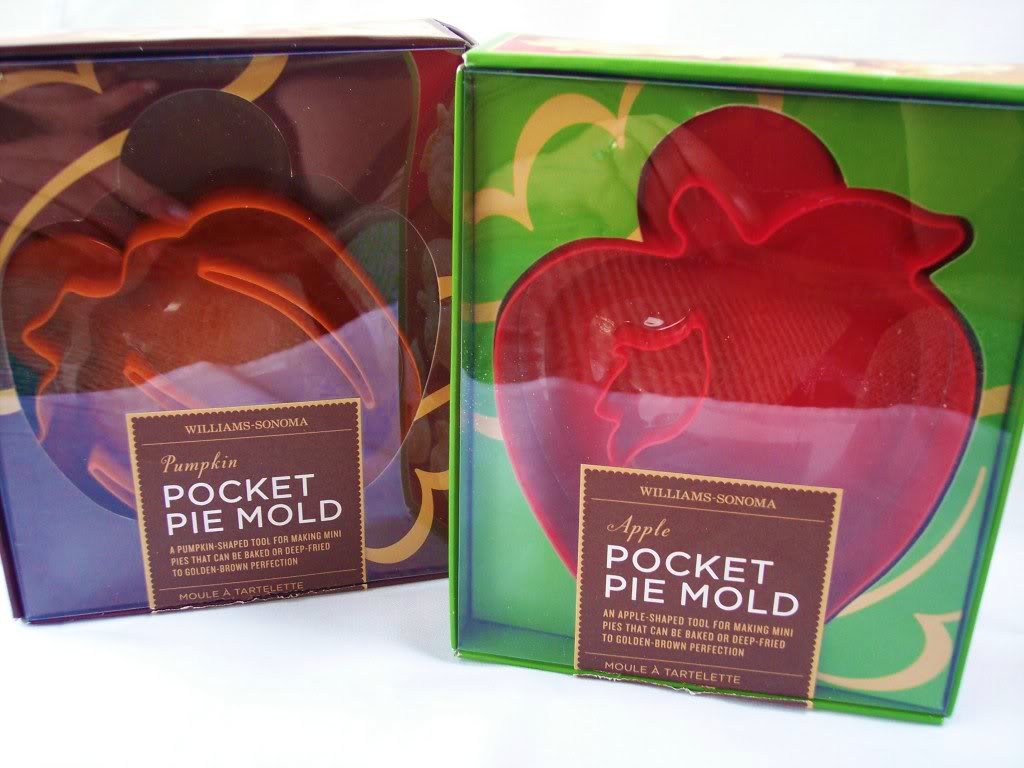
I picked up these cute little pocket pie molds from Williams Sonoma not to long ago with the intention of doing this with my granddaughter. This past Sunday we made pocket pies together.
Just your basic apple pie filling, apples, cinnamon, butter and a little flour to thicken it all, we even used refrigerated pie dough, nothing fancy it was just fun doing it together. You could be really creative with all different kinds of fillings and maybe even making some savory ones.

We used the apple and pumpkin shapes but they also have heart and star molds too. Wouldn’t these be cute as gifts wrapped in cellophane bags and tied with raffia? ( I’m getting so crafty!)
Buon Appetito!

Signature

Cauliflower Sformato

Sformato is a molded dish, usually a vegetable of some sort mixed in with a bechamel parmesan cheese sauce that turns into a light and fluffy almost custard like souffle. In this case I used cauliflower, but you could also use zucchini, spinach, asparagus, artichokes, and mushrooms, just to mention a few. The same thing goes with the sauces, the possibilities are endless!

I saw this awhile back on Linda’s blog and wanted to make it then, but never got around to it until recently when I saw it again in the recent issue of La Cucina Italiana magazine. In the magazine they used a ring mold which gave a pretty presentation but I didn’t have one so I just used my 6″ spring form pan which has deep sides, and that worked out very well.

Essentially you cook up your cauliflower then pulse it in a food processor, mix it in with your creamy savory custard sauce, season everything, place it in your mold and bake. The recipe says to boil your cauliflower, drain it, then squeeze out the excess water, I found that roasting it until tender was easier and I didn’t have to squeeze anything out, just make sure you don’t caramelize your veggies. I roasted mine at 375F but I was watching it often by pulling it out and checking for doneness. Here’s the link to the recipe, also before I placed it in the oven I sprinkled parmesan all over the top. I served mine with a light marinara sauce, it was delicious!

I hope you give this a try, be creative, you’re going to love it!
Buon Appetito!!
Signature

Beans, Greens, and Broken Spaghetti Soup

With the cold weather upon us nothing warms me up better than a bowl of steamy hot soup. A huge pot of soup simmering on the stove to me, is the perfect comfort food! Not only is it economical to make, but when you throw in some dark leafy greens such as swiss chard, you up the nutritional and health benefits too. So it’s not only something that taste’s good, it’s good for you, I call that a win win situation!

Swiss chard is packed with nutrients, one of them being vitamin C. Lab studies suggest that regular consumption of foods rich in vitamin C help maintain normal connective tissue, prevent iron deficiency, and helps the body develop resistance against infectious agents by boosting immunity, and with the H1N1 virus lurking all around us, I would say immunity boosting foods are a good thing!

Here’s the Ingredients:
2 cans of rinsed and drained cannellini beans or you could use dried.
2 onions chopped
2 carrots diced
1 large bunch of swiss chard, stems removed and leaves chopped.
6-8 cups of homemade stock or a good store bought brand.
Precooked broken spaghetti
Olive oil, fresh finely minced basil, 1-2 crushed garlic cloves, grated parmesan, salt and pepper.
In a heavy soup pot, saute onion, carrot, garlic and chard, then add everything else and simmer for about an hour. If your like me and you save your cheese rinds in the freezer, please add one to your soup, it makes a world of difference to the flavor of your broth, otherwise just add your grated parmesan to your individual bowls.
In a bowl add the cooked spaghetti, and then ladle your soup over the top along with plenty of grated cheese, and if you want, a tiny drizzle of olive oil. Grab a spoon and go curl up on a couch with a good book, or in my case any foodie magazine will do. Enjoy!!
Buon Appetito!
Signature

Butternut Squash Stuffed Shells with a Lemon Sage Brown Butter Sauce

I’m sorry, but I just can’t get enough of butternut squash this season! I know I just previously posted a lasagna using it but recently after flipping through a beautiful Donna Hay magazine I also got inspired to stuff it into pasta shells.

Donna used sweet potatoes in her recipe, which I’m sure is delicious but I knew immediately I’d be using butternut squash. I also added spinach to my stuffed shells and an egg for binding. This dish is great as a main course, or on a buffet, or even a side dish to your holiday meal.

Stuffed shells are a great addition to any dinner party, they’re individual, easy to serve, and easy to eat.

***Peel, chop and toss in olive oil your butternut squash, then into a hot oven roast the squash at 400F for 15-20 minutes, let the squash cool down and then with a fork slightly smash them leaving some chunks.


***Cook jumbo pasta shells according to directions but make sure they’re al’dente because they’re going to cook a little more in the oven, drain and set aside.


***In a bowl add 2 cups of ricotta,** 1/3 cup parmesan cheese,** 1 fresh smashed garlic clove,** 1/4 cup frozen chopped spinach ( squeezed and drained)** 1 egg, **salt, pepper,** your cooled down roasted and smashed squash, around 2 cups,** and the zest of 1 lemon.** The lemon zest was key to this dish and added a nice bright flavor.
***Stuff the shells with the mixture and place in a buttered baking dish.
Make a sage brown butter sauce by melting 1 stick of butter in saute pan until golden brown and bubbly.
Add at least 10 sage leaves until slightly crisp. Turn off heat and squeeze in fresh lemon juice of the lemon you zested.


Place your stuffed butternut squash shells in a 375F oven until heated through with some foil loosely on top for around 20-25 minutes. When finished spoon your warm sage sauce all over and sprinkle with grated parmesan.

Inspired by Donna Hay

Fills around a dozen shells.


We took a drive the other day to see all the gorgeous fall colors, before we know it all the trees will be bare and we’ll be looking at snow. That I could live with out


Buon Appetito!

Signature

Apple Wrapped Ricotta Tarts

The other day while I was photo grazing over at TasteSpotting, I came across Confessions of a Tart, she had just posted apple and ricotta tartlets. What caught my eye was that instead of a pastry crust, she used sliced apples. What a great idea! A dessert I don’t have to feel guilty about eating, and besides that, it just sounded so good to me. I knew I was going to make this.

I wanted to change mine up a bit, so I decided to add some rum soaked golden raisins to the ricotta mixture, which turned out adding great flavor to the ricotta. Basically you slice apples very thin, and then you arrange them in overlapping circles inside muffin cups. Irene had a great visual on this so take a look at her photo here. This takes a little time and patience, and as you can see from my little tart above, my apple layering didn’t turn out nearly as pretty as Irene’s.

So I decided to pull out my little 8″ spring form pan, butter up the sides and bottom and then layered my apples around the bottom and along the side. As soon as I spread the ricotta mixture down it served as a wall and I added more apple slices in layers along the side. This was way easier for me to handle, and I think the result turned out nice. What do you think?

The only thing I would suggest if you use a spring form pan, is to wrap tin foil around the bottom and lower sides so that none of the juice from the apple slices will seep through and smoke up your oven.


Here’s the ingredients:
This recipe makes 8 tartlets, but you can double or triple the recipe, if you want to make more than 8, or if you want to use a spring form pan.
**Rum soaked golden raisins.
**4 firm apples, peeled, cut, cored and sliced thin for layering.
**8oz. of ricotta cheese.
**4T of sugar.
**1 egg.
Drain your raisins and sprinkle on top of your ricotta mixture.

Bake 350F for 30-35 minutes until set and puffed. If you’re making the tartlets let them cool and remove them gently with a tablespoon, I found that worked well. Taste great warm or cold!

We throughly enjoyed ever bite of this!
Buon Appetito!!
Signature

Eggs al Forno

Al Forno means “from the oven” and that’s exactly where I like to get my breakfast from on a cold and rainy weekend morning. A thick sliced crusty baguette layered with cheese, topped with an egg, and more cheese. Crunchy, creamy and oozing with goodness!

So simple to make, here are your ingredients.

Heat oven to 500F.
Butter an individual casserole dish** Place a thick slice or two of a toasted baguette snugly in the bottom of the dish** Drizzle with olive oil** Sprinkle grated fontina cheese all over the bread along with grated Parmesan** Crack and egg or two on top of the cheese** Sprinkle with more grated Parmesan, salt and fresh ground pepper and another drizzle of olive oil** Garnish with sliced scallions** Bake until eggs are set, about 10 minutes**
Recipe adapted from La Brea Bakery


Make sure the coffee is brewed and serve this up immediately while it’s still nice and warm!
Enjoy your weekend!
Buon Appetito!
Signature

Pork Saltimbocca and 26.2

In a pinch and need a quick meal? In about 10 minutes or so you can have this for dinner! Lean, thin cut, pork cutlets sauteed in a buttery white wine sauce topped with prosciutto and a sage leaf. So simple with a ton of flavor, no wonder saltimbocca translated means, ” jump in the mouth”!

*First you’ll want to take your cutlets and pound them down a little to flatten them out a bit.
*Season your cutlets with salt and ground pepper.
*Take a slice of prosciutto and lay it on your cutlet, and gently pound it into the meat, add a sage leaf on top.
*Drizzle a hot pan with olive oil and prosciutto side down fry cutlets about 2 minutes on each side.
*Remove from pan and deglaze with 1 cup of white wine, scrapping up all the brown bits.
*Add 3T of butter to gloss the sauce.
*Return the cutlets back to the sauce and finish cooking. Buon Appetito!

2009 Chicago Marathon

I want to give a big shout out to my son for completing his 2nd Chicago Marathon which was yesterday. That’s him on the right in yellow ready to cross the finish line. He actually knocked 50 minutes off his time from last year! He amazes us all with his dedication and determination! The weather yesterday in Chicago was bitter cold, great for the runners, but not so great for the spectators, notice the gloves, hats, scarves and winter coats. I thought this was fall!

Signature

Butternut Squash Lasagna, Revisited

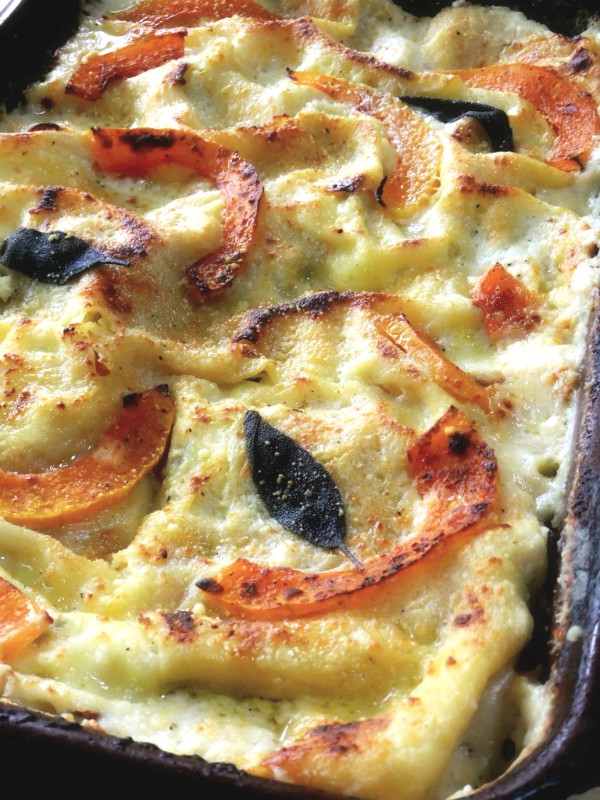
I love this time of year it puts me in the mood for butternut squash lasagna. Have you tried it yet? If you haven’t, you must. I love serving this along side a roasted turkey on Thanksgiving, to me it’s the perfect complement and a great pasta side dish.

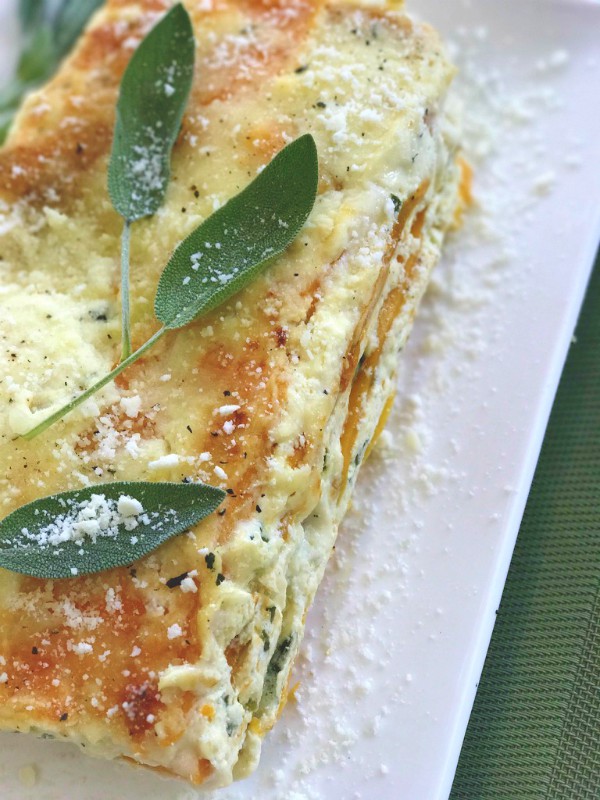
butternut squash lasagna

Over the years I’ve made it so many different ways with a little tweaking here and there. I updated some of the pictures in this post to reflect that. Time has sure past since I first posted this back in 2009, and now it’s almost 2020 and I’m still making butternut squash lasagna!

butternut squash loasagna

I love adding a bechamel sauce that’s infused with herbs and garlic. In the past I infused the sauce with roasted garlic and rosemary then moved on to roasted garlic and sage. When you infuse those flavors into warm bechamel sauce it takes the whole lasagna to another level of flavor and taste!

Sometimes I’ll add on the layers ricotta cheese mix and some shredded mozzarella, sometimes no ricotta just bechamel, parmesan, the squash and maybe even another cheese like shredded fontina which melts really nice, it’s all good!

I think an important thing to remember is to make enough sauce. When I first started making this four cups of sauce was not enough because the pasta seems to soak it up and also you want a nice layer ending on the top, as well as some for serving.

And if you’re going to use the no-boil pasta, well that tends to need a lot of sauce anyway. So you be the judge, but I would start out with six cups of sauce, it’s better to have more than not enough.

I used one large butternut squash which was perfectly enough for a 13×9 pan.
Peel the squash, slice it, scoop out the seeds and cut it into chunks. Place them onto a baking sheet seasoned with salt and pepper and an olive oil drizzle, roast in the oven at 400F until fork tender but not mushy. In the same oven I roasted 1 small head of garlic wrapped in tin foil.
In the meantime, make your basic bechamel sauce, when finished add in a few of the roasted and smashed garlic gloves, you be the judge on how much you want in there, toss in some fresh sage leaves and a good handful of grated parmesan, salt and pepper.
Let the magic happen and let it infuse for a good 20-30 minutes, give it a taste to see if it meets your flavor standards, if not add more of something.

If you’re going to add ricotta to your layers whisk an egg into it along with a generous helping of grated parmesan, salt and pepper. Start layering with the sauce, then pasta, more sauce, pasta, the squash, ricotta mixture, shredded cheese and more grated cheese.
Then repeat, ending with sauce on top of the last layer of pasta.
Bake covered with tin foil at 375F. for about 30 minutes, take the foil off and stick it under the broiler until golden brown for a few seconds.
Feel free to use any kind of lasagna noodles, boil, no boil, whole wheat or white lasagna noodles, again just make plenty of sauce (which I feel is key).
noodle-less lasagna
I’ve even made a noodle-less version of a butternut squash lasagna which is equally delicious and perfect for those who are gluten free.
Butternut Squash Lasagna, Revisited
 
Author:
Ingredients
  • FOR THE BECHAMEL
  • 6 cups whole milk
  • 12 TBL. butter
  • 12 TBL. flour
  • ¾ cup grated parmesan cheese
  • handful of rosemary or sage
  • roasted garlic cloves, smashed
  • Melt butter in a saucepan, whisk in flour. Cook and stir for around 1 minute to cook off the raw and starchy taste of the flour. Whisk in the milk stirring frequently until it starts to bubble ad thicken.
  • Toss in the smashed roasted garlic, herbs and parmesan to infuse sauce. Let it sit for 20- 30 minutes
  • Taste for salt and pepper and remove herbs.
  • ROASTING THE BUTTERNUT SQUASH
  • 1 large squash, peeled and cut into cubes, drizzled with olive oil, salt and pepper and placed on a sheet pan until tender but not mushy at 400 degrees.
Instructions
  1. Feel free to use any type of pasta noodle, no boil, boil, whole wheat or plain white or even fresh.
  2. You can add a ricotta mixture as stated in the post along with shredded fontina or mozzarella, the squash and bechamel.
  3. You can make it without ricotta by just using the butternut squash, shredded cheese and bechamel.
  4. You can make it noodle-less as shown in the post with a link by slicing planks of squash into . "pasta noodles".
Signature

Arborio Raisin Rice Pudding

Now that fall is officially here and the air is cool and crisp outside, inside I’m thinking more and more about comfort foods. Is there anything more comforting then a bowl of old fashioned rice pudding? It’s simple, straight forward, none pretentious and quite economical!

There are so many variations using different ingredients such as butter, egg yolks and cream. Different techniques in cooking it, baked, stove top, and even some crock pot recipes. Fresh fruit, dried fruit, nuts, raisins, coconut, and some even spiked with liqueur, just to name a few.

In my house it’s golden raisins with cinnamon and vanilla, although I have been known to spike it with some Amaretto at times, (so good!) I don’t use cream or egg yolks or butter, because frankly we don’t need it, and believe me you won’t miss it.

If you want to fancy it up you can make or buy some dried apples and stick them into the rice pudding for a pretty presentation, I’ve done that a couple of times but normally I just eat it as is, the flavors are “fancy” all on it’s own.

I had so much success with oven drying tomatoes, that I thought I’d give it a try with some apples and pears. It took a lot less time and the result was great, and even 2 weeks later they were still moist and chewy! Make sure to store them in an airtight container.

I used a mandolin for slicing my up my fruit which I then placed single layer on a baking sheet topped with parchment paper. They took about 3 hours to dry in a 225 F oven. I sprinkled cinnamon sugar on mine before baking, but you don’t have to.

Scenes from a pumpkin farm we went to over the weekend, don’t you just love fall, it’s my favorite season.

Arborio Raisin Rice Pudding
 
Author:
Ingredients
  • 5 cups whole milk
  • 1/ 2 heaping cup of arborio rice
  • ½ cup sugar
  • pinch of salt
  • ½ golden raisins
  • 2 teaspoons good vanilla
  • optional cinnamon or a drizzle of amaretto liquor
Instructions
  1. Combine the milk, sugar and salt in a sauce pan on medium heat, when it reaches a boil add the rice, stir and reduce to a slow simmer.
  2. You need to stir the rice mixture frequently and total time could take up to an hour.
  3. When you see it thicken up nicely like a loose pudding it's finished.
  4. Remove pan from heat add the raisins and vanilla.
  5. Let it cool down, then cover the top of the mixture with plastic wrap and refrigerate til cool.
  6. You can sprinkle with cinnamon or omit the cinnamon and spoon some amaretto liquor on top.
  7. I highly suggest you double the recipe, you'll be glad you did!
  8. Enjoy!


Buon Appetito!
Signature

Ziti with Caramelized Onions and Portobellos "O Foods"

This is a healthy quick meal you could put together during the week and I promise you,
you won’t even miss the meat! The sweetness of the caramelized onions, paired with the earthy flavor of the portobellas are a perfect combination. I decided to use a whole wheat pasta which held up perfectly to the dense texture of the mushrooms.

Ingredients:

3 Onions
1 Leek, White Portion Only
3T Olive Oil
1 t Sugar
1 Pound Portobella Mushrooms Cut Into 1/4″ Slices
3 Garlic Cloves Minced
1/2 Pound ziti
Fresh Chopped Parsley
Grated Romano or Parmesan Cheese
Salt and Pepper

In a large skillet, combine onions, leek and 2 T of olive oil. Cook for 2 minutes, stirring to coat well. Stir in some salt and the sugar. Cover skillet and cook on low for about 45 minutes, or until onions are light brown. Stir occasionally to prevent sticking. Next, stir in mushrooms and remaining olive oil and a T of water if mixture seems to dry. cover and cook on medium for 5 minutes. Stir in garlic, parsley, salt and pepper.

Cook pasta Al dente, drain and add to mushroom mixture. Serve with grated cheese and fresh chopped parsley.
Recipe adapted from a 2005, Tastes of Italia magazine.

I’m sending this dish off in my support of Ovarian Cancer Awareness, my own mother was a victim of this disease at a very young age. If you can, please join in the support!


September is Ovarian Cancer Awareness Month, and for the second year in a row, Sara of Ms Adventures in Italy and Michelle of Bleeding Espresso are hosting the O Foods Contest to raise awareness of this important health issue.
There are TWO WAYS to take part in the O Foods Contest:
ONE: Post a recipe to your blog using a food that starts or ends with the letter O (e.g., oatmeal, orange, okra, octopus, olive, onion, potato, tomato); include this entire text box in the post; and send your post url along with a photo (100 x 100) to ofoods[at]gmail[dot]com by 11:59 pm (Italy time) on Monday, September 28, 2009.
PRIZES for recipe posts:
1st: Signed copy of Dolce Italiano: Desserts from the Babbo Kitchen by Gina DePalma, Executive Pastry Chef of Babbo Ristorante in NYC, who is currently battling ovarian cancer, inspired this event, and will be choosing her favorite recipe for this prize;
2nd: Signed copy of Molto Italiano: 327 Simple Italian Recipes to Cook at Home by Mario Batali (winner chosen by Sara);
3rd: Signed copy of Vino Italiano: The Regional Italian Wines of Italy by Joseph Bastianich (winner chosen by Michelle).
OR
TWO: If you’re not into the recipe thing, simply post this entire text box in a post on your blog to help spread the word and send your post url to ofoods[at]gmail[dot]com by 11:59 pm (Italy time) on Monday, September 28, 2009.
Awareness posts PRIZE:
One winner chosen at random will receive a Teal Toes tote bag filled with ovarian cancer awareness goodies that you can spread around amongst your friends and family.
———
From the Ovarian Cancer Research Fund:
Ovarian cancer is the leading cause of death from gynecologic cancers in the United States and is the fifth leading cause of cancer death among U.S. women; a woman’s lifetime risk of ovarian cancer is 1 in 67.
The symptoms of ovarian cancer are often vague and subtle, making it difficult to diagnose, but include bloating, pelvic and/or abdominal pain, difficulty eating or feeling full quickly; and urinary symptoms (urgency or frequency).
There is no effective screening test for ovarian cancer but there are tests which can detect ovarian cancer when patients are at high risk or have early symptoms.
In spite of this, patients are usually diagnosed in advanced stages and only 45% survive longer than five years. Only 19% of cases are caught before the cancer has spread beyond the ovary to the pelvic region.
When ovarian cancer is detected and treated early on, the five-year survival rate is greater than 92%.
And remember, you can also always donate to the Ovarian Cancer Research Fund at our page through FirstGiving!
Please help spread the word about ovarian cancer.Together we can make enough noise to kill this silent killer.

Signature

Scallop Piccata

Piccata is such a simple sauce that comes together quickly but produces extraordinary results. No need to wait until you visit your favorite Italian restaurant to order up this classic, you can easily make it at home!
The word piccata is translated to mean, tasty, savory, spicy and piquant, and that is so true because of the key ingredients of lemon, parsley and capers.
I’ve always made the classic piccata with chicken, and recently have come to love it with tilapia, but now my new favorite way is with scallops! Thanks goes to my friend Ciao Chow Linda, for giving me the inspiration! I can’t believe I never made it with scallops before! It’s all such a perfect pairing, if you haven’t tried this yet, please do.

Hop on over to her delicious blog and check out her recipe, and pay close attention to searing your scallops, you’ll want to make sure you get some good color on them.
I served mine with a side of angel hair pasta and extended my sauce a little by adding 1/2 cup of chicken broth.
Hope I’ve inspired you to give this dish a try, it was wonderful!

Buon Appetito!

Signature

Pears with Gorgonzola

Autumn fruits are everywhere and pears are definitely in season. I’m certain you’re going to love this recipe if you’re a Gorgonzola fan. Pears with Gorgonzola, it’s such a perfect paring! (no pun intended). Ripe juicy pears, cooked in Marsala wine that reduces down and becomes infused in a wonderful glaze. Each pear is then topped with a combination of Gorgonzola, mascarpone and toasted chopped walnuts.

I love the deep rich salty flavor of Gorgonzola and the “bite” it gives you from it’s blue vein. Combine that with the sweetness of the pear and Marsala. Perfection!

This recipe comes from an old issue of Tastes of Italia magazine, the recipe is for 4 servings but you can alter it for 2.
4 Pears cut in half lengthwise, remove cores.
2 Cups Marsala Wine
2T Lemon Juice
1/4 Cup Sugar
2t. lemon Zest
4oz Gorgonzola
3 T Mascarpone
2T Toasted Chopped Walnuts
In medium pan combine wine, sugar, zest. Bring to a boil, cover, reduce and simmer for 10 minutes. Add pears and cook 10-15 minutes until fork tender. Remove pears, place on serving dish. Bring wine mixture to a boil, cook for 6 minutes until liquid thickens. Remove, let it cool and drizzle around pears. In a small bowl add mascarpone, Gorgonzola, and chopped walnuts, mix well then fill pears.

Here’s another way of getting that same flavor combination of pears and Gorgonzola, something that you could put together fast for either a quick appetizer or an ending to a meal. Peel your pears and cut them into 1 inch chunks, cook them in warm honey until tender, then skewer a piece of Gorgonzola between 2 pieces of pear, finish with an extra drizzle of honey. Enjoy!
Buon Appetito!

Signature

Dinner for Two with an Italian Turkey Meatloaf


I brought this little care package over to the new parents the other day, a little comfort food to nourish them from lack of sleep, besides, it was great excuse for seeing my sweet little Granddaughter again!

I used ground turkey for this meatloaf, but you can certainly substitute ground beef. For 2lbs of turkey I used 2 eggs, a nice handful of grated romano cheese, 3 cloves of minced garlic, 1/2 of a chopped onion, 1/2 cup of grated carrot, 1 T. of basil pesto, 1/4 cup of white wine, 1/2 cup of diced fire roasted tomatoes, (drained of juice) panko breadcrumbs, 1/4 cup of small diced provolone or fontinella cheese, salt and pepper.

I baked 2 individual casseroles for my son and DIL and even had enough for me and the hubby for our dinner. Bake at 375F for about 1 1/2 hours or when thermometer reaches correct temperature. The sauce on top was a quick roasted red pepper sauce made by blending in a food processor, leftover roasted peppers, a small amount of marinara and a clove of garlic. If you haven’t tried a meatloaf with turkey yet you really should it’s so good!

I’m still getting some zucchini from my garden so I made this and it was delicious! Zucchini layered with roasted tomatoes, basil, panko breadcrumbs, and feta.


I’ve been seeing these square cut potatoes all over in the blogosphere, they’re called potato dominoes, check out Steamy Kitchen for a great step by step on how to make these. For mine, I decided to add a sweet potato along with the baking potato for a different twist, olive oil instead of butter, fresh snipped rosemary, salt and pepper. I will be making these again after I perfect my mandoline skills!

Enjoy your weekend, and Buon Appetito!

Signature

Holding On To Summer with A Tomato Bread Pudding, and an Opened Faced Tomato and Egg Sandwich

Looking for more ways to use up your summer tomatoes? Here’s 2 recipes you have to try! Tomato Bread Pudding. The minute I saw this flipping through the pages of Amy Goldman’s book ,The Heirloom Tomato, I was inspired to make it. I loved the idea of a savory tomato bread pudding. Think toasted ciabatta cubes tossed in a tomato and herb cheesy custard! What a great side dish this is, we loved it! and I know I’ll be making this again!

Although I do remember all the ingredients, I don’t own Amy’s book, so I can’t give you the true recipe, but I will give you my version of what I did. I cut up and cubed half of a ciabatta loaf, put it in a 400F oven till crispy. In a large bowl I diced 4 tomatoes, added fresh parsley, thyme, and rosemary. Next I added in the same bowl 1/2 cup of half and half, and 1/2 cup of milk, 2 eggs, 1/4 cup of grated asiago, and 1/4 cup of grated romano cheese, salt and pepper.

In a small pan saute 1/2 onion and 2 garlic cloves.Toss this into the bowl with the tomatoes. Place your bread cubes in a buttered baking dish and pour the custard mixture all over covering the cubes, let it all absorb. Place grated romano all over the top and drizzle with olive oil. Bake at 350F in a larger baking dish filled halfway up with water, 25 minutes. Brown under broiler.

Opened Faced Tomato and Sunny Side Up Egg Sandwich

This is great for a weekend morning breakfast. The picture pretty much explains the recipe.

Crunchy toasted bread, slathered with pesto, topped with a hefty slice of your favorite tomato, then topped with a fried egg. Simple concept, extrordinary taste!
I hope you get a chance to try these! Have a great Labor Day weekend and Buon Appetito!

Signature

Caprese Risotto w/ Tomato Chips, and My Second Blogiversary

I can hardly believe it’s been 2 years since I started Proud Italian Cook! My, how time flies when you’re having fun. I can truly say that this blog has enriched my life in so many ways but especially in having the opportunity to meet so many great people along the way. I want to say thank you to all my dear blog friends, you know who you are, thanks for all your inspiration, your comments and words of encouragement, thanks to my family for putting up with me, and a big thank you to all my subscribers and those who just look on in silence. Looking forward to year 3!

Because I still have an abundance of tomatoes, I’ve been thinking of different ways to use them up, in fact you haven’t seen the last of my tomato recipes! If you love a good caprese salad and love risotto, then this is for you. Combine fresh vine ripened tomato’s, in my case it was yellow and red heirlooms that I diced into bite size pieces along with cubed fresh mozzarella, fresh chopped basil, a little salt and pepper and a good drizzle of olive oil. Set this aside.

Make your risotto by sauteing 1/2 of a chopped medium onion in in olive oil and a little butter. Add three cloves of chopped garlic and saute, then add 1 1/4 cups of arborio rice, toast it up a little then deglaze with 1/2 cup of white wine. When wine is absorbed start adding 6 cups of warmed broth one cup at a time stirring till all is absorbed. When rice is finished, stir in some grated Parmesan, and lastly fold in your caprese mixture, adding extra basil if needed. This is a great transition to fall meal, summer flavors and comfort food all in one!

I saw this recipe in a book called The Heirloom Tomato, by Amy Goldman. I thought the idea of a tomato chip sounded unique and different. I envisioned eating them with white bean dip or used as a garnish, very fancy schmancy! I had a bowl full of tomatoes that had some bruises and decided to just cut away the bad spots, slice them up and make chips! This is something you do when your going to be home all day and your oven won’t be used for anything else. Depending how juicy your tomatoes are, this process can take 3-5 hours, mine took 5.

Warm up some olive oil in a small pan and add crushed garlic to infuse the oil, let it sit for about an hour. Preheat oven to 250F. Line baking sheets with a silpat or parchment, (I used parchment) Brush each 1/4″ sliced tomato with the infused garlic oil. Sprinkle with salt, pepper and fresh thyme. Go easy on the salt and pepper, flavors intensify more than you think. ( I found that out!) Bake single layer 1 hour, then lower the temperature to 200F and continue baking until crisp, 3-5 hours. Store in an airtight container and keep in your fridge. We loved these, the taste was intensely tomato, I even wrapped some up and gave them as a gift!
Stay tuned for a few more ideas for using up the last of your summer tomatoes!
Buon Appetiito!!
Signature

I’m Not Afraid of Phyllo Anymore!

I’ve been out the kitchen for a while enjoying the birth of my sweet new baby granddaughter. Her name is Analena, and she’s just as beautiful as her name! I could hold her for hours ( and I have) and never tire. We just can’t get enough of her!

But now I’m back in the kitchen enjoying the bounty of summer with all the apricots and peaches that are in the markets, and thinking of different ways to use up all my tomatoes!
I’ve always had a fear of phyllo, because every time I worked with it disaster struck, it would tear and be a big mess. But I wanted to conquer it once and for all because phyllo can be a great alternative to a pastry crust. Its light, flaky and crispy and as long as you don’t drench it in melted butter or olive oil it can be a perfect low fat choice for the crust of a tart. I thawed mine in the frig for 24 hours, I think that was key.

I roasted my apricots in the oven at 400F with just a sprinkling of brown sugar until soft, about 20 minutes. Mixed 1 lb of ricotta with 2 eggs, orange zest, a pinch of cinnamon, a pinch of cornstarch,1/4 cup of sugar ( or Splenda), and a heaping TBL of apricot preserves. Sprayed my tart pan with butter spray, which will cut down big time on the calories along with butter spraying each of my 7 layers of phyllo which I placed one by one in the tart pan. Spread my ricotta on the phyllo dough and positioned the apricots on top. Baked it for about 1/2 hour in a 375F oven, you want it golden brown and crispy, so just keep checking. While still warm, glaze the top with thinned out apricot preserves. Drizzle some honey on your slice!
For the tomato tart I used my red and yellow heirlooms that I cut into a 1/4″ slice. I let them drain out a little on paper towel because they were super juicy.
Mixed 1 lb of ricotta with 1 egg, grated romano cheese, grated asiago, and fresh chopped basil, salt and pepper. This time I sprayed my tart pan with olive oil spray, along with each sheet of phyllo, I used 7 sheets. Layered the tomatoes around the top, and baked until golden and crispy, about the same time and temperature as above. Depending on how juicy your tomatoes are you might have to cook it longer, I did.

These tarts are best if eaten the same day, but if you have leftovers like I did, don’t worry if your phyllo becomes soggy. I just put my leftover pieces on a baking sheet in a 400F oven and it all became nice and crispy again!
Phyllo is now my friend and I can’t wait to use it again!

Enjoy your weekend, and Buon Appetito!

Signature

Sausage Making 101

Each month a member of our Italian/American club gets to host a cooking class of their choice, its called Cucina Italiano. I did one here. This past week I attended a sausage making demo at a members home. Homemade Italian sausage made “old school way” with a hand cranked meat grinder.

She was very prepared and had her pork shoulder all trimmed and ready to go, leaving it about 80% lean to about 20% fat. The meat was then cut into chunks and passed through the meat grinder. Seasonings such as salt, pepper, fennel and red pepper flakes were then added to the ground sausage. At this point I would cook up a tiny bit to see if your seasonings are to your liking, if not, you could always add more before you start stuffing.
Next the sausage stuffing attachment was put on and the casings were placed over the stuffing tube. It worked great with 2 people as one was cranking and feeding the sausage meat into the hopper, and the other was guiding it in the casings.

Grills and ovens were going as everything got cooked up and taste tested! Its nice to know what’s actually in your sausage. Quality meat with no fillers! Years ago I use to make my own sausage, it inspired me to try it again. I’d like to try making some of those gourmet sausages that cost a fortune, maybe a chicken sausage with sun dried tomatoes and artichokes. Yumm!

The possibilities are endless!

FINAL GARDEN UPDATE

Well I have to give a big shout out to the hubby he has proved he has a green thumb!

Our tomatoes are coming in like gang busters. Vine ripened juicy tomatoes of several different varieties, a joy to eat with our dinners. Eggplants are almost ready to be picked and the zucchini has all been perfect, we make sure to pick them before they get to big.

I’m sure gonna miss this when the cold weather comes around!

These are little Japanese beetles going to town on our grape leaves. We have a small vine on our fence and they’ve been destoying all our leaves. They feast on the tissue between the veins and leave it looking all skeletal, nasty little creatures!

Enjoy your weekend, and Buon Appetito!

Signature

Deconstructed Grilled Veggie Lasagna w/ Romesco Sauce

Everything you see here I happened to have leftover in my frig. Grilled veggies, a cup or so of ricotta, a couple pieces of fresh mozzarella, a handful of spinach, and some need to be used up ASAP! fresh pasta sheets. I can’t stand to waste good food!

I also happened to have about 2 cups left of this awesome Romesco sauce I made for the baby shower, courtesy of my friend Stacey’s recipe.

Romesco sauce is intensely flavored by using roasted red peppers, almonds or sometimes hazelnuts, a couple of crusty bread slices, olive oil and garlic and a few other things all whizzed up in a food processor. This stuff is terrific! It goes excellent with grilled protein of any kind as well as grilled veggies.

So with the small amounts of ingredients I happened to have on hand I decided to make a lasagna in a deconstructed way, as you can see in the first photo it was really easy to do. I can’t even explain how good this was, you’ll just have to try it! Seriously, the hubby and I loved it.
The sauce was the star of the show and the flavors blended so well with everything. The only thing I changed up in the sauce was that I used some roasted garlic instead of raw.
As for the lasagna, I would recommend fresh pasta sheets if you can get them, but I’m sure it would be fine with dry, but please don’t use the no boil!

We thoroughly enjoyed every bite of this, I’ll definitely be making this again!

Buon Appetito!

Signature

Oh Baby!!

I wanted to share with you some of the food I had the privilege of making this past weekend for a baby shower we had that was held in honor of my son and daughter-in-law. Their request was to have it very casual, in their home, with finger foods and appetizers. I had so much fun doing it and I can’t wait for the arrival of my new Granddaughter!

The menu was:

Caprese Skewers
White Bean Dip w/ Rosemary and Olive Oil Pita Chips
Artichoke Crostini
Grilled Eggplant Rolled w/ Roasted Red Pepper and Creamy Feta and Herb Cheese
Proscuitto Wrapped… Rosemary and Lemon… and Pesto Marinated Chicken Skewers, served with a Romesco Sauce and a three Citrus Aioli for Dipping
Mini Italian Meatballs
Grilled Shrimp and Orzo Pasta Salad Greek Style w/ Fresh Lemon and Olive oil Dressing
Bow Tie Pasta Salad w/ Spinach, Sundried Tomatoes, Pinenuts, Feta and Olives

The only thing I did not make was the fruit salad, those adorable cookies that you see, (which by the way were homemade) and of course the cake, which happened to be a huge cannoli cake that we ordered from a great Italian bakery!

Four weeks more to go and we’ll be able to meet our new little family member, I’ll be sure to announce her arrival!

Have a great week, and Buon Appetito!

Signature

Parmesan Cones with White Bean Mousse

For the last few weeks I’ve been on the hunt for appetizers unlike the usual ones I normally make, scouring through different cookbooks trying to find something different and elegant looking. Well I found what I was looking for, not only do these look good they taste even better!
Savory cones made of coarsely grated fresh Parmesan cheese that is specked with black pepper and filled with a mousse made of white bean, basil pesto, fresh lemon juice and olive oil.

I was going to make these for my son and DIL’s upcoming baby shower but opted not to, because they’re a little too time consuming for a large crowd, but for a smaller and more intimate dinner party these would be fantastic! Just remember to fill them right before eating so the cone stays nice and crispy.

Heres what you do:

Make a paper cone out of a 3 1/2″ circle, sturdy paper, tape it and set aside.
Heat oven to 375F and on parchment paper trace 3 1/2″ circles 3″ apart. Have 2 baking sheets ready to go.
Grate about 3/4 cup of cheese on a metal grater, please do not use powdery fake cheese, it won’t work!
Combine cheese and pepper together and spread a heaping tablespoon of cheese onto each circle, bake for about 5 minutes till melted and golden.
Remove from oven and after 1 minute gently remove with a thin metal spatula and shape it over your paper cone. Let them cool before removing. Repeat process. This recipe makes 10 cones.

White Bean Mousse

1 can of rinsed and drained white beans.
Basil pesto, (a couple of teaspoons). Taste it for flavor but be careful not to use too much you might turn the white bean color green.
A good squeeze of fresh lemon juice.

Put this all in a food processor and process until smooth and creamy by drizzling in some good olive oil.
Spoon mousse into a ziplock bag and snip off a corner and pipe right into the cone, garnish with basil and serve immediately. Cones can be made ahead. Place in a tin with wax paper until ready to fill.

Happy Entertaining!

Signature

Grilled Pizza and a Garden Salad

Making pizza on the grill has become a summertime favorite for us. The dough cooks up in a matter of minutes, and it always creates a nice crisp crust. Whether you have a good source for buying fresh pizza dough or you make your own, if you haven’t tried this yet put it high on your list!

I like to roll my dough out a little, but when you put it on the grill it changes it’s shape, but that’s the beauty of it! Make sure your grill is nice and hot. Brush the top with olive oil and put that side down on your hot grill. Brush the raw side with olive oil and then flip the dough when you see grill marks underneath.

Have all your ingredients ready because now you will be adding them to the first cooked side, it grills up very fast so have things precooked, mostly light and fresh ingredients work best. I have tried so many combinations, as you know when making pizza the possibilities are endless!

For this pizza I tried something different. Pancetta with caramelized red onions, creamy bocconcini, fresh tomatoes and roasted artichoke hearts, a great combination that I would do again. Here’s a couple of my other favorites.

This is great for a leisurely weekend dinner while you’re sitting outside enjoying the weather, pour yourself some wine, make a salad, and you have a great meal!

Speaking of salad! This all came from my garden, doesn’t it look so nice and fresh? I can’t wait to dress it up with my best olive oil and favorite vinegar.
Buon Appetito!
Signature

Figs, Sweet and Savory

The other day I came across a small container of the most beautiful fresh figs, you could just smell their sweetness! I knew I had to make something special with them. We’re huge fig fans here and my hubby loves a good custard pie, so when I saw this recipe while searching the Internet, I knew instantly it would be a match made in heaven!

My version I tweaked a little, I didn’t have an 8″ tart pan so I used my 9″ one, I also wanted to lighten it up a bit so I used half and half instead of heavy cream, and 2% milk instead of whole milk. It took longer to bake but I just kept checking it til the custard didn’t wiggle anymore and was completely set. I also doubled the custard amount because my pan was larger, but ended up with some left over. The result was outstanding, and the hubby was a very happy man!

This is a great appetizer to get your sweet and salty fix. We love the taste of fig with warm brie cheese, in fact we often buy a jar of this wonderful fig spread that Whole Foods carries and put it over a wedge of brie that’s been warmed up a little. It’s so good!! These little one bite wonders give you that same flavor but with the added bonus of proscuitto! Your eyes will roll as you taste the combination! I’m not kidding!!

All you have to do is quarter your figs, stick a skewer through them, place a small cube of brie on the side and then wrap with a strip of proscuitto. They’re fragile, so I used my inside grill pan, but you can certainly do them outside if you have a smaller hole grill pan on top of your grates.
Just cook for a couple of minutes to crisp up the proscuitto and melt the cheese a bit.
Only use sweet, juicy ripe figs they are the key to both recipes!!
Buon Appetito!
Signature

Stuffed Onions with Grilled Chicken Under A Brick

For your next BBQ try these stuffed onions, they make a great side dish to any protein you might be cooking on the grill. I like to prep them the day before and have them all ready to go.

Large sweet onions that are filled with feta cheese, sun-dried tomatoes, garlic, breadcrumbs, fresh herbs and pine nuts. There’s something about the sweet taste of a caramelized grilled onion!

HERE’S WHAT YOU DO:

In a large pot of boiling water add 2 large whole onions with the skin on. Boil for about 12 minutes. Drain and cool. Cut each onion in half and carefully slip off the skin. Remove the center of each onion, leaving a thick shell. Chop up the scooped out onion, place in a bowl along with 1 cup of crumbled feta,1/2 cup of breadcrumbs, sun-dried tomatoes drained and chopped, 2 small minced garlic cloves, chopped parsley, thyme, and basil and toss in some pine nuts.
Brush the whole onion with olive oil, drizzle some on top too, place on your grill with a tent of foil over top, cook for around 40-45 minutes.

CHICKEN UNDER A BRICK
I usually cut the backbone out and then split a whole chicken in half, place a brick that’s been cleaned and wrapped in tin foil on top of the chicken, this will ensure nice even cooking, crispy skin, and a very moist and juicy chicken.
I make a paste/rub consisting of 5 cloves of garlic that has been smashed with the back of your knife then chopped fine, 2 tablespoons of fresh chopped rosemary, a healthy dose of black pepper and course salt, place in a small bowl and drizzle in some olive oil, then rub all over the chicken, underneath the skin and everywhere.
The garlic rosemary flavor makes this crispy juicy chicken a definite must for your summertime grilling.
Happy Grilling, and Buon Appetito!

Signature

Thinking Pink with a Raspberry Souffle

Pink is in the air as we anxiously await the arrival of a new baby girl in our family! This will be the first child for my son and daughter-in-law, and we are beyond excited for them, and for us!

We can’t wait to meet her and to see what her sweet little face looks like!

I know I’m a little early, because the stork is not due to arrive until Sept 1st, but I’ve had pink on the brain with shower planning and shopping for a little girl.
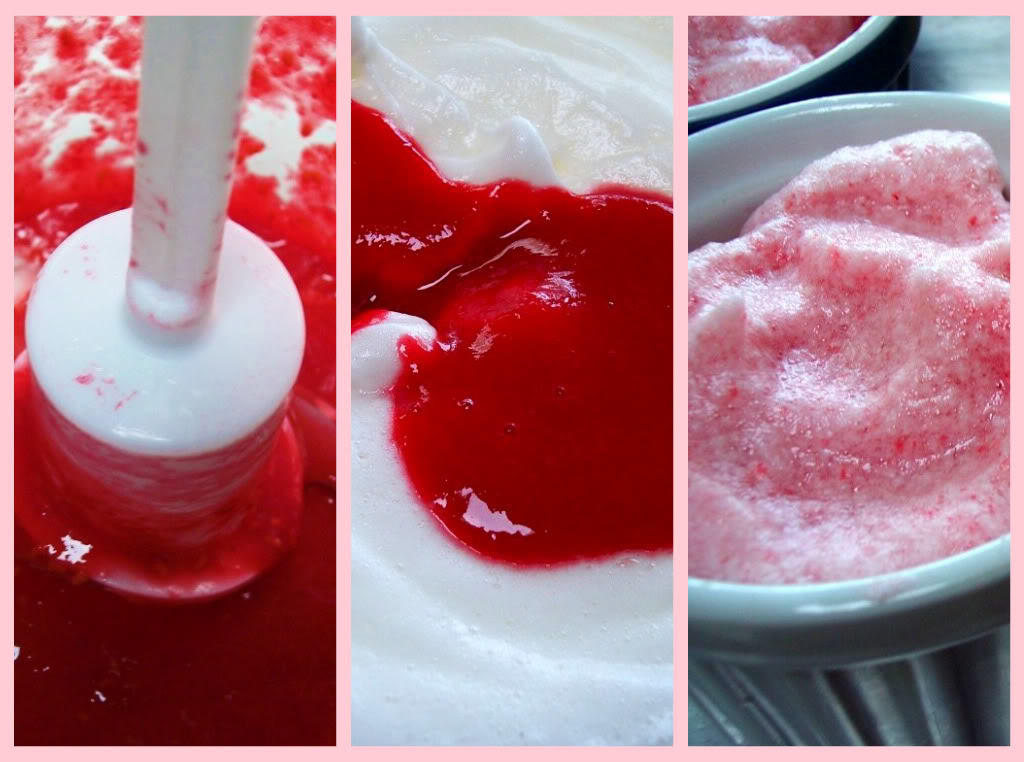
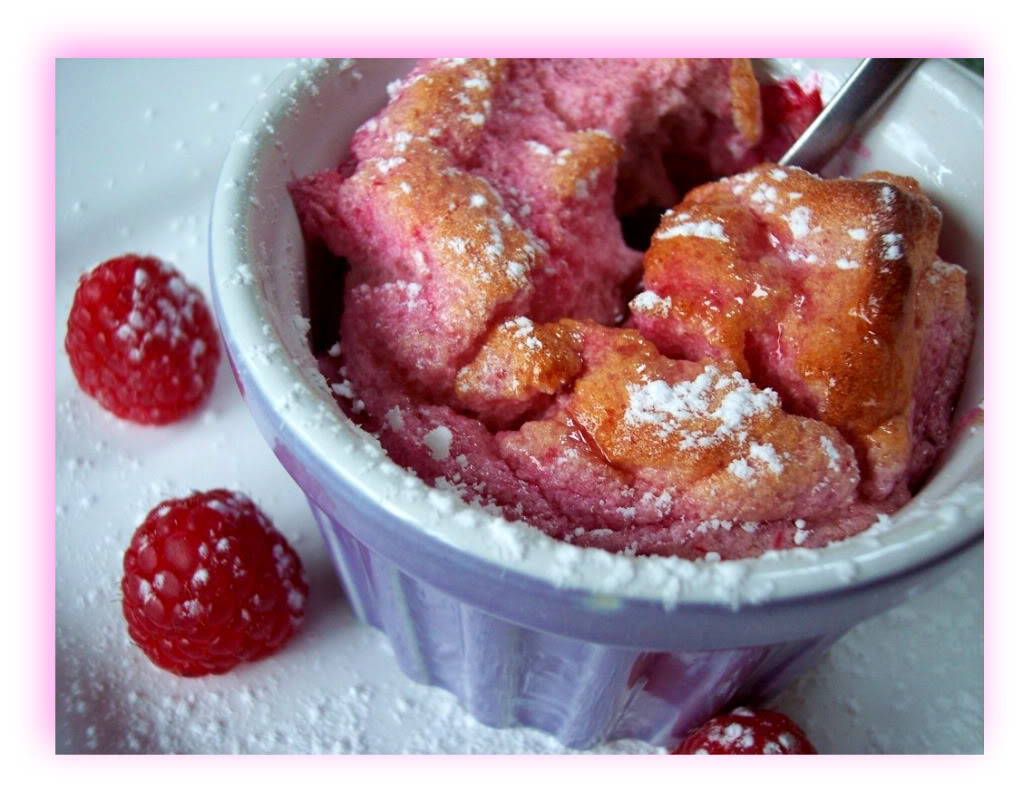
So in honor of my soon to be baby granddaughter, I thought I’d post something pink!

I’ve also been on a quest to lighten up our desserts around here, and so a souffle seemed the way to go since I was lucky enough to come across some beautiful raspberries. I looked on the Internet for some recipes and this was the one that I chose, I altered it slightly by using a little less sugar in the egg whites, and then finishing it off by pouring a little raspberry liqueur right down the center.

This dessert takes no time at all if you use your food processor to puree your berries, but remember that raspberries have lots of seeds, so you have to strain it really good. Gently fold your puree into your stiff white peaks and bake, that’s it! To be honest, the puree was so good the hubby tried it on some ice cream and loved it. I might do that more often!

This was almost too light for the hubby, I think he ended up eating three! Oh well, so much for portion control!

I found this onesie the other day, I couldn’t resist, isn’t it the cutest?

Signature

Grill Up A Romaine Salad!

Want a different take on your salad? Try it grilled! This was new to me, having never done this before, but something I wanted to try for a while. My inspiration came after I saw Lori Lynn grill up some escarole wrapped in prosciutto!

I put a little different twist on mine by using romaine lettuce that was washed and completely dried, I cut it straight down the middle, brushed it with olive oil, salt and black pepper, then sprinkled grated Parmesan all over the top. Next, placed it cut side down on a hot clean grill just for a few minutes until grill marks appear. Carefully move to a platter and let cool.
The dressing was made fresh with a handful of parsley and basil that I snipped from my garden, a zest of one lemon and all the juice, some salt and pepper and finished by drizzling in some good olive oil.

This was surprisingly good, the hubby loved it and so did I, and the grilled tomatoes on the side made it even better! Next time you throw a steak, chicken or chop on your grill think of this as a side.

GARDEN UPDATE

Hubby’s green thumb is proving true, everything is lush and green in our garden. The tomato plants are bushy and tall with little tomato’s starting to come out all over. Peppers are arriving as well as tiny zucchini and eggplant, as you can see the broccoli is coming along and so is my Swiss chard. I can’t wait to cook with all of this! We’ve already had salads with some greens we planted, and some onions. I’m happy to say I don’t have to buy any herbs from the store, I now can walk out and get my own!! Woo Hoo!

Buon Appetito!
Signature

Grilled Mini Corn Cobs w/ Cilantro Pistachio Pesto

It’s been an interesting few days, the weather here has been crazy! Storms , power outages, no cable, no internet, it’s sad how dependent I am on all those things, 1 day without, I can handle, but 3, no way!! and to top it off we discovered a mama raccoon and 4 of her babies living somewhere under an eve on my roof! The hubbby has done a bunch of things to get rid of them, but unfortunately “They’re Back!!!” Any clever idea’s you might have to get rid of them would be much appreciated! (Thanks for letting me vent!)
Anyway the storms have past and now it’s very hot, humid, and sticky. Time for a BBQ! These mini corn cobs are great for a party or BBQ, and much easier to eat than a whole ear of corn, and they fit on your plate perfectly along side all your other food!

Grill your ears of corn whole, they could even be done the night before then placed in a Ziplock bag until ready to use.When you’re ready to eat, place the whole cob back on the grill to warm it up a bit, then slice them into one inch disks and place in a bowl.
You can make the pesto the day of, it takes no time at all, I used my food processor and tossed in a handfull of cilanto, 2 scallions, a couple tablespoons of pistachio’s, olive oil, salt and pepper. If you’re not a cilantro person , of course my beloved basil would work as well. Toss everything together in a bowl making sure you’re coating your mini corn cobs with all the pesto, then serve. Four ears of corn makes quite a bit when cut up.

The combination of flavors here along with the smokey grilled corn is terrific!

Give these a try at your next party your guest’s will love them!
Buon Appetito!

Signature

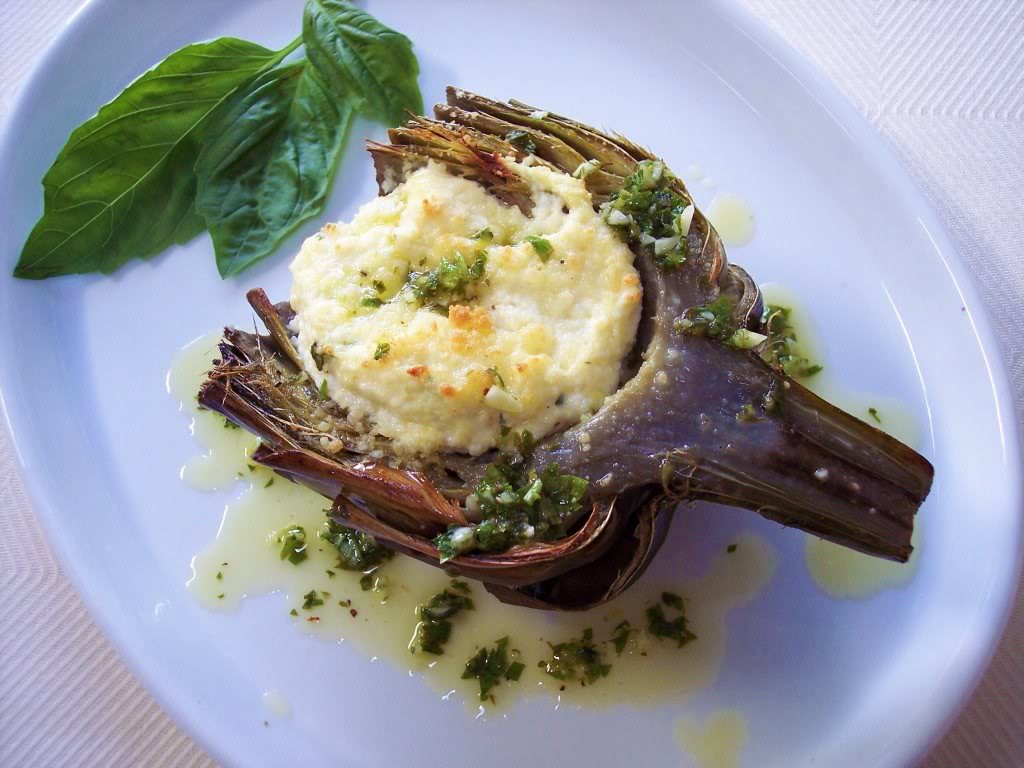
Ricotta Stuffed Artichokes with Lemon Herb Oil

The other day I found four of the most beautiful artichokes, they were huge and flawless, I was smitten as soon as I saw them and knew exactly how I was going to cook them.
This is a lighter take on the classic stuffed artichoke, no breading here but equally, if not more delicious. Perfect as an appetizer or side dish. Fresh herb and cheese flavored ricotta fills the cavity of your prepared artichokes, baked til golden and set, then while still warm you drizzle your herb olive oil all over and use that as your dipping sauce! Have I convinced you yet?

I told you they were beautiful! Who could resist these gems!

ricotta stuffed artichokericotta stuffed artichoke My advice would be to prepare and cook your artichokes the day before by steaming or boiling til tender, (but of course you can do it the same day as well.)
Then let them cool completely in a strainer to drain out any excess water, gently cut them right down the middle and remove the fuzzy center with a spoon, refrigerate in a container with some paper towels to soak up the moisture, it will be so much easier the next day when you want to eat them, especially if you’re making a bunch.
I used 2 very large artichokes for this recipe. Preheat your oven to 375 degrees, in a bowl combine about a 1 cup of ricotta, a hand full of Parmesan or grated romano cheese, fresh snipped basil and parsley, 1 egg, 1/2 grated garlic clove, lemon zest, salt and pepper.
Brush the center and cut side of artichokes with olive oil and sprinkle with salt and pepper. Spoon ricotta into the artichoke halves, and then sprinkle more grated cheese on top.
Place in your oven for about 15-20 minutes till golden brown, you might want to stick it under the broiler for a quick minute to get it more golden but don’t leave and keep checking!
The herb olive oil was made by mincing 1/2 of a garlic clove along with fresh basil, parsley, lemon zest, salt and pepper. Place in a small bowl and drizzle in some good olive oil and fresh squeezed lemon juice.
Follow me on Instagram to see what else I’m cooking up during the week.
All you artichoke lovers out there, you’re gonna love this!
Signature

Clams on the Grill!

Want something different to cook on the grill? This is a summer favorite, and it’s so easy to do! Clams cooked straight on the grill, then tossed in a rich tomatoey sauce spiked with some white wine and crumbled Italian fennel sausage! This would be perfect for Memorial Day, Father’s Day or whatever day you want! Just have some hot crusty garlic bread ready to eat along side this, and you’ll give yourself and your guests a very memorable meal!

Come to your table with a big platter of this and you’ll be sure to hear lots of Oooh’s and Aaah’s!
Your tomato sauce can be made ahead of time and heated up while the clams are cooking on the grill. Cook your cleaned and scrubbed fresh clams on medium heat, just until all the shells open up.
The sauce is simply made by removing your favorite Italian sausage from it’s casing, it could be either hot or mild, whatever you like. Brown it up, then add lots of coarsely chopped garlic, a good splash of wine, some clam juice and a couple cans of good quality tomatoes that have been drained and chopped up, along with some fresh basil, simmer till done. Of course depending on how many clams you have, adjust accordingly, I had five pounds. When finished, transfer your clams to a platter or a deep pan and spoon and toss the sauce all over and add some fresh chopped parsley.
Now do you see why you need that crusty garlic bread? You have to sop up those juices!
This was so good I still have certain family members talking about this meal, and you will too!
If you’re a real clam lover you might also want to try out this recipe too!
Have a great weekend, and Buon appetito!
Signature

Cedar Planked Prosciutto Wrapped Scallops

Have you tried plank grilling yet? I’ve been wanting to do it for sometime now. I was completely sold on the idea after some research and reading these few sentences from a Minnesota website that produces grilling planks… “Plank-grilling fish and other foods on sections of soaked aromatic woods set over a grill is surely one of the most sensuously culinary experiences. As the food cooks, almost basting itself in its own oils and juices, it absorbs fragrant wood smoke to achieve a layering of flavors not found in any other form of cooking.” SOLD!!

It’s very important to soak your wood first so it doesn’t burn and flare up on the grill. I soaked mine for 2 hours by laying them in a roasting pan filled with water and weighed down, you can also add apple cider, salt and even wine to your water to give it another layer of flavor.
Some good choices for wood are cedar, alder, pecan, cherry, hickory, oak and maple, but remember to never use lumber scraps, or any wood that is treated or stained.
My scallops were wrapped with strips of proscuitto and then skewered with a rosemary branch. Remove all the leaves except those on top.
Drizzle with some olive oil and season with salt and pepper.
Heat your planks on both sides at a medium temperature, when you hear it crackle you know they’re ready. I wanted some grill marks showing so while the wood was heating up I seared one side of the scallops onto my oiled grill. You’ll also want to rub olive oil on the side of the plank you’ll be cooking on, this will prevent sticking and also impart extra flavor.

The end result was a trio of extraordinary flavors!! The smokeyness of the cedar, the saltyness of the proscuitto, all that encompassing sweet scallops, with just a hint of rosemary. I served them with grilled peppers stuffed with Israeli couscous, fresh herbs, garlic, chopped fresh tomatoes and parmesan cheese.
I will be planking more in the future, next time salmon with some maple wood!
Buon Appetito!
Signature

Roasted Peaches with Amaretto Ricotta

This is such a quick dessert, very light for hot summer days, and can be made ahead of time. Great with peaches, but any stone fruit will do. Just gather up some peaches, cut them in half, remove the stone, and on a baking sheet sprinkle them with a little butter, cinnamon and brown sugar, roast for about 15 to 20 min’s in a 400F. oven. Roast cut side down.

Place your drained ricotta in a bowl, sweeten to taste with some sugar, and then pour in some Amaretto liqueur, start with a couple tablespoons, just taste test it, you’ll know when to stop.

I like to add some chopped candied orange peel, or freshly grated peel to the ricotta. Combine everything really well together. When the peaches are soft and warm, place your cold ricotta mixture on top and then sprinkle with toasted sliced almonds, and a drizzle of honey. Now all you have to do is pour a cup of coffee and enjoy!!

GARDEN UPDATE
Hubby’s green thumb is working! Our tomatoes are getting tall and so are our Melrose Peppers.

Everything is blooming, I love this time of year!
Have a good work week.
Buon Appetito
Signature

A Blast from the Past…Heirloom Tomatoes

Have you ever tasted heirloom tomatoes? We’re actually trying to grow them in our garden this year, the ones pictured here are not mine, I bought these beauties from Whole Foods the other day, I just couldn’t resist that fluted one! Normally a whopping $5.00 dollars a pound, the day I was there they were just 2.99! Such a deal!!

Heirlooms are grown from seeds handed down through generations, somewhere between 50 and 100 years old. There’s no genetic modifications, they are cross- pollinated, and they are not cookie cutter hybrids.

They come in all shapes and sizes, lumps and bumps, hundreds of varieties, with almost every color of the rainbow to choose from.
Heirlooms generally have much more flavor than hybrids, it’s that good old fashioned taste of a real tomato I remember as a kid. Don’t get me wrong, I have tasted some duds, but that was mainly because of where they were grown.

When you see them popping up at the farmers markets ask to taste them, you’ll quickly pick out your favorite ones. Or better yet, trying growing your own if you can!
I loved how the fluted one looked after I cut into it, I didn’t want to hide it with a bunch of cheese. They look beautiful on a platter dressed up with the simplest of ingredients, don’t you think?

With some good crusty bread, a glass of wine, you can make a meal out of these, they’re that good!!
Have an enjoyable weekend, and Buon Appetito!
Signature