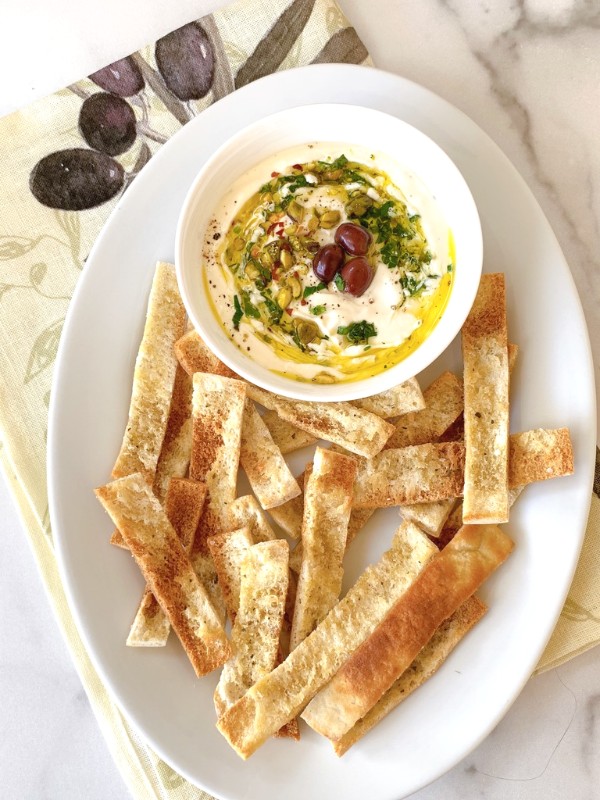
Creamy Feta Dip with Toasted Pita Chips

feta and pita

Everyone needs a go-to dip to have for a special occasion, one that requires little work but tastes like a million bucks! NYE is a couple of days away and then game day will be right around the corner, so I thought it would be the perfect time to introduce this creamy feta dip with toasted pita chips.

dip

This dip is so creamy and full of flavor, a little swipe goes a long way. Feta cheese is the shining star along with Greek yogurt and some cream cheese, it’s the perfect blend for a nice smooth dip.

The feta dip itself can be served with an array of fresh sliced veggies, for a healthier version or with my favorite dipper, these toasted pita chips.

cutting pita

I was introduced to this way of preparing the pita chips by a friend of mine years ago, she made it for a girls lunch and we just couldn’t tear ourselves away from them. The chips are thin and crispy but yet sturdy enough to hold up well when dipping.

I’ve made them many times since and they’re always a hit!

One bag of pita yields so many chips! You’re going to cut the pita into 6 or 8 strips with scissors, then snip the tops and end off so you can open it up.

separate. pita

One strip will give you 2 thin pieces. So for 1 whole pita you can get 12 to 16 chips out of it, so if you do a whole bag that’s quite a few chips!

brushed olive oil

Then place the inside rougher side up on a baking sheet and brush each strip with oregano infused olive oil.

pita crackers

I think what makes these so special is definitely the shape and the thinness, as opposed to the thicker triangle shaped ones, and of course the olive oil flavor coming through. I can’t say enough about these dippers, they’re amazing!

They’re the perfect accompaniment to the creamy feta dip. But don’t get me wrong, honestly they go well with any dip! Think crab, shrimp, hummus, white bean, onion, spinach artichoke, I could go on and on.
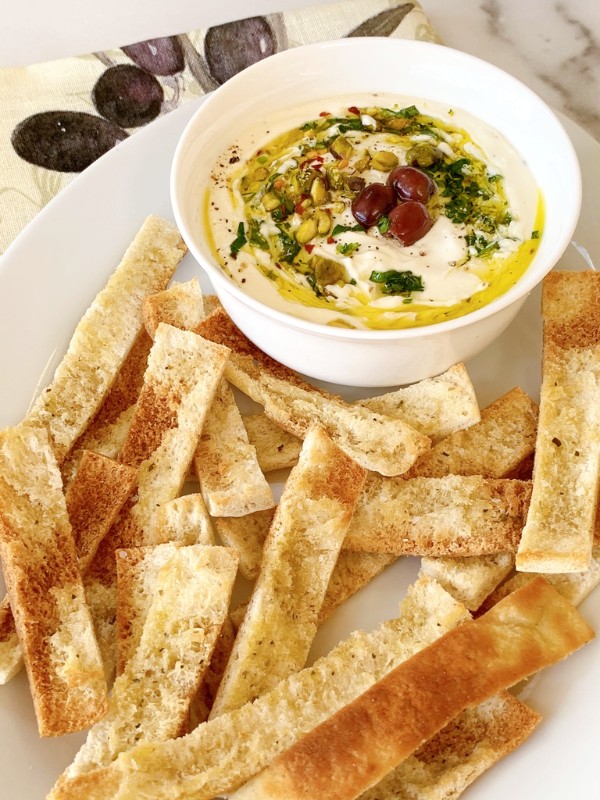
feta dip

I garnished the top of my dip with olive oil, parsley, red pepper flakes, pistachios and olives but be creative and do what you like.
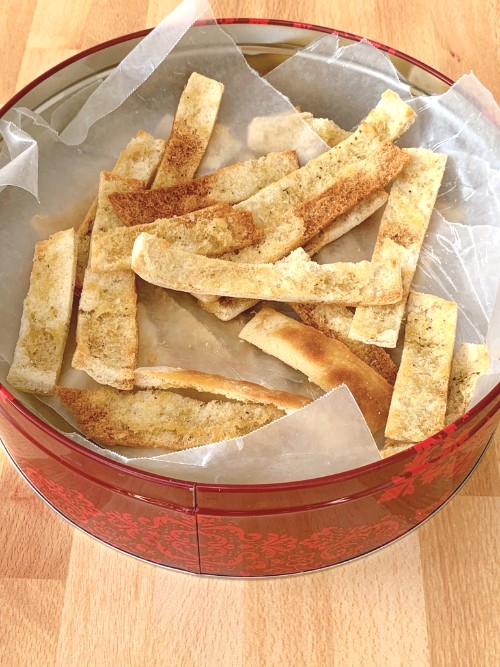
can of pita

I would encourage you to take the time and make these chips, you won’t be disappointed, it’s the ultimate combo along with the creamy feta dip.

They can be made well in advance and they stay perfect for up to 3 weeks, that is if they last that long! Once you put them out you’ll see them disappear!

I like to store them in a tin can layered between wax paper.

Enjoy!

Creamy Feta Dip with Toasted Pita Chips
 
This dip recipe can be doubled because it stays very well in the fridge, and the dipper chips can be made well in advance.
Author:
Ingredients
  • 8 oz. feta, good quality Greek in brine, patted dry
  • 4 oz. full fat cream cheese, room temp
  • ¼ cup full fat plain Greek yogurt
  • 2 teaspoons of oregano infused olive oil
  • 1 teaspoon lemon juice
  • 1 small garlic clove, grated
  • FOR THE TOASTED PITA CHIPS
  • 1 bag of fresh, Greek pita
  • ¾ cup of olive oil
  • 1 teaspoon of dried oregano
  • a light sprinkling of kosher salt to top the chips before toasting
Instructions
  1. In a small bowl add the oil and oregano together and let it sit for 15 minutes to infuse.
  2. Then in food processor first add the feta to break it down, then add in the cream cheese, yogurt, lemon juice and garlic.
  3. Give it all a whirl until it's nice and creamy.
  4. Remove from processor and place into a serving bowl and garnish with a little of the olive oil, parsley, lemon zest, olives or whatever you like.
  5. If making the pita chips, take 1 pita at a time, with a scissor cut 6 to 8 strips then snip the top and bottom off of each strip so you can gently open up the pita and have 2 pieces. (See blog post for example)
  6. Continue cutting the pita into chips then brush each one on the inner rough side with the oregano infused olive oil.( see blog post for visual)
  7. Place onto a rimmed baking sheet, sprinkle them all lightly with a little kosher salt, then into a 400 degree oven for 7 or 8 minutes until golden. Ovens vary so watch closely, you want them golden not burnt, they cook fast.
  8. Remove chips and place on a rack to cool.
  9. Chips can be stored in a tin can layered between wax paper for up to 3 weeks.


Signature

Party Dipping

I want to share with you two of my favorite dips that I often make for parties.  The one above is a Pineapple Cream Cheese Dip I found over a year ago from The Healthy Foodie blog, I would give you the link but it keeps saying potential virus so I’m not going to give it to you.
Anyway, I just loved the presentation and it tastes really good too. Trust me you’ll get a lot of ooohs and aaahs when you bring this out!
It’s so simple to make, Just get a fresh pineapple and cut off the top, now split the top in half so it will lay flat. You just need the top, save the pineapple for eating later.
I’ve since tweaked the recipe a little, here’s my version.In a bowl add 2 blocks of softened cream cheese, reduced or full fat, whatever you like.
1/4 each of a red, green and yellow pepper, small diced.
1/2 cup of sliced black olives from a can, I just chopped them up.
1/2 of a large piece of celery, finely diced.
2 or 3 small green onions, finely diced.
2 tablespoons of parsley, plus salt and pepper to taste.
A heaping 1/4 cup of crushed canned pineapple, drained
2 heaping tablespoons of crushed pecans.
Stir everything together tasting for the correct seasoning adding more of the ingredients if you so desire. Now cover and refrigerate the mixture for a couple of hours, you can make this all the day before if you want.
When you are ready to assemble, plop the mixture on to your serving platter and shape it into a barrel, now go get the top of the pineapple that you previously cut and place it on top.
I used about 70 pecan halves, nice ones, not cracked. It sounds like a lot but I just bought an 8 ounce bag of raw pecan halves at Trader Joes and still had some leftover.
Place them all over in rows on top and along the sides.
You can serve this with your favorite crackers or baby carrots, it feeds a crowd!
You can even make the cream cheese mixture up to 3 days before, I’ve done it and  it tastes even better because all the flavors come together.
Now this is my absolute, go to, hands down, favorite appetizer dip! Rosemary Olive Oil Pita Strips with Tuscan White Bean Dip. I can’t tell you how many times I’ve made this for a party, the recipe comes from my friend Jean, you can make a ton for practically pennies!
The bean dip has flavors of garlic, parsley, and lemon all swirled with olive oil.
The pita chips are made my taking a piece of pita bread, cutting it in strips then snipping the tops off and separating the top from the bottom.  Then each strip is individually brushed with dried rosemary and olive oil then baked. You could make them up to 3 weeks ahead.I did a blog post on these a while back, here’s the link to the recipe on that page and here is the recipe on this post.

ROSEMARY OLIVE OIL PITA CHIPS WITH TUSCAN WHITE BEAN DIP: (Thanks Jean!)
First thing you do is soak some dried rosemary ( not fresh) in a bowl of extra virgin olive oil, you’ll be using this mixture for brushing on the pita’s. Let it soak for a good hour or so.
**1 15oz can of drained and rinsed cannellini beans.
**1/4 cup of fresh Italian parsley
**2T fresh lemon juice along with and the grated lemon peel of one lemon
**1 garlic clove
**salt and pepper
**1/3 cup of olive oil
Put everything in a food processor and stream in the olive oil until nice and creamy. So easy!
For the pita chips, buy a bag of fresh pita’s, take each pita and cut them into long strips, you should get six to 8 strips per pita. Now snip off the tips to square them off, and separate. After separation you should have around 16 individual chips then per pita. ( see why I say it makes a ton!) Brush each strip with the rosemary olive oil mixture on the rough side of the pita, the inner side, place on a baking sheet, sprinkle with kosher salt and bake in a 400F oven for about 7-8 minutes, or until golden brown. Let them cool on a rack, then place them in your cookie tin for storage.
NOTE: I would suggest not to put any rosemary in the dip at all, just the parsley, otherwise it would be too overpowering, the freshness of the zest, lemon juice, parsley and garlic is a great compliment. Feel free to double, triple, or whatever the recipe. I made 8 bags of pita with 6 cans of beans for my son and DIL’s baby shower!!!
Print Friendly
I hope you try these summer appetizers for your next party!


Signature

Bunco!

I’m a part of a Bunco group, where twelve of us get together once a month taking turns hosting at each others home. We get together to play a game but really it’s an excuse to connect with friends for some good food, fun and lots of laughs. The month of June was my turn.

See all these women here, they can get pretty wild and crazy!

In case you’re wondering what Bunco is, it’s a game of dice played in rounds. Players take turns rolling the dice and trying to accumulate as many points as possible to win each round. The game is played at tables of four in competing teams of two. The first one that yells out “Bunco!” wins the round. This is a game that requires no skills at all, anyone can learn how to play in 5 minutes!

Yes, we’re high rollers and we play with money, everybody chips in five bucks!

The one hosting supplies all the food and drink but almost always someone will walk in with delicious homemade cookies or a cake. We usually visit and eat first then play the game, afterwards we’ll have coffee and dessert. Finger foods and appetizers are typically served.

Along with various dips and a caprese pizza, here’s a few other things I made when I hosted at my house.
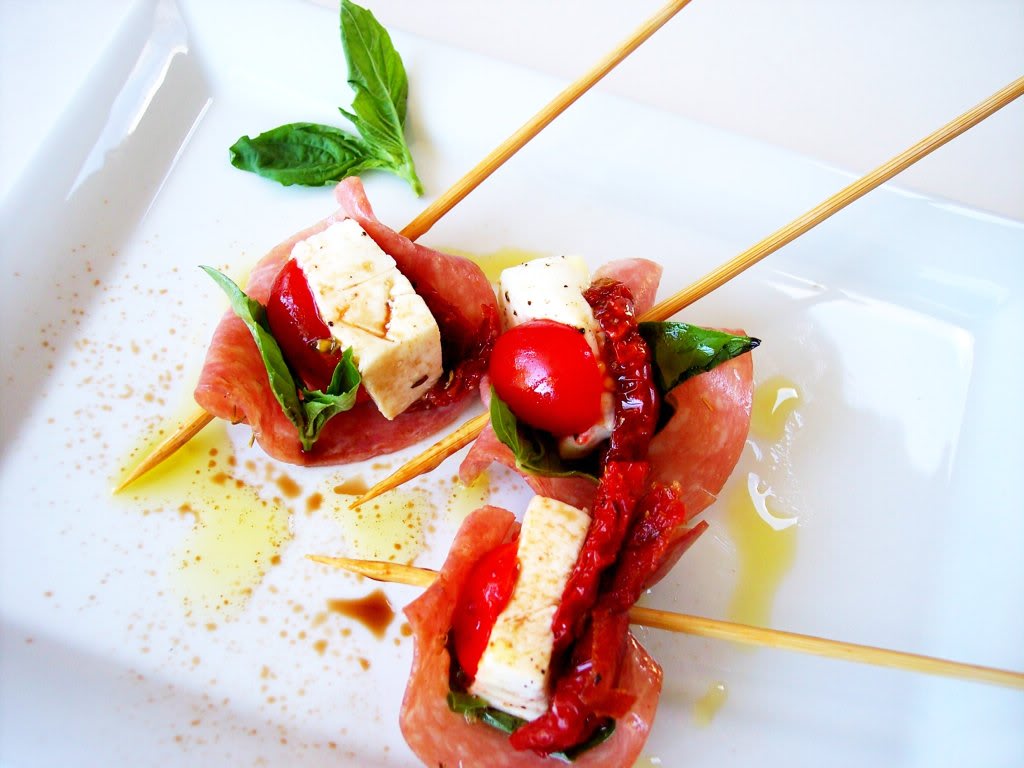
Salami and Bocconcini Bites
On a piece of thin sliced salami place one basil leaf, one half of a cherry tomato, a small bocconcini ball or a cube of fresh mozzarella and one sun-dried tomato in oil. Secure with a pick and drizzle with balsamic and olive oil.

Fruit Kabobs with strawberries, pineapple, cantaloupe and blueberries.
If you have extra fruit freeze it into ice cubes it tastes great in a punch, tea or lemonade and it keeps it nice and cold.

Tostada Cups with Artichoke Salsa

The tostada cups are made by spraying both sides of a tortilla with cooking spray and then cutting into 8 wedges. Press the wedges into 8 muffin cups with all 3 points sticking out. Bake in a 450F oven for about 5 minutes or until golden and crispy.

The salsa is simply made by opening a jar or two of your favorite marinated artichokes, draining them and pulsing them in your food processor. When finished pulsing, pour into your bowl.
Then chop some red onion, kalamata olives, 1 clove of smashed garlic and diced and seeded tomatoes. Finish off with salt, pepper, shredded basil, a hint of lemon peel and a little olive oil to taste.

La Bomba, is a mix of eggplant, fennel, roasted peppers, onions, artichokes, mushrooms and olives diced up small and served with Mini Pita Rounds flavored with olive oil and rosemary. This is a perfect party appetizer, it makes a huge amount and can be made ahead of time.
Here’s the recipe.
The pita chips I made before but this time I just used mini round fresh pita’s, split them horizontally and baked them like this.

These bite size spaghetti appetizers were a big hit, I got the inspiration from Joan at Foodalogue, she added bacon and peas to hers but I had a lot of different things going on so I wanted to keep them lighter.

Cooked spaghetti, mozzarella, provolone, parmesan, eggs and fresh basil mixed together and baked in mini muffin tins topped off with a light marinara sauce.

When the cheese melts and the flavors blend together with the spaghetti the result is addicting! Here’s Joan’s original recipe.

And of course sipping on some chilled Limoncello while your playing the game makes everything just perfect!
Buon Appetito!

Signature

Rosemary & Olive Oil Pita Chips with Tuscan White Bean Dip

This is a fantastic appetizer that you might want to bring to one of your upcoming holiday parties. It feeds a crowd, it won’t break the bank, it’s easy to do, and it tastes amazing! Another nice bonus is that the chips can be made way in advance.

I’m warning you these chips are addictive, you won’t want to move very far away from them. This is my friend Jean’s recipe, the first time she made this she could hardly pry us all away to move on to the next course, in fact, we would have been very happy to continue munching on these.

The pita chips are nice and crunchy and flavored with extra virgin olive oil, a hint of rosemary and kosher salt.

The best way to store them is in a cookie tin between sheets of wax paper. They will stay crunchy and delicious for up to 3 weeks! I would recommend to make a bunch, you’ll be glad you did, as they would be great with lots of other dips or condiments you might be making. In fact I have an upcoming post for another use for these, so stay tuned!

Here’s the recipe: (Thanks Jean!)
First thing you do is soak some dried rosemary ( not fresh) in a bowl of extra virgin olive oil, you’ll be using this mixture for brushing on the pita’s. Let it soak for a good hour or so.
**1 15oz can of drained and rinsed cannellini beans.
**1/4 cup of fresh Italian parsley
**2T fresh lemon juice along with and the grated lemon peel of one lemon
**1 garlic clove
**salt and pepper
**1/3 cup of olive oil
Put everything in a food processor and stream in the olive oil until nice and creamy. So easy!
For the pita chips, buy a bag of fresh pita’s, take each pita and cut them into long strips, you should get six to 8 strips per pita. Now snip off the tips to square them off, and separate. After separation you should have around 16 individual chips then per pita. ( see why I say it makes a ton!) Brush each strip with the rosemary olive oil mixture on the rough side of the pita, the inner side, place on a baking sheet, sprinkle with kosher salt and bake in a 400F oven for about 7-8 minutes, or until golden brown. Let them cool on a rack, then place them in your cookie tin for storage.
NOTE: I would suggest not to put any rosemary in the dip at all, just the parsley, otherwise it would be too overpowering, the freshness of the zest, lemon juice, parsley and garlic is a great compliment. Feel free to double, triple, or whatever the recipe. I made 8 bags of pita with 6 cans of beans for my son and DIL’s baby shower!!!
Buon Appetito!!
Signature