Tropea Onion Tarte Tatin

savory tarte tatin

I never realized how simple and fast it was to make this savory tarte tatin. It’s made with store bought puff pastry and vegetables of your choice, in this case I was using Tropea onions that were imported from Calabria Italy.

My local Italian grocery store  ( Caputo’s ) had them there, imported straight from Calabria, and I was lucky enough to grab some before they were all gone.
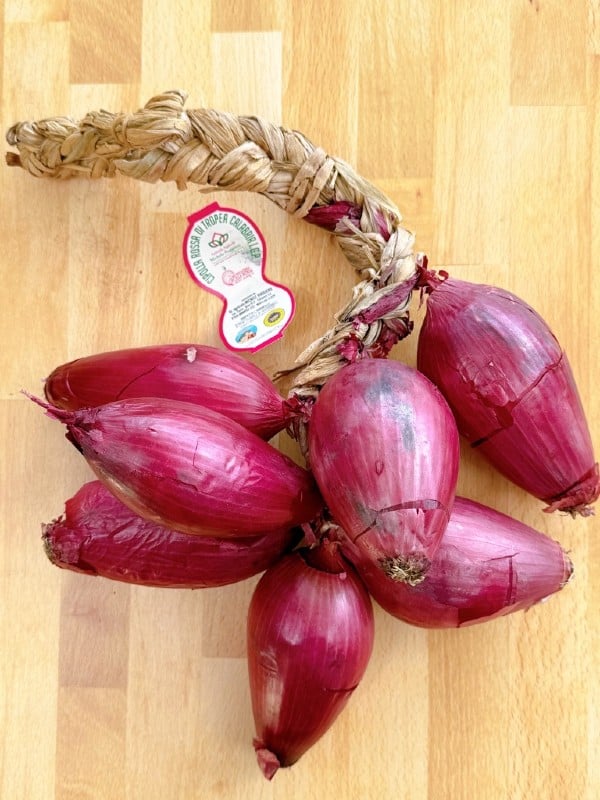
rope of Tropea onions

Tropea onions are naturally sweet and grown in the coastal soils of Calabria Italy. They have low acidity and a natural sweetness, and I love their torpedo shape.

I realize you might not come across this particular onion but you can make a savory tarte tatin with other onion varieties as well and it will come out just as delicious, it’s all about the rustic process.

A savory tarte tatin works well with any onion variety, you could also use shallots, tomatoes, fennel, zucchini, eggplant, peppers, even butternut squash works perfectly.
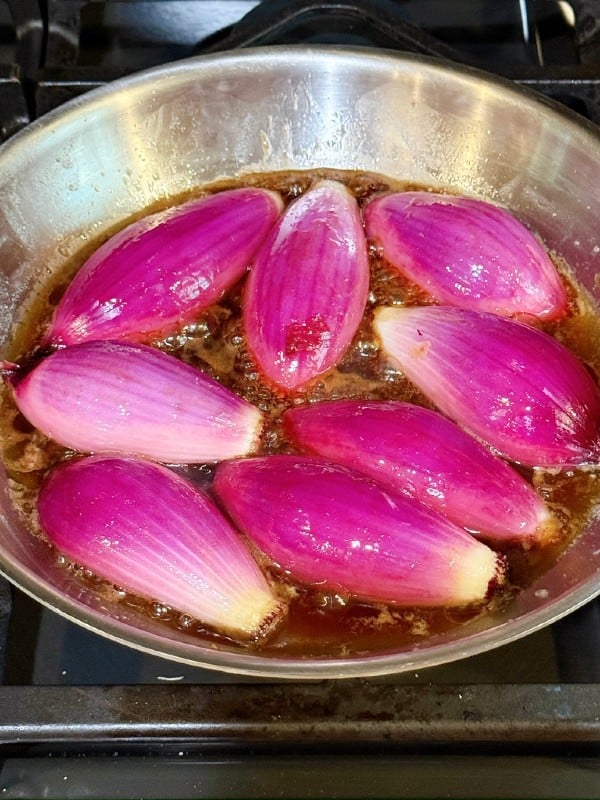
simmered Tropea onions

The onions are first simmered in a pan with butter, honey and balsamic vinegar, simmered together the mixture starts to caramelize and become concentrated. Then it’s time to top it off with a blanket of puff pastry and finish off in the oven, it will be all done when the pastry is golden and crisp.

It’s baked just like that, upside down with the pastry on top, because when it’s finished you’re going to flip it over onto a serving plate and the pastry will then be the crust on the bottom.
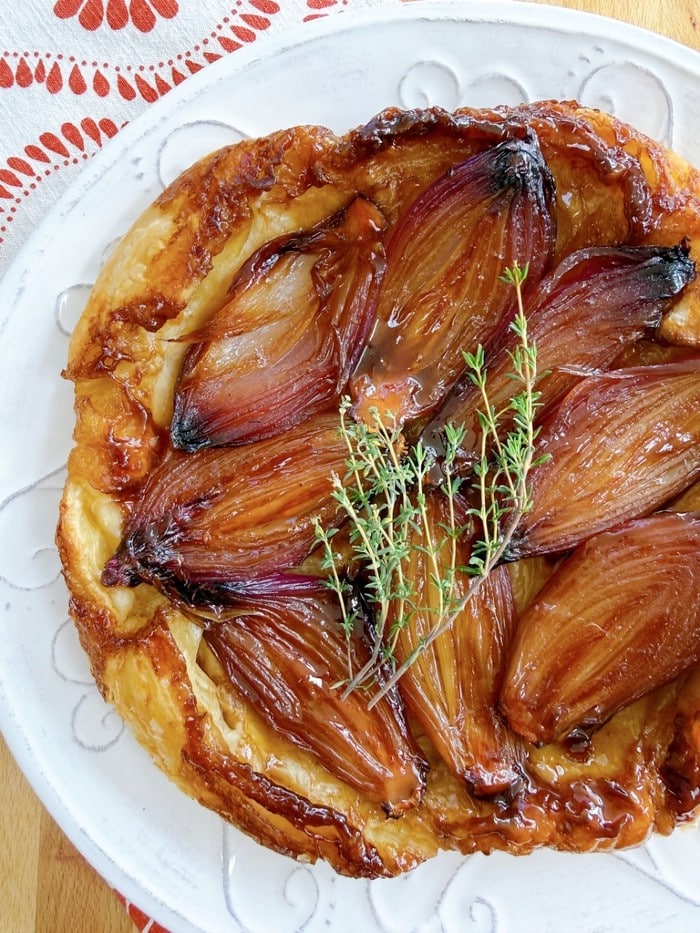
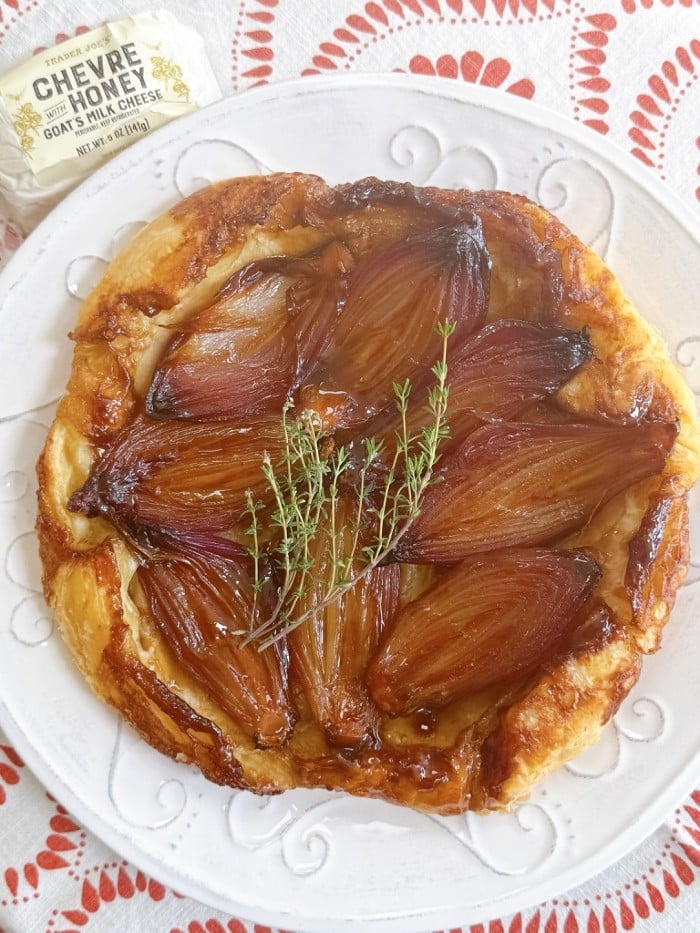
tarte tatin

When turned out the onions, in this case become the star. All jammy and glazed with the caramelized juices oozing all over and the look is spectacular!
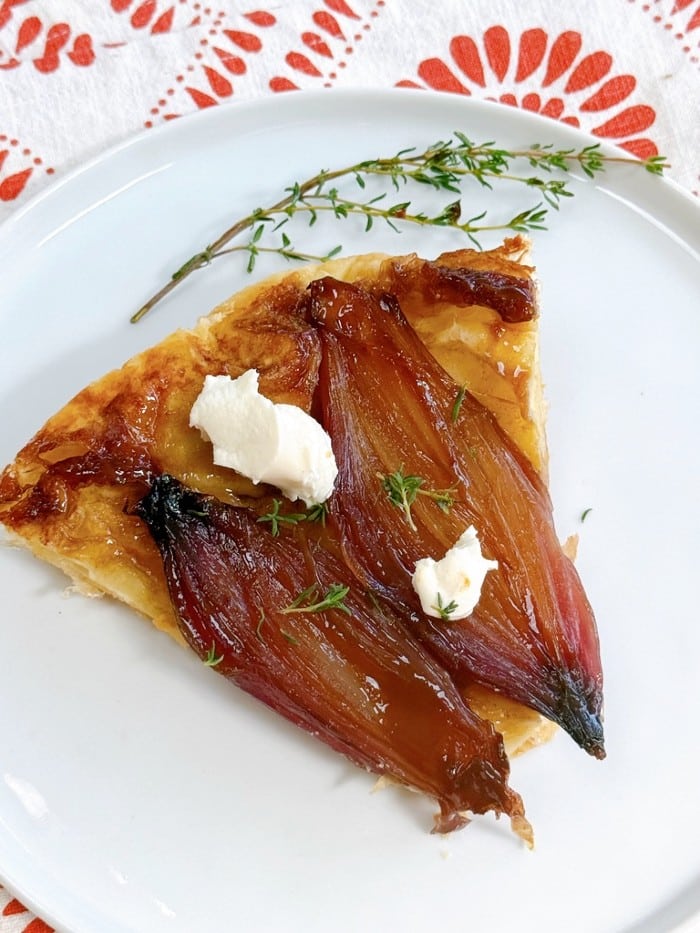
sliced tarte tatin

A tarte tatin is rustic and easy to make and the possibilities are endless (as I stated with different veggie as well.)

I topped mine with dollops of honey infused goat cheese and thyme.

Serve for lunch or a light dinner along with a simple salad, so delicious.

Enjoy!

Tropea Onion Tarte Tatin
 
Rustic and simple to make, this onion tarte tatin turns out spectacular!
Author:
Ingredients
  • 4 Tbl. butter
  • 3 large Tropea onions, cut in half or enough to fill your skillet snugly.
  • 3 Tbl. honey
  • 3 Tbl. balsamic vinegar
  • 1 sheet store-bought puff pastry, thawed
  • goat cheese, optional
Instructions
  1. NOTE: I used a 10 inch oven proof skillet. I also used Tropea onions. I realize you might not come across them, but if you like that elongated shape try it with shallots or even sliced regular onions or whatever vegetable you like, the process works.
  2. Peel and slice your onion in half keeping the root intact.
  3. Melt your butter in your oven proof skillet and place your onions cut side down in your desired pattern, make them nice and snug.
  4. Let them simmer on medium low for around 10 minutes.
  5. Add the honey and balsamic vinegar and as it thickens start to baste the onions over top.
  6. Make sure the onions aren't sticking to the bottom.
  7. Place your puff pastry over the top and tuck around the edges of the onions thn making a few slits on top for steam to escape.
  8. Bake at 400F for around 30 minutes when pastry is a nice golden brown.
  9. Remove skillet from the oven and let it rest for at least 15 minutes or so.
  10. Place your serving plate snugly around the pastry, holding with your hand while you flip it over to release the tarte.
  11. Top it off with dollops of goat cheese and thyme, optional.


Signature

Cauliflower and Sausage Stuffing

cauliflower stuffing

Thanksgiving is only a couple of weeks away so it’s time to start talking and planning the big meal and side dishes. Do you have anyone you might be serving this Thanksgiving who is gluten free, keto or doing low carb, if so this is a great option.

Last year I made this cauliflower and sausage stuffing for a gluten free family member, not only she enjoyed it but everyone that tried it loved it, it definitely satisfies your stuffing desire.

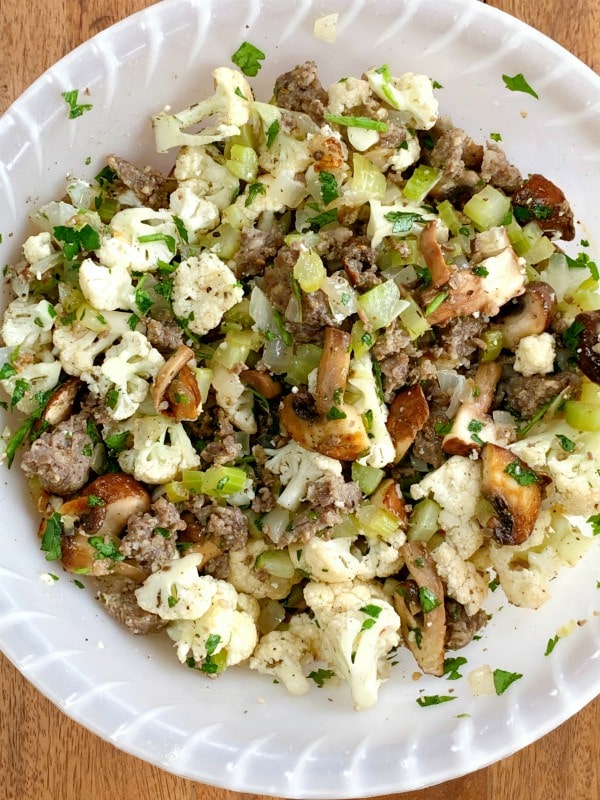
It’s made similar to my traditional stuffing with all the same flavors going on except cauliflower florets replace the bread, but the nice thing is you’ll still get crispy bits along the edges ( my favorite part), with fresh and dried herbs mingled between the sausage and all the veggies.

low carb stuffing

I’ve always added breakfast sausage to our stuffing, preferably one flavored with extra sage, it’s tradition over here, so that’s what I’ve added in this cauliflower stuffing.

Feel free to add your favorite type of sausage or eliminate it all together. I do however suggest that you add in some mushrooms as I did to punch up the flavor and give it more bulk.


gluten free stuffing

There’s a little bit of prep before like browning the sausage and a quick saute of the veggies, but as far as the cauliflower goes you can toss it in raw as long as the florets are in bite size pieces.

Everything then goes into as buttered casserole dish, like a traditional bread stuffing. This can all be prepped a day or two ahead then popped into the oven with the rest of the other sides on the day your serving it.

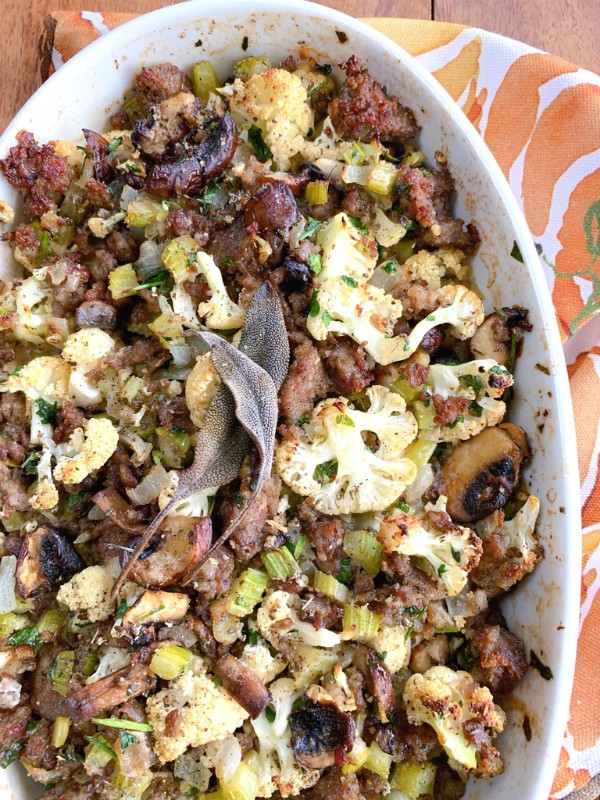
cauliflower and sausage stuffing

When it comes out it looks like this, crispy and golden. The cauliflower takes on all the traditional flavors of a bread stuffing but without any bread!

A delicious option for all to enjoy!

Cauliflower and Sausage Stuffing
 
A nice option for those who are gluten free and those preferring to eat less carbs.
Author:
Ingredients
  • 1 good size medium cauliflower cut into bite size florets
  • 1 lb. breakfast sausage like Jimmy Dean or Bob Evans, in bulk
  • 1 large onion, diced
  • 4 or 5 celery stalks, diced
  • 8 oz. baby bella mushrooms, sliced
  • 3 garlic cloves, crushed
  • 1 stick of butter
  • ½ to ¾ cup of chicken stock
  • handful of chopped parsley
  • dried sage, thyme, poultry seasoning (optional) salt and pepper to taste
  • Fresh sage leaves for garnish
Instructions
  1. Butter the inside of the casserole role dish you'll be using
  2. In a large skillet place remaining butter until it melts then saute the onions, garlic and celery until soft, then add the sliced mushrooms for a couple of minutes.
  3. Place all the sautéed veggies into a large bowl.
  4. Next brown up the sausage in the pan, breaking it up with a wooden spoon and cooking it until you see no pink.
  5. Drain the sausage on paper towels then toss it into the bowl with the sautéed veggies.
  6. Fold into the bowl the bite size cauliflower, raw. If you think its to big you can toss it into the skillet for a couple of minutes to take the rawness away.
  7. Add in the chopped parsley.
  8. Add in the spices, dried sage and thyme and poultry seasoning if using into the mix. Start with 1 teaspoon each and then taste for your preference, adding more if you like plus the salt and pepper.
  9. Place everything into the buttered casserole dish, then distribute the broth all around.
  10. Top with a few fresh sage leaves for garnish.
  11. At this point it's all prepped and you can refrigerate it 1 to 2 days ahead.
  12. When you’re ready to serve, heat oven to 400 degrees.
  13. lightly foil the dish for 15 minutes then remove the foil and continue roasting until cauliflower is tender, golden, the sausage edges have crispy bits.
  14. Ovens do vary so keep checking every 15 minutes or so, you can also stick it under the broiler for a few minutes at the end to get desired golden look if needed.


Signature

Chicken Parmigiana with Roasted Cherry Tomatoes

chicken parmigiana

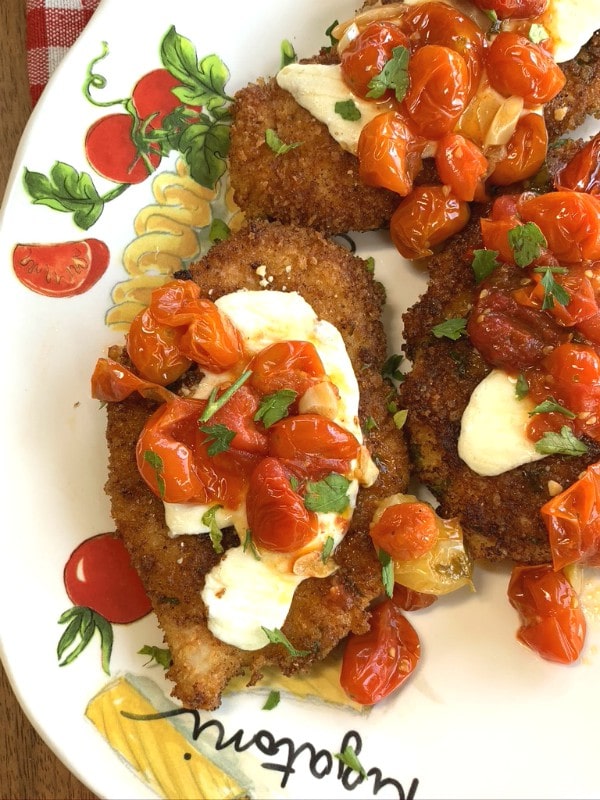
Chicken parmigiana is an intensely flavored dish of crispy, crunchy chicken topped with warm, oozing melted cheese and then garnished with the luscious flavor of roasted cherry tomatoes.

roasted cherry tomatoes

It all begins with a pan of roasted cherry tomatoes, I’m obsessed with roasting tomatoes, I’ve been doing it for years and you can’t beat the flavor.

I like to line my pan with foil so none of the juices dry up and burn, you want every single drop. I always add shaved garlic into the pan and toss in some fresh basil along with dousing the tomatoes with olive oil, salt and pepper.

You’ll want to roast the tomatoes until they burst open and release their juices so that they all mingle together with the garlic and basil flavors.

You can prepare the tomatoes early in the day,  just warm them up before using.

cooking cutlets

Then you want to cook up your chicken. Sometimes I can find thinly cut chicken cutlets but more often I just trim my own by slicing a breast longways into two or three pieces, then you’ll want to pound then flat for even cooking.

The chicken cutlets are dipped in egg first then into a mix of panko breadcrumbs, grated parmesan, granulated garlic, fresh snipped parsley and a touch of paprika.

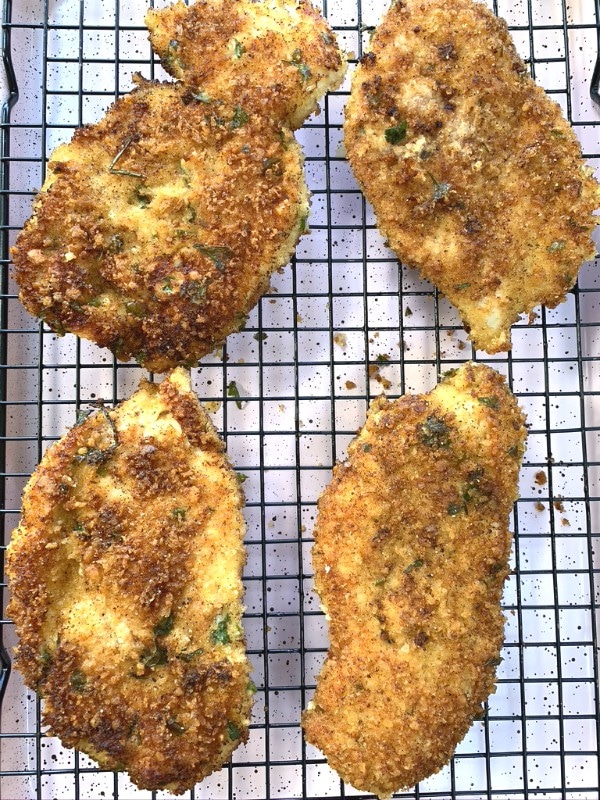
chicken cutlets

Pan fried in olive oil will give you a nice crunchy crust. Be sure to place them on a rack to keep that crunch after frying, otherwise the bottom might get soggy and believe me you don’t want soggy chicken parmigiana!

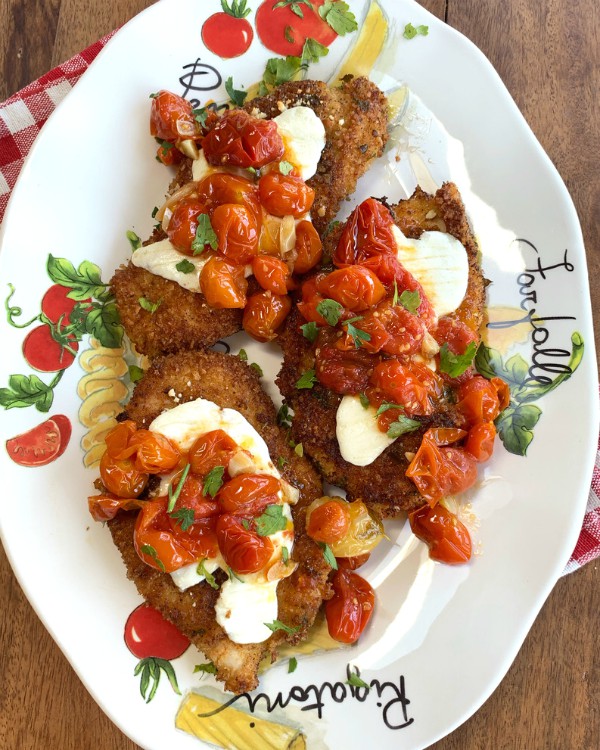
parmigiana

Then plop a slab of fresh mozzarella on top, stick the cutlets under the broiler just until the cheese starts to melt. Pull the chicken cutlets out and top them with the warm roasted tomatoes, this is a heavenly combo!

Make this anytime of the week, prepare the tomatoes ahead, then everything else will take no time at all!

5.0 from 3 reviews
Chicken Parmigiana with Roasted Cherry Tomatoes
 
No exact measurements, it will depend on how many cutlets you have. Just mix up your breadcrumb mixture as you go. Start out with 2 eggs.
Author:
Ingredients
  • chicken cutlets, sliced thin and pounded flat
  • ROASTED TOMATOES
  • at least 2 pints of cherry tomatoes
  • 2 or 3 shaved garlic cloves
  • fresh torn basil
  • olive oil
  • BREADCRUMB MIXTURE
  • panko breadcrumbs
  • granulated garlic
  • fresh chopped parsley
  • a handful of grated parmesan
  • paprika
  • 2 eggs scrambled
  • slices of fresh mozzarella
Instructions
  1. Preheat oven to 400F.
  2. Prepare your tomatoes on a rimmed baking sheet lined with foil. throw on the tomatoes, shaved garlic, salt, pepper and torn basil, douse with a generous amount of olive oil.
  3. Roast tomatoes until they burst and juices mingle with the olive oil.
  4. Set up your breadcrumb mixture and scrambled eggs.
  5. Dip cutlets into egg first then into crumb mixture then directly into a pan with the bottom coated with olive oil.
  6. Cook cutlets on both sides til golden brown with no pink inside.
  7. Place cooked cutlets onto a rack to stay crispy.
  8. Place the cheese on top then under the broiler just until it melts slightly.
  9. Remove and place them on a platter and spoon the warm, garlicky roasted tomatoes on top.
  10. Garnish with more basil.
  11. Enjoy


Signature