From My Kitchen To Yours…

Ok just one more cookie! At the last minute I caved in and made some Cucidati, I wasn’t going to make them at all this year but I was slightly coerced by my brother-in-law and husband who were giving me a guilt trip.

Cucidati are traditional Italian fig cookies very popular at Christmas time consisting of a tender dough that wraps around a thick and flavorful filling of figs, raisins, almonds, orange peel and a few other things that are laced with brandy and warm spices.

On a cold winter day my house quickly warmed up with the scent of cucidati baking in the oven. I don’t know what I was thinking, it just wouldn’t be the same without a few of these gracing our table!

In the end I made two people very very happy that day, and isn’t that the
real reason why we cook anyway?

Here’s my favorite recipe.

I want to take this time to wish each and everyone of you a most delicious holiday filled with lots of love and happiness!
From my kitchen to yours,
Marie

Signature

Tis The Season To Be Baking!

By now you’re probably deep into baking all your favorite holiday treats, pulling out recipes you haven’t made in a year or so. I started my baking last week, placed them in pretty tins ready to give away and share with family and friends. Here is a few of the things I baked so far.


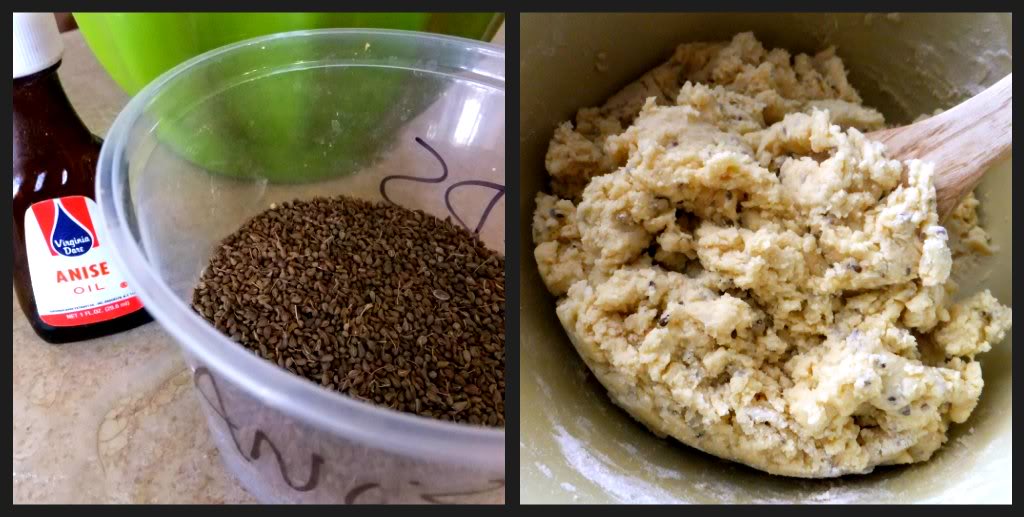
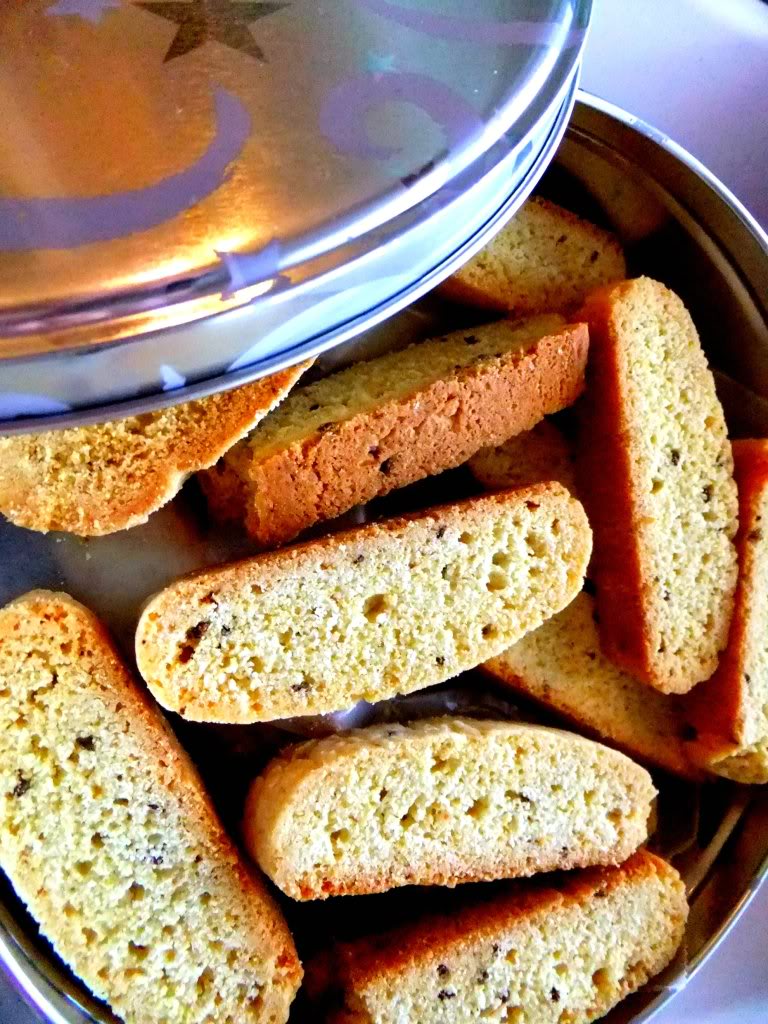
Traditional ANISE BISCOTTI, it’s a huge favorite of my husband and brother-in-law, they love that sweet licorice taste of the anise. These biscotti are perfect for dunking in your coffee or espresso and great to have on hand when someone stops by.

To get that true anise flavor I always use anise oil instead of the extract, usually found in an Italian market or on line, and along with that I also mix in some anise seed, the oil is really strong so you don’t need very much but the flavor and smell lingers forever (or as long as your biscotti last,) in fact there’s still a lingering aroma of anise inside my house and I finished baking them a week ago!

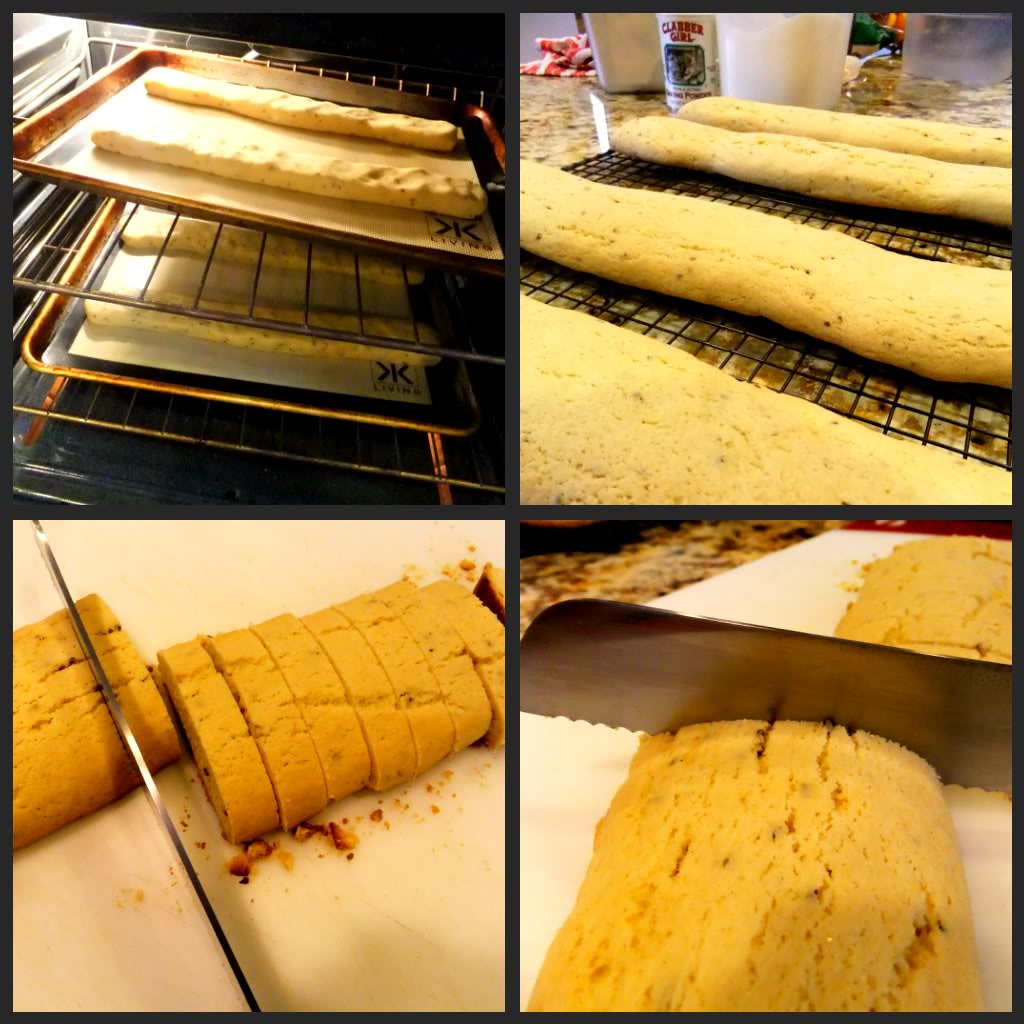
The dough comes together very quickly it’s the baking that will take you the longest since you have to twice bake them. After first baking your logs you want to make sure they cool down before you cut into them for that second baking otherwise you’ll have a pile of crumbs. I use a heavy serrated knife to cut through mine, but I just recently got a great tip from my sister-in-laws from Florida, they cut their biscotti with an electric knife! Isn’t that a great idea? I’ll be on the lookout for electric knife for next year to try.
The great thing about biscotti is that they last weeks after you bake them and they taste just as good as the first day, if properly stored. I like to put mine in tin cans layered between wax paper, they stay all nice and crunchy that way!

ANISE BISCOTTI

Ingredients

5 cups unbleached flour
4 teaspoons baking powder
1/2 teaspoon baking soda
1/2 teaspoon salt
1 cup of softened butter (2 sticks)
4 eggs
1 1/2 cups sugar
1/2 teaspoon of anise oil,( that’s correct 1/2 of a teaspoon).    or 2 tablespoons of anise extract
2 tablespoons plus 1 teaspoon of anise seed
Nuts are optional, I would use at least 1 cup of sliced almonds for this recipe


Directions
Sift dry ingredients together, including the anise seed. Set aside. In a large bowl with a mixer beat butter, sugar, until fluffy, add eggs one at a time along with the anise oil or extract. Add flour mixture and beat on low until blended. Divide mixture into 4 parts. Each part becomes a log measuring around 2 1/2 inches by 9 or 10 inches long. Place logs on a parchment lined baking sheet. Bake in a preheated 350 degree oven 25 minutes or until golden brown on the bottom, check your oven, every one is different.
Remove from the oven and let them cool down on a rack. Carefully cut them 1/2 inch thick, turn each piece on their side and bake on each side for 5 to 8 minutes or until lightly golden on each side.
Makes around 60 biscotti depending on size.


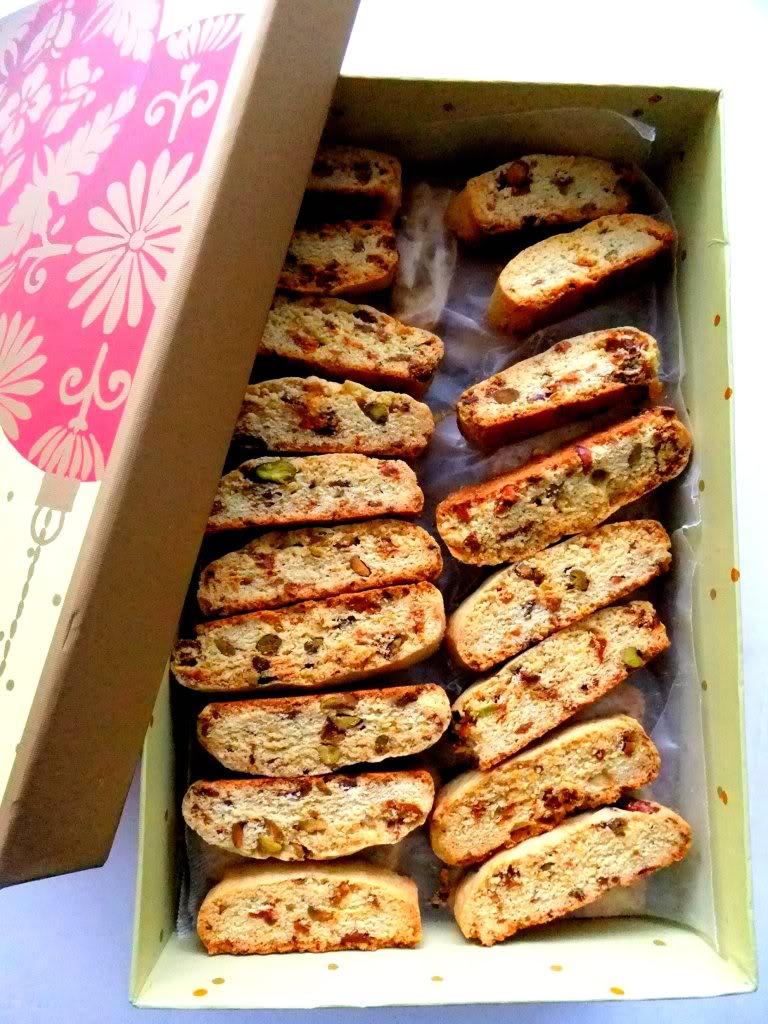
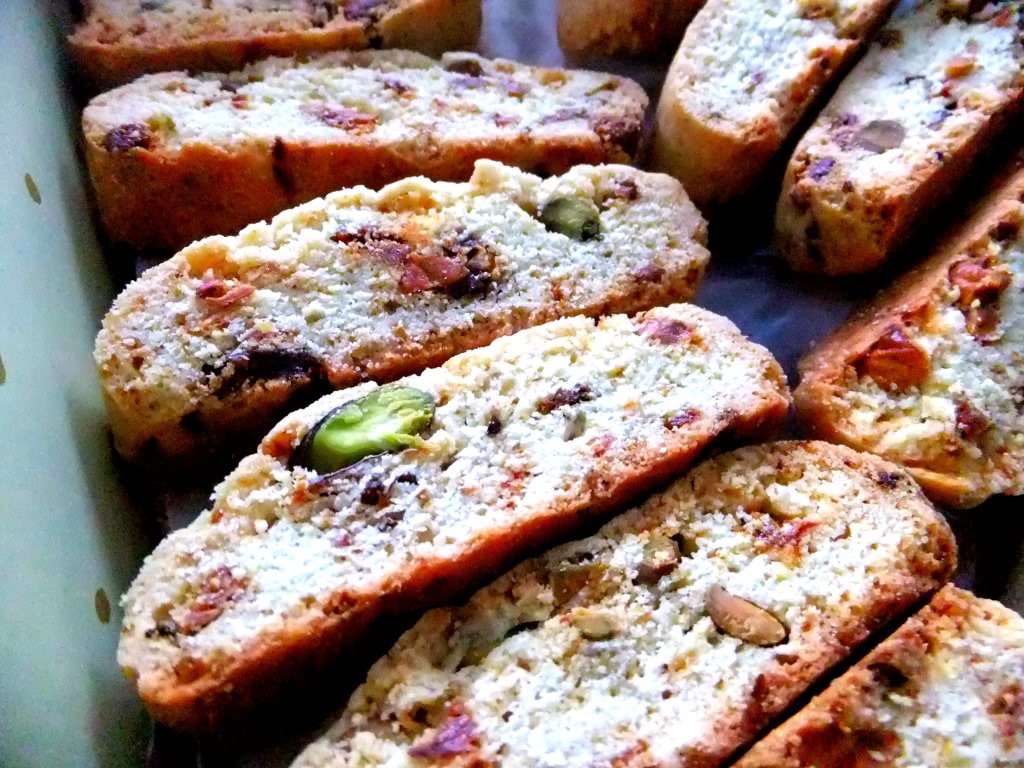
If you were to ask me what my personal favorite biscotti was I would have to say it would be this FIG and PISTACHIO version. Dried fig with just a hint of orange and anise flavors the crunchy biscotti that is studded with pistachio’s. You can’t beat this with a warm cup of espresso on the side, every bite is so full of flavor! If you like figs you will love these!
I’ve shared them on my blog before, so if you’re craving these crunchy goodies you can check out the recipe here.

Next up is PUFF COOKIES, I make them every year and I always will, they remind me of my mom and aunt. You’re probably familiar with these almost every nationality has their own version of them, also known as Mexican Wedding cookies, but to me and my family they’ll always be Puff Cookies!

Like puffs of snow these rich and buttery cookies just melt in your mouth, great as a gift in a pretty tin or just placed on a platter for any special occasion, either way they will be most appreciated. I also shared these on my blog way back when I first started blogging, you can find the recipe here.

And finally, I always like to put a new cookie into the mix, well new for me anyway. I’ve tasted RICOTTA COOKIES before but I haven’t ever made them myself until I saw Claudia’s version over at Journey of an Italian Cook. Poor thing she lives in Minnesota and just got hit by that big blizzard recently, stuck in the house she’s been cooking and baking up a storm! (no pun intended). I’m sure her family has been very grateful for the snowfall!
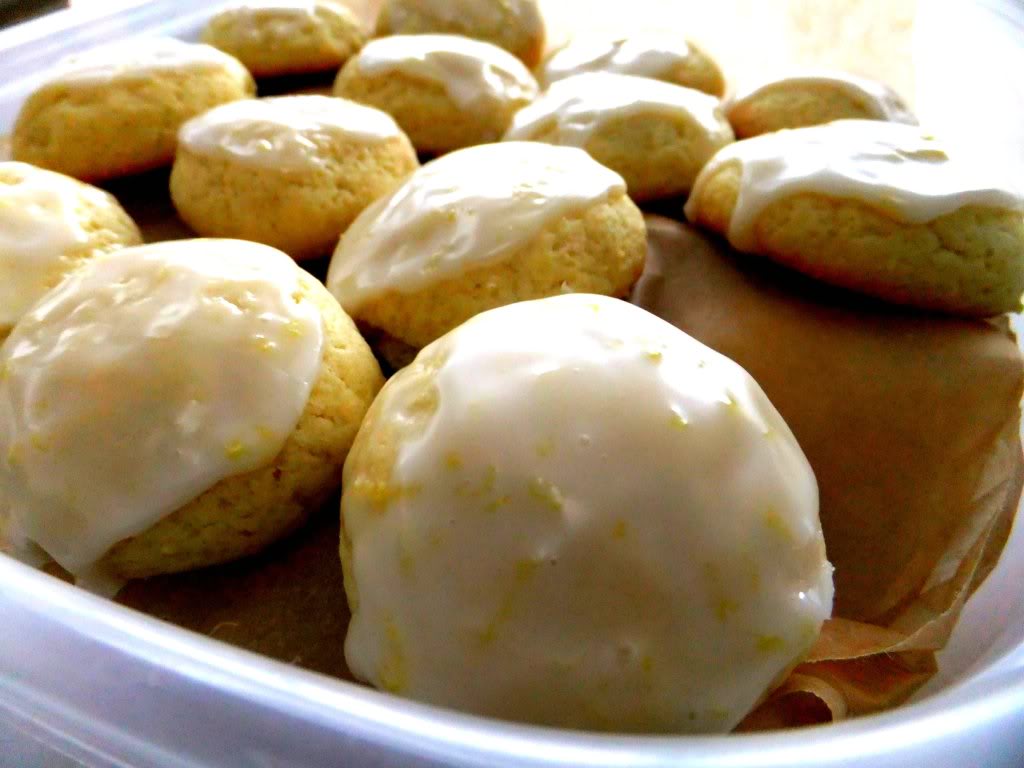
These cookies are truly addictive, the taste and the texture is perfect, not to sweet, just right!


Please, go out and get some ricotta, you still have time to make these and add them to your cookie tray, I promise you won’t regret it!

I’m sending you over to Claudia’s blog to get the recipe, the only thing I changed up was that I doubled the lemon zest in the batter, and then for the glaze, instead of 1 teaspoon of vanilla I did 1 teaspoon of lemon extract and more fresh lemon zest. I had a lemon theme going on and it went wonderful with the ricotta flavor, I will make these over and over again and so will you!

Happy Baking, and Buon Appetito!

Signature

Cappelletti in Broth

As I said in my previous post I had the privilege of learning how to make cappelletti from my daughter-in-law’s nana who was in for a visit from out of town. This women is in her 80’s and is a spitfire in the kitchen! Not a strip of dough was wasted that day. She took over the kitchen like it was a military procedure, every scrap of dough left over was made into something edible. She put all of us “younger” ones to shame as she kept saying, ” Come on girls we still have more dough here!”

She has the best personality, I want to be like her when I grow up!

Making cappelletti is a labor of love, I didn’t realize it until I made them myself, you’re working with small disc’s of dough each one stuffed individually and then shaped into a little hat, it’s very time consuming but so much fun when you’re doing it with a bunch of people, there were 5 of us actively making them.

It didn’t take me too long to catch on, I think after about 15 tries I became an honorary cappelletti maker.

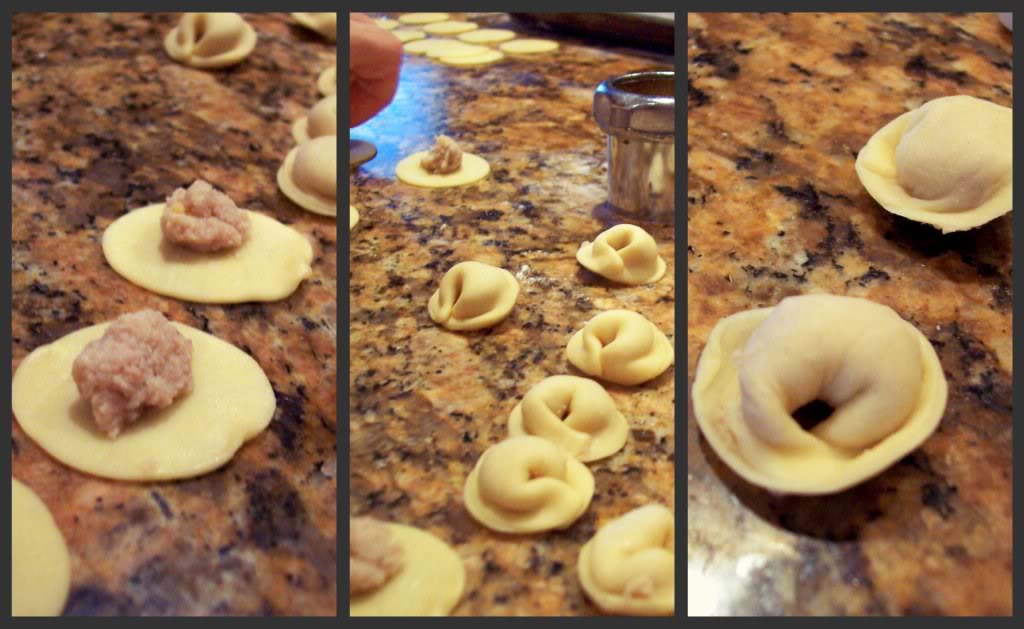
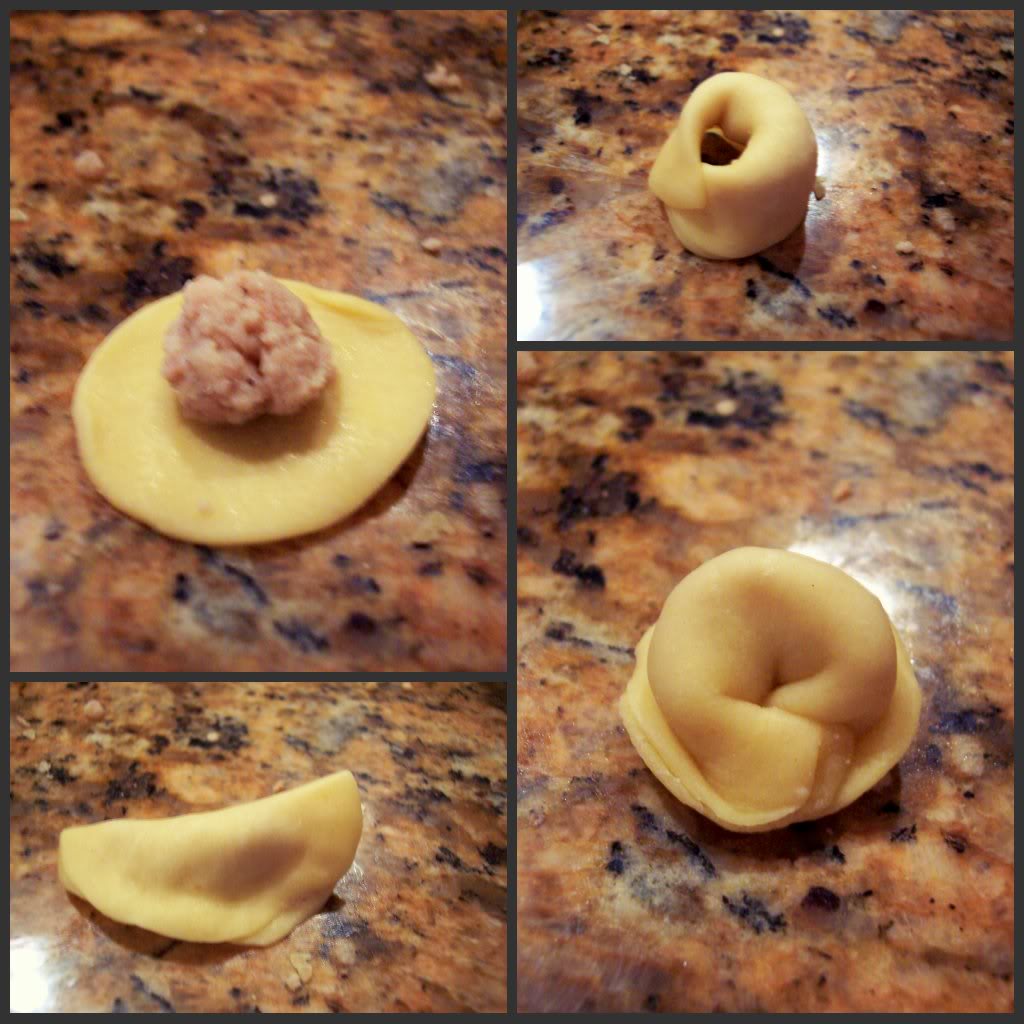
The dough was cut from a handmade disc the size being around 2 inches, then a savory filling of meat and cheese was piped right into the center.
Next the dough was folded in half to make a half moon keeping the rounded edge facing down, after that you take the two top end corners and stretch them around the back until they meet, then just flip the bottom edge up a teeny bit to make a tiny brim.
.

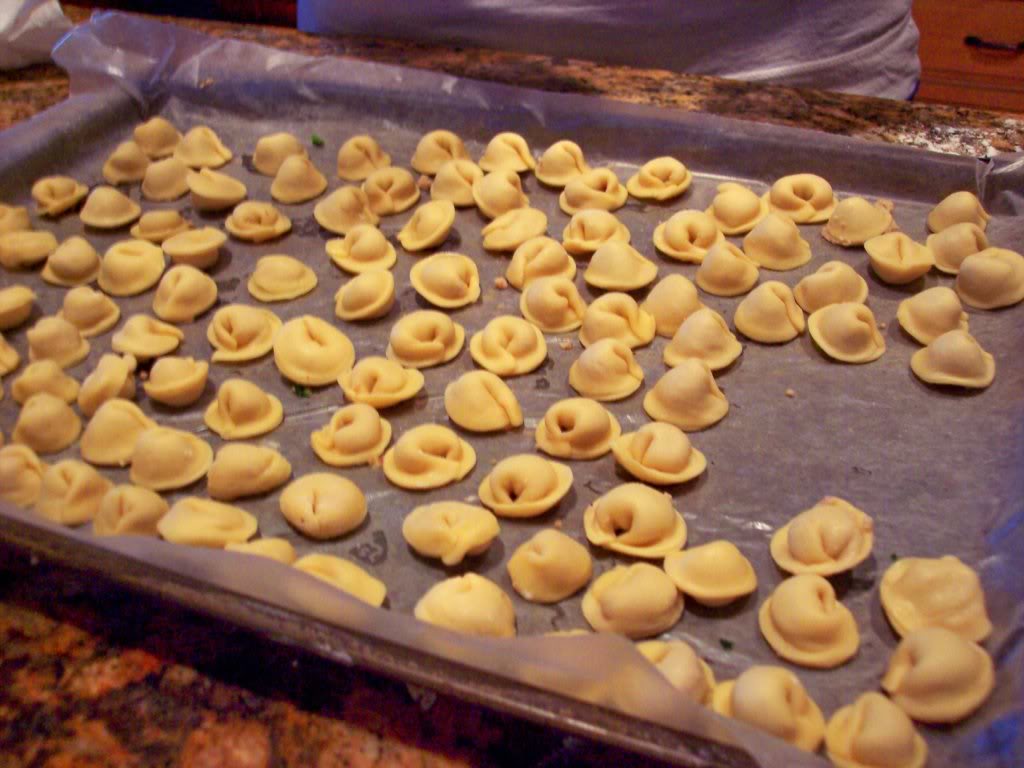
After you sit doing them for a while you start to pick up speed and by the time we were finished we ended up with 800!
They were then placed in the freezer single layer on baking sheets until frozen, then into freezer bags.

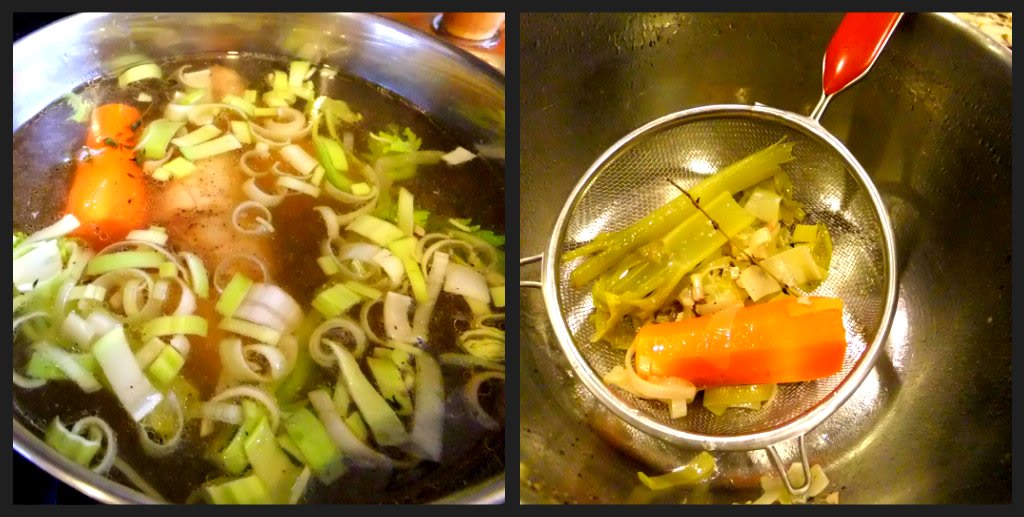
We each went home with our own goodie bags, I couldn’t wait to taste these, but such a labor of love requires homemade broth to place them in, so that is what I did. The day before we ate them I made a rich chicken stock with leeks, onions, carrots and herbs, when it was finished simmering I strained it twice so it was nice and clear, because after all the cappelletti is really the star here.

The next day I warmed up the broth and gently placed the frozen cappelletti into it and avoiding a rolling boil, you don’t want them to break open!

Less than 5 minutes later they were finished cooking.

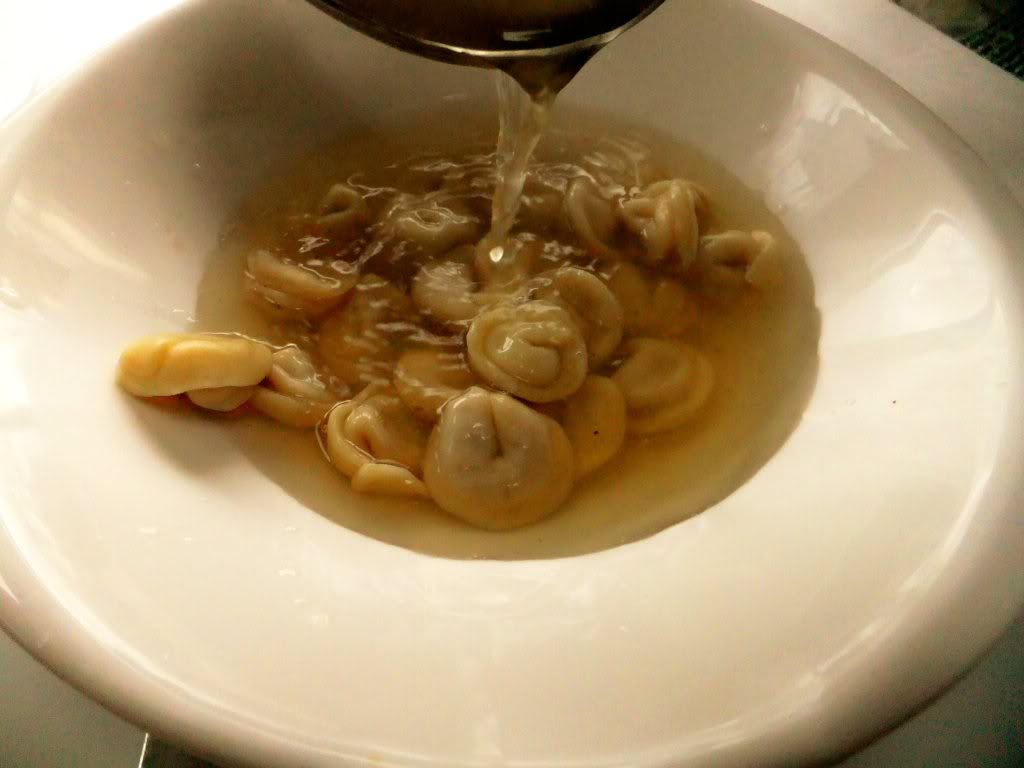
Scooped out with a slotted spoon and gently placed in a bowl, now it’s time to ladle your broth over them.

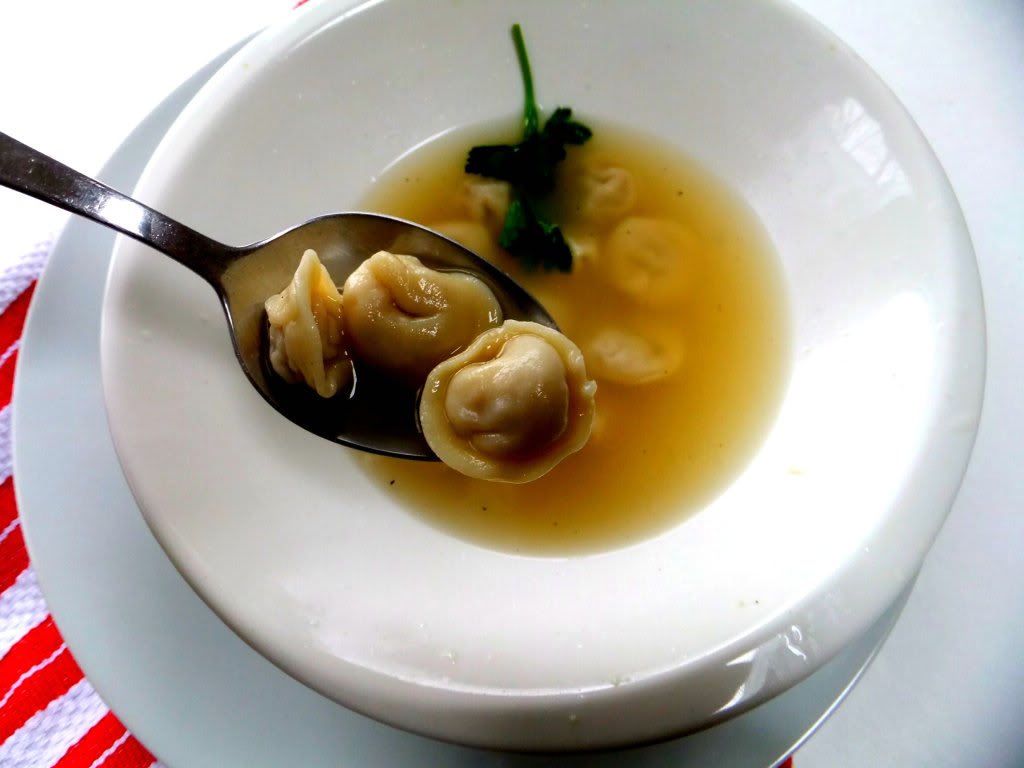
I added freshly grated parmesan cheese on top and savored every bite!

Scrumptiously good to the last drop! Thank you Lena!

Buon Appetito

Email me for recipe.

Follow me on Instagram to see what else I’m cooking up during the week.

Signature

Butternut Squash Ravioli and Scenes from our Annual Ravioli Making Day

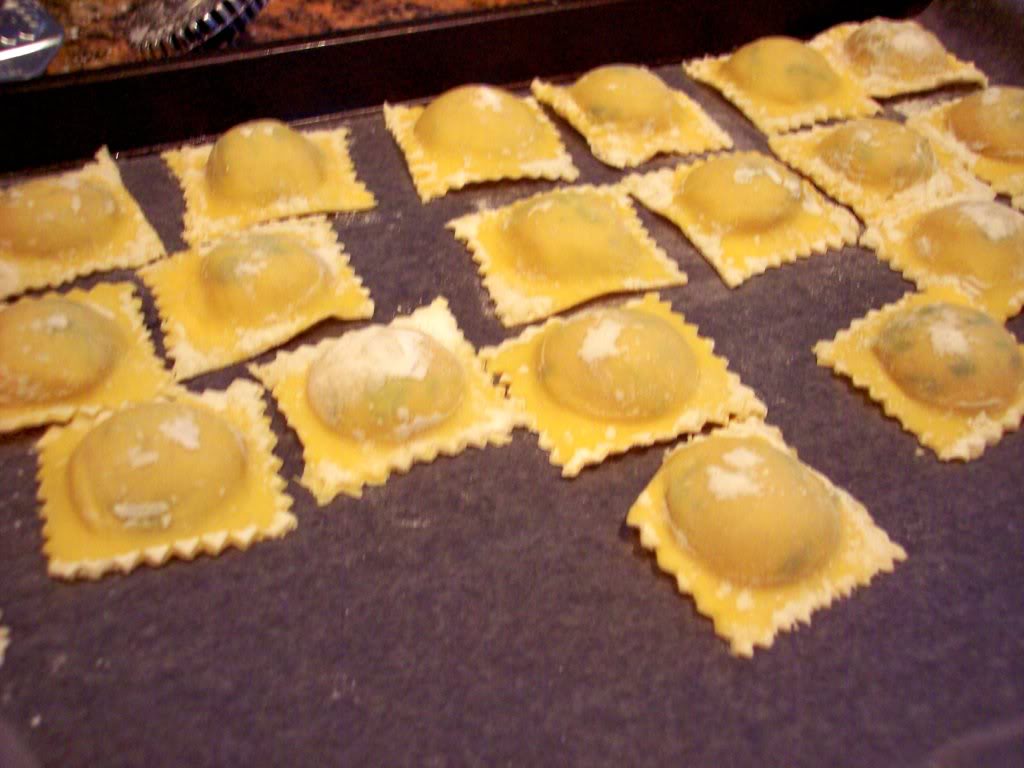
Each year we get together as a family and spend one whole day making homemade ravioli, I’ve written about it before and shared pictures of past years on my blog.

Before our day gets off and running we assemble all our tools. This year along with our ravioli we were also going to making cappelletti as well.
What are cappelletti? They look like little baby tortellini, tiny “little hats” of pasta each one stuffed with a savory filling, something I haven’t ever made myself but had the privilege to learn this year by way of a master, my daughter-in-law’s nana who was in for a visit.

I’m devoting my next post to our cappelletti making so for now, back to the ravioli!

The first thing we always do is to make all the dough at once before we get to rolling it out, it’s always done in a food processor, fast and easy! Then we wrap each ball up and let them all rest for awhile before we begin.

We always make meat filled ravioli and the meat filling is always prepared in advance, this is Nana Lena’s special recipe and all I can say is that it’s fantastic!! It’s a mixture of 3 different meats, cheese’s, spices and herbs all of which have been passed through a meat grinder.
Along with the meat ravioli we also make cheese filled and I’m in charge of the filling for that. This year I got adventurous and also made a butternut squash filling for us to try.

Even the kids get involved, my two gorgeous granddaughters are here helping out.

Everyone usually settles into their own specific jobs and the ones that they’re most comfortable doing.

We ended up making around 400 ravioli
that day along with 800 cappelletti, yes you heard me right, 800! Of course with all that hard work going on all day we had to nourish ourselves, so pizza’s and salads were ordered for lunch along with some decadent cupcakes for dessert!

Here’s the filling I made for the butternut squash ravioli, a mixture of roasted squash, buttery sauteed shallots, a touch of cream and lots of grated parmesan cheese all blended until smooth in a food processor which I did the day before and then placed in a piping bags. Piping the fillings out result in a very efficient, neat and all in all a much faster way of getting it all done.

When completed all the ravioli are placed single layer on sheet pans and then placed in the freezer until frozen, then eventually they go into freezer bags.
I recently took out a bag of the butternut squash ravioli to have for our dinner, I couldn’t wait to see how they turned out!

They held together perfectly as they were boiling in the water, I love when they don’t break open and not one of them did!

While they were boiling I made a quick brown butter and sage sauce, I just love the smell it brings into the kitchen.

I drizzled the sauce all over my cooked ravioli and then added more parmesan cheese.

It’s hard to describe just how good this was but I’ll try, cheesy, buttery, slightly sweet and creamy texture of the filling, nutty, earthy, decadent flavor of the sauce, and the fresh pasta? well what can I say, there’s nothing like fresh pasta!
If you haven’t ever tackled making fresh pasta why not give it a try, it’s so perfect for the holidays!
Buon Appetito!

Signature

Craving Something Green!

I don’t know about you but after a couple of days of turkey leftovers I’m turkeyed out and craving something green, broccoli rabe/ rapini will always satisfy my craving!

Broccoli rabe is highly nutritious and contains many antioxidants in just a small portion, something I definitely need right about now!
If you’ve never tried broccoli rabe it’s taste is something similar to kale with a slightly bitter bite to it, wonderful as a side dish and so good with pasta!

Blanching in boiling water for 3 minutes and then placing in an ice bath will help reduce that bite a little, but after all it’s a hearty green and that slightly bitter taste is the distinctive quality of broccoli rabe.

Drizzle a generous amount of olive oil in the bottom of a saute pan, add shaved garlic and cook until golden along with red pepper flakes to taste. Place your drained broccoli rabe in the pan and cook until tender around 10 to 15 minutes, you can add a tiny bit of water or even some broth to create steam to help it cook through to your desired tenderness, finish off with a squeeze of lemon on top and a drizzle more of olive oil.

I served my broccoli rabe on the side with spaghetti squash tossed with roasted red peppers and a boneless pork cutlet, I told you I was turkeyed out!

Buon Appetito!

Signature

Last Minute Turkey Day Idea’s

By now most of you have your Thanksgiving Day meal all planned out, but if your still thinking about adding a few more dishes to your table you might want to try some of these idea’s from my archives. Enjoy!
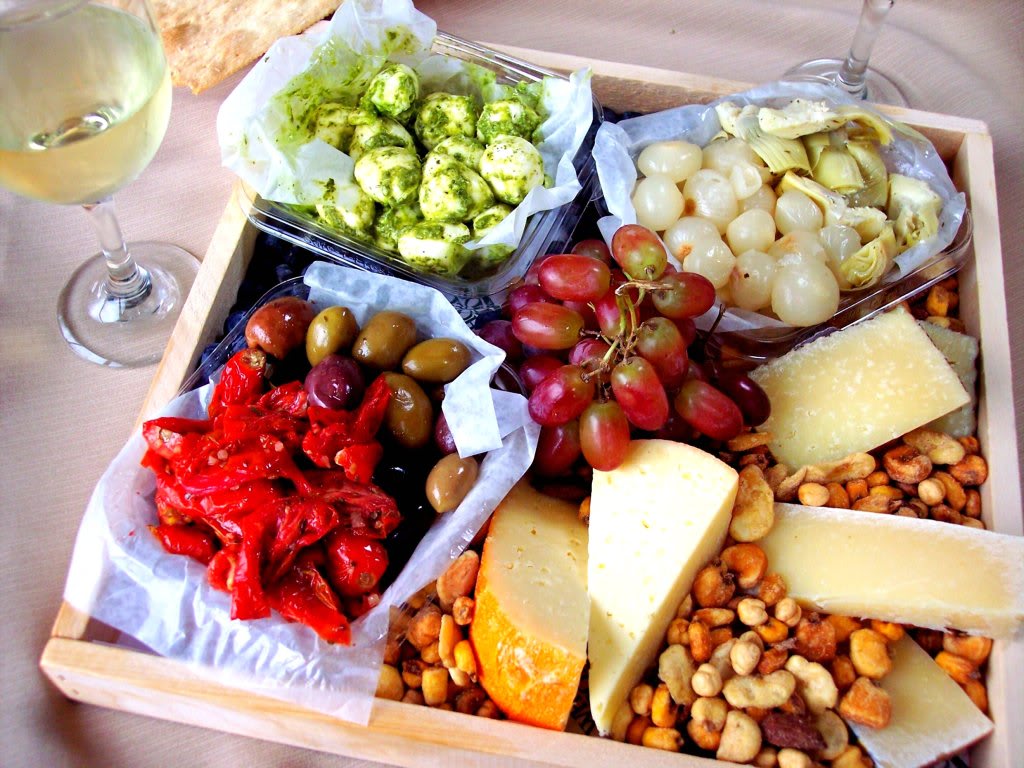
Antipasto platters are always good, this one was actually purchased but you can easily put together your own with a few different things like assorted olives, roasted red peppers, artichoke hearts, cocktail onions, fresh boccochini balls tossed in pesto, grapes, nuts, and a few other cheese’s of your choice, serve with assorted crackers and some cold wine, this is always a big hit!

What can I say, we love Stuffed Artichokes and they are always present here during the holidays.

You have to have some kind of pasta on the side, no? Homemade Ravioli’s or buy some good Italian deli ones, I won’t tell!

Or how about a Meatball Lasagna, a little extra work making those tiny meatballs, but hey it’s a special day!

Butternut Squash Lasagna, my new favorite addition, you can’t go wrong with this, it’s so Thanksgiving like.

Or how about Butternut Squash Stuffed Shells filled with spinach and ricotta drizzled with a lemon sage butter sauce. Wouldn’t a couple of these look good on your plate sitting right next to your turkey?

Roasted Parmesan Creamed Onions, these are to die for, there’s nothing more to say!

Balsamic Glazed Onions, sweet and delectable little things!

Simple Roasted Carrots elevated up a notch with Shallots, Green Olives and a Gremolata sauce.
Roasted Balsamic Glazed Acorn Squash almost to pretty to eat, almost!

Cauliflower with Red Pepper roasted in olive oil with a crunchy coating of breadcrumbs, grated romano cheese and fresh snipped parsley, always a nice side dish.

And last but not least! I know pumpkin pie is always the star on Thanksgiving Day but how about adding in a
Sweet Ricotta Pie as another choice, it’s dreamy creamy filling of ricotta, chocolate chips, orange and cinnamon will be the perfect ending to your holiday meal.
HAPPY THANKSGIVING EVERYONE!

Signature

Memories of Ribollita, and by the way, did you notice my Printer Friendly button?

When we traveled to Florence years ago the food I remember most was ribollita, it’s a thick and creamy soup with many variations but the main ingredients always include leftover bread, cannellini beans and inexpensive vegetables such as carrot, cabbage, beans, Tuscan kale, onions and a bunch of other things. It was originally made by reheating or reboiling the leftover minestrone or vegetable soup from the previous day. Ribollita is classic Tuscan peasant food.

I had the perfect opportunity to make this last week as we had relatives staying with us from sunny Florida, a big pot was waiting on the stove the day they arrived to warm them up and get them acclimated to our weather here.

My sister-in-law and I share the same fondness for ribollita, we would order it practically everyday when we were all in Italy together. Over the years we talked many times about making it ourselves but we never got around to it, but thanks to the Internet and a search for ribollita I was able to come up with a great recipe by combining a few that I saw.

They recently traveled back to Florence to celebrate their 40Th anniversary so the taste of ribollita was fresh in their mind, I have to say she was raving about my ribollita so I know it had to be pretty good.

They surprised me with this beautiful apron they had embroidered in Florence at the San Lorenzo Market, I love it!

Wouldn’t this be the perfect gift for all your foodie friends? Check out those baby bibs and chef hats, I love personalized gifts!

They said it didn’t take very long to make my apron maybe about 15 minutes or so, the machine did it really fast.

I’m so glad they thought of taking photo’s so I could actually see it being made.

Of course what would a visit to Chicago be without having some cannoli cake in the mix? It was my sister-in law’s birthday while she was here so this was the perfect dessert, it’s consistently amazing every time we order one from our favorite Italian bakery!

Sponge cake bathed in rum and layered with fresh cannoli cream surrounded in whipped cream, oh so good, but that’s another blog post alltogether!

Before I give you the recipe for ribollita I have to thank my brother-in-law John for installing the Printer Friendly button for me, I tried to do it several times myself and chickened out each time being in fear of the dreaded HTML. To the many subscribers and readers who personally wrote me asking me to do this I just want to say thank you for your patience, you’re going to love this feature, so easy with just a click you can take out the photos and just print the text only, try it, you’ll like it! I really feel like I finally entered the 21st century!
Additional note to my subscribers: Because you’re just receiving a feed through email, ( which is not my actual blog) you will have to come over to my blog site to use the print friendly button, you will see it at the bottom of each of my posts. My blog address is www.prouditaliancook.com.

Ribollita
Ingredients:
8 to 10 cups of chicken/ vegetable stock
1 chopped onion
2 carrots chopped
1 large celery celery stalk with greens chopped
1 head of dark kale sliced thin
6 cloves of chopped garlic
1 fennel bulb chopped
1 or 2 leeks cleaned and chopped
2 cans of cannellini beans drained, by all means use fresh if you want.
2 diced red potatoes
1/2 head of savoy cabbage sliced thin
1 large zucchini chopped
2 cups of diced canned tomatoes
Day old bread, (optional)
A generous handful of grated parmesan cheese
1 parmesan rind, (they sell the cheesey rinds at my Whole Foods, I pick some up everytime I go there and stick them in my freezer for soups all winter. If you can’t find them just add more grated cheese.)
Fresh rosemary, thyme and red pepper flakes, you could also add sage, plus salt and pepper to taste.
Here’s what you do:
1. In a large stock pot nicely drizzled with olive oil saute all your vegetables until slightly soft, then add in herbs and red pepper, next pour the stock in and add the cheese rind.
2. After it starts to boil let it simmer for a good 45 minutes then add beans and simmer a few more minutes. At this point I like to taste and add, maybe more pepper, rosemary, thyme, olive oil, or grated cheese, you be the judge.
3. I took my immersion blender and blended half of the pot, it renders a nice smooth yet still chunky consistency. I did not add the the day old bread into my soup I felt it didn’t need as it was super thick, feel free to add it if you wish especially if you don’t use an immersion blender.
Ladle soup into bowls and drizle olive oil on top along with grated cheese, this is comfort food at it’s best!
Enjoy and Buon Appetito!
Signature

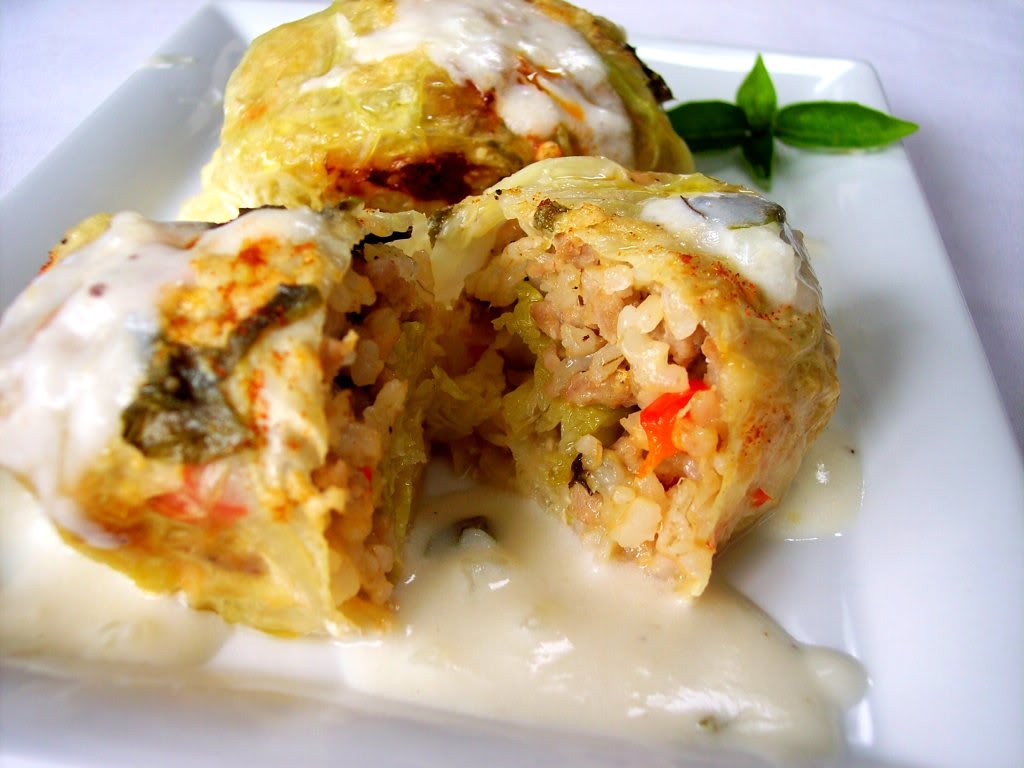
Stuffed Cabbage with Basil White Wine Cream Sauce

I told you I’ve been stuffing things! Stuffed cabbage is something I make a few times over the fall and winter season, ultimate comfort food, warm and satisfying little bundles filled with meat, cheese, vegetables and herbs usually covered in a light tomato sauce but this time I wanted to change it up and replace it with and a basil white wine sauce. The wine sauce definitely elevated this dish to a different level!

My cabbage of choice is always savoy, I love the look of it’s lacy patterned veins and crinkled leaves, it tastes great and cooks up perfectly, of course other cabbage would work just as well.
For this recipe I used one HUGE cabbage and it made 15 rolls.
Preparing the Cabbage
Core as much of the cabbage possible before the actual steaming. Do not remove the outer leaves. Steam the whole cabbage in a large pot with approximately three inches of water. As the leaves soften, remove them one at a time to a large platter. Steaming the whole cabbage should take about thirty minutes. Cabbage leaves should be softened but not mushy. When cabbage has cooled enough to handle, use a paring knife and pare the thick base of the cabbage leaf. Set aside the tough outer leaves of the cabbage.

Stuffing Mixture

1lb. of ground turkey, I like to brown mine up a little beforehand
1/2 cup grated asiago cheese
1/4 cup of grated parmesan or romano cheese
1/2 chopped onion
2 garlic cloves, minced
1 diced red pepper
10 oz of cooked brown rice or cauliflower rice
Salt and pepper
Grated lemon zest, fresh parsley and basil


Basil White Wine Cream Sauce
Saute 2 shallots in 1 tablespoon of butter, deglaze with a healthy splash of white wine, then add to that 1 1/2 cups of chicken broth and equal amounts of cream and whisk. Snip fresh basil into the sauce and let it reduce down until thickened, adding salt and pepper to taste.
Note: If cream is not your thing, you can make a bechamel with lowfat milk instead, but don’t forget the wine!
Stuff each cabbage leaf and then fold them over like a burrito, place rolls seam side down in a baking dish that has some chicken broth on the bottom and a small amount of the sauce, drizzle cabbage rolls with olive oil and sprinkle with paprika, grated parmesan, salt and pepper. Cover loosely with foil and bake around 45 minutes in a 400 degree oven.

When finished baking place your cabbage rolls into a pool of sauce spooning some over the top.
The majority of the sauce is used as a finishing sauce because I found that if you pour it all over and then bake it, during the baking process it tends to break down and you sure don’t want to miss out on swiping each bite into that creamy luscious sauce now do you?
Enjoy and Buon Appetito!
Signature

Stuffed Acorn Squash

I’ve been stuffing lots of vegetables lately, cabbage, peppers and squash to name a few, I don’t know why maybe because it’s November, it’s cold out and I have that comfort food thing going on.

I actually made this tonight for dinner along with a spinach salad it was healthy, hearty and very comforting!

Some people get intimidated by squash with all the different shapes and sizes, don’t be, you’ll be missing out on such a treat! Just make sure your knives are sharpened when you cut into it! Here’s a quick video on how to cut one properly.
I love the shape of acorn squash with those scalloped edges, just cut it in half, scoop out the seeds and pulp then roast it in your oven at 375 degrees cut side down for around 40 minutes, after it cools a bit then take a spoon and scoop out some of the meaty flesh along the sides and bottom reserving that to add to your stuffing mixture.

The cooked squash then becomes your perfect edible bowl pretty scallops and all! You can get very creative in what you choose to stuff them with, the possibilities are endless.
For mine I used sauted onion, garlic and scallions, cooked brown rice, chopped fresh spinach, dried cranberries, a shredded cheese blend of asiago, fontina and mozzarella, grated parmesan, the scooped out squash I reserved, cooked and diced chicken sausage that was flavored with roasted garlic and fontina, fresh parsley, thyme, salt and pepper.

After you stuff them place them back in the oven for around 20 minutes or until heated through. We enjoyed every bite!!

This is the view of my back yard, I guess we have a ton of raking to do this weekend, winter’s right around the corner!
Buon Appetito!

Signature

Pumpkin Bread Pudding

I made this on the spur of the moment the other day after gazing upon a day old half of baguette that was sitting on my counter totally intended for breadcrumbs. The winds were 60mph here in the Chicago area so this was the perfect dessert for a cool crisp day!

I’ve been stocking up on canned pumpkin because I’m always hearing there’s a shortage of it so I had plenty of that along with all the other ingredients.

This was so quick to put together, the longest part was waiting for my raisins to soak up the bourbon, but oh it was so worth the wait!
Of course the bourbon is optional if you want to omit it just double the amount of hot water.
Add all your ingredients into one bowl, whisk it up and pour the mixture into individual ramekins, perfectly portioned for one.

The aroma is amazing, the warm spiced custard along with the bourbon soaked raisins will put a happy smile on your face! Feel free to put a dollop of vanilla ice cream on top if you wish.

Pumpkin Bread Pudding
Adapted from Martha


Unsalted butter, room temperature, for ramekins
6 tablespoons brown sugar
1 cup golden raisins
1/3 cup bourbon
1/3 cup hot water
One 15-ounce can pumpkin puree
4 large eggs
1 cup sugar
1 1/2 cups milk
2 teaspoons vanilla
1 teaspoon ground cinnamon
1/2 teaspoon ground ginger
1/2 teaspoon ground allspice
1/4 teaspoon nutmeg
1/2 teaspoon pumpkin pie spice
Pinch of salt
One 12-ounce day-old loaf brioche, challah or rustic baguette cut into 3/4-inch cubes
Confectioners’ sugar, for dusting


Directions
1. Preheat oven to 350 degrees. Butter six 10-ounce ramekins or custard cups, and sprinkle each with 1 tablespoon brown sugar, set aside on a baking sheet. Place raisins in a small bowl, and cover with bourbon, if using, and the hot water; let soak until plump, about 20 minutes. Drain; set aside.


2. In a large bowl, whisk together pumpkin, eggs, sugar, milk, vanilla, spices, and salt. Toss in the bread cubes, and stir gently to evenly coat; let stand a few minutes. Fold in the raisins. Divide among ramekins, pressing down slightly to make level.

3. Bake until custard is set in the center and top is golden, about 40 minutes. If bread browns too quickly, cover loosely with aluminum foil. Remove from oven; let cool slightly. To serve, un-mold onto plates; dust with powdered sugar.
Enjoy and Buon Appetito!
Signature

Homemade Ricotta Cavatelli Made Easy!

A few weeks ago my girlfriend let me borrow her cavatelli pasta maker it was the first time I ever used a machine, all I can say is wow, what a great invention! She has a brand that no longer exists but if you check on Amazon there are many well made brands that our very reasonably priced, just remember to get one that has the wooden rollers.

If you’re crazy about cavatelli, those shell-like ridged noodles that capture and hold the flavor of a sauce so well, then have no fear you can have these made, cooked and on your table in no time at all.

I was amazed at just how easy the process was, you simply feed a strip of pasta dough into the machine and turn the handle, the machine does the rest. The rollers send the dough past a drum set with two tiny blades which cut the dough into small pieces and presses them against the drum’s ridged lining. As quick as you can turn the handle is as fast as they come popping out, you’ll have trays of them done before you know it!


If you want to freeze some, leave them individually on the tray as shown above placing the whole tray in the freezer, when completely frozen you can then bag them up, mine took about a half hour to 40 minutes to freeze.

The ricotta dough is my favorite they turn out so light tasting, you won’t get that heavy doughy feeling at all I promise. They also cook up really fast, just place them into salted boiling water and when they rise to the top, which only takes a few seconds, they’re pretty much done and you can start scooping them out.

Whatever sauce you choose you can be sure that those deep ridges will catch it all!

A simple sauce made of olive oil, garlic, red pepper flakes and some of the pasta water was the perfect combination for the fresh cavatelli with shrimp and broccoli.


Tossing them into a light marinara sauce is my personal favorite, even my 14 month old granddaughter loved them, I cut them into thirds for her and she gobbled them up.
Here’s the food processor method for making the dough
Serves 4
4 cups of flour
1 egg
1 lb. ricotta cheese
1 t. salt
1/4 cup milk
Using the metal blade process the flour, egg, ricotta and salt together, pour the milk through the tube and process again until dough ball forms. That’s it!
At this point if you get the machine you’ll have instructions as to how thick the dough should be when you roll it out and cut it into strips.
If you want to make the cavatelli by hand without the machine (why would you?) you can still enjoy this recipe.
You might consider putting this on your Christmas list, I highly recommend it!
Buon Appetito!
Signature

Butternut Squash Tart with Caramelized Onions and Kale

Butternut squash has become a favorite in our house, it’s so versatile and can be used in so many different dishes. I usually buy one every week, cut it into chunks, roast it and tuck it away in my fridge to use up during the week.

It’s so readily available this time of year and with prices like this how can I refuse!

I’m always looking for new ways to use it so while researching the Internet I kept seeing Smitten Kitchen’s galette version, those caramelized onions she used were calling my name so I decided to make a tart but changing it up a bit using puff pastry instead and adding kale for color and added flavor. I’ve already made this twice we loved it that much!
There’s something about the sweetness of the caramelized onions paired with the sweet and buttery squash, it’s such a perfect match, add to that fontina and parmesan cheese and a touch of sauteed kale, this dish screams fall!
I promise you you won’t be disapointed, you can even substitute spinach if you want or omit it all together. The puff pastry was a dream to work with, so easy to put together once all the components were ready.
Butternut Squash Tart
Prepare Squash, you can do this ahead of time
Peel squash cut into chunks toss in a bit of olive oil salt and pepper then and roast in a 375F- 400F oven til tender and golden.
One sheet of puff pastry, defrosted
Unfold the pastry sheet onto a Silpat or parchment paper and place on a baking sheet. Using a sharp knife, score a 1/2-inch border around the edge of the pastry sheet. Prick the center of the pastry sheet thoroughly with a fork.
Caramelized Onions
For this I sliced three onions into half moons and then sauteed them in a dab of butter and olive oil, added a pinch of sugar and a couple of sprigs of fresh thyme slowly cooking them for almost 40 minutes until a rich golden brown color appears. Don’t hurry this process even though you might want to, it really makes a difference!
For the kale I just took a about 6 leaves and cut them chiffonade style, saute in olive oil until wilted.
When all those components are finished sprinkle parmesan on the base of the puff pastry sheet, then add your caramelized onions all around then touches of kale here and there, maybe a cup or so of cubed fontina spread about, more parmesan and a drizzle of olive oil on top and along the border of the puff pastry, place in a 400F oven for 25- 30 minutes or until nicely browned on the bottom.
Each year during the fall local Girl Scouts create nature themed scarecrows near my home, very creative don’t you think?
Have a wonderful weekend and Buon Appetito!

Signature

Vegetable Egg in a Hole

Traditional Egg in the Hole is made by cutting a hole in the middle of some bread then cracking an egg inside the hole and then simply frying it all together. Do you remember the famous breakfast scene in Moonstruck between Olivia Dukakis and Cher? I once did a post on the famous “Moonstruck Eggs”.

Well this is the low carb veggie version. I love how acorn squash looks when you slice it into rings a perfect ready made hole for your egg! Don’t bother to peel it, just carefully slice the squash into rings, take out the seeds, toss in olive oil, salt and pepper and roast in an oven at 400F for about 20 minutes, you can do this all the day before.

egg in vegetableegg in vegetable When you’re ready to cook it drizzle some olive oil in the bottom of your pan, place the squash rings inside then gently crack your egg in the middle. Cook on low heat partially covered then snip fresh rosemary on top along with freshly grated parmesan cheese, it’s a perfect flavor combination with the squash and a beautiful presentation for a special breakfast, and it’s so easy to do! Don’t worry about the peel it slips right off.
Also you can be creative and add in some pretty spinach leaves to give it some color and added deliciousness, I think you will love this!

Another great vegetable that works well is peppers of all different colors, here I used red peppers which I sliced into rings then sauteed in olive oil until tender right in the pan it only takes a few minutes, then finish cooking the egg as I did above, this was garnished with a dry Tuscan style herb mix that I have.

Everything stays contained in it’s own neat little package, and again such great flavor combinations going on here, sweet red pepper, creamy egg, olive oil and herbs!

Here’s more of a free form method I do when I have leftover veggies, put them in a pan, make a hole in the center and crack an egg right in the middle,just be careful when you slide it on to your plate you might want to add some cheese to the veggies so they stay together or better yet use individual casserole dishes so everything is contained.
Acorn squash and red peppers are everywhere right now so pick some up and give this a try I think you’re going to love it!
Have a great weekend, and Buon Appetito!
Signature

Eggplant Stacks

This is a quick meal you can put together providing you have some roasted eggplant slices tucked away in your fridge like I usually do, but if not it still won’t take you too long to get this meal together. Great for mid week or just a lazy weekend, serve with a salad and some crusty bread and you’re good to go.

I say quick because it’s basically just all about the layering of ingredients together. How could you ever tire of buttery eggplant, fresh oozing mozzarella, creamy pesto and a light and flavorful homemade sauce? I know I can’t!

I’m still able to find really good eggplant and I hope you can too so you could make this ASAP!


Here’s what you do:
Prepare the eggplant
by cutting the tip and ends off, then stand it up and with your knife peel the skin off in a zebra fashion, striping it as you go around, leaving some skin on and taking some off. Then slice your eggplant into 3/4 inch rounds. Toss with olive oil and bake in a 450F oven until golden and tender.

Ingredients:
Fresh mozzarella
Roasted eggplant slices
Basil pesto
Marinara sauce, homemade ( it takes no time at all to make your own!)
Basil leaves
Toasted breadcrumbs and grated romano or parmesan for garnish
1. Spread sauce in a baking dish, add one eggplant slice, spread sauce on top of it along with a piece of fresh mozzarella and a basil leaf, 2. Add another eggplant slice on top and spread with pesto, 3. Add final eggplant slice, more sauce and another piece of fresh mozzarella. 4.Top with more sauce, toasted breadcrumbs and grated cheese. Repeat for as many stacks you’ll be making. 5.Bake uncovered at 375F until heated through and cheese is melted.
Have a nice weekend and Buon Appetito!
Signature

Baking with Fruits of the Season

When it comes to baking I usually go for the more “rustic style”, nothing long and complicated for me, quick breads, muffins, one bowl whatever. I get excited when I don’t have to pull out my hand held beaters. I don’t own a Kitchen Aid and probably never will although I do like those pasta attachments!

That’s why I love making this cake, Torta di Mele, which is an Italian apple cake. Just grab a big bowl and combine:

2 Cups of flour
4 Eggs
1 Cup of canola oil
1 Cup sugar
2 Teaspoons baking powder
3 Tablespoons Amaretto liqueur
6 apples cored, sliced and tossed in the juice of one lemon

Preheat oven to 325F. Combine all ingredients in bowl and stir until smooth. Pour batter into a buttered 9 or 10 inch spring form pan and place your apple slices all around gently pressing them in as pictured above, then bake for 60 to 70 minutes or until golden and cooked through. Cool and serve at room temperature.

I love Italian plums, when I see them I’m instantly reminded of my favorite aunt and uncle who grew them proudly on their property, they’re much smaller than the standard black and red plums that we normally see, their texture is a little firmer and they hold up great in baking. My friend Stacey calls this recipe, Plum Cake for Dummies, which is right up my easy baking alley!

Italian Plum Cake

For my recipe I used the Italian plums which I sliced in half and pitted, you can use as many as you want filling the whole top of the cake if you so desire. The key to this recipe is the easy batter which consists of;

1 1/2 Cups flour
2 tsp Baking powder
1/2 Teaspoon salt
3/4 cup of sugar
1 egg
1/4 Cup canola oil
1/2 Cup milk

Cinnamon sugar to sprinkle over plums,
1 Tablespoon of sugar combined with 1 teaspoon of cinnamon.

Directions:

Mix the wet with the dry ingredients, I used my hand held mixer, then pour the batter into a buttered 8 inch square pan.
Place your plum halves on top of the batter facing cut side up, I pressed one deep into the batter and then another one directly on top of that, so I used 2 halves per section right on top of each other pressing down a bit.

Sprinkle the plum halves with cinnamon sugar and dot the top of them with 2 tbsp of butter and bake at 375F for 40-45 minutes.
This cake was super moist and great with a hot cup of french roast coffee! This would be equally good using other stone fruits or even apples, why not!

And lastly, for a nice Sunday breakfast that you can prepare the night before and pop in the oven the morning of, Baked Cranberry Apple French Toast.

Wouldn’t you like to wake up to the smell of this baking in your oven? It’s easy, here’s how you do it.

Ingredients:

1/2 cup brown sugar
1/4 cup melted butter
1 1/2 tsp. cinnamon
2 or 3 tart apples, depending on size, peeled, cored and thinly slice
1/4 cup dried cranberries
1/2 loaf of Italian or French bread, cut into 1-inch slices
3 large eggs
3/ 4 cups milk
1 tbsp. pure vanilla
Feel free to spike it with some rum or Amaretto for extra added flavor!

Directions:
Toss apples and cranberries with brown sugar and 1 tsp. cinnamon. In a buttered 8×8-
inch baking dish arrange bread cubes on top. Mix the eggs, milk, vanilla and remaining 2 tsp. cinnamon until well blended. Pour mixture over bread, soaking bread completely. Arrange apple and cranberry mixture all over then cover and refrigerate overnight. Next morning, bake covered with aluminum foil in a preheated 375F degree oven for 30-40 minutes. Uncover and bake 5 minutes more. Remove from oven and let it stand for 5 minutes.
Serve warm, garnish with slivered almonds and serve with maple syrup!
Buon Appetito!
Signature

Time to Make the Pesto!

Our basil this year was the best ever! It was so nice to have it available whenever I needed it this summer, but now that the nights are getting cooler I thought it was time to cut it down and make some pesto before it starts to shrivel up because that would be just too sad!

UPDATE!
Since I wrote this post back in 201o I thought it would be nice to do an update on my beloved basil, it is now 2020, ten years later and I’m still going strong with my love for all things basil!

basil plants
My husband is still the gardener and he’s the one that grows it for me every year. We use to grow it in the ground but now we grow it in pots and the quality and taste seems even better!
picking basil
I make pesto many times during the season, I also freeze it, recently I bought some cubed silicone ice cube trays which I fill with my finished pesto, when totally frozen I then pop the cubes out and stick them into a container and tuck it back into the freezer. I can’t wait to defrost some to use in the dead of winter!
pesto ice tray

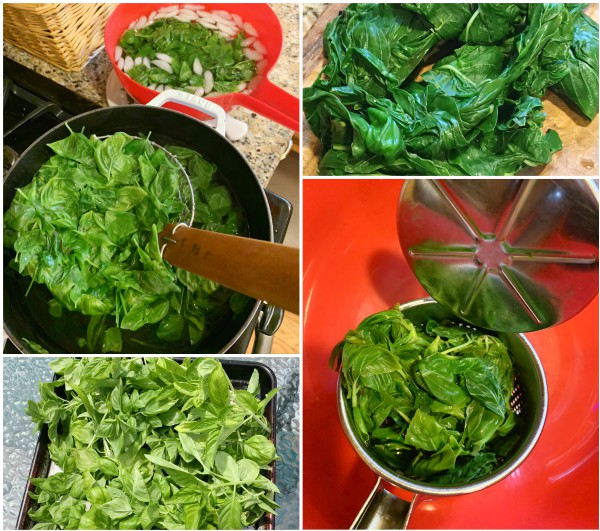
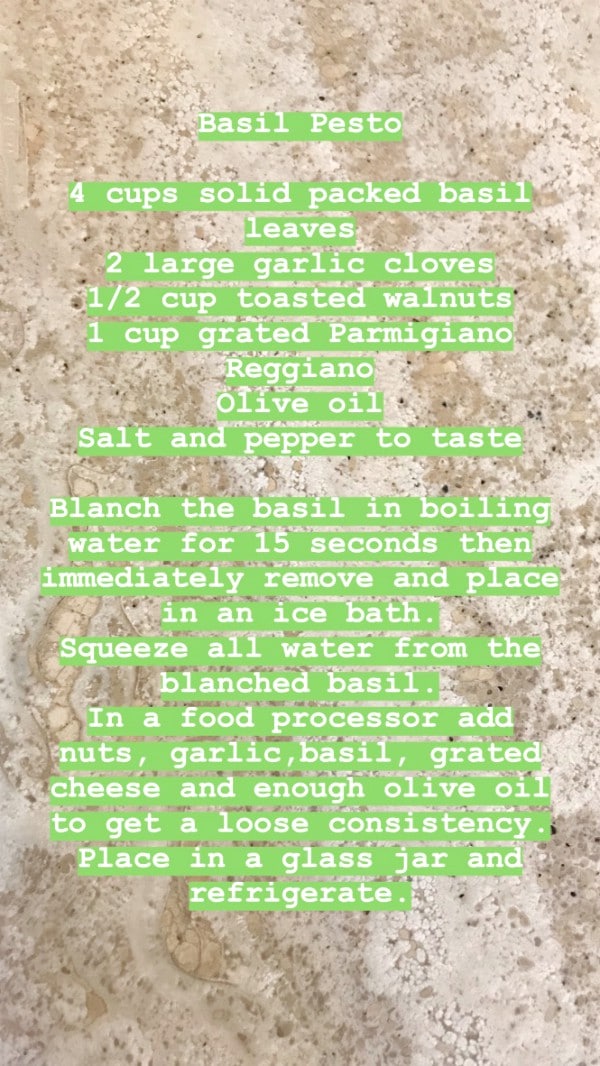
I personally do not like when pesto starts to turn brown, but years ago I found that just by blanching the leaves into boiling water for less than a minute and then submerging them quickly into ice water keeps their vibrant green color.

It’s been said that you can’t freeze pesto with the cheese in it, I’ve done it both ways and I see no difference, so I freeze mine completed with the cheese.

prepping pesto

So after picking the leaves off the branches I wash them first then get a pot of water boiling. When the water is boiling blanch the leaves for less than a minute, then into ice water which you will then squeeze dry.

An excellent tip I got years ago from a fellow blogger was to squeeze the water from spinach using a potato ricer and so I thought why not squeeze the water out of the blanched basil the same way using a potato ricer, and let me tell you it works like a charm!

When I’ve purchased store bought pesto’s in the past I find them way too garlicky or just too oily for my taste, but when you make your own you can add or subtract any of the amounts that you put into it. My advice is keep tasting it as you go along mixing it to get the right balance for you.

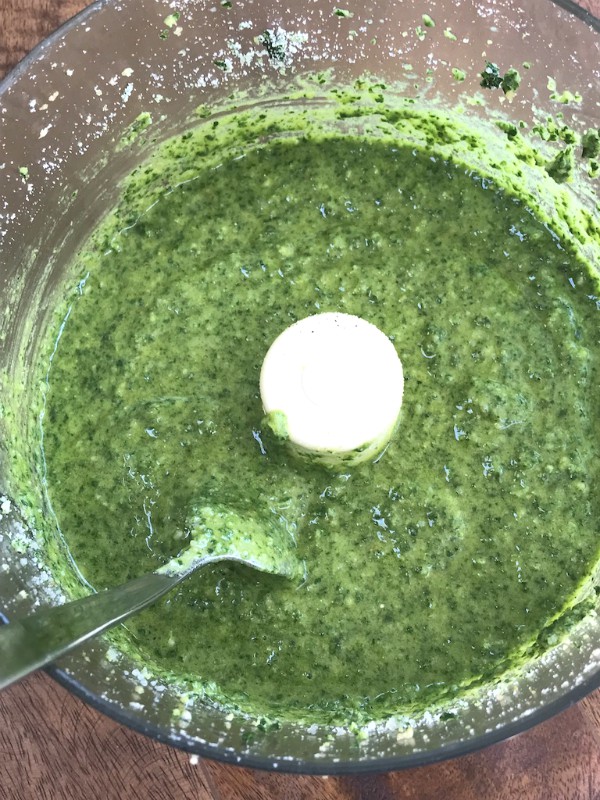
processor pesto

I stopped using pine nuts years ago, they’re just too expensive and then there was that whole “pine mouth” thing going around where badly produced pine nuts if eaten would take away your sense of taste and I didn’t want that to happen, so toasted walnuts it is, and you know what we love the flavor!

pesto ingredients
Good cheese like Parmigiano Reggiano,or even Pecorino Romano I have used, quality olive oil, fresh garlic and toasted nuts is all you need to make a fabulous basil pesto.

Delicious folded into warm pasta, so much flavor! Great with meats, salads, veggies, seafood and sauces, basil pesto is so versatile!

pesto recipe

Remember to keep tasting it, you might want to add more cheese, oil, salt, garlic or nuts whatever suits your own taste buds

ANOTHER TIP:

If you have an over abundance of basil leaves like I do you might want to try Lidia’s way of preserving them.

“Pluck the whole leaves and set them in a small paper cup, fill with water until the herb is submerged, then freeze. When frozen solid, pop the block of ice with the embedded herbs out of the paper cup and into a ziplock bag. The herbs, once the ice melts will be fresh and ready to use.”
 I hope you will give this a try it was so simple to do and you can pack quite a few leaves into the paper cups, another way to preserve your beautiful basil bounty!

Signature

Asiago, Romano and Black Pepper Biscotti

Savory biscotti, excellent on their own, even better when you’re sipping a glass of wine, also the perfect companion with all your homemade soups, chili’s and salads.
Just like its cousin the sweet biscotti, the combinations you could use here are endless and left only to your imagination!
These are so flavorful and perfect for entertaining, with every crunchy bite you’ll taste the bold flavors of cheese, the spiciness of the black pepper and just a hint of whatever herb you use.
Hard and semi hard cheeses are best, think parmesan, chedder, gouda, provolone to name a few, for nuts you could use pistachio’s, pine nuts, walnuts, almonds or pecans, herbs such as thyme, basil, oregano and rosemary, like I said the possibilities are endless!

Now go and create a batch, here’s the basic recipe. Feel free to switch out the cheese and herbs of your choice, I did!

Ingredients:
4 cups flour
1 1/2 tablespoons coarsely ground black pepper
2 teaspoons baking powder
2 teaspoons kosher salt
1 cup grated Asiago cheese
1 cup grated pecorino Romano
12 tablespoons (1 1/2 sticks) cold unsalted butter, cut into 1/2-inch pieces
1 cup thinly sliced almonds

Snipped fresh thyme, not too much
A healthy pinch of cayenne pepper, (optional)
3 large eggs lightly beaten, plus 1 large egg, lightly beaten, for brushing the dough
1 cup whole or 2 percent milk

Directions:

Combine the flour, peppers, baking powder, salt and cheeses in the bowl of a food processor; pulse to combine. Add the butter and pulse briefly. Add the almonds but do not process.
Combine the 3 beaten eggs and the milk in a measuring cup, then add to the food processor bowl, pulsing as you pour. Process just until the egg mixture and nuts are incorporated and the dough begins to form a ball.

Turn out the dough onto a large piece of wax paper, patting it into a disk. Wrap the disk in the paper and refrigerate for at least 2 hours and up to overnight.
Position oven racks in the middle and lower third of the oven; preheat to 350 degrees. Line 2 rimmed baking sheets with parchment paper or silicone liners.
Remove the dough from the refrigerator; if it is very firm let it sit at room temperature for about 15 minutes. Divide into 4 equal pieces. Roll each piece into a log about 11 inches long, 2 inches wide, and 3/4-inch to 1-inch thick. Place 2 logs on each baking sheet, spaced at least 1 inch apart. Use a pastry brush to lightly brush the tops of the logs with the remaining beaten egg, if using.
Bake for 15 minutes, then rotate the baking sheets from top to bottom; then bake for 15 minutes so the logs are golden on top and springy to the touch. Use a wide spatula to transfer the logs to a wire rack to cool for 20 minutes; keep the baking sheets at hand because they will be used to bake the sliced biscotti. (Wipe the paper or liners clean as needed.)

Reduce the oven temperature to 325 degrees. Working with one log at a time, place it on a cutting board and use a serrated knife to cut crosswise on the diagonal with a slow, sawing motion into 1/3-inch-thick slices, arranging them closely together on the baking sheets as you go. Bake both sheets for 15 minutes (on the middle and lower racks), then rotate them from top to bottom and front to back; bake for 15 minutes, until the biscotti are golden and crisp. Transfer to a wire rack to cool completely.
Recipe makes approximately 7 to 8 dozen.
MAKE AHEAD: The dough needs 2 hours rest in the refrigerator, or overnight. The dough can be made in advance and refrigerated for up to 3 days or frozen in a food storage bag for up to 3 months. Baked biscotti will keep at room temperature for up to 2 weeks in an airtight container.
Recipe adapted from The Washington Post 2009
Buon Appetito!
Signature

Melrose Peppers, It’s a Chicago Thing!

I couldn’t let summer fade away without posting about Melrose Peppers, a local variety of peppers that are at their peak right now. Back when I started my blog three years ago I think my second post was about Melrose Peppers, since then I have gotten numerous emails from fellow and former Chicagoans expressing their love for this humble pepper, just a couple of days ago I received this touching email from a man who pretty much sums up the feelings of so many regarding this delectable pepper, my family included!

“Oh Memories of “Ma” Josephine Selefski I have been having a craving for a few weeks now. Quietly searching and coming up empty. Feeling waves of anticipation, Similar to planning a wedding, birth of a child, your 21st birthday …Alas today. Today was the day! I found at the local grocery store “Melrose” peppers. Fresh succulent vine ripened tomatoes, fresh, still warm crispy crusty bread.

Sharp provolone cheese and pan oil roasted Melrose peppers, topped with a drizzle of vinegar and oil with Italian seasoning.Those of you who know the deliciousness … be aware the peppers are in season. As for those who don’t … I have to say my vocabulary is not large enough to explain. Think perhaps mouth- gasms. Ma turned this then young Polish kid into a Melrose pepper eating machine.

As I tore into this wonderful Sandwich, all I could do was close my eyes, savor the flavor and bow my head in thanks for that sweet woman that created so many great memories and introduced me to these flavors.

Thanks Ma, God bless you and keep you in his heart.”

Everyone has their own special way of making and preparing them that is near and dear to their hearts, my husband loves them simply sauteed in olive oil with a little red sauce added, he will make a whole meal out of them with some good crusty bread and a few hunks of provolone cheese!

On how they originated here the story goes like this, an Italian family immigrated to Melrose Pk, Il, which is a western suburb of Chicago, they brought with them the seeds of these tender and sweet thin skinned peppers.
They quickly became very popular among gardeners in the Italian community and then a local and very well loved fruit and vegetable market started selling them and made them extremely well known, and the rest is history!
Sometimes I like to change it up and stuff them, even though it’s time consuming it’s so worth it!
But ever since I discovered this seed and stem remover it’s made my life alot easier, it’s my new favorite gadget and I only payed $4.00 for it! Not only does it do a great job seeding and coring peppers, I use it to clean out the gills from portobello mushrooms, also great for seeding cucumbers and tomatoes and steming strawberries.

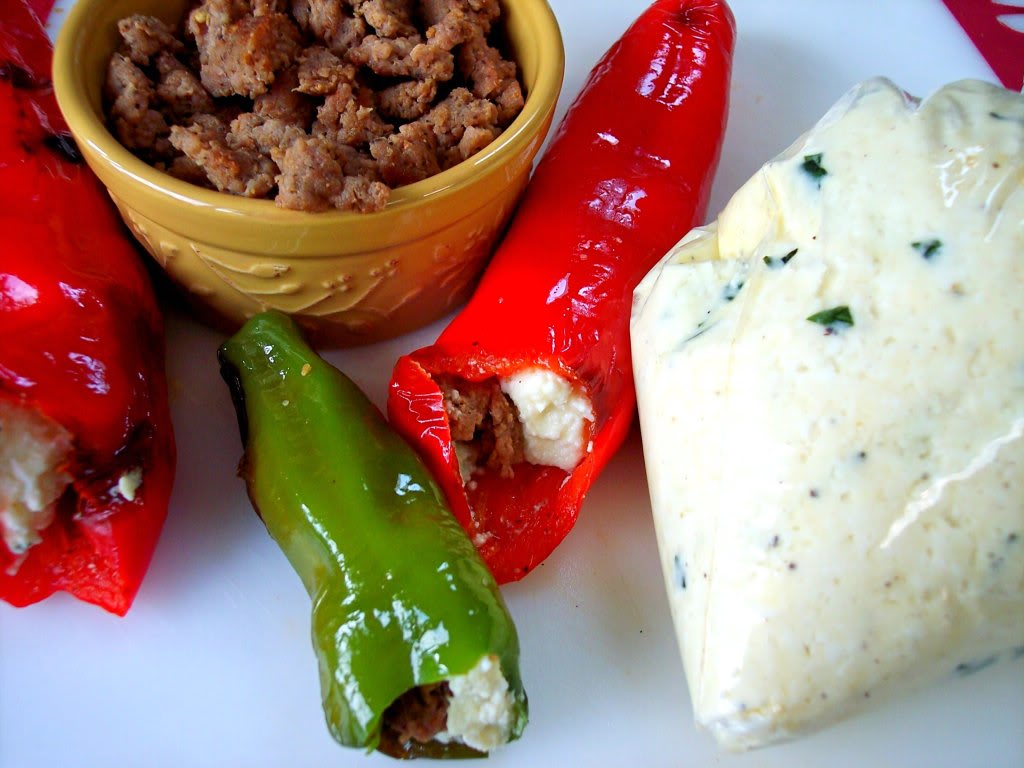
There are many ways to stuff Melrose Peppers, in the past I’ve used Italian sausage and fontina cheese, in this case I used Italian sausage as well as a mixture of ricotta, mozzarella, grated romano cheese, eggs and basil. I usually alternate between the cheese mixture and the sausage as I’m stuffing the pepper. I like to use a zip lock bag with the tip cut off for ease in doing the ricotta mixture, also a quick saute of the peppers beforehand makes them easier to handle.

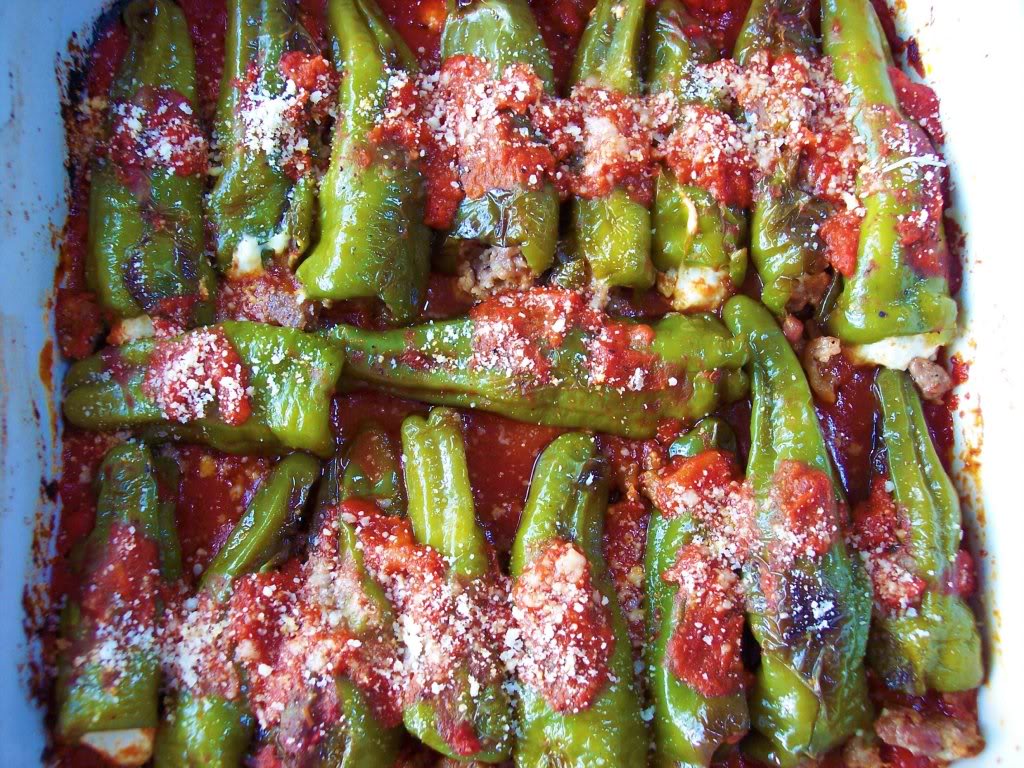
Place them single layer in a baking dish with a light marinara sauce spooned over top , cover loosely with foil and bake at 375F until tender and the cheese and egg mixture is cooked through.


You might have come across this type of red pepper in your market sometimes refered to as Ancient Sweets red peppers, typically they are very long about 10 inches, since they’re so big they’re great for stuffing with whole pieces of sausage, nice and sweet and very tender similar to the Melrose Pepper.
Hope you’re enjoying all the local and seasonal produce in your areas as summer winds down.
Buon Appetito!
Signature

From Garden to Table

Besides my herbs, tomatoes and kale have been our top producers this season from our garden, we have given away so much kale and it’s still growing! It’s been so nice to walk out to the garden, pick something and then create a meal around it. Cold weather and winter comes too soon here so I’m savoring every last bit of summer.

What’s summer without fresh sliced tomatoes simply dressed with olive oil, basil, salt and pepper? Sometimes I add fresh mozzarella or fresh ricotta or even just plain, it doesn’t matter as long as there’s some good crusty bread alongside, it’s a meal in itself!

Vine ripened cherry tomatoes roasted and tossed in pasta is good plain or with any kind of seafood, topped off with crunchy breadcrumbs and fresh herbs enhances the flavors.

How about a zucchini ricotta pie? You can add tomatoes, grated cheese, onions, garlic, lemon zest and fresh herbs, with or without a crust, either way it’s a great summer meal with a salad.

I have really grown to love kale this year and the fact that it’s so good for you is a bonus!

Pasta with sauteed kale, garlic, roasted tomatoes and cannellini beans graced our table a few times this summer, shave a little pecorino romano on top and you have a nice healthy meal.


Of course everything is cooked with heart healthy extra virgin olive oil, is there really anything else?

I wanted to make ricotta gnocchi, so instead of adding spinach like I normally do, I thought why not try it with kale, I just chopped it up small, sauteed it for a few minutes and folded it right into the ricotta.

This was so good tossed into a light marinara sauce and so quick and easy to make. It’s hard to believe September is right around the corner. Hope you’re enjoying every last minute of your summer!
Buon Appetito!

Signature

Grilled Veggie Torte Revisited

Some things just need to be revisited, they’re worth repeating especially when you change them up a bit, such is the case with this Grilled Veggie Torte. My inspiration for making this first hit me a few years ago when I saw this layered beauty in the case at my local Whole Foods store. I asked them how they made it, was there any cheese between the layers? I was in awe of it’s cake like structure and the beauty of it. It was made in a spring form pan piled high with veggies and feta cheese in between, I instantly went home and tried to recreate it, since then I have made it several times for parties, to bring along to a friends house or just when I want to use up an abundance of veggies like I did here. It’s very impressive looking and it can be made in any size pan, the one in my previous post was a 6 inch pan, the one here was a nine inch.
The more colorful you make it the better it is, that’s what gives it the wow factor. I used green, red, yellow and orange peppers, vadalia onion rings, zucchini, eggplant and portabello mushrooms tossing torn fresh basil in between. Feel free to use any of your favorite veggie combinations.

In previous times I have put feta cheese, shredded mozzarella, parmesan or asiago between each layer and on top. Grilling all your veggies do take some time so feel free to grill them the day before and just assemble it on the day you bake it. Remember to brush them all with olive oil and season with salt and pepper before grilling.

Then the other day my friend Stacey posted a beautiful Grilled Vegetable Torte with a crispy and cheesy breadcrumb topping on it and I was inspired to make her version ASAP! all I can say is that the topping enhanced the over all deliciousness of the torte! Check out her beautiful version here.
I also added sliced garden tomatoes on one layer after seeing hers. I made my crispy topping with homemade bread crumbs, grated romano cheese, snipped basil, salt and pepper, and a generous drizzle of olive oil on the top. The two new additions were incredible!
Bake it at 400F for about a half hour. The key is to let it really cool down before you pop the spring on the pan and you will have no problem cutting it into perfect wedges, just make sure you use a serrated knife and slowly cut through it.
The torte can stand proudly alone as a vegetarian meal along with a salad or it’s a wonderful side dish with any type of grilled meat. I served mine with this chicken above. A great summer meal indeed!

Buon Appetito!

Signature

It’s My Blogiversary Today!

Three years ago today Proud Italian Cook was born, I can honestly say it has been one of the best things I’ve ever done, mainly because along this journey into the blogosphere I have met the most incredible people with so much amazing talent that inspires me on a daily basis.
Thank you, Thank you, Thank you to all of my dear blog friends, subscribers, readers , family and friends, I appreciate and adore all your comments!

Looking forward to my journey into next year!

To celebrate my blogiversary I’d like to introduce you first to a company called Blog2Print, they provide bloggers with an easy way to turn their blog into a professionally printed book.

A friend of mine first told me about them and she encouraged me to check them out. I started thinking how cool it would be to have my blog in book form, something to hand down to my family, after all our blogs are like a journal into our daily lives whether it be through food, travels or any other passion that we blog about.

Then one day I got an email from Julie at Blog2Print and she asked me if I would like to try out their product, as you can imagine I was very excited.

With Blog2Print you can print all your pictures, posts, and comments if you wish, if you’ve been blogging for a while you might want to do it in volumes like I did. Depending on how many photos and text you have that’s going to determine the pages used in your book. For instance my first volume consisted of 123 pages, plus a dedication page, and 4 table of contents pages. I was able to fit most of my first year of blogging into the book. I didn’t add any comments into my book it would have taken up too many pages and added to the cost, but that’s entirely up to you.

It’s easy to do and you can personalize your book any way you want with their simple instructions.

I think giveaways are more fun when everyone has the chance to participate so for one lucky reader you’ll be recieving a coupon code for forty dollars from Blog2Print so all my Canadian and International friends can take part, just be aware that there will be some shipping costs. Shipping within the U.S. is free.

So now you can use that coupon to create your own blog book like mine up above. I wish I can offer one to each and every one of you but unfortunately I can’t, but at least I hope I’ve encouraged you to think about doing this your self. You can test it out for free and see your blog in book form on their site with no obligation at all, go and check it out but once you do you’ll be hooked like me. The quality is even better in person!

All you have to do is leave a comment on this post, the winner will be announced on Friday August 20th.

I will be using random generator, if I can figure it out! lol

Signature

Using Up Our Summer Bounty

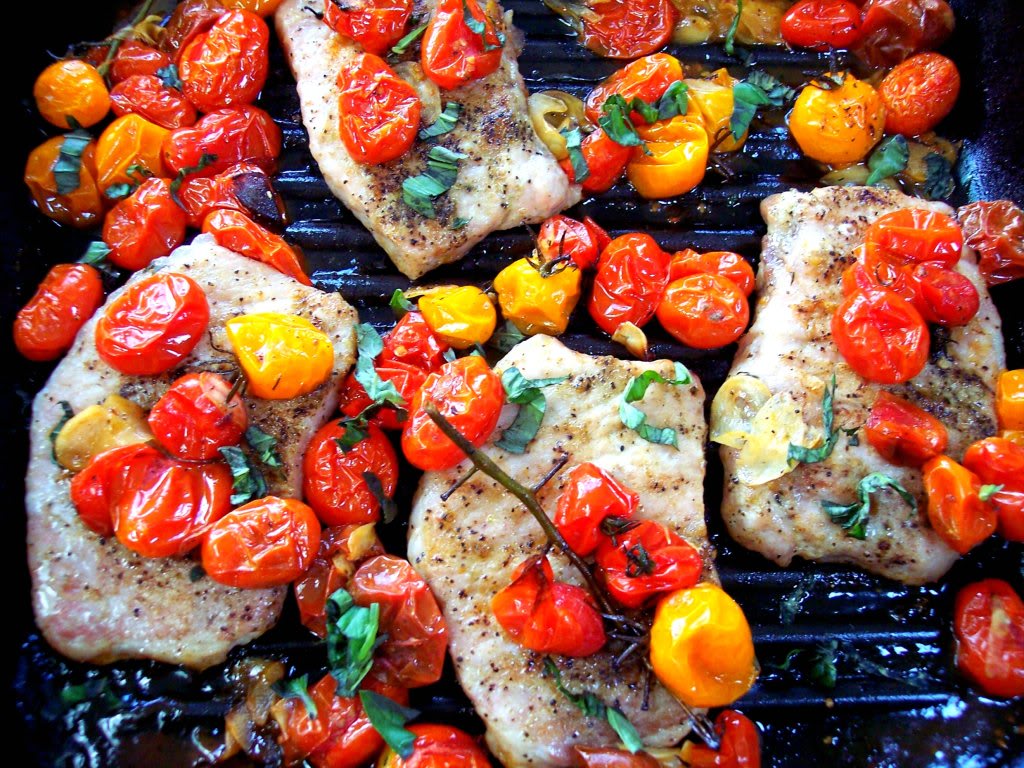
This quick and easy meal is something I made often this summer, everything is cooked in one pan and before you know it it’s on your table, providing you use thin cut boneless pork chops like I used here or some chicken breast.

It’s been so hot and muggy here the humidity is off the charts, walking out to my grill is not appealing, sometimes I’d rather cook inside with my nice cool air conditioning on. Yes, you have to heat up your oven for this but it’s nothing compared to the heat outside plus it’s a great way for me to use up my sweet cherry tomatoes that we’re fortunate enough to be picking on a daily basis.

We have an over abundance this year I think we went a little overboard in our planting of cherry tomatoes I’m constantly thinking of ways to use them, I made this recipe up out of necessity and it’s become one of our summertime favorites.

I love the different colors and how they cluster together and stay on the vine. They’re so delicious fresh, but sometimes I think I love them even more when they’re cooked and caramelized, the flavor just intensifies! We have a few different varieties some being heirlooms. Right now I’m looking out my window and all I see is red!


I used my cast iron grill pan, but you can use any heavy pan, you’re first going to brown your pork or chicken on top of the stove and then finish it off in a 375F oven until the meat is cooked through and the tomatoes are caramelized.
Pre heat oven
Season your meat with salt and pepper
Brown on both sides in a hot pan drizzled with olive oil
Toss in your cherry tomatoes, I used a lot as you can see
Shaved garlic
Fresh basil
Drizzle olive oil over top of the tomatoes
When finished garnish with more basil, you can never have too much!
Serve this with some five minute cous cous on the side and you’re done! I told you it was easy.
Buon Appetito
I hope you can stop by and help me celebrate my 3rd Blogiversary on Sunday, until then have a great week!
Signature

Zucchini Tomato Gratin

zucchini gratin Our garden is producing wonderful things and I’m inspired daily to use everything we pick. Winter comes all too soon here and it’s going to be really sad to say goodbye to all this freshness! So for now I give you my version of a gratin.

I like to make this in a wide pan, I use this paella pan that I have, I’m sure you’ve seen it in many of my posts, but I love it I can’t help it! I’m sure a cast iron pan would work as well.
First layer; Sweet Vadalia onion ring slices on a nice drizzle of olive oil ( the pan I use gets them all caramelized on the bottom)
Sliced zucchini
Handfull of romano cheese spread all over
Toasted homemade Italian bread crumbs spread about
Small cherry tomatoes placed all around
I had some cut leeks I needed to use so I threw them in, glad I did!
Drizzle with olive oil
More cheese
More breadcrumbs
Repeat!
Garnish with fresh snipped basil
Place in a hot oven at 425 till tender and crispy and the tomatoes pop and get caramelized, you could even place it under the broiler at the end to crisp up the top more, I have a convection roast feature on my stove so that always does the trick.
The imported romano cheese, the tomatoes ( you must use cherry tomatoes, please) the homemade breadcrumbs and those caramelized onions paired with the zucchini, I’m telling you I could almost become a vegetarian!

But instead I made more of that beautiful cod along side it. I saw this preparation on the cable TV show, Every Day Food, it’s so simple but BURSTING with flavor! Chop up some fresh herbs, I used basil, chives and parsley, now grate some fresh lemon zest into the mix. Salt and pepper your fish and swipe the top with Dijon mustard, now press it down into the herb mixture and of course drizzle with olive oil. Bake at 425 till translucent. This…Was…Fabulous! The fresh herbs complemented the fish so well, so light, so summer!

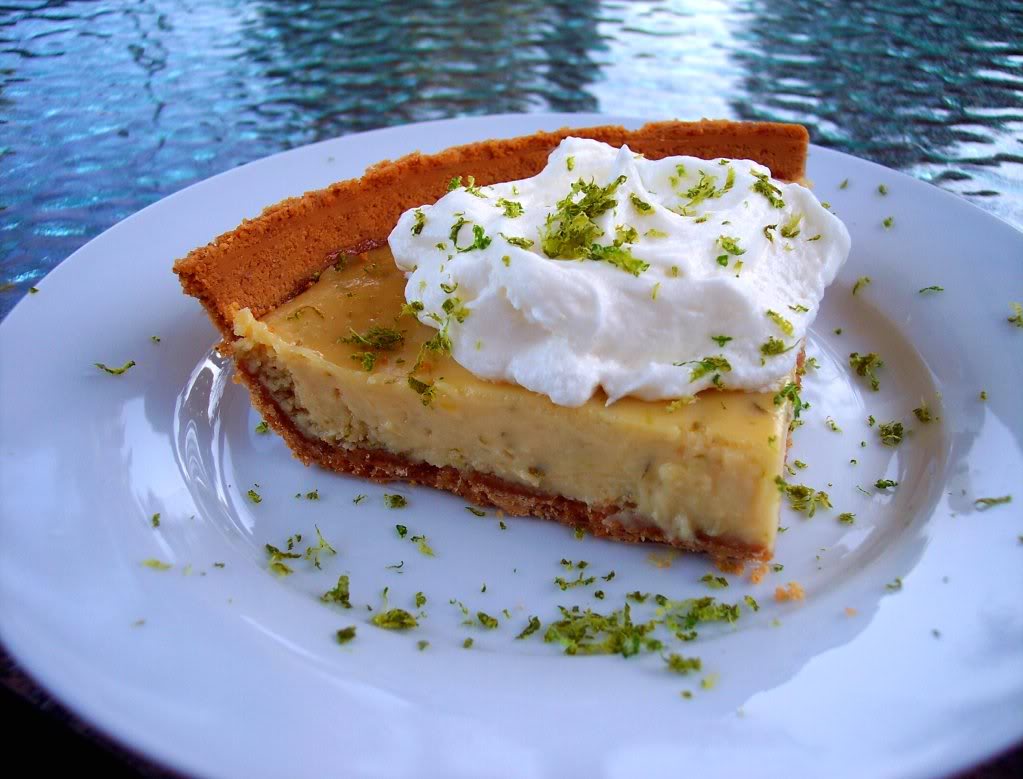
Now for a little palette cleanser, how about some Key Lime Pie. Sorta. You see my husband and I are crazy about key lime pie, but living here in Chicagoland key limes are not readily available so I never even thought about making this, until I saw Pioneer Woman’s post on it.
She calls it Key Lime Pie, Sorta because she uses regular limes not key limes, no problem here because I just bought 20 limes for $1.00! So I was inspired. I won’t even tell you how many times I’ve made it this summer, we crave it! I know it’s not the so called “real thing” but it’s darn close!
So before summer is over all you key lime pie lovers, you MUST make this! So here’s the recipe.
Note: From my guilt of making this so often I used reduced fat condensed milk and I even bought a reduced fat graham cracker crust and the result was just as good. I would encourage you to try her version first, but if you go past 3 pies like I did, you might want to think about switching things up! It’s so refreshing on a hot summer day.
Enjoy your weekend and Buon Appetito!
Oh, next week August 15Th is my 3 year Blogiversary I hope you can stop by for a visit, I have a nice giveaway too!
Signature

Open Faced Portobello Burger with Zucchini "Fries"

This burger is so good I promise when you bite into this you won’t miss the meat at all! Portobello mushrooms have such a meaty like texture, the large caps are a perfect replacement for a beef burger. I try to make a few vegetarian meals each week and this has been one of our current favorites.

I like to grill up a bunch of different vegetables over the weekend and then use them in various quick meals during the week. I almost always do onions, red and green peppers, zucchini, and eggplant, however with the portobello’s I like to cook them up right before I assemble this, which I did inside on my grill pan.

For this burger roasting or grilling the vegetables will give you the same results.
I like to remove the gills on the mushrooms but you don’t have to, then just a quick toss in olive oil, salt and pepper is all you have to do to prepare them.

Each component together gives you an amazing end result!

Toasted ciabatta bun
Grilled red pepper
The portobello, gill side up
A dollup of basil pesto
Fresh mozzarella
Grilled onion
Tomato
Garnish with a balsamic glaze over top

You could eat this with a bun top but it was so huge, I would suggest using a thinner bun.

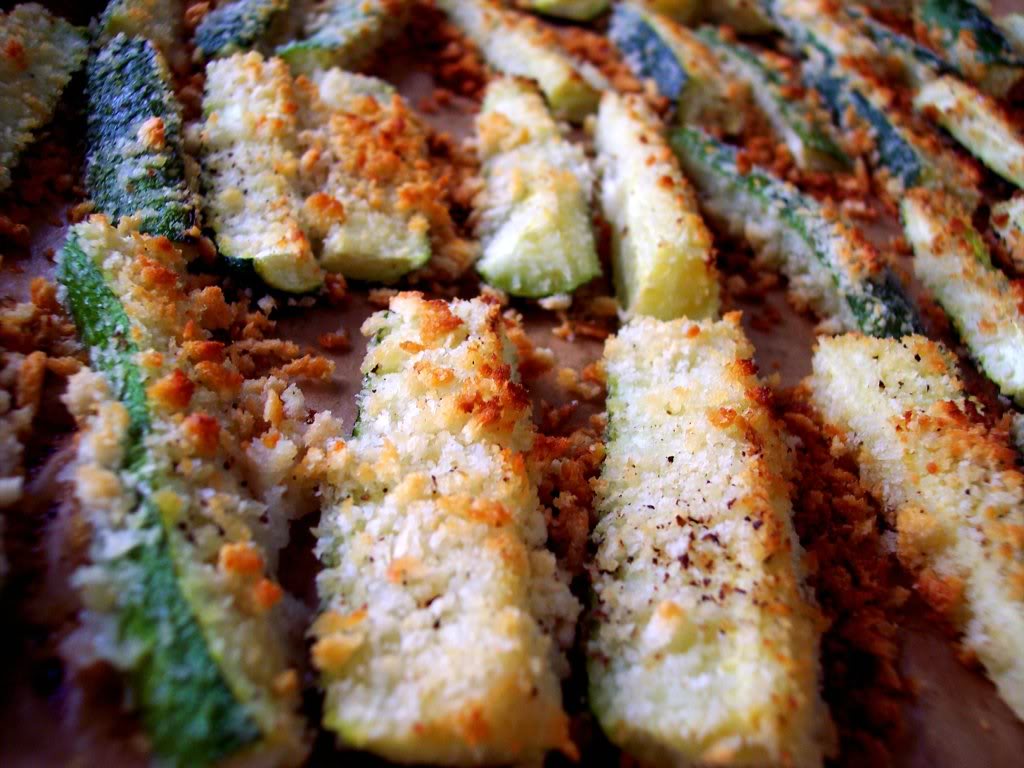
The zucchini fries were made by tossing them in olive oil to coat then dipping them individually in a mixture of panko breadcrumbs and grated parmesan or romano cheese, salt and pepper.

Bake them in a hot oven around 450F turning them as they brown. If you have a convection roast feature use that to brown them up faster.

Have a great week and Buon Appetito!

Signature

Sunday Morning

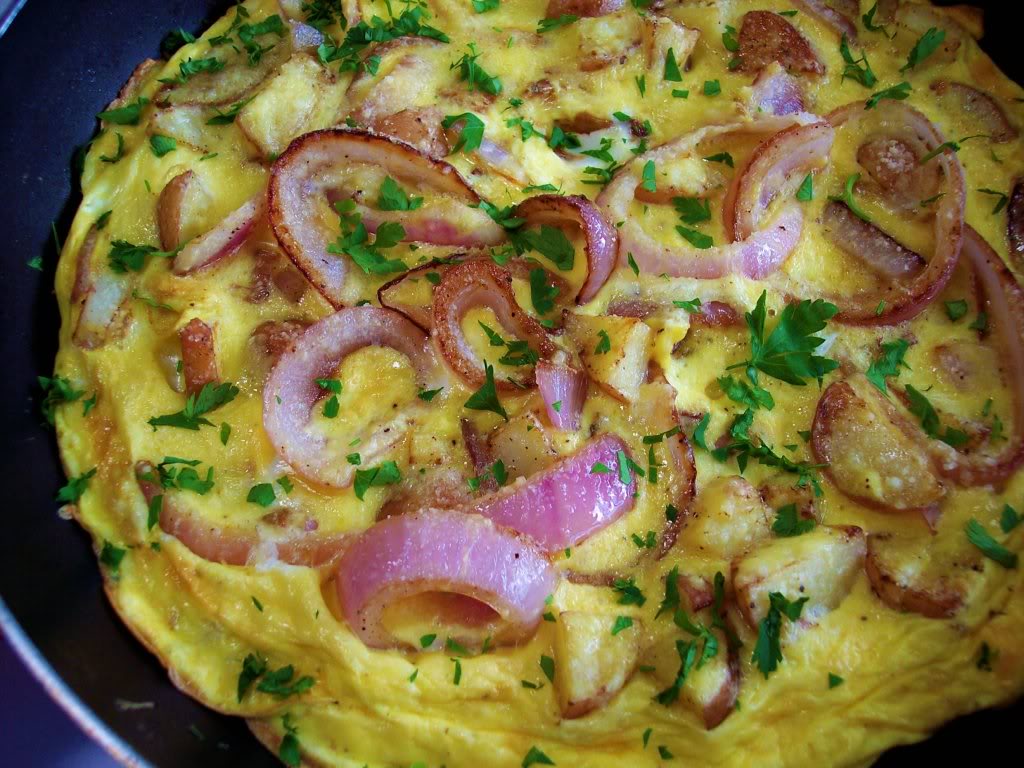
Potatoes and Eggs with Onions, We grew up on this stuff, my husband still craves it and once and a while I’ll make it for him. Great for a lazy Sunday morning or a lunch with a salad.

I guess you could call it a frittata, but we just call it potatoes and eggs. Four simple ingredients blended together make a wondrous combination!
Eggs
Thick sliced red onion
Pre-cooked red potatoes
Romano cheese

Saute your potatoes and onions in olive oil, add a very generous amount of romano cheese to your beaten eggs then pour over all and cook til set. Sprinkle with fresh flat leaf parsley.

Or you might want something like this! Toasted Italian bread, ( I love that smell) slathered with fresh basil pesto, now go ahead and add a thick slice of a nice juicy summer tomato and then top it with an egg.

Whatever you decide, it’s all good.

Happy Sunday morning!

Signature

Rustic Fig and Ricotta Tart

Again I struck gold at Whole Foods, this time it was with fresh organic figs and even better than that was the price, only three dollars a pint!

Sometimes when I buy fresh figs even though they look and feel ripe, when I get them home they have no flavor at all, does that ever happen to you?

Not the case here, they were all you would ever want in a fig, perfectly ripe, plump and oh so sweet!

I’m dedicating this post to my friend Stacey because she is a true figaholic, if you don’t believe me go check out her blog she has a ton of fig recipes, sweet and savory, all good! If we lived closer I would have brought this over to her house to share.

I love making rustic tarts, nothing sophisticated about them, easy to make, very casual and homey. You can make your own pastry dough or use a good refrigerated one as I did, I’ve had it both ways and it’s equally as good.

For the Ricotta Filling:
1lb ricotta
2 eggs
1/4 cup sugar
Orange zest
Heaping tablespoon of orange marmalade
Pinch of cinnamon
Beat together on low speed until all incorporated

On a baking sheet place parchment paper, then place your dough round on top of that and prick the bottom with a fork.
Spread ricotta mixture all over except where you’re going to be folding the edges up. Then place figs on top.
Brush the top with a beaten egg or milk, bake at 375F until golden brown, check the bottom with a spatula to make sure it has a nice brown color.


While still warm you can glaze the top with a warmed up preserve if you like.


I had a few figs left over so I decided to make myself a little afternoon treat, this time I decided to caramelize my figs by dipping them cut side down on a plate sprinkled with brown sugar and cinnamon then placing them down on a grill pan for just a few minutes until caramelized. Place them in a pretty bowl on top of some fat free greek yogurt add a drizzle of honey and crunchy pistachios! It was sinfully good, hope you give it a try!

Buon Appetito

Signature

Roasted Cod with Cherry Tomatoes

My local Whole Foods had a 3 day sale on Alaskan cod this weekend so I scooped some up and made this for dinner, I couldn’t resist the pristine white fish that was sitting all pretty in the showcase window.

If you’re a reader of my blog you know I love roasted tomatoes of any kind especially those little cherry and Campari tomatoes. I use them often adding them to many dishes I cook, I just love the deep robust flavor they add.
My garden is filled with all different varieties and colors and I’m just now beginning to reap the benefits, so I hope you don’t mind, but I’ll be posting more upcoming recipes using them.

My husband said this was the best fish I ever made, but then again he says that often, he’s a good guy! But I must say the flavors were really awesome, so awesome that I ran out today to pick up more fish before the sale was over.

For this dish do your tomatoes ahead of time. I like to roast mine on a small sheet pan covered with foil it’s seems to hold all the juice from the tomatoes and olive oil much better and that’s a good thing, because I just can’t bare for any of that to burn off. I also always add shaved garlic and some kind of a fresh herb like thyme, basil or oregano. Roast at 400 until they split and blister and the juice runs out.

To prepare the fish, place the fillets in a shallow baking dish drizzled with olive oil.
Season the fish with salt, pepper, and a little paprika.
Squeeze half a lemon all over, then cover the fish with a few thin slices of lemon and a quick drizzle of olive oil.
Add fresh thyme branches and kalamata olives.
Now take those luscious roasted tomatoes along with all the juice that’s infused with garlic and olive oil and place that in amongst the fish. Bake in a hot oven at 450 until fish is opaque. Let it rest for 5 minutes then garnish with parsley.

Enjoy the rest of your weekend and Buon Appetito!

Signature

Grilled Baby Artichokes with Tomato Basil Salsa

I struck gold when I came across a huge pile of baby artichokes at my Italian market this Saturday and they were even on sale, I couldn’t wait to get them home and put them on my grill!

Baby artichokes are easy to prep and great for grilling, they’re the perfect light appetizer for a hot and sticky day. The most important thing is to precook them in boiling water or steam them first until tender, you don’t want to just toss them on the grill before cooking they’ll be very tough, burnt and unappetizing and they’ll never get tender.

The grill adds a nice smoky flavor that enhances the taste and the tomato basil salsa gives you a fresh and summery dipping sauce, guilt free nice and light and perfect served at room temperature.


Here’s what you do:
Slice tops off artichokes, pull off leaves until you see pale green, trim stems, and snip off thorny tips. In a large pot, bring water to a boil. Add 1 tablespoon salt, the juice of 1 lemon, garlic cloves and artichokes; cover and steam until artichoke bottoms pierce easily, 20 to 40 minutes. Drain artichokes.
When cool enough to handle, cut each artichoke in half lengthwise and scrape out the fuzzy center, sometimes you don’t even have to with the babies. In a bowl, combine crushed garlic, olive oil, you could also add balsamic vinegar if you want, and salt and pepper. Toss your artichokes in the mixture and place cut side down on a grill over medium heat, don’t move them until you see nice grill marks, then turn on the other side until lightly browned.
Tomato Basil Salsa
Chopped tomatoes
Fresh basil
Chopped scallions
Extra virgin olive oil
Salt & pepper

Place the arichokes cut side up on a big platter and spoon the salsa all over. Now go ahead and make these before summers bounty is all over!
Buon Appetito
Signature

Bunco!

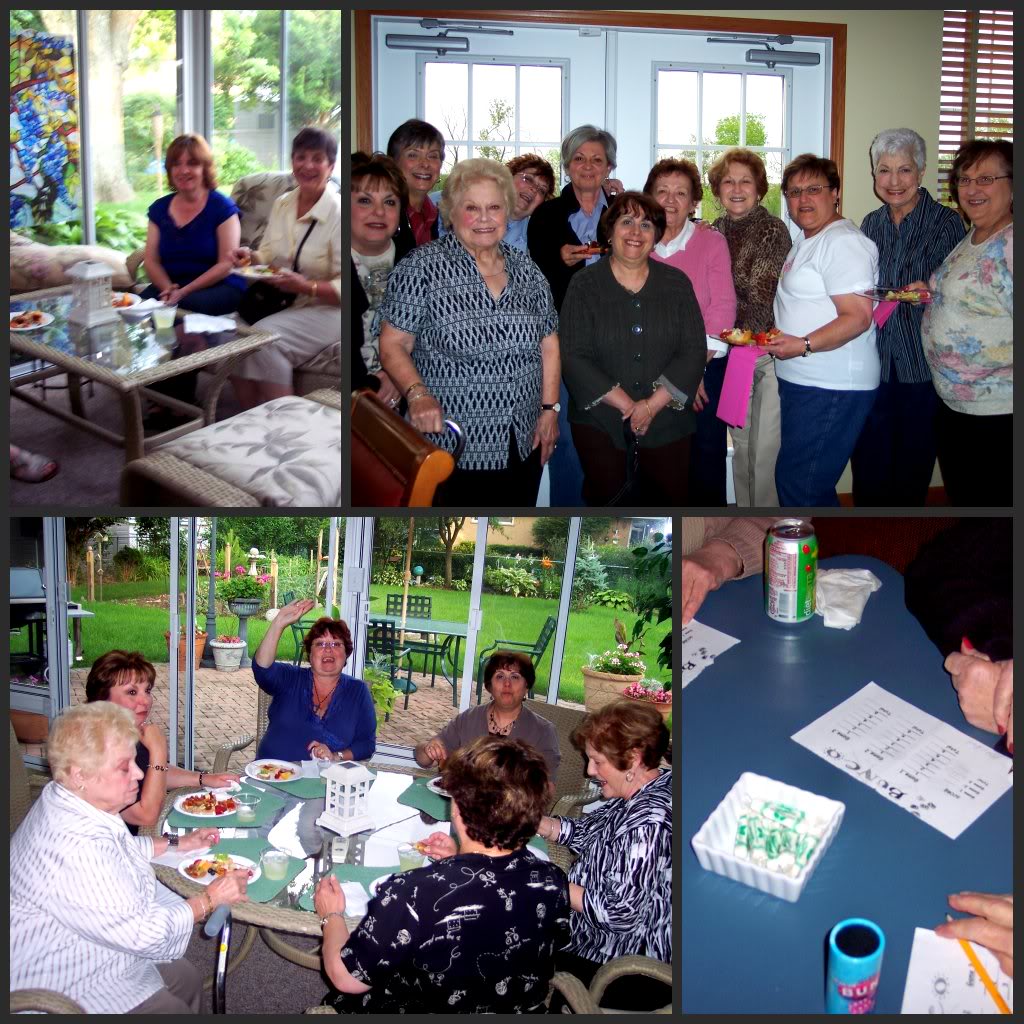
I’m a part of a Bunco group, where twelve of us get together once a month taking turns hosting at each others home. We get together to play a game but really it’s an excuse to connect with friends for some good food, fun and lots of laughs. The month of June was my turn.

See all these women here, they can get pretty wild and crazy!

In case you’re wondering what Bunco is, it’s a game of dice played in rounds. Players take turns rolling the dice and trying to accumulate as many points as possible to win each round. The game is played at tables of four in competing teams of two. The first one that yells out “Bunco!” wins the round. This is a game that requires no skills at all, anyone can learn how to play in 5 minutes!

Yes, we’re high rollers and we play with money, everybody chips in five bucks!

The one hosting supplies all the food and drink but almost always someone will walk in with delicious homemade cookies or a cake. We usually visit and eat first then play the game, afterwards we’ll have coffee and dessert. Finger foods and appetizers are typically served.

Along with various dips and a caprese pizza, here’s a few other things I made when I hosted at my house.
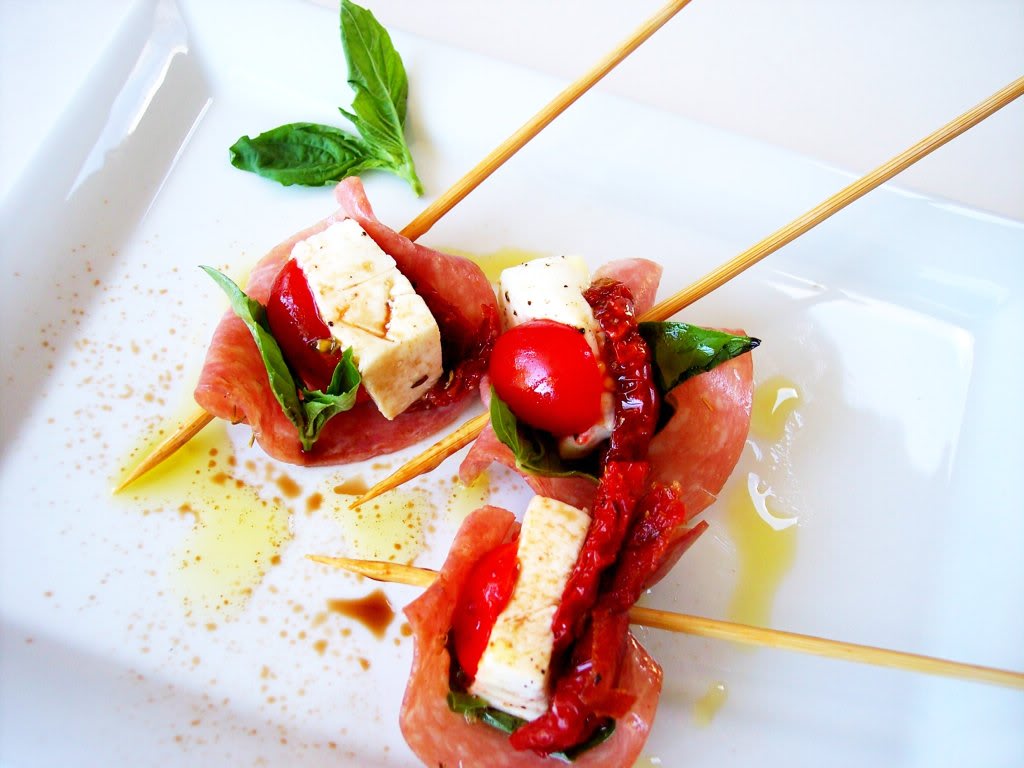
Salami and Bocconcini Bites
On a piece of thin sliced salami place one basil leaf, one half of a cherry tomato, a small bocconcini ball or a cube of fresh mozzarella and one sun-dried tomato in oil. Secure with a pick and drizzle with balsamic and olive oil.

Fruit Kabobs with strawberries, pineapple, cantaloupe and blueberries.
If you have extra fruit freeze it into ice cubes it tastes great in a punch, tea or lemonade and it keeps it nice and cold.

Tostada Cups with Artichoke Salsa

The tostada cups are made by spraying both sides of a tortilla with cooking spray and then cutting into 8 wedges. Press the wedges into 8 muffin cups with all 3 points sticking out. Bake in a 450F oven for about 5 minutes or until golden and crispy.

The salsa is simply made by opening a jar or two of your favorite marinated artichokes, draining them and pulsing them in your food processor. When finished pulsing, pour into your bowl.
Then chop some red onion, kalamata olives, 1 clove of smashed garlic and diced and seeded tomatoes. Finish off with salt, pepper, shredded basil, a hint of lemon peel and a little olive oil to taste.

La Bomba, is a mix of eggplant, fennel, roasted peppers, onions, artichokes, mushrooms and olives diced up small and served with Mini Pita Rounds flavored with olive oil and rosemary. This is a perfect party appetizer, it makes a huge amount and can be made ahead of time.
Here’s the recipe.
The pita chips I made before but this time I just used mini round fresh pita’s, split them horizontally and baked them like this.

These bite size spaghetti appetizers were a big hit, I got the inspiration from Joan at Foodalogue, she added bacon and peas to hers but I had a lot of different things going on so I wanted to keep them lighter.

Cooked spaghetti, mozzarella, provolone, parmesan, eggs and fresh basil mixed together and baked in mini muffin tins topped off with a light marinara sauce.

When the cheese melts and the flavors blend together with the spaghetti the result is addicting! Here’s Joan’s original recipe.

And of course sipping on some chilled Limoncello while your playing the game makes everything just perfect!
Buon Appetito!

Signature

Eggplant Salad/ Sandwich

eggplant salad
One of my favorite salads of all time is this layered eggplant salad. The original combination comes from a popular restaurant here in Chicago called Rosebud. The first time I tasted this I was hooked!
On the menu it’s described as an eggplant salad, but it could also pass as an eggplant sandwich.
eggplant salad ingredients
It’s typically served three layers deep with crispy breaded eggplant, sliced tomatoes, fresh mozzarella and arugula tossed with olive oil and a touch of balsamic glaze.
Breaded eggplant and frying it might scare off a few people, but honestly you need that crunch in between the layers, plus it’s only three pieces of eggplant anyway.  I pan fry mine and control the amount of oil I use, but today there’s air fryers and you can even manage to get a crisp oven bake, I’m sure that would work as well.
The main thing you want to accomplish is to end up with a crispy, crunchy eggplant slice.
rosebud salad
You can go two or three layers high, whatever you prefer, and don’t be afraid to stuff those layers high!

I sliced my eggplant lengthwise, dipped each piece in beaten egg then coated each slice with dry breadcrumbs, you can also use panko crumbs and if you want to go low carb you can bread the eggplant with nut crumbs, I’ve done it and it’s delicious!

I used a non stick pan drizzled with olive oil to cook the eggplant in and when you get both sides crispy, place on a wire rack so not to get soggy.

Then it’s all about the layering, start with a slice of eggplant, then layer with fresh mozzarella, next the tomato, then pile high the arugula which should be tossed in a combo of olive oil and a couple of drops of balsamic glaze beforehand.

Repeat layers ending with eggplant on top. Secure with a pick if you like for more stability.

You’re going to love this!

NOTE;

THE LAST PHOTO WAS TAKEN BACK IN 2010, IT IS NOW 2021, I FIGURED I NEEDED A LITTLE UPDATING DONE HERE. THE PHOTOS MIGHT HAVE CHANGED BUT THE FLAVORS AND COMBINATIONS HAVE NOT.


ENJOY!

Signature

I Made Kale Chips, and Hated Them!

I knew I was going to make these chips sooner or later, recipes have been floating around the blogosphere for a while now and I couldn’t wait to try it myself. You see I have a daughter who loves kale, she convinced me to try it, and now I too love kale. In fact we’re growing two different kinds in our garden this year and it’s growing like crazy!

I sent her home with a huge bag of raw kale last week so she could make her salads with it, I tried giving her the kale chips, and she “No thanks!” This is coming from a kale loving person, and even she didn’t like them!
I guess it’s a love hate thing but to me it tastes like crispy seaweed that turns into dust in your mouth. Maybe I should have flavored them up more or done something different, or maybe I should just let it go and eat it the way I really like it, in salads and braised.

The way I made them was simple. Wash your kale real good and then make sure it’s nice and dry. Cut your kale leaves off the stem and tear them into bite size pieces. Toss in olive oil, place on a baking sheet, sprinkle with salt and bake until crispy about 20 minutes in a 300F oven.
If any of you kale chip lovers have some tips you want to share please feel free to do so, maybe there’s still hope!

My husband who has the green thumb pulled our first eggplant and my favorite tiny clustered tomatoes today and the basil is growing out of control!

It must be all that watering he does! Enjoy your short work week, and Buon Appetito.

Signature

Red, White and Blue Potato Salad

red white blue potato saladred white blue potato saladNo Fourth of July picnic or barbecue is complete without a potato salad of some sort. We all have our favorites but if you want to change it up a bit and bring a little patriotic theme to your table, search out those teeny tiny red, white and blue potatoes.

I happen to come across some at my local farmers market last week and couldn’t resist. These bite size potatoes are no bigger than an olive and they’re just perfect for roasting, they have a tender thin skin so there’s no need for peeling, and they cook up in a matter of minutes.
I also love those colored fingerling potatoes they’re a little larger and cook up just as fast.
My favorite way to prepare them is to simply roast them in a hot oven around 450 degrees, drizzled with olive oil. I like to add in some red pepper to roast along with the potatoes.
 
When they become fork tender, which doesn’t take long, toss them into a bowl and add chopped red onion or shallots, snipped chives, sliced scallions, fresh parsley, salt and pepper to taste with lots of grated lemon peel.
Whisk up fresh squeezed lemon and olive oil for your dressing and pour it all over and toss, as it sits it just gets better and better as all the flavors start to absorb.
I like to leave some whole and cut a few in half so you can see the vibrant colors. So perfect for the Fourth of July and no worries about keeping it cold, no mayo required.

The nice thing about potato salad is that it goes perfect with just about anything that you make on your grill or pack up for a picnic.

Sip something cold, relax and enjoy your weekend. I’ve been on an ice cube making binge lately, adding blueberries and raspberries to water then freezing the cubes and dropping them into lemonade.

Here I made cubes out of watermelon puree and mint, a nice change from the norm!

Have a safe and Happy Fourth of July!

You can follow me on Instagram to see what else I’m cooking up.

Signature

Cantaloupe Puree with Prosciutto-Wrapped Bread Sticks

This is the perfect starter for a summer dinner party, it’s sort of a modern twist on the very classic proscuitto-wrapped melon, you’re still going to get that sweet and salty flavour experience that we all love, but with two different textures going on.

I’m almost embarrassed to tell you how simple this is to make, just cut your cantaloupe in chunks and place in a food processor/blender and process until smooth! How simple is that!

Then to make things even more simpler, I used store bought bread sticks, but you can make your own if you’re adventurous. Wrap one slice of prosciutto on the end of each bread stick and place on the rim of a glass. Serve immediately.

Would you like to wow your guests at your next party? You can make a whole tray of these by using those cute little shooter glasses that you can get at any party store. Just cut your bread sticks in half, wrap them with 1/2 slice of proscuitto and place on the rim of your shooter glasses.
So quick and very inexpensive! You might even want to spike it with some tequila, prosecco or vodka, now doesn’t that sound good?
Enjoy your weekend, and Buon Appetito!
Signature

Almond Crepes, Pan Roasted Strawberries and Amaretto Sabayon

First of all before I go on, I must disclose that I didn’t make the fabulous dish featured above, but I can assure you that I soon will! This dish was created by a local here, Chef Paul Virant of Vie. Chef Paul took part in the Chicago Cadillac Culinary Challenge last week along with,

Chef Martial Noguier of Cafe des Architectes.

Two local Chefs in a friendly competition using strawberries as the key ingredient in their recipe creations.

The event was sponsored both by Bon Appetit magazine and Cadillac and I was fortunate enough to be invited and to be one of the judges of the challenge, thanks to my friend Courtney of Coco Cooks.
To kick off our day we were treated to a wonderful lunch at Braxton Seafood Grill along with other media, the Chefs, representatives of Cadillac and our hostess Mary Nolan of Food Networks Chic and Easy. It was fun and informative to be able to visit and speak with them on a casual basis.
Courtney and I both chose the grilled seafood platter for lunch consisting of shrimp, scallops, salmon and a crab cake. A decadent chocolate truffle cake was our dessert.Judging the challenge was difficult because each Chef went a different direction, one decided to do a dessert and the other a savoury dish. Above is Chef Noguier’s, Peekytoe Crab Salad with Strawberry, Rhubarb, Pickled Turnip and Radish. What I loved about his dish was his use of lemon confit, it really made all the flavors pop!


But in the end it was Chef Virant’s dish that blew everyone away! For me it was the amaretto that he put in the sabayon, also known as zabaione in Italian, which is a very smooth and light whipped custard that usually is made with Marsala wine. The strawberries and all the almond flavors were a match made in heaven!
We ended our day by getting to test drive Cadillac’s 2010 SRX.
Here’s the fabulous winning recipe!

Almond Crepes, Pan Roasted Strawberries, Amaretto Sabayon
4 Servings

Sweet Almond Crepe

9 ounces milk
1 ounce sugar
1 teaspoon almond extract
2 ounces butter
1 ounce almond flour
1 teaspoon salt
3 eggs
2 ounces all purpose flour
Combine milk, sugar, extract, butter, almond flour and salt in a saucepan. Heat until the butter melts.
In a mixing bowl combine eggs, all purpose flour and mix well. Carefully pour the hot milk mixture
into the egg mixture, mix well. Allow batter to rest for an hour. Cook 2 ounces of crepe batter at a
time in a 10 inch skillet. Set aside.

Amaretto Sabayon

4 egg yolks
1⁄4 cup sugar
1⁄4 cup amaretto
1⁄4 cup + 2 tablespoon heavy cream
Combine yolks, sugar and amaretto in a mixing bowl. Cook over a simmering water bath, whisking
constantly, until the mixture is thick. Set aside to cool. While the base cools, whip the heavy cream to
soft peaks. Fold into chilled base and set aside.

Pan Roasted Strawberries

1 tablespoon butter
1 tablespoon sugar
1⁄2 pound strawberries, washed, hulled
and quartered
1 tablespoon amaretto
Salt to taste
Heat a large saute pan and add butter. When the butter melts, add the sugar and strawberries. Cook for
1 minute on high heat, deglaze with amaretto, season with salt and set aside.
To Finish
Preheat an oven to 350F. Divide the strawberries onto 8 crepes, fold them in half and heat in the oven
until warm. Place two crepes on each plate, dust with powdered sugar, spoon sabayon over and serve.

The garnish was sugared marcona almonds.

I hope you give this a try, I’m still dreaming about how good it was!

Signature

Mario’s Linguine with Clams

If you’re a fan of pasta with shellfish then you can’t go wrong with Mario Batali’s Linguine with Clams.
Speaking of Mario, I’ve been enjoying the old reruns of Molto Mario on the the new
Cooking Channel on cable, have you seen it yet? Although it’s owned by the Food Network it’s a refreshing change from all the competitions and the other over done shows that go on there.
What you’ll love about this recipe is the light garlicky tomato and wine sauce that the clams and pasta bathe in, the flavors are amazing together!
Here’s the recipe which I slightly adapted. You might even want to consider this for Fathers Day, it’s that good!
Linguine with Clams
3 tablespoons kosher salt
1 pound linguine
12 tablespoons extra-virgin olive oil
4 cloves garlic, thinly sliced, I used 10
1 pound littleneck clams, scrubbed, I used 4 1/2 pounds, this was a main dish
1 tablespoon plus 1 teaspoon red pepper flakes, I used a little less but added more on my plate
1 cup dry white wine
1 (14-ounce) can whole San Marzano tomatoes in juice, juice reserved and tomatoes coarsely chopped
1/2 cup plus 2 tablespoons fresh flat-leaf parsley, coarsely chopped I added some basil too.

Here’s what you do:

In large pot over moderately high heat, combine 8 quarts of water to boil and salt. Bring to boil, then add linguine and cook to 1 minute short of al dente according to package directions (pasta should still be quite firm).
Meanwhile, in large sauté pan over moderately high heat, heat 6 tablespoons extra- olive oil until hot but not smoking. Add garlic and sauté until just golden, about 30 seconds. Add clams and 1 tablespoon red pepper flakes and sauté 1 minute. Add wine, tomatoes and juice, and 1/2 cup parsley and simmer, uncovered, just until clams open, 7 to 8 minutes.
Reserve 1/2 cup cooking water, then drain linguine and add to pan. Simmer, tossing occasionally, until linguine is just tender, about 1 minute. If necessary, add some of reserved cooking water to keep moist. Remove from heat. Add remaining 2 tablespoons parsley, 1 teaspoon red pepper flakes, and extra-virgin olive oil, tossing to coat. Transfer to serving dish and serve immediately.
Of course you’ll need some crusty garlic bread to sop up all that yummy sauce, so here’s the recipe!
Garlic Bread with Herbs
1 stick butter (1/2 cup), at room temperature
2 garlic cloves, mashed into a paste with a pinch of salt and olive oil
2 tablespoons each of chopped fresh parsley and basil
Kosher salt and freshly ground black pepper
1 loaf crusty baguette
Extra-virgin olive oil
Preheat oven to 375 degrees F.

For the bread, stir together the butter, mashed garlic, and herbs in a small
bowl and season with salt and pepper. Cut open the bread lengthwise and spread the garlic mixture over the halves. I cut mine in quarters so it was easier to fit on the baking sheet.
drizzle with a little olive oil. Bake for 15 minutes or until nicely golden.
Happy Fathers Day to all the Dads out there!
Signature

Turkey and Sweet Potatoes, They’re Not Just For Thanksgiving Anymore!

Are you tired of having hamburgers and steaks on the grill yet? Try something different and cook up an Herb Grilled Turkey Breast! It’s really very simple, it’s just a matter of chopping up some of your favorite fresh herbs, adding lemon zest, smashed garlic, drizzling in some olive oil, salt and pepper until you have a nice thick paste, and then rubbing it all over your turkey breast, under and over the skin, front and back. I had a half of a turkey breast and the herbs I used were thyme, parsley and basil.

I put the turkey breast directly on the top of my grill cooking it with indirect heat, which means the middle burner was shut off, I kept the temperature hovering around 350F until internal temp reached 180F. Of course cooking times will vary according to weight, but make sure you check it because you don’t want it to go past 180F.

The result you’ll get is meat that is exceptionally moist and bursting with flavor, now that’s a good thing!

Since this is a summer version of a turkey dinner how about a Grilled Sweet Potato Salad to serve on the side?I like using corn, green onions, red and yellow pepper rings along with my sweet potatoes, but this time I added some asparagus and string beans that I had in my fridge. Toss everything in olive oil, seasoned with salt and pepper and just grill them all up!

Same goes for the sweet potatoes, which by the way taste excellent when grilled, remember their the star in this salad after all!

After all the veggies are grilled up, shuck your corn and place everything on a platter and garnish with chopped parsley, chives or whatever fresh herbs you like, and then drizzle your salad with a Homemade Vinaigrette, here’s mine;
3 Parts Extra Virgin Olive Oil
1 Part Red Wine vinegar
1 Teaspoon Dijon Mustard
1 minced garlic clove
1 Teaspoon dried Greek Oregano
A squeeze of Fresh Lemon Juice
Salt and pepper
Enjoy and Buon Appetito!
Signature