 I’ve been yearning for a corzetti stamp for a long time, practically begging relatives of mine to search out one for me on their recent trip to Italy, which by the way they never could find. Little did I know back then that I could have gotten one right here in this country, specifically from California!
 Fast forward about a month later when Terry Mirri, the owner of a company named,
Fatto in America – Artisanal Pasta Tools, contacted me to try out two of his handcrafted artisinal pasta tools, a corzetti stamp and a garganelli board. Their mission is for home chefs to explore food preparation with tools rarely seen by the American consumer. After receiving them and actually seeing the fine craftsmanship that went into each design, the beautiful woods they used, I was in awe!
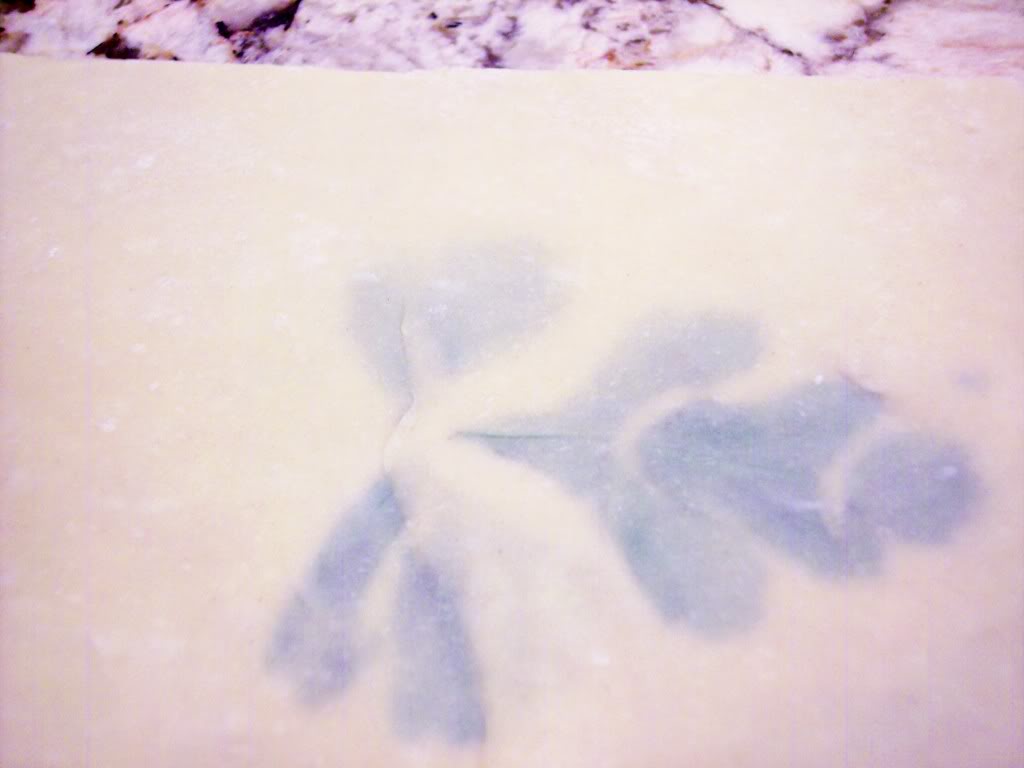
Corzetti are a highly decorative pasta, but at the same time it’s also functional because the embossed pattern helps to hold oily sauces such as different types of pestos.
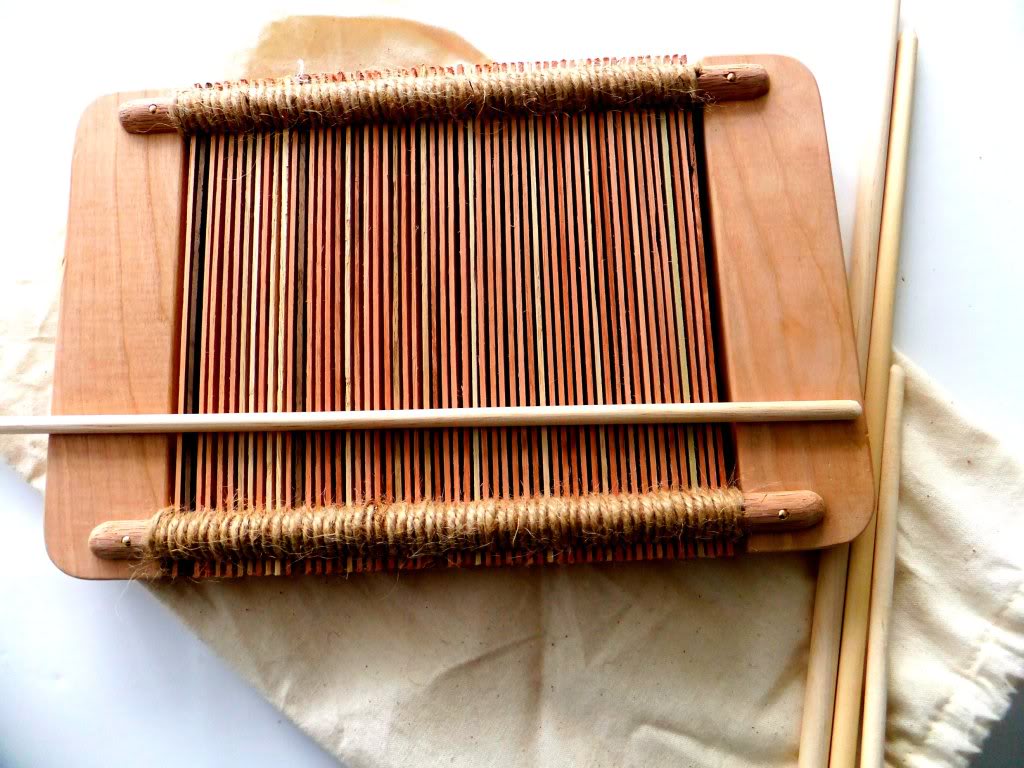
Just one look at this garganelli board and you will be amazed to see all the work that was put into making this. Fifty six individually cut slats of wood anchored in place with natural jute, all done by hand, oh, and you can also make gnocchi on this too!
Garganelli pasta are thin ridged tubes that are shaped by wrapping ( 2 inch) squares of egg pasta diagonally around a wooden dowel, then rolling it over the slats, ( or combs) to give it it’s signature ridges.
Needless to say, I couldn’t wait to start making pasta with both of these beautiful tools!
 But because it’s really not fun to make pasta all by yourself I asked my three good friends, Jean, Joanne and Mary-Alice to join me. Joanne (middle) graciously offered her beautiful newly remodeled kitchen for all of us to work in.
Needless to say, I couldn’t wait to start making pasta with both of these beautiful tools!
But because it’s really not fun to make pasta all by yourself I asked my three good friends, Jean, Joanne and Mary-Alice to join me. Joanne (middle) graciously offered her beautiful newly remodeled kitchen for all of us to work in.We arrived early in the morning with our aprons and ingredients in hand to the smell of monkey bread baking in the oven, a delicious egg and sausage breakfast ring loaded with all sorts of veggies and cheese, fresh fruit and coffee brewing, not a bad way to start the day off, hey?
 After our fulfilling breakfast it was time to get started, we made all the dough first, the eggs were cracked, the flour measured and with a little tweaking with the measurements, into the food processor it went, as each recipe was completed we wrapped the dough in plastic and let it rest for about 30 minutes.
 Time to crank out the pasta sheets! Just look at the texture of the dough, nice and smooth. Nice job girls!
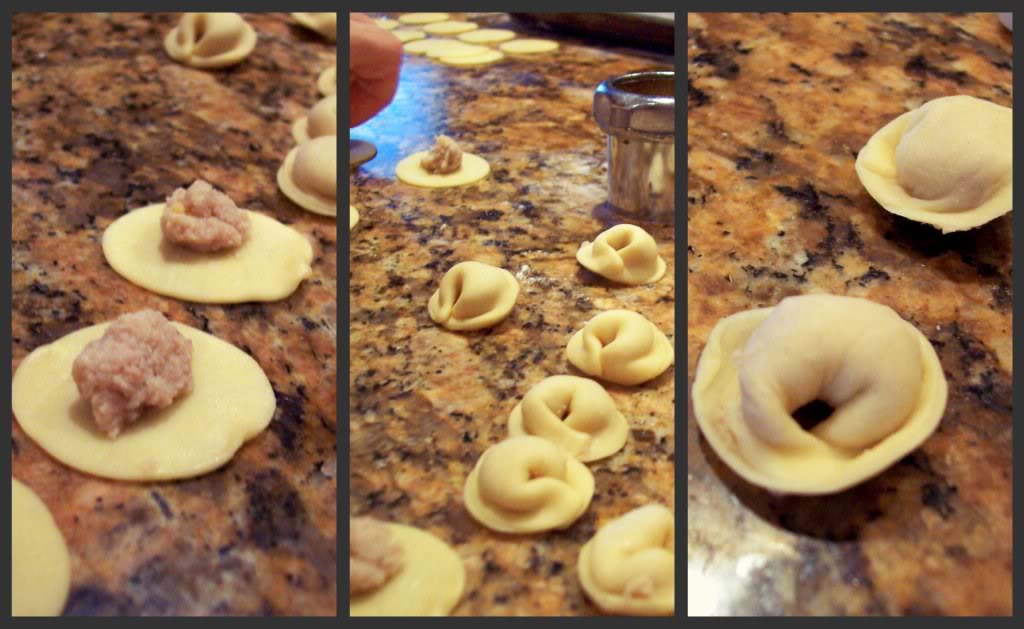
 I couldn’t wait to try this, here’s what you do, you cut out the circles with one end of the stamp, ( like a cookie cutter) then you flip the stamp over and place the circle of dough over the embossed side, then take the other section which has the knob handle on it, stamp down over the circle. The underside of the handle, which you can’t see in the picture also has the imprint, so when completed both sides will have the beautiful design on it.
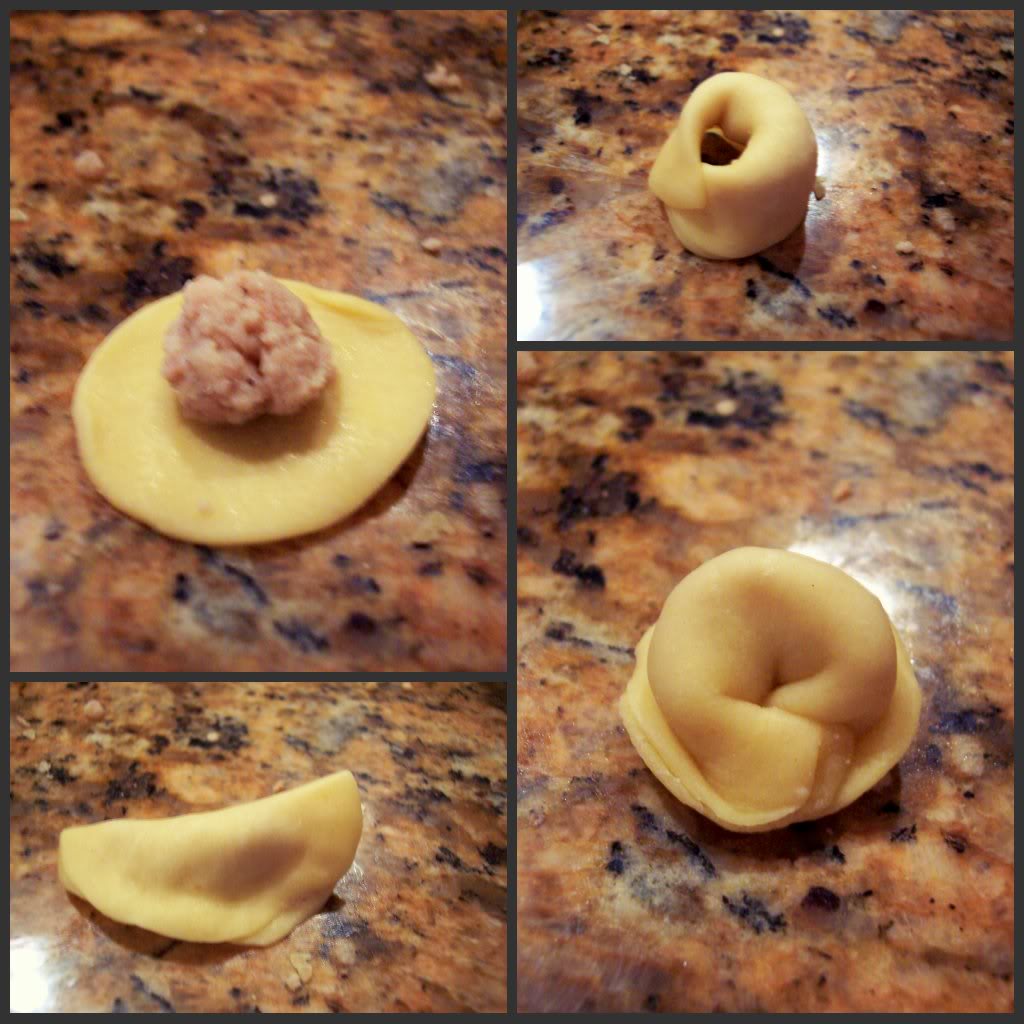
 Look how easy the dough peels off! Perfection! On a side note I did a comparison with a corzetti stamp that was purchased from a popular online kitchenware site but it was very inferior to Terry Mirri’s product, the wood was rough, the circles didn’t cut right, I could barely peel the pasta off the stamp, and as for the design factor, you couldn’t even see it!
After our fulfilling breakfast it was time to get started, we made all the dough first, the eggs were cracked, the flour measured and with a little tweaking with the measurements, into the food processor it went, as each recipe was completed we wrapped the dough in plastic and let it rest for about 30 minutes. Time to crank out the pasta sheets! Just look at the texture of the dough, nice and smooth. Nice job girls! I couldn’t wait to try this, here’s what you do, you cut out the circles with one end of the stamp, ( like a cookie cutter) then you flip the stamp over and place the circle of dough over the embossed side, then take the other section which has the knob handle on it, stamp down over the circle. The underside of the handle, which you can’t see in the picture also has the imprint, so when completed both sides will have the beautiful design on it. Look how easy the dough peels off! Perfection! On a side note I did a comparison with a corzetti stamp that was purchased from a popular online kitchenware site but it was very inferior to Terry Mirri’s product, the wood was rough, the circles didn’t cut right, I could barely peel the pasta off the stamp, and as for the design factor, you couldn’t even see it!I can’t say enough about Terry’s products, the craftsmanship is unbelievable, heirloom quality which can be handed down throughout generations! Check out his other products too, he carries polenta and cavarola boards, and a handmade storage box to house your pasta machine.
 Aren’t they beautiful? This is not something you would make everyday but on holidays or a very special occasion, it will be the object of conversation!
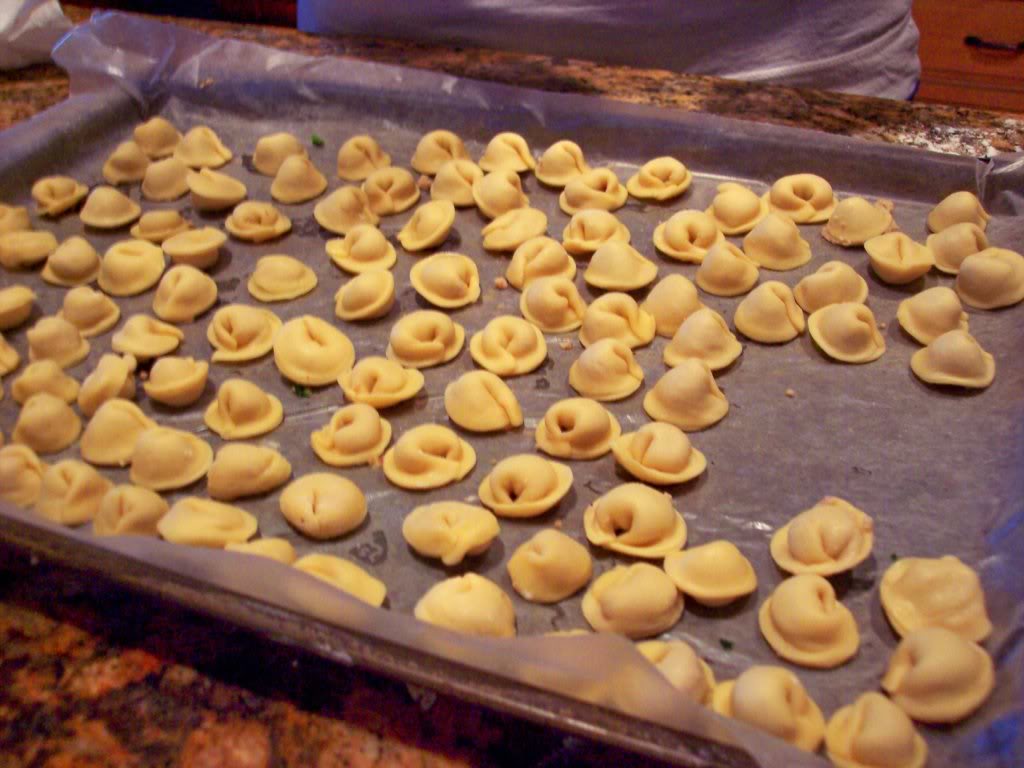
 We made multiple trays of these, but waited until we got home to freeze them and place into freezer bags.
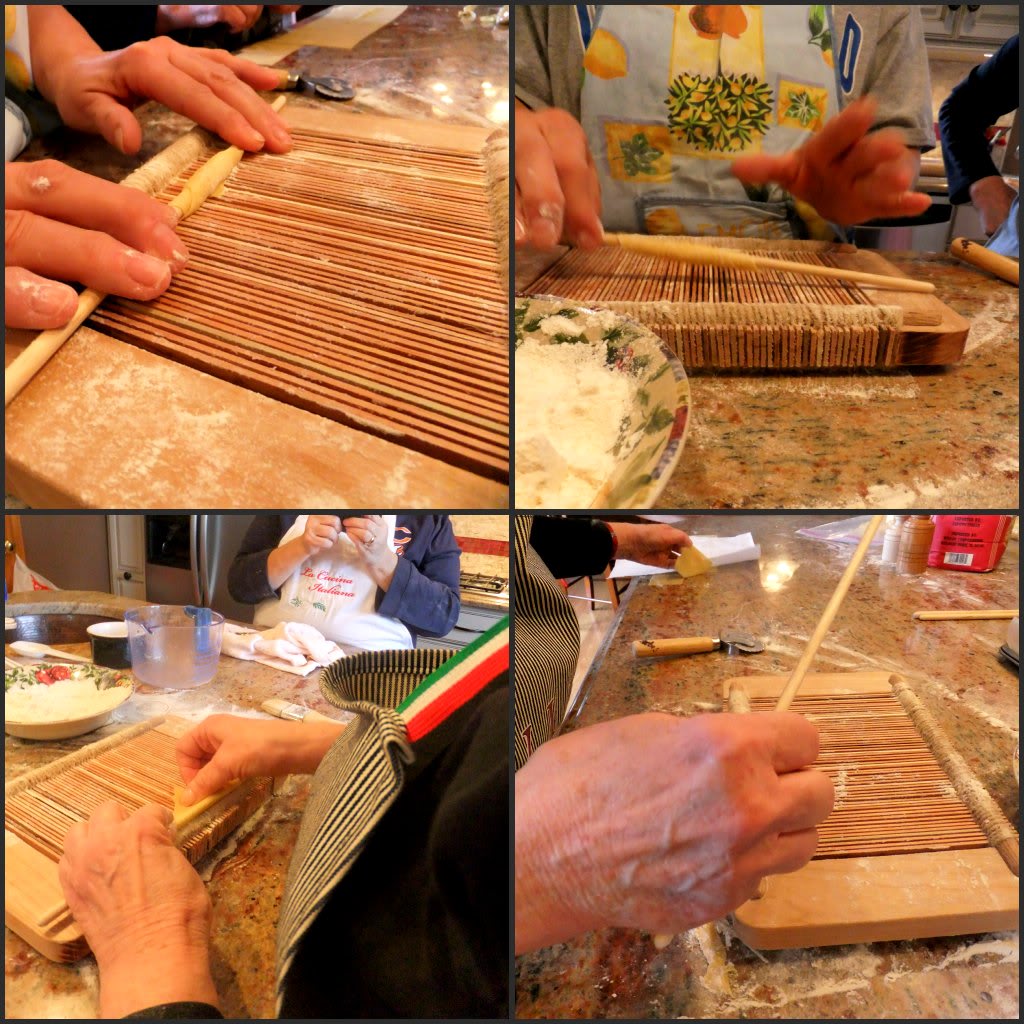 Making the garganelli was easy once we all got the hang of it, here’s what you do,**cut dough into squares**position squares with point slightly over jute rail**wet far tip with water** place spindle over square**flip the tops of pasta over spindle**push and roll over the slats with your palm**slide garganelli off.
 After our trays of garganelli were finished we left them single layered so as not to squish the cylinder and waited until we got home to freeze and bag them up.
 We had many scraps leftover from cutting out the corzetti so we became very resourceful and started making spaghetti and fettuccine and even a few pasta sheets.
 Pasta was every where, on tables and counters, we had a sea of pasta from one end to the other!
 Here we are admiring the fruits of our labor, so much fun, can’t wait to do it again girls!
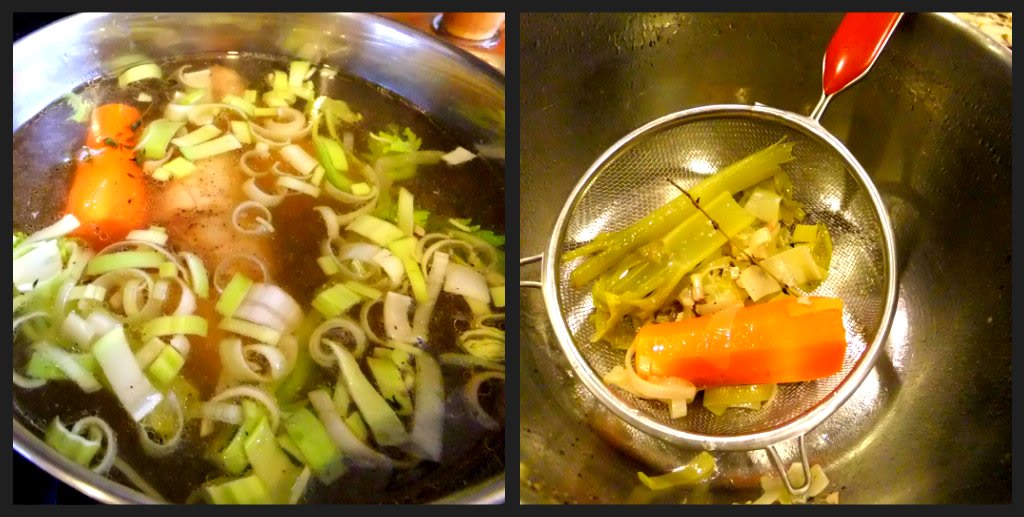
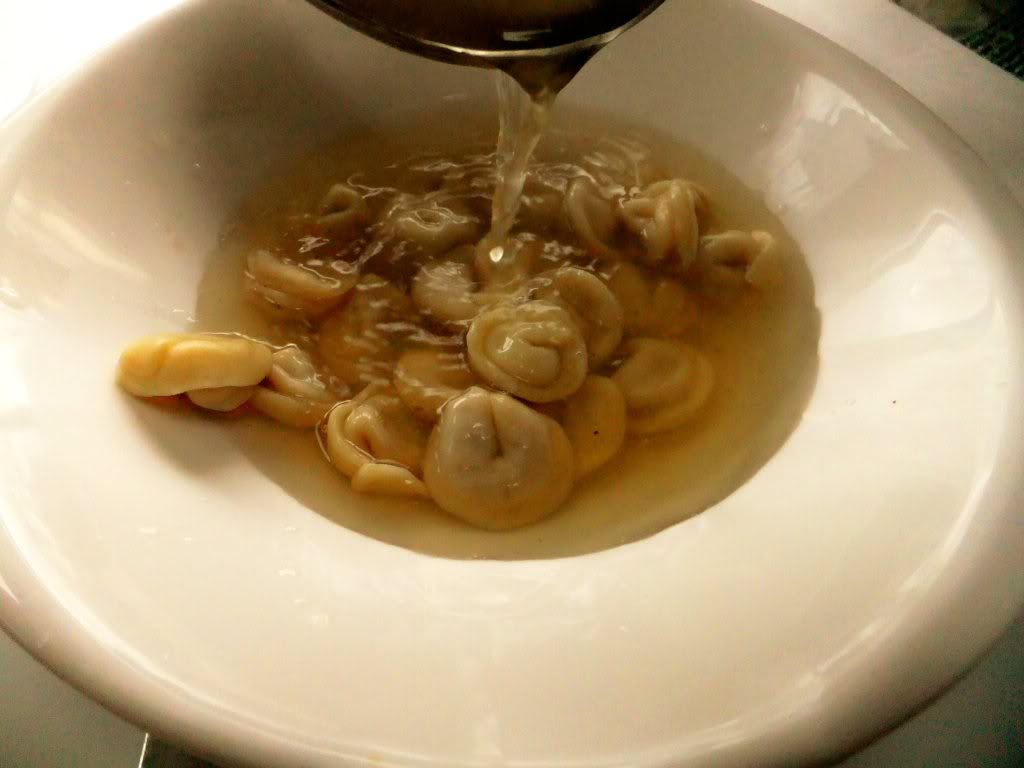
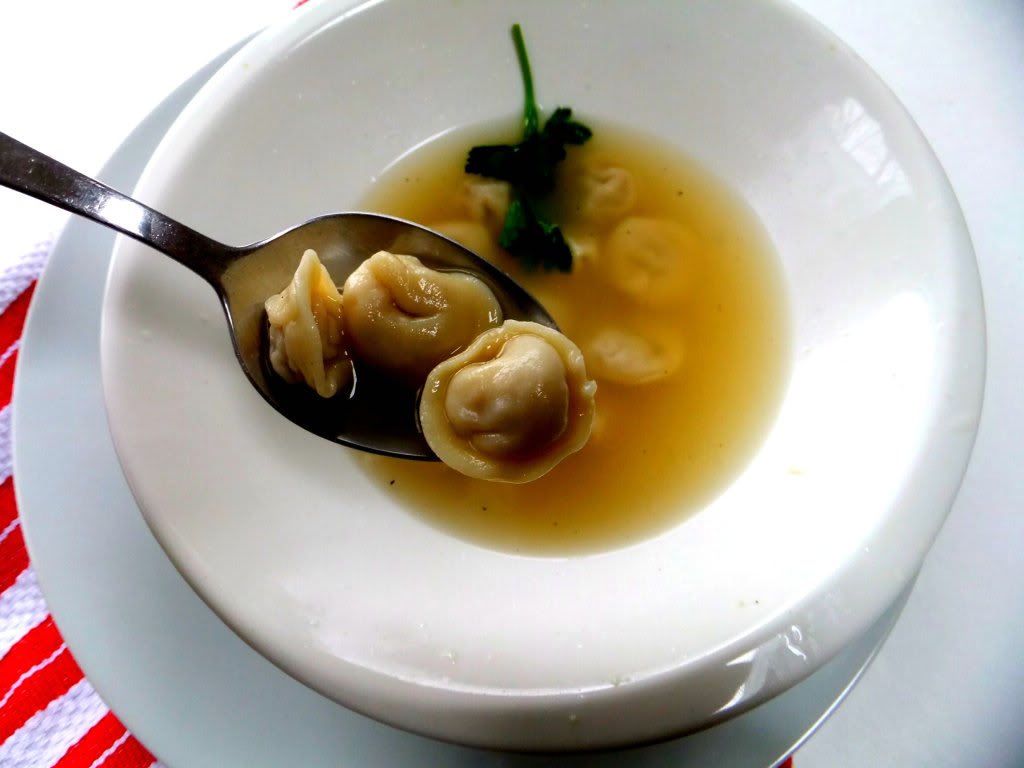
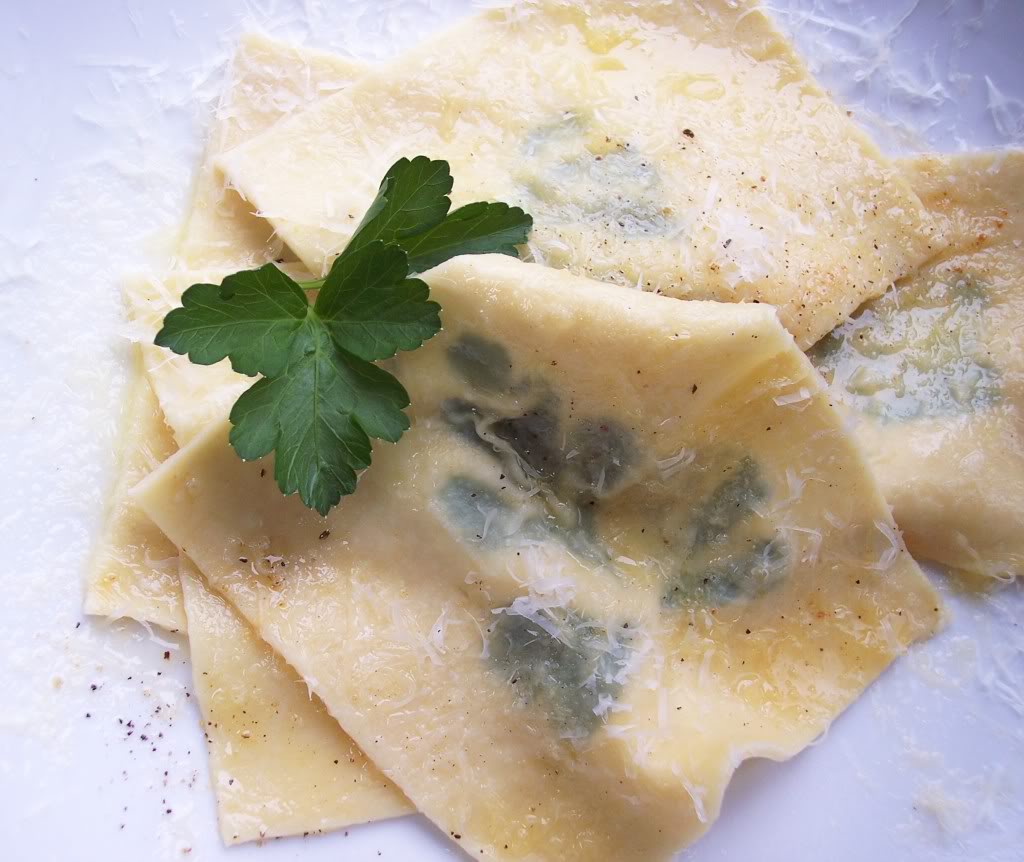
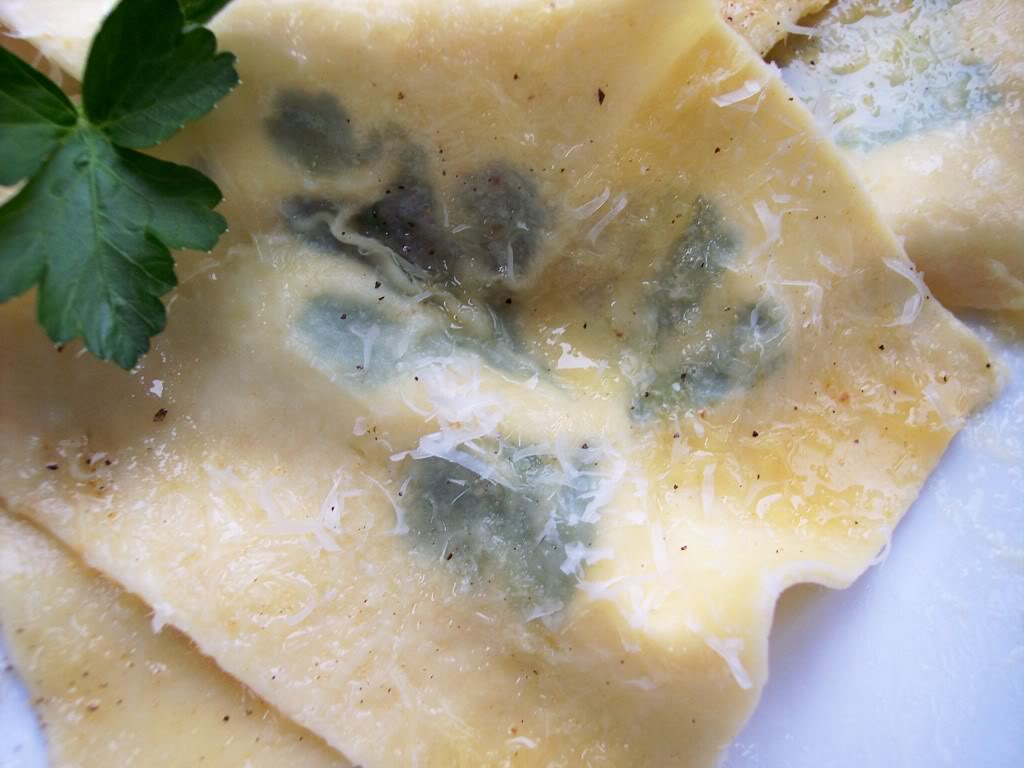
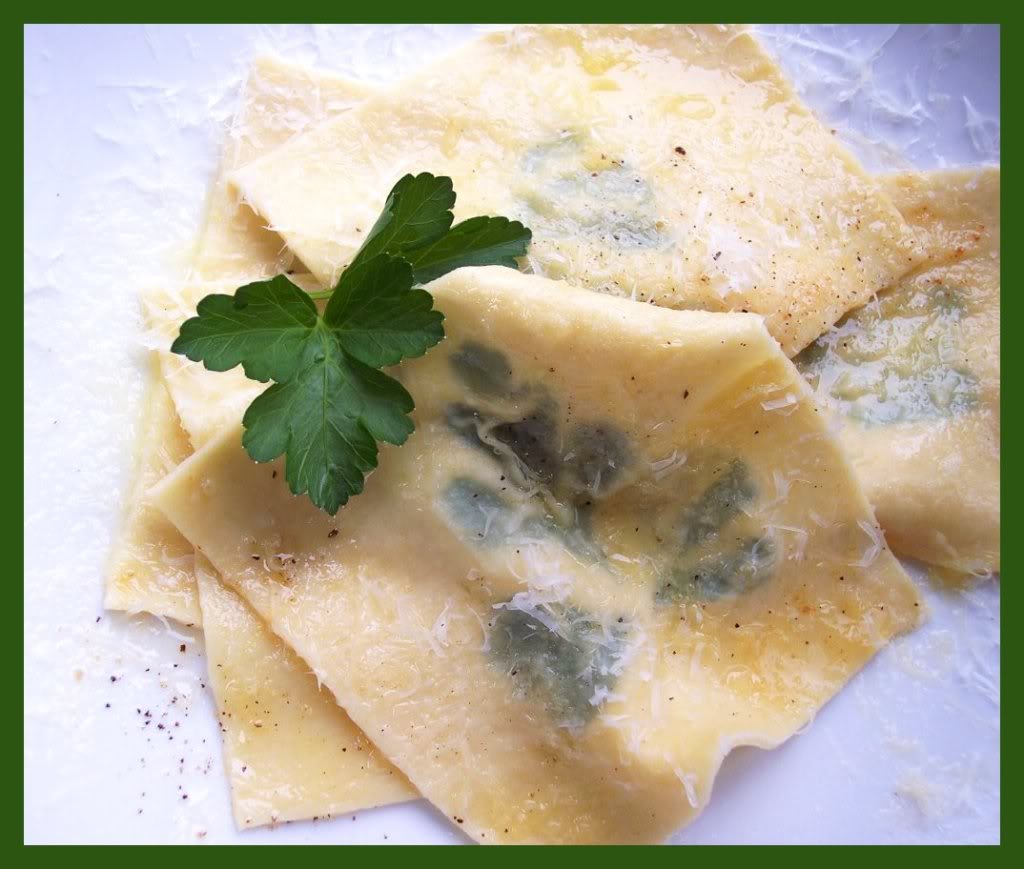
 I cooked up my corzetti a few days later and used a garlic, olive oil, basil, parsley and parmesan sauce which I gently spooned over the cooked pasta and sprinkled toasted walnuts all over. Delicate, light and oh so good!
 Imagine bringing a huge platter of these out to your table, your guests will be wowed! Look how pretty the design turned out.
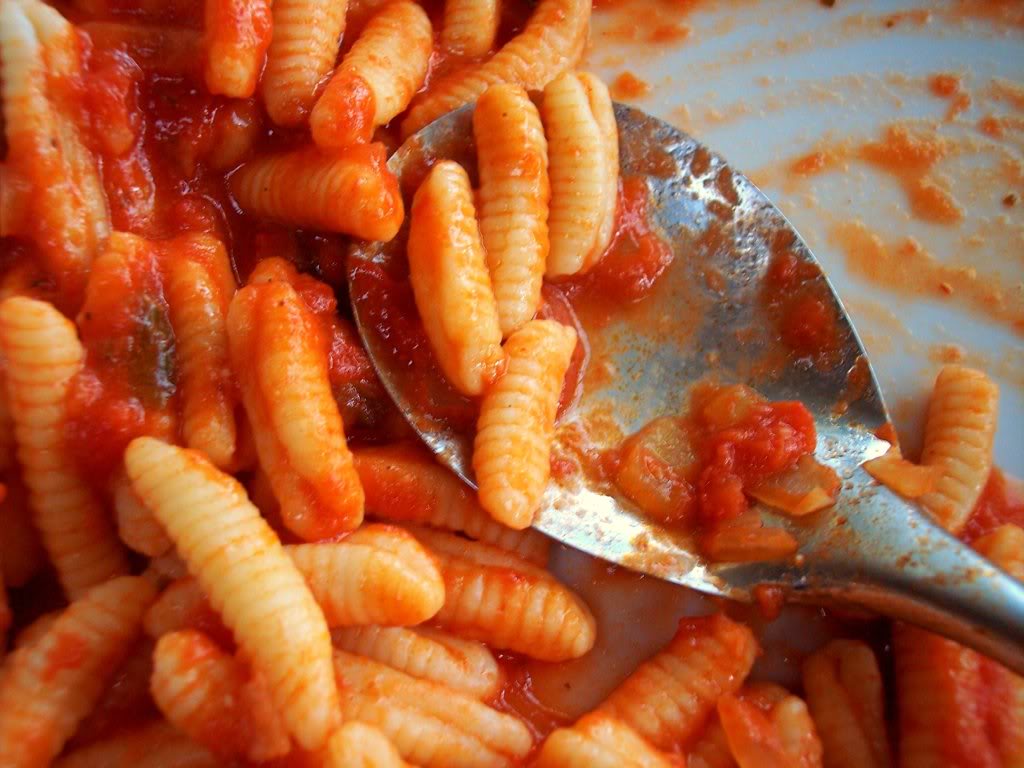
 Although there are many different sauces you could use for the garganelli I opted for a nice marinara, it was wonderful!
Aren’t they beautiful? This is not something you would make everyday but on holidays or a very special occasion, it will be the object of conversation! We made multiple trays of these, but waited until we got home to freeze them and place into freezer bags. Making the garganelli was easy once we all got the hang of it, here’s what you do,**cut dough into squares**position squares with point slightly over jute rail**wet far tip with water** place spindle over square**flip the tops of pasta over spindle**push and roll over the slats with your palm**slide garganelli off. After our trays of garganelli were finished we left them single layered so as not to squish the cylinder and waited until we got home to freeze and bag them up. We had many scraps leftover from cutting out the corzetti so we became very resourceful and started making spaghetti and fettuccine and even a few pasta sheets. Pasta was every where, on tables and counters, we had a sea of pasta from one end to the other! Here we are admiring the fruits of our labor, so much fun, can’t wait to do it again girls! I cooked up my corzetti a few days later and used a garlic, olive oil, basil, parsley and parmesan sauce which I gently spooned over the cooked pasta and sprinkled toasted walnuts all over. Delicate, light and oh so good! Imagine bringing a huge platter of these out to your table, your guests will be wowed! Look how pretty the design turned out. Although there are many different sauces you could use for the garganelli I opted for a nice marinara, it was wonderful!What a labor of love pasta making is but worth all the effort especially when you do it with family and good friends!
Buon Appetito!


 I’m Marie, a wife, mother, mother-in-law, and gramma of two beautiful girls. My passion is food, clear and simple but especially Italian food, hence the name of my blog, Proud Italian Cook. I want you to feel right at home here so grab a cup of coffee, I’ll get the pastries, take a look around and enjoy your visit! {


