 Recently I taught a class on making gnocchi at my friends gorgeous home, a hands on class where everyone would take part, we started the day off early, I was all prepped and ready to go!
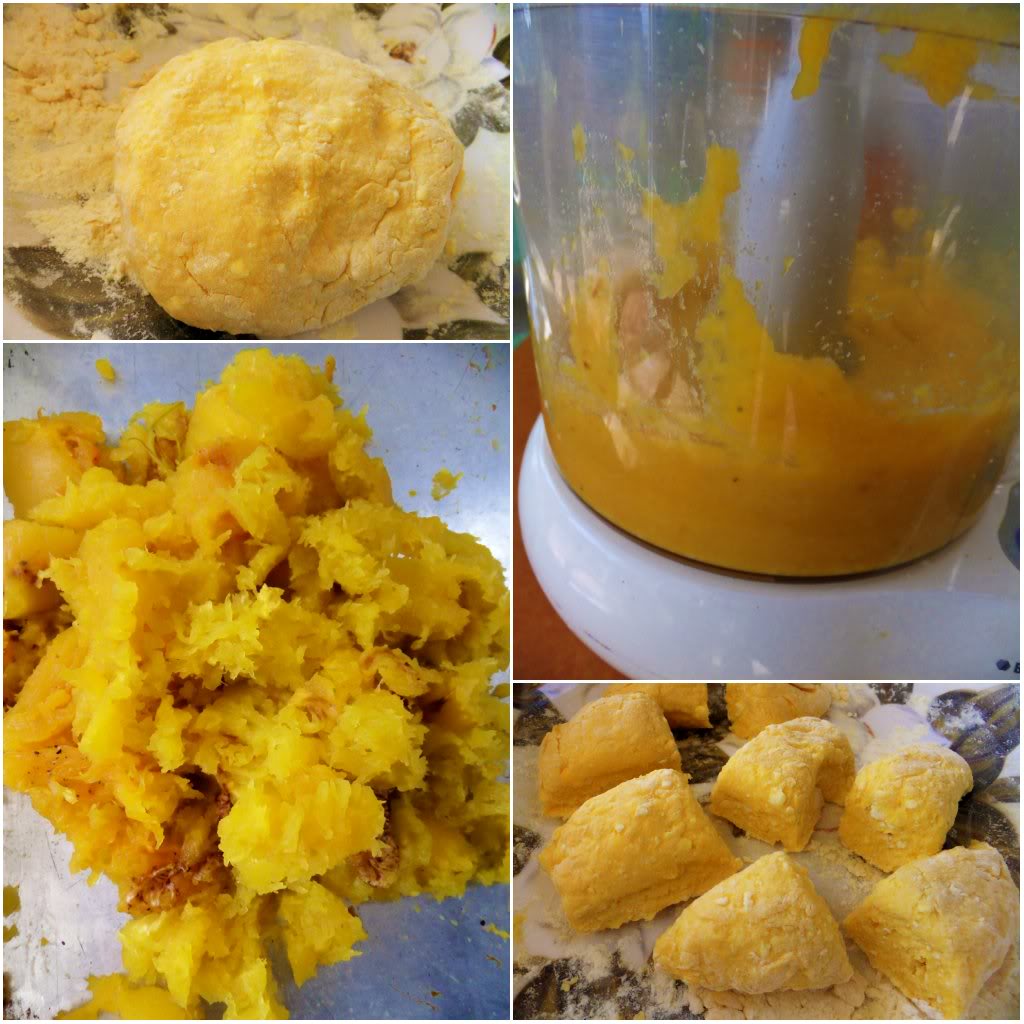 We made two different kinds of gnocchi, butternut squash and ricotta. The squash was roasted, pureed in a food processor along with other ingredients, and then gently mixed into a dough.
 Before we started we munched on a few appetizers and had some drinks, because after all we needed to build up our energy!
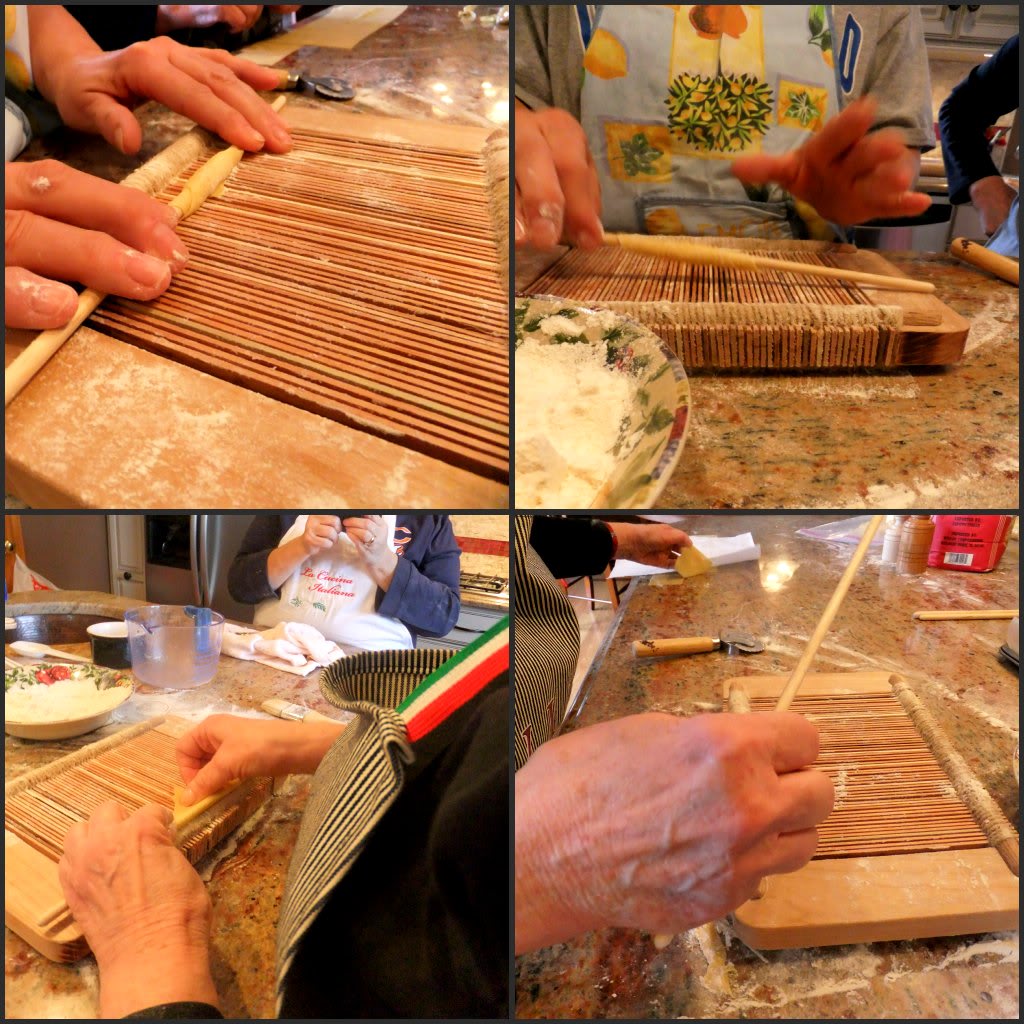
 And then we got down to gnocchi business, with aprons on, each person had a job, some mixing the dough, some rolling, some cutting, but everyone wanted to try out the gnocchi boards, it was fun to see how fast they were all getting, gnocchi was flying everywhere!
 We quickly filled up many trays, this was the butternut squash, I just love the color and taste, a big favorite of the day! Very light not heavy tasting at all.
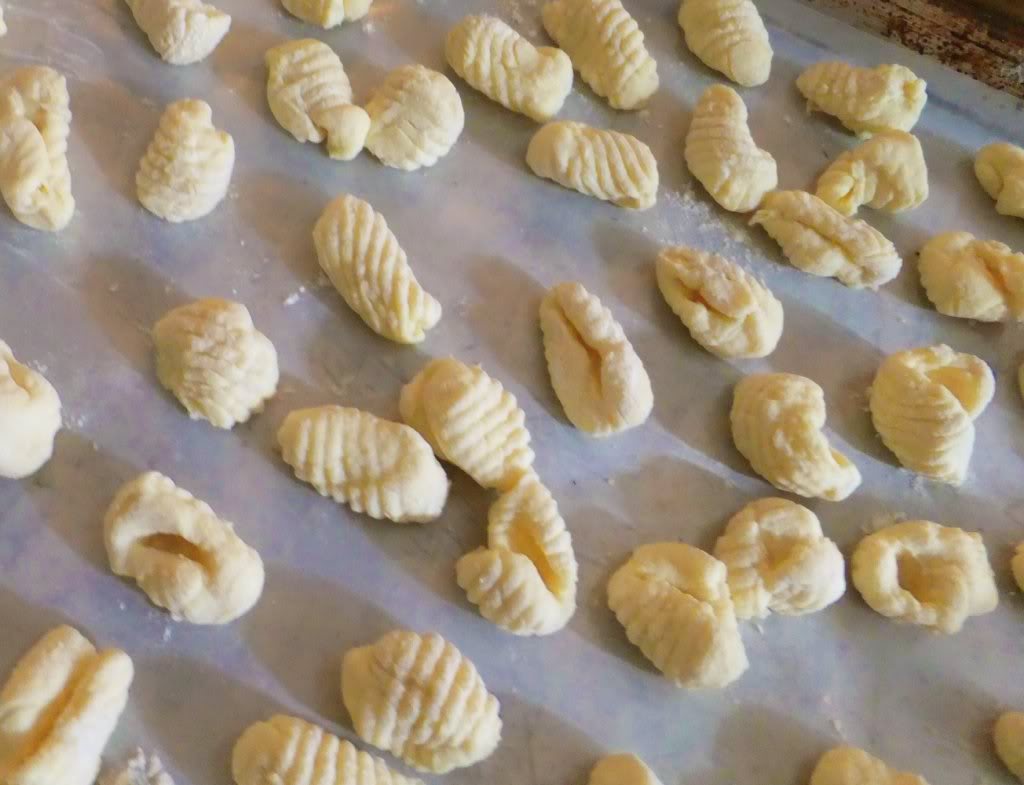 The key to a light and fluffy ricotta gnocchi is to drain the ricotta of all moisture, I placed my ricotta in a fine strainer over a bowl in my fridge overnight, you can’t believe how much liquid comes out! By straining the ricotta you won’t have to keep adding additional flour to soak up that moisture which will keep them nice and light tasting.
 I roasted mushrooms with olive oil, onions, garlic and zucchini and tossed the butternut squash gnocchi into it all, topped with fresh chopped parsley and generous amounts of freshly grated parmesan.
 This is a perfect autumn dish, they just melt in your mouth, and the roasted vegetables just complement it all.
 Another sauce that goes well with the butternut squash gnocchi is a fontina cheese sauce with torn spinach leaves and parmesan.
 You can never go wrong with a simple marinara for the ricotta gnocchi, always a favorite!
 But my new favorite way of eating them is tossing them into crumbled Italian sausage, roasted mushrooms, onions, garlic and cherry tomatoes. All dowsed with olive oil and freshly grated parmesan, and a sprinkling of fresh basil and parsley. Heavenly!
 A fun day it was! Thanks to all who attended. The recipes are quite long so I didn’t put them in my post but I’d be happy to email them out to anyone if you so desire, just contact me at prouditaliancook@hotmail.com subject, Gnocchi.
UPDATE…
Thank you for the overwhelming response I got requesting my gnocchi recipes, I’ve sent out close to two hundred already! I’ve since learned how to post them on my Proud Italian Cook Facebook page. For those of you who are Facebook users you can get the recipes by going to my wall and on the lefthand side under “notes” they will be posted, for any others I will still email them out. Thanks to all!!


 I’m Marie, a wife, mother, mother-in-law, and gramma of two beautiful girls. My passion is food, clear and simple but especially Italian food, hence the name of my blog, Proud Italian Cook. I want you to feel right at home here so grab a cup of coffee, I’ll get the pastries, take a look around and enjoy your visit! {


