Caprese Omelet

At the moment, this is my current favorite omelet. Maybe it’s because tomatoes have been tasting so good lately, or maybe it’s because the basil I used was freshly picked from my garden, or is it because it just screams summer!


Perfect for the weekend when everything slows down a bit and you get to linger over your second or third cup of coffee.
Be sure to pop some crusty Italian bread in your toaster. Have I told you I love the smell of toast?

This is so easy to prepare, it will take you just a few minutes.
Ingredients are:
Cherry Tomatoes, cut in half
Fresh Mozzarella, torn
Fresh Basil
Eggs
In a pan saute your cut tomatoes in a drizzle of olive oil and butter, make sure tomatoes are cut side up when finished. Next, throw in your torn basil and then pour your egg mixture over the top and now place your fresh mozzarella randomly around. I mixed my eggs with water, salt and pepper. Let it cook on medium until it sets, in the meantime, I put my broiler on but put my pan on a lower rack so just the heat from the broiler sets the top.
This omelet is not meant to be thick but rather thin, like a pizza.
Buon Appetito!

Signature

Grilled Polenta

Over Memorial Day weekend I grilled a pork roast Tuscan Style and served this grilled polenta as one of my side dishes, it went perfectly together. What makes this polenta extra special in flavor is the addition of shredded zucchini and grated cheese that gets folded in at the end.

Then for even more flavor, a roasted tomato is added on top of each slice so that when you cut into it everything mingles together and makes perfect harmony.

I used roma tomatoes, and after slicing off the tip and a little off the bottom I cut them into thirds, added a piece of shaved garlic on each, along with salt, pepper and dried oregano and then a generous drizzle of olive oil. Roasted in a 400 degree oven on a baking sheet lined with foil until wilted but still juicy. This can be done the morning of.

To shred your zucchini use either a box grater or a food processor as I did.

Next, you have to squeeze out all the liquid from your zucchini, a task I’ve always hated to do until I saw this brilliant way to do it on my friend Debby’s blog.

If you have a potato ricer laying around that you rarely use like I did, get it out and dust it off it will be your new best friend in the kitchen, if not, go out an get one it will make your life so much easier! I was amazed to see how much liquid came out when I used it, the zucchini was practically dry! It sure beats squeezing it with a towel or by hand, she even says it works great for spinach as well.
After your zucchini is squeezed out you’ll need to saute it in a pan drizzled with olive oil, cook it until it’s not raw anymore, it only takes a couple of minutes.

Cook your polenta according to directions and when it’s finished fold in the cooked zucchini and a generous amount of grated parmesan or romano cheese. I used a half a box of polenta and 3 zucchini.

Spread the mixture into a rimmed baking sheet that’s been brushed lightly all over with olive oil, I used a quarter sheet pan and it worked perfectly. Spread the warm polenta evenly all over the pan and smooth it down with a silicone spatula. After it cools down a bit cover with tin foil and refrigerate it preferably overnight. I would suggest doing this all the day before because you really want the polenta to be cold when you go to cut into it.

When you pull it out of the fridge and take the foil off you might have a tiny bit of condensation on top, no worries, just dab it with a paper towel. Now you’re ready to cut your polenta into squares.

Heat up your grill and make sure it’s super clean, then take a paper towel soaked with canola oil or vegetable oil and rub it all over your grates. Place your polenta squares on and wait until you see some good grill marks appear then flip over and do the other side. I have an olive oil sprayer so I sprayed a little on top of each before I flipped them over. I also had my grill on medium heat, you don’t want them to burn!

When done they should look like this! They hold their shape really well and look very nice when put together and placed on a platter.

They taste best when served slightly warmed. Now wouldn’t you like to bite into these?

Happy grilling!

Signature

Grill Up Some Eggplant This Weekend

When I have a cookout or when I’m invited to one, I like to make salads and side dishes that are free from any mayonnaise base, that way I don’t have to worry about them sitting out and spoiling. Here’s 2 recipes you might want to consider while you’re grilling out this weekend. You still have time to run out and get some eggplants!

Both are great served at room temperature.

I love this grill pan I’ve had it for years, and it still works like a charm, it’s like a wok and your able to toss and evenly brown your veggies very easy on your grill. I drizzled my eggplant with olive oil, salt and pepper before I put them in my hot grill pan.

This simple salad is made with chunks of eggplant, pitted green olives, fresh parsley, capers and lemon peel, all tossed together in a fresh lemon and olive oil dressing. It actually tastes better as it sits out!

This is my new favorite eggplant salad, I’ve already made it twice. Chunks of grilled eggplant tossed with diced tomatoes, toasted baguette bread cubes, fresh torn basil and defrosted frozen corn all drizzled with a good olive oil. If your lucky enough to find frozen roasted or grilled corn, use that, it adds a nice smokey flavor, but it’s not necessary. Great at room temperature, the juice of the tomatoes, olive oil and basil flavor the chunks of crunchy bread cubes. So good!
Enjoy your holiday weekend and day off of work!
Buon Appetito!
Signature

Berry Good Desserts

Here’s a few desserts that I enjoy making once the weather starts warming up. Nothing complicated here just simple and easy, quick to put together so you can enjoy the great weather.
This is equally as good with sliced strawberries so use whatever berries you like, just remember once it’s assembled it should be eaten right away.

Easy to put together with just a few store bought ingredients. I wanted to lighten mine up a bit so instead of using heavy whipped cream ( which would be amazing) I used Greek yogurt. Even the no fat version is so thick and creamy, I just love the stuff!
Take a store bought pie crust, roll it out, and with a 3 inch cookie cutter make as many rounds as you can. Place them on a baking sheet, prick them with a fork, and bake about 8-10 minutes at 400 degrees, times may vary, you just need them to be golden brown. This step could be done ahead of time and kept in the freezer until ready to use.
Next take your yogurt (or whipped cream) and fold in a dollop of good quality lemon curd, that’s really all there is to it, now just layer your stacks with the berries and lemon “cream”. Garnish with lemon zest and nuts if you like. How easy is that?

Light and refreshing, this little treat is made in minutes by warming up some orange marmalade, tossing in your berries, placing them in a pretty glass topped off with a dollup of yogurt and some toasted slivered almonds. You’ll love the combination of flavors!


BLUEBERRY TART, I’ve made this several times. I got this recipe 2 years ago from my friend Pat’s blog who got it right out of Women’s Day magazine. Pat also made this substituting the blueberries with strawberries, which I’ve yet to try, but soon will.
Don’t you think this would be a perfect ending to your Memorial Day barbecue?


INGREDIENTS:
1 cup plus 2 Tbl. flour
2/3 cup plus 2 Tbl. granulated sugar
1/2 tsp salt
1 stick (1/2 cup) unsalted butter, cut up
1 Tbl. white vinegar
5 cups blueberries
1/4 tsp ground cinnamon
1/2 tsp almond extract
Powdered sugar

1. Heat oven to 375°F. Spray a 9-in. square or round tart pan with a removable bottom with nonstick spray.
2. Pulse 1 cup flour, 2 Tbl. sugar and the salt in food processor until blended. Add butter; pulse until coarse crumbs form. Sprinkle with vinegar; pulse until blended. Turn out dough and bring together with fingers.
3. Press dough into bottom of tart pan. Top with 3 cups berries. Mix remaining 2 Tbl. flour, 2/3 cup sugar and cinnamon in medium bowl. Evenly sprinkle over berries; drizzle with almond extract.
4. Bake tart 50 to 60 minutes until bubbly. Remove from oven and top with remaining 2 cups blueberries. Let cool in pan on wire rack. Sprinkle with confectioners’ sugar. Serve warm or at room temperature.
From Woman’s Day July 8, 2008

Note: I’m not plugging store bought pie crusts, but if you’re in a hurry or you don’t feel like making your own, it’s a great substitution and a nice convenience every now and then, and guess what, it still tastes every bit of delicious!

Buon Appetito!
Signature

Wine Infused "Beer Can" Chicken

Plopping a whole chicken on top of an open can of beer and then roasting it on a grill might sound odd but once you try it you’ll be hooked!

Beer can chicken is something I’ve been making for years, and with very little effort it always seems to come out perfect. Usually I’ll make a dry rub of several different spices like cumin, paprika, garlic, cayenne, dry mustard and brown sugar and rub that all over my bird.

But this time I wanted to try something different and use wine instead of beer, and replace the dry spice rub I with a fresh herb mixture consisting of lemon peel, garlic, red pepper flakes, thyme, parsley, oregano, salt, pepper and a drizzling of olive oil which made a nice thick paste. I rubbed the paste all over my rinsed and patted dry chicken, making sure to get it underneath the skin as much as possible, then I let it sit for a good 30 minutes.
In the meantime I opened up a bottle of wine that was room temperature, rinsed out some empty tin cans and then proceeded to pour the wine into the cans, making sure to leave a little room at the top. I used an inexpensive chardonnay which had some citrus notes, a good choice for the chicken.
You can find beer can chicken holders in many different stores and on line. There’s double and single holders, some are very fancy and some very basic, they all work well. You really don’t even need to use a holder because the chicken usually balances perfectly just right on the can, but a holder makes it easier for you to pick up and move the chicken.

Lower your chicken over the can until the can is inside the body cavity, this will insure that all the wine will infuse throughout the bird, then to make sure that the steam doesn’t escape just place a sliced onion wedge on top where the neck cavity hole is.

Having a gas grill makes it easy to regulate the heat, make sure your cooking temperature stays between 350 and 375 degrees. Depending on the size of your chicken times may vary, mine took 1 1/2 hours to reach the internal temperature of 180.
Never place the chicken on direct heat, I have 3 burners I shut the middle one off and that is where I place my chicken, the other 2 burners are on.
For charcoal grills read manufacturers suggestions for indirect heating.

Make sure you let your chicken rest for 10 to 15 minutes before cutting into it.
The result from using wine instead of beer was fantastic, the herbs infused the chicken with so much flavor, the wine made the meat so tender and moist and the skin was super crunchy, a win win situation!

For one of my sides I made Ricotta Stuffed Tomatoes. Plum tomatoes stuffed with grated cheese and basil, it went excellent with the chicken.

I got this recipe from my friend Stacey’s blog, I’ve been making them over and over, they’re that good!

I also made some Italian Potato Salad. Green beans, tomatoes, olives, red onion and potatoes all dressed with olive oil, oregano, salt, pepper and red wine vinegar.
A nice alternative to a mayo based potato salad.

I have to give a shout out to my hubby who always keeps our yard looking so good with all the flowers he plants. Next week the forecast is finally looking warm, the tomatoes and other veggies are ready to go into the ground. Stay tuned for updates!

Buon Appetito!

Signature

Baked Tuna with Herbacious Gremolata

This recipe can be adapted to any firm fish that you like. It goes equally as well with salmon, swordfish and a nice fillet of cod. I recently bought some fresh tuna steaks and couldn’t wait to use them for this.

Thirty minutes before you place your fish into the oven you’ll want to marinate it so all the flavors infuse. Place your fish into a baking dish, add sliced lemons, at least 4 crushed garlic cloves, dried oregano, white wine and olive oil.
Bake your fish in a preheated oven at 350 degrees, it took about 12 minutes for the tuna but time and temperature will vary according to the thickness and the type of fish you use.

While the fish is marinating start making your gremolata. The bold flavors come together with a generous handful of fresh parsley, basil, 1 garlic clove, the zest and juice of 1 lemon, a couple of tablespoons of rinsed and drained capers, a splash of red wine vinegar and drizzled olive oil to get the right consistency. I used my mini food processor and pulsed everything together and then drizzled in the olive oil.
Spoon the gremolata on top of your warm fish!

Another great use for the gremolata is to drizzle it over grilled vegetables, so be sure to make extra!
Buon Appetito!

Signature

It’s Fava Bean Season!

Beautiful and plump fava beans are showing up all over in our produce markets. These very versatile beans are known to be the stars of the legume family and taste fantastic in salads, crostinis, pastas, risottos, stews and dips just to name a few.

Look for favas that are bright green with slightly fuzzy pods and avoid any ones that are blackened and limp.

Shucking the beans can be a little time consuming but well worth the effort once you unveil the inner glossy green bean! Here is a visual guide to show you how to do it.
Their taste has been described as a buttery texture with a nutty, slightly sweet flavor.

Methods for removing the shell vary. The most common way is to bring a pot of salted water to a boil, add the beans, cook for 1 minute, then drain and plunge them in ice water to stop the cooking process. This softens the outer shell and allows you to slit open its side and force out the beautiful glossy bean.
I have other plans for these little beauties besides this awesome Spring Salad I made which consisted of the blanched favas, defrosted peas, and blanched asparagus cut on the diagonal, all tossed with arugula and shaved fontinella cheese, you could also use parmesan or pecorino as well. The dressing was made with fresh lemon and olive oil that went perfectly with all the vegetables.

I served the salad along side this Asparagus and Ricotta Tart for a meatless meal we had during the week. I had leftover blanched asparagus from my salad so I put them to good use and made this.

I lined a 9 inch tart pan with a store bought pie dough which was fast an easy.
In a bowl mix 1 1/2 cups of ricotta
2 large eggs
1 crushed garlic clove
Zest of one lemon
Salt and pepper to taste
1/2 cup of grated parmesan
Whip until smooth and incorporated and then pour mixture into your pie shell.

Arrange your asparagus on top and sink them into the ricotta. I blanched the asparagus for 3 minutes in boiling water which was then plunged into ice water, thoroughly drained and patted dry. Sprinkle with more cheese and a drizzle of olive oil on top.
Bake in a 375 degree oven until crust is golden and ricotta is set.
Have a great week and Buon Appetito!
Signature

Tiny Tomatoes: Big Taste

Even though it’s not tomato season in my area yet I can always find those sweet little grape tomatoes along with Campari tomatoes on the vine, and just recently I’ve been buying the mini heirlooms packaged as Gourmet Medley, all of them have such great flavor in every bite.

Recently I went a little overboard in the tomato department and had to find ways to use all that I had, besides I can’t bare to waste them! Great in salads but also great to cook with, which I often do. Here are a couple of ways I like to enjoy them.

Zucchini Boats


Just cut a zucchini in half lengthwise and trim a little off the bottom so it sit still in a baking dish*** Scoop out the center where the seeds are with a spoon*** Brush the surface with a mixture of crushed garlic, olive oil, salt and pepper*** Arrange halved grape tomatoes into the grooves, sprinkle with bread crumbs and bake in a 350 degree oven for about 30 minutes*** Remove and place diced fontina or mozzarella in between the tomatoes, place them back in, but now under the broiler til golden and bubbling***Remove and drizzle with olive oil and a sprinkling of grated parmesan. You will love this as a side dish!

Caprese Tart


This comes together so quickly, I even used a store bought pie dough. I love the flavor of the tiny heirlooms which makes this tart taste spectacular!


Place your pie dough on a removable bottomed tart pan, I used a 9 inch one here*** Prebake your pie crust in a 425 degree oven for 10 minutes*** Remove from oven and reduce the temperature to 375 degrees*** Drizzle olive oil on top of the crust along with fresh snipped basil and a sprinkling of grated parmesan cheese*** Layer the bottom of your crust with slices of fresh mozzarella, and since I had some fontina left from my zucchini boats, I mixed that in as well*** Arrange your halved tomatoes all around the tart right on top of the cheese*** Add more snipped basil and another drizzle of olive oil*** Bake for about 25 minutes*** Let it cool down before you cut into it. This, with a nice tossed salad is perfect for dinner!
Enjoy and Buon Appetito!
Signature

I’ve Been On a Salad Kick Lately!

I have to thank my daughter for getting me to try a kale salad, I thought it was strange not to cook it, I thought it would be really bitter, I was wrong. Whole Foods makes a very popular kale salad here which is beautifully displayed in their deli, the demand is so great that sometimes they run out, I bought a small container one day on the advice of my daughter, and I was hooked!

Since then I’ve been making kale salads all different ways, here’s one of my favorites. This nutritious and healthy salad can be put together in a few minutes, a nice alternative to the usual salad greens. Ingredients listed above, no measuring, just put as much as you want.

I had two blood oranges left that needed to be used so I made this simple salad consisting of oranges, raw onion rings, salt, pepper and extra virgin olive oil. The combination together creates a great balance of flavor.

A good use for leftover chicken is to recreate it into a salad. Diced chicken, red onion, avocado, grape tomatoes, kalamata olives, torn fresh basil leaves and pine nuts tossed with some whole wheat bow tie pasta and fresh spinach drizzled with your favorite vinaigrette. Great for lunch or a light dinner.

Shrimp stuffed in an avocado has been around for years, what sets this apart is the 3 Citrus Aioli that’s drizzled all over it. Scoop out one side of an avocado, dice into medium chunks and place into a bowl, add your cooked shrimp that has also been cut into medium chunks ( leave a few whole). Toss in grape tomatoes that have been cut in half, granulated garlic, fresh parsley and red onion, stuff it back into the other avocado half.
For the 3 Citrus Aioli, combine the juice of a lemon, lime and orange, whisk it into a good store bought mayonnaise until you get the right consistency and then drizzle all over. The citrus brightens everything up and goes perfectly with the shrimp and creamy avocado.
Enjoy, and Buon Appetito!
Signature

Zucchini Ribbon Salad

Ribbons of zucchini can instantly transform a simple salad into something you might see served at an upscale restaurant, not only does it look pretty, but the added zucchini adds a special element of flavor. This is so easy to make and you don’t even need a fancy gadget to do it!

A simple vegetable peeler is all you’ll need to to cut the thin lengthwise strips of zucchini. Start by cutting off the ends of your zucchini then use your peeler to cut the strips, stopping and turning when you see the seeds. The unused portion as seen in the photo above can easily be diced up and used for future use.

You’ll want to make sure you cook your strips of zucchini either in a stove top grill or saute pan coated with a tiny bit of olive oil, they only take a couple of minutes. Make sure they cool completely before adding them to your salad.

I used arugula for my salad base and tossed it in a vinaigrette of 3 parts olive oil to 1 part red wine vinegar, added a touch of Dijon, a crushed garlic clove, salt, black pepper and oregano, any lemon based dressing would be work as well.
Lay your zucchini strips on top, toss in some feta or shaved Parmesan and sprinkle with toasted nuts, I used hazelnuts here with the feta, but pine nuts or slivered almonds would be just as good. To finish, drizzle a little more dressing over the top. Just let your creative juices flow and make it your own!
Buon Appetito

Signature

Fresh Strawberry and Ricotta Tart

I love this time of year when fresh fruit and berries are popping up all over in the grocery stores, and even though it’s not quite the season yet they’re looking really good and there’s always some kind of a sale going on which makes it even better! So I just can’t resist buying berries every week.

Most times I’m mixing them up in some Greek yogurt which is very satisfying in itself, but every once in a while I like to make a tart or a pie of some sort. When I found this recipe I knew I was going to love it, strawberries and ricotta go so well together.

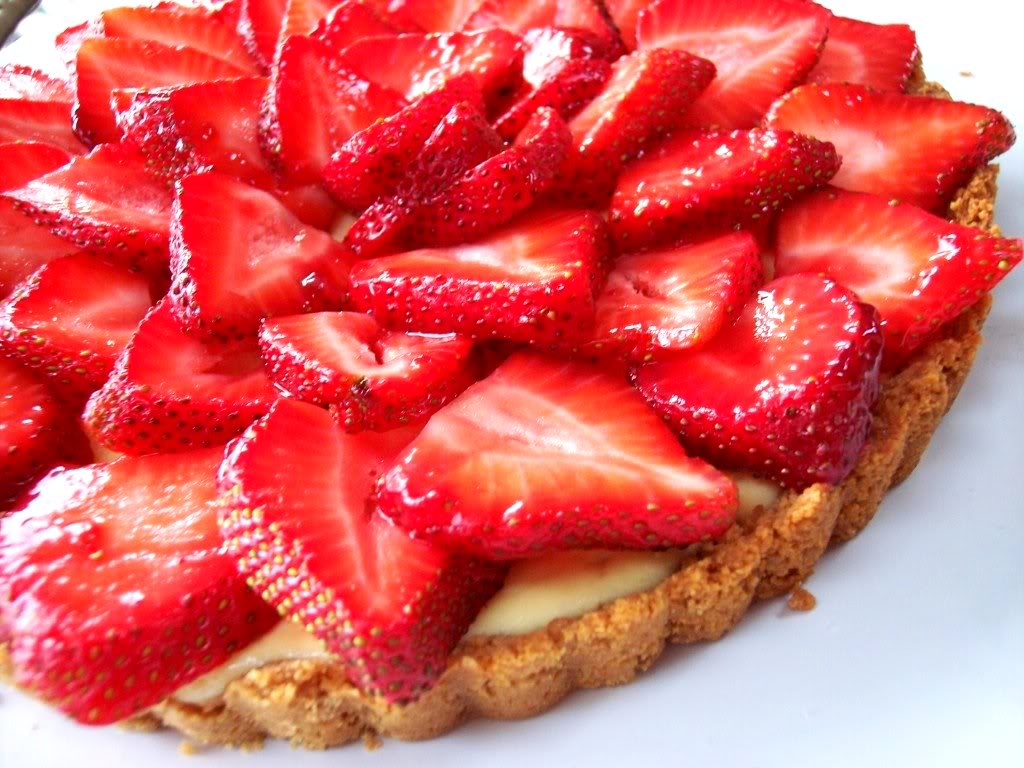
This is not an overly sweet dessert, in fact the balance is just right, the creamy ricotta actually complements the strawberries in a way that lets them shine through. And lets face it, glossy fresh strawberries topped on any dessert is hard to resist!

We couldn’t resist, as you can see!
Adapted from Rustic Fruit Desserts
The original recipe calls for a short dough crust, but I felt like a graham cracker crust so I made that instead, but feel free to make or purchase your favorite pie crust.
For my version you’ll need:
1 ½ c. of finely ground graham crackers
1/4 c. sugar
5 Tbs. butter, melted
1/8 tsp. salt
Firmly press the crumb mixture into the bottom and up the sides of a 9 inch fluted tart pan with removable bottom.

Ingredients:

1 cup ricotta
1/3 cup cream cheese at room temperature
3/4 cup granulated sugar
1/2 teaspoon salt
2 eggs
1 tablespoon vanilla extract
6 cups strawberries hulled, and sliced on the thick side
1/2 cup strawberry jam
Here’s what you do:
1. Preheat the oven to 350°F.
2. Using a beater, mix your ricotta, cream cheese and sugar together on medium speed. Add the eggs one at a time, beating until smooth after each addition and scraping down the sides of the bowl occasionally. Stir in the vanilla.
3. Pour the filling into the prebaked tart shell and bake in the middle of the oven for 30 minutes, or until the edges have puffed up and toothpick comes out clean. Cool to room temperature on a rack, then chill in the fridge for 1 hour.
4. Just before serving, put the strawberries in a bowl. Warm the strawberry jam in a small sauce pan over low heat, then toss and coat the jam over the strawberries. Arrange the sliced berries on top of the tart and serve immediately.
Note: The tart filling can be made a day in advance and refrigerated. Top with the strawberries just before serving.
Enjoy and Buon Appetito!
Signature

All About Peas…

When I think of pasta and peas I think of my mother-in-law, she use to make this simple dish for her lunch, she would drain a can of peas, saute garlic, onion and red pepper flakes in olive oil, throw in her cooked pasta and a generous amount of grated cheese, lunch was done in a matter of minutes. I still make it her way today, but replaced with frozen peas instead.

This is an updated version of pasta and peas, and if you like a little heat in your food like I do you’re going to love this. Thinly sliced jalapenos, shaved garlic, lemon zest and lemon juice all sauteed in olive oil make up the flavored sauce for this dish. Of course you can omit the jalapenos or at least reduce the amount if you like, but in my opinion go for the heat! This was so simple and sooooo good, I can’t wait to make it again!

Pasta with Peas and Lemon

1lb spaghetti
4 cloves shaved garlic
2 jalapenos seeded and thinly sliced
1 lemon zested
1/3 cup lemon juice
1 1/2 cup peas
1/3 cup parmesan
3 tablespoons olive oil
Salt and pepper

Cook pasta, while cooking heat a large skillet with the olive oil, add shaved garlic, sliced jalapenos, zest and juice, saute til golden, toss in cooked pasta, add grated cheese and a drizzle more of olive oil.
Recipe adapted from Real Simple Magazine

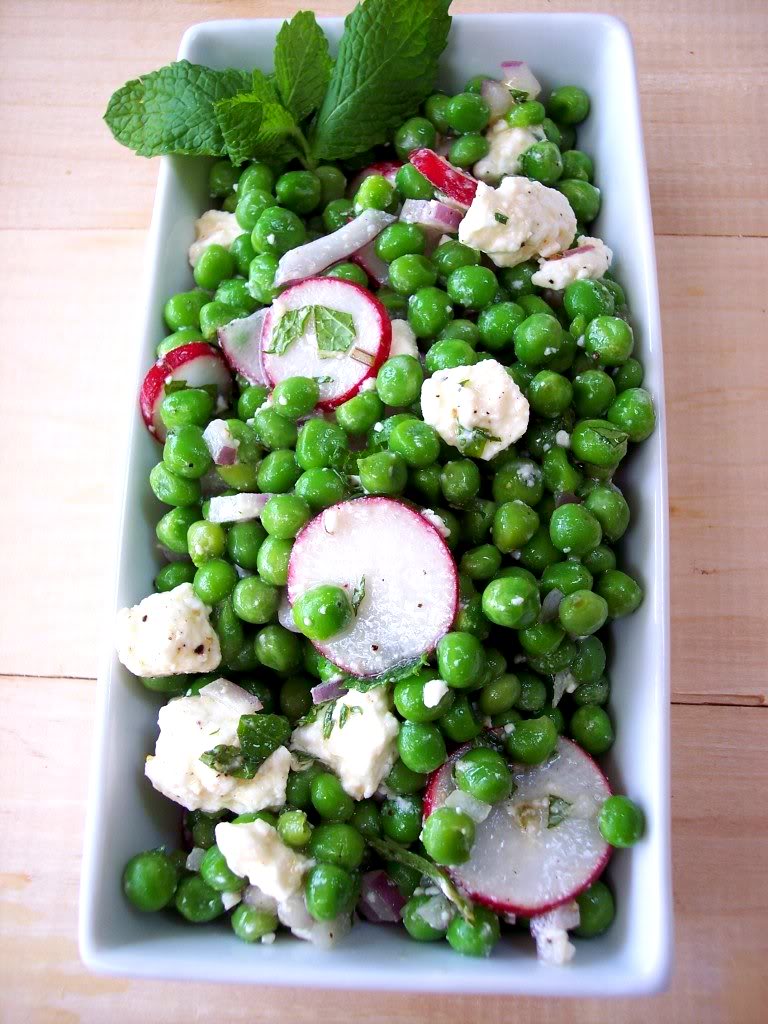
Speaking of peas! Here’s a great salad composed of peas, feta cheese, radishes, red onion and mint.

After blanching 2 cups of frozen peas for 5 minutes, cool down with cold water. Make a dressing of 2 tablespoons of olive oil, 1 tablespoon each of honey and red wine vinegar and 2 teaspoons of Dijon mustard. Whisk together and toss with 1 finely diced red onion, 1/4 cup feta, 1/4 cup fresh mint, and 2 or 3 finely sliced radishes.

Have a great weekend and Buon Appetito!

Signature

Roasted Tomato Shrimp

This is one dish I make often, I always seem to have shrimp either in my freezer or fresh, sometimes I toss in spaghetti, or if we’re not in a spaghetti mood I might make some couscous on the side to serve with it, but one of our favorite ways to eat this is by putting the whole pan right in the middle of the table surrounded by other little small bites and appetizers.

What you have here is the intensely concentrated flavor of tomatoes that have been roasted with shaved garlic, olive oil and thyme. The tomato’s of choice are either grape or the Campari variety on the vine, or a mixture of both.

Roasting your tomatoes ahead of time can place this dish on your table in less than 15 minutes.

For a pound of shrimp coat your pan with a generous drizzle of olive oil, add to your pan 4 cloves of shaved garlic, saute til golden, add shrimp and a good splash of white wine. When the shrimp turns pink and is almost cooked through add in your roasted tomatoes and toss. Garnish with chopped parsley and fresh basil.

Buon Appetito!

Signature

Easy Entertaining with Brunch

For Easter I decided to do a brunch, something different than the norm, it turned out to be a very relaxed form of entertaining, I can’t wait to do it again! Food was served buffet style and we all ended up eating in my sun room with all the windows open, it was a beautiful spring day.

The menu consisted of mini pasta and cheese frittatas, artichoke frittata, pea and edamame crostini, fig stuffed french toast and Belgium waffles made to order. There was fresh fruit, strawberry and yogurt parfaits, orange juice, coffee and champagne punch.

One of the highlights of our brunch was this Italian Sausage Bread that I got over at
Food Blogga, it’s actually Susan’s mother-in-laws famous recipe. My family makes something very similar to this but we call it bastone, and always used a special cheese called tuma, ( which isn’t always easy to find) and our dough was way more complicated. This appealed to me because she used pizza dough and fresh mozzarella for the cheese.

All the ingredients, which consist of hot Italian sausage, pepperoni, eggs, fresh mozzarella, parmesan cheese and parsley are precooked stove top in one pan and then it all gets folded into the dough. It was so quick and easy to do and such a hit! I will be making this throughout the year.

Don’t be afraid to use hot Italian sausage, the dough and the egg soak up a lot of the heat and what you’re left with is the perfect amount of spicyness. The only thing different I did was that I used thin sliced pepperoni instead of chunks, which I didn’t have. I just snipped mine with a scissor and it was just fine. The flavors blended together are out of this world!

Go on over to Susan’s blog to get the famous recipe and all the step by step instructions.

A word of advice: Cut a slice of this and pop it in the toaster for your morning breakfast!

For “something sweet” I made a glazed lemon pound cake, cinnamon rolls and a fresh strawberry quick bread.
If you haven’t ever hosted a brunch in your home I would highly recommend it, I’m looking forward to doing it again!
Buon Appetito!
Signature

Sweet Ricotta Pie

It isn’t Easter time without a ricotta pie! I know there are hundreds of different ways to make ricotta pie, but if you like the flavor of cannoli then you’re going to love this. A blend of ricotta, orange zest, candied orange peel, mini chocolate chips and a hint of cinnamon flavors this pie.

You still have plenty of time to make this, you can use your own favorite pie dough recipe for the crust, but if you feel rushed and don’t have time or you’re not a fan of making your own, go ahead and use a good quality store bought crust that’s refrigerated or even frozen, I’ve done it many times myself!

Now for an important note: Make sure you drain your ricotta good! You don’t want it to be wet, make sure you get all the excess moisture out or else it will affect the cooking time and texture. You could drain it overnight in the fridge or a couple of hours before you put it together or just look for a drier ricotta, not one that is soaking in water.

Here’s the filling: 1 1/2 lbs of ricotta, 3/4 cup sugar, 5 large eggs, 1 tablespoon vanilla, 1/2 teaspoon cinnamon, zest of one orange, 1/2 cup of mini chocolate chips, semi sweet, and 1/2 cup of diced candied orange peel.
Preheat the oven to 350 degrees. In a large bowl with an electric mixer, beat the ricotta with the sugar until very smooth. Add the eggs, 1 at a time, beating well after each addition. Beat in the vanilla and cinnamon. Stir in the candied fruit, zest of one orange and chocolate chips. Pour the filling into the pie shell. Sprinkle the top with cinnamon and swirl it with the tip of a knife.
Bake the pie for 45 minutes, or until ricotta is set and toothpick comes out clean. Let cool and chill.
Make sure you chill it down in the refrigerator before you slice into it to receive the optimum full flavor.

Happy Easter!
Signature

Stuffed French Toast with Fig and Cream Cheese

Stuffed french toast, what can I say, if you haven’t had it your missing out, so simple to make at home, it takes common french toast and elevates it to a much higher level, worthy of being the star on your brunch or breakfast table, it could feed a crowd, be made ahead of time and kept warm in your oven.

Think of your favorite jam’s or marmalade’s, apricot, orange, peach, raspberry, strawberry, blueberry or plum, or if you prefer any fresh berries will do.

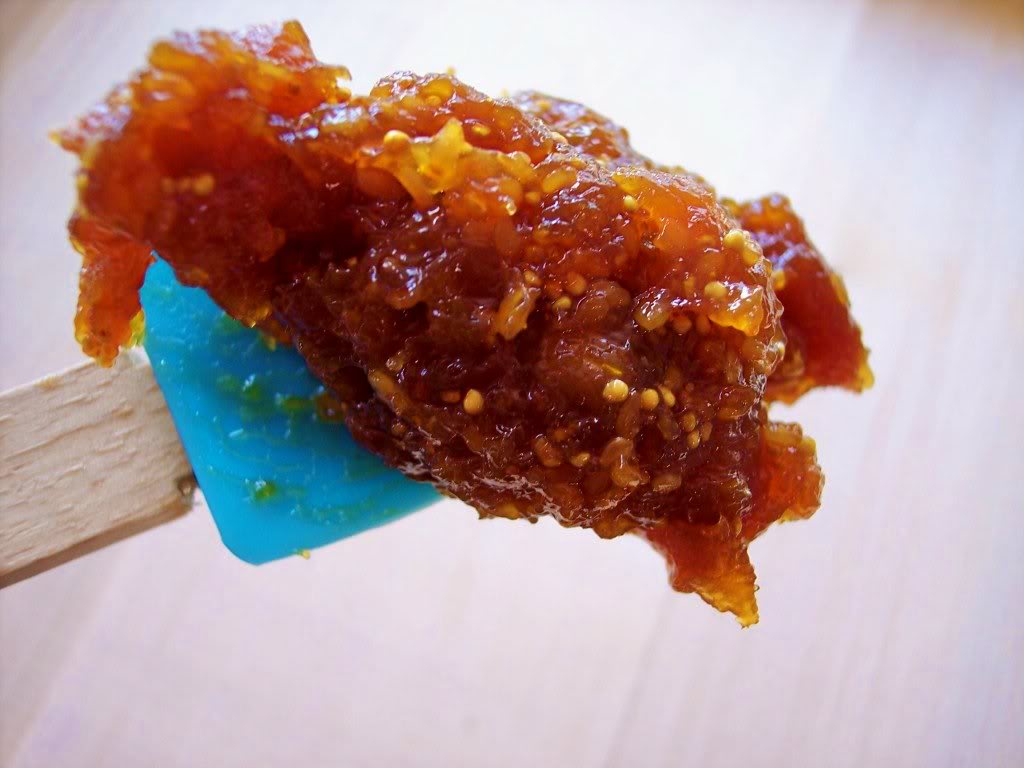
I recently purchased a huge jar of fig paste that was out of this world from a middle eastern store in the city, I couldn’t believe it was only $5.00! Loaded with figs and much thicker than a jam, it worked perfectly, I’m going back for more.

I like to use a good hearty Italian bread or a country loaf, artisan style that you can cut yourself.
Make 1 1/2 inch slices and then with your paring knife make a slit to form a pocket, be careful not to cut all the way through.

For each individual serving I used a mixture of 2 tablespoons of fig paste along with 2 tablespoons of reduced fat cream cheese, so just figure out how many servings you’re going to make and you’ll be able to figure out the amounts. If you’re using fresh berries you might want to add a little powdered sugar in the cream cheese for added sweetness.

Your egg mixture for dipping your french toast will consist of eggs, milk, cinnamon and vanilla. I always sprinkle more cinnamon on top while it’s cooking, the more the better!
Recipe adapted from Everyday Food

Buon Appetito

Signature

What to do with an Over Abundance of Asparagus

Lately I’ve been buying a ton of asparagus, they’re popping up all over in grocery stores, markets and menus, a sure sign of spring, and over the last couple of weeks I’ve been making them all different ways. Here’s just a few ideas to serve them either as a side or a starter.

Asparagus with Gorgonzola and Hazelnuts

Make a vinaigrette with 3/4 cup of olive oil to 1/4 cup red wine vinegar, 1 shallot minced, 1 teaspoon Dijon, a squeeze of 1/2 lemon, salt and pepper. Whisk until blended. Pour some of it over your roasted asparagus, crumble up some Gorgonzola and sprinkle on top, garnish with toasted chopped hazelnuts.

Note: You’ll likely have extra vinaigrette unless you make a huge amount of asparagus, so bottle it up and save it for salads of all kinds.

Phyllo Wrapped Asparagus

Mix lemon zest and parmesan cheese together with salt and cracked pepper, use this mixture to sprinkle over your raw asparagus.

Preheat oven to 400 degrees F.
Snap off the tough ends of the asparagus. Unwrap the phyllo and cut the stack in half lengthwise. Reserve 1 stack for later use. Cover the phyllo with a damp towel to keep it from drying out. Take 1 or 2 sheets of phyllo and brush lightly with olive oil. Sprinkle with the parmesan mixture. Place 2 to 3 asparagus spears on the short end of the sheet. Roll up, jelly-roll style. Place each piece, seam side down, on a baking sheet. Brush with more melted butter and sprinkle with more Parmesan. Repeat until all the asparagus spears are used up. Place baking sheet in oven and bake for 15 to 18 minutes, or until golden brown and crispy.
Serve with an aioli, or in this case I used Stacey’s wonderful romesco sauce for dipping.

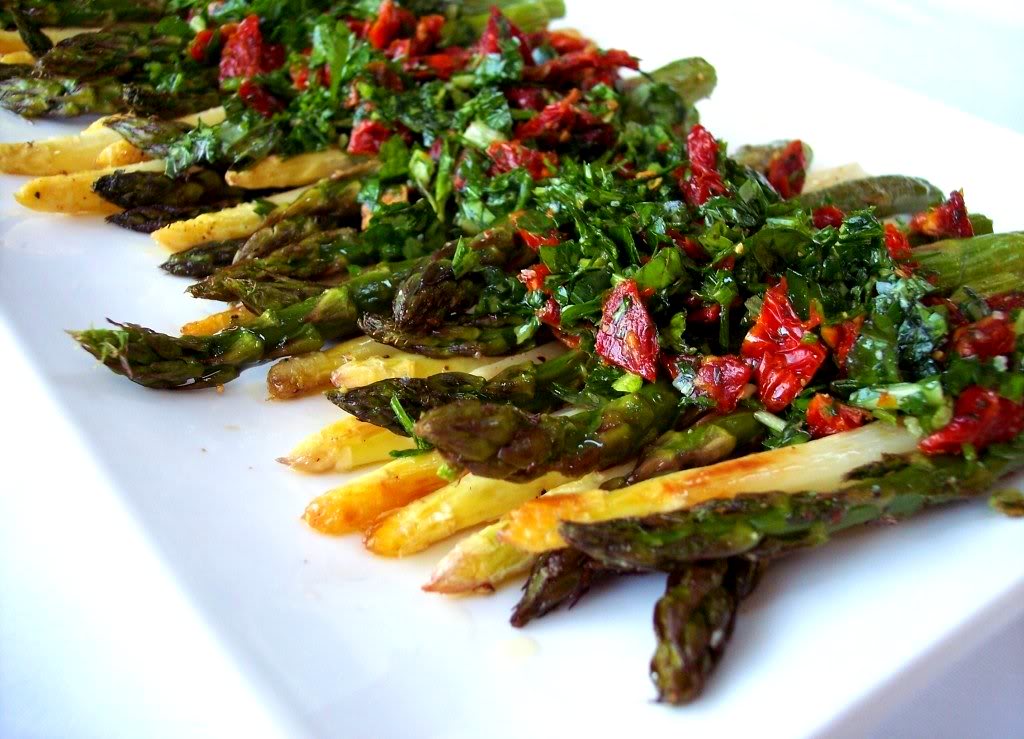
Roasted Asparagus with Sun-Dried Tomato Gremolata

In a food processor add 6 sun-dried tomatoes marinated in oil, 2 cups of parsley, 1 cup of basil, 1 clove of garlic.

Pulse til desired chunkiness. Sprinkle over your roasted asparagus. Great with cauliflower too!

Creamy Asparagus Soup

This is the perfect soup for springtime , I found this recipe while visiting Deb’s blog last Sunday, she just raved about how good it was and said it was a winner three times over. Fortunately I had everything I needed to make this and whipped it up in no time, it took less than 30 minutes. We loved it, very healthy and low fat, I just used a dash of milk at the end to “cream it up” a bit. Oh, and it has secret ingredients that make it extra special. Go check out the recipe here.
Buon Appetito!
Signature

Braised Artichokes

I know spring is here because I see artichokes popping up all over in the stores. Artichokes happen to be one of my top 5 vegetables that I couldn’t live without! So with that being said, whenever I see them cooked a different way or a new recipe I haven’t tried, I’m all over it!

Such is the case with braising artichokes, would you believe I’ve never actually braised an artichoke before?
I’ve stuffed many in my lifetime with various fillings, I couldn’t put a number on it.

I’ve fried them (don’t do that anymore), grilled them ( so good ), put them in everything you can imagine, salads, omelette’s, quiche, dips, bruschetta, crostini, hummus, salsa, pasta dishes, risotto, pizzas, soup, added alongside meat dishes, marinated, frozen or fresh it doesn’t matter!

I came across this recipe from the book Salt to Taste, and I’m so glad I did, this will now become part of my beloved artichoke repertoire. Great for a buffet or an antipasto table, it tastes best when slightly warm or at room temperature. I used fresh artichokes for this recipe so it took a little time to cut them in quarters and to prep them, but oh so worth it. I don’t see any reason why you couldn’t use frozen instead, I would not recommend marinated.

Here’s the fabulous recipe:
Adapted from Salt to Taste
4 large artichokes quartered with choke out and rubbed with lemon, tender leaves only
2 lemons
1/2 cup of extra virgin olive oil
3 sliced garlic cloves
3 small whole red pepperoncini, or less if you like
1 T. of dried oregano
1 large onion, thick slices
2 small rosemary sprigs
1/4 cup white wine
1/2 T of white wine vinegar, I used fresh lemon juice instead
1/4 cup of chicken broth
Salt and cracked black pepper

After your artichokes are prepped and ready to go, place oil, garlic, pepperoncini and oregano on low in a large deep skillet. Gently warm til garlic is soft about 5 minutes. Add onion, rosemary and cook over low heat until onion is soft. Add wine, vinegar or lemon juice and broth. Bring it to a boil then reduce to a simmer, add the artichokes and cook til tender. Allow to cool, serve warm or room temperature.

The flavors all blend together perfectly and you get a hint of spicy because you never cut the pepperoncini open, you could just place them in at the end the heat will slightly seep out. Garnish with lemon slices.

Imagine this with some good crusty bread for dipping the juice, some imported cheese like provolone, olives and some Italian deli meats, heaven!

Have a great weekend and Buon Appetito!

Signature

Cooking Demo ala Timpano

For the past week I’ve had a knock down dragged out viral infection that kept me from cooking in the kitchen or anything else. I’m happy to say I feel so much better now, and after living on soup for a week I’m excited to eat something different.

I’ll be back in my kitchen tomarrow, but for now I wanted to leave you with a visual of a cooking class/demo I did for the Italian/ American club that I’m a member of. I demonstrated making a Timpano like the original one from the movie “Big Night” with Stanley Tucci.

If you’re not familiar with a Timpano or never heard of it before, it’s a drum of pasta, 3 pounds to be exact, homemade mini meatballs, sauce, provolone and romano cheese, hard boiled eggs and salami that’s all incased in a pasta dough and baked in a very special pan. Perfect for large crowds and big parties. We had 23 people in attendence and each had a generous slice for tasting, many came back for seconds. When I first started my blog in 2007 I did a whole post on it which goes into a little more detail. Click here to view.

See you soon!

Signature

Frittata? or Strata

Either one you choose would be a great option for breakfast, brunch or even a dinner. I love frittatas because the variations are endless and they’re cooked up and on the table in no time.

A simple zucchini and onion frittata has graced our table many times. Mix your eggs with a little bit of milk, grated romano cheese, fresh basil, parsley salt and pepper. Pour over your sauteed zucchini and onions, when your egg mixture starts to set, place the whole pan under the broiler until cooked through and golden in color. Invert onto a platter, garnish with fresh basil. Served along side a nice green salad and a bowl of fresh fruit, it’s a wonderful light brunch or dinner!

The thing I like about stratas is you can assemble all the ingredients the night before, then in the morning all you have to do is pull it out of your frig and pop it in the oven! This is a savory egg dish that easily adapts to many different vegetables and cheeses.

Portobello and Asparagus Strata
Adapted from the Whole Foods website
Ingredients
1 tablespoon extra virgin olive oil
1 1/2 cups chopped yellow onion, 1/4 teaspoon dried thyme 3 cloves garlic, finely chopped, 1 (8-ounce) package Baby Bella mushrooms, thinly sliced.
1/2 pound asparagus, trimmed and cut into 1-inch lengths, 1 teaspoon salt, 8 eggs, 1 cup milk, 1/2 cup grated parmesan, 2 tablespoons Dijon mustard, 3 tablespoons chopped parsley, Black pepper to taste, 5 cups (1-inch) cubes sourdough bread, 4 ounces herb or plain goat cheese crumbled, feta, or in my case I used fontina.
Here’s what you do:

Heat oil in a large skillet over medium heat. Add onions and thyme and cook until softened, about 4 minutes. Add garlic, mushrooms, asparagus and 1/2 teaspoon of the salt and cook 5 more minutes longer. Set aside. Meanwhile, whisk together eggs, grated cheese, milk, mustard, parsley, pepper and remaining 1/2 teaspoon salt in a large bowl. Set aside. Spread half of the bread over the bottom of a lightly greased 9-x13-inch baking dish. Top with half of the mushroom mixture and a third of the goat cheese. Layer with remaining bread and mushroom mixture, and pour egg mixture evenly over the top. Cover strata and chill overnight. Preheat oven to 375°F. Remove strata from refrigerator and bring to room temperature while the oven heats. Sprinkle remaining two-thirds cheese over the top and bake until firm in the center and golden brown on top, about 45 minutes. Let rest 10 minutes before serving.
Buon Appetito!
Signature

Smashed Peas with Ricotta Toasts

I came across this fantastic recipe the other day while I was sitting in the waiting room of my husbands Chiropractor. I picked up the February issue of Better Homes and Garden and while flipping through it, I found this and I instantly knew I was going to make it.

For a split second I thought about silently ripping the page out, but then that wouldn’t be very nice, so I started fishing through my purse but couldn’t find a pen, so I finally just asked the office girl if she would kindly make a copy for me and she did, I was happy!

It’s hard to explain how good this is, but think fresh lemon juice, sauteed garlic, fresh mint and cracked pepper swirled into a puree of peas and edamame flavored with salt and a healthy drizzle of olive oil, but then the best thing is, you take it and smear it on top of a baguette slice that was slathered with ricotta and toasted under the broiler! Oh my, it’s addicting!
This is such a great appetizer, it makes a ton and it’s really healthy, no mayonnaise, sour cream or cream cheese to make you feel guilty about eating it.

The thinly shaved garlic is a must as well as the coarsely cracked pepper, that along with the lemon and mint make a wonderful flavor combination.

Here’s the recipe:
Adapted from BHG February 2010 issue
1 16oz. pkg, frozen peas
1 12oz. pkg frozen or precooked and shelled edamame
1 T olive oil
4 cloves thinly sliced garlic
2 T lemon juice
1 to 2 tsp. freshly cracked pepper
kosher salt to taste
1/4 cup snipped fresh mint
1/2 lb.of sliced baguette
1 cup ricotta cheese
Extra olive oil for drizzling
1. In a large pot cook peas and edamame for 5 minutes in a small amount of boiling water. Drain, transfer to food processor and puree.
2. In a small skillet with olive oil, add garlic and cook till tender. Stir into pureed peas along with the lemon, pepper, salt and mint.
3. Meanwhile, for ricotta toasts, spread baguette slices with ricotta cheese, arrange on a baking sheet and broil until ricotta is warm and bread is toasted. Sprinkle with salt and cracked pepper.
4. Before serving drizzle pea mixture with olive oil and additional cracked black pepper.

Buon Appetito!
Signature

Sunday Roast Chicken and Winter Sides

Sunday is a good day to roast a chicken, the smell permeates the air and all is good. There are virtually thousands of ways to roast a chicken and we all have our favorites, mine will always consist of fresh herbs like thyme and rosemary, lemon, and roasted heads of garlic, the sweet garlicy pulp gets smeared all over your chicken or you can use it in your pan gravy, amazing!
But no matter how you cook up your chicken, your going to need some sides to go along with it.
The following are some sides I made throughout the fall and winter but never posted, they’re great not only with chicken but with any cut of meat. Some I saw in a magazine and tried, and some my own, either way you’ll love the taste!

Green Beans and Walnuts with Lemon Vinaigrette. Whisk together 2 tablespoons of shallots, 1 tablespoon of Dijon mustard, 1/3 cup of olive oil and the juice of one lemon. Pour over 1 pound of cooked green beans that are still warm, season with salt and freshly ground pepper. Garnish with 2/3 cup of coarsely chopped toasted walnuts and lemon zest.

Thyme Roasted Apples and Onions with Cider Glaze. Reduced down apple cider makes a syrupy sweet glaze that flavors and coats the apples and onions perfectly, this goes great with pork!
This can be done a day ahead. Boil and reduce 4 cups of apple cider for around 1/2 an hour, then whisk in 5 tablespoons of butter, and 1 teaspoon of salt.

Toss apples and onions in a bowl along with fresh thyme and some of the glaze, place in a shallow baking dish and roast at 425F. The last 10 minutes of roasting raise the temperature to 475F, pour the rest of the glaze all over, add more thyme, cook till fork tender but not mushy.

Fontina Stuffed Sweet Red Peppers. I don’t know the proper name of these peppers, but they are very thin fleshed and really long, like 5 or 6 inches. I love them and they make a quick side dish for chicken or pork cutlets or any type of grilled meat, and they look pretty too! Carefully cut the pepper lengthwise, take out the seeds, place on a baking sheet and roast at 400F until slightly tender, they don’t take very long to cook. Remove from oven and place your fontina cheese inside, back in the oven till melted. Garnish with sliced kalamata olives and fresh chopped parsley.

Enjoy your weekend!
Buon Appetito

Signature

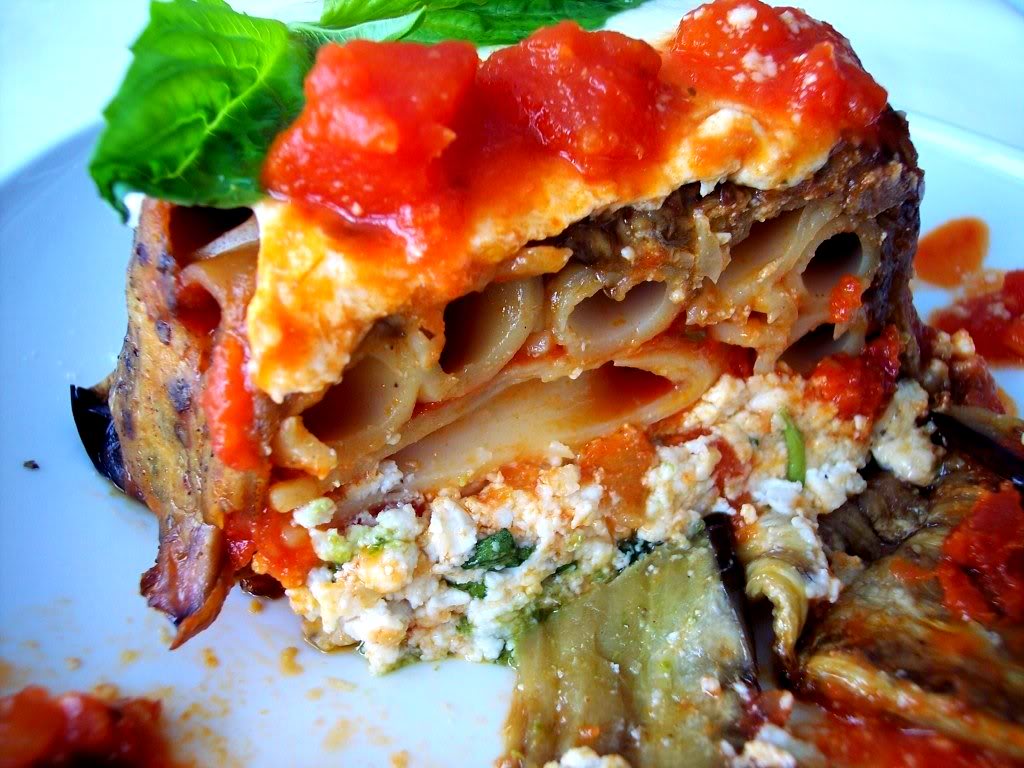
Mini Ricotta, Eggplant and Pasta Timbales

Want to fancy up that one lonely eggplant you have left? Do you have a tiny bit of ricotta sitting in your frig, a little leftover pasta and sauce? If you do, you can make these individual mini timbales.

They look so special when they’re unmolded that those you serve them to will think you spent all day in the kitchen, I won’t tell!

I also like them because they’re portion controlled, something I’ve been really getting in to lately, just serve with a salad and some crusty bread and your meal is complete!
I used one large eggplant for 4 ramekins, or you could use two smaller ones. The eggplant was cut 1/4 of an inch thick and preroasted in a 4o0F oven.
Next, you’ll want to rub some olive oil in your ramekins then line the base and the sides with the eggplant. Start layering your pasta, sauce, and ricotta mixture of chopped basil and parmesan, pressing down firmly as you go. I topped mine off with a dollop of basil pesto and then closed it all up by folding over your hanging eggplant.

Bake for 15 minutes at 350F, or until heated through. Let it sit for 5 minutes, unmold.
I then put a slice of fresh mozzarella on top of the timbale, placed it on a baking sheet, and stuck it under the broiler until it melt. Serve topped off with more sauce and grated cheese!

Enjoy and Buon Appetito!
Signature

Pesto Fish Roll-Ups and a Clafoutis

I try to make fish at least once a week, it’s quick, healthy and light. This fast preparation is great for mid week, it couldn’t be easier to make, and you’ll love the simple flavor combinations. Make sure you use fillets about 1/2 inch thick, you could use sole, flounder, tilapia, or as in this case I used a pacific cod.

Spread one side of each fillet with a generous amount of basil pesto. Sprinkle each with shredded carrot. Roll up starting on the short side. Secure with toothpicks. Place seam side down in a baking dish. Toss together plain panko bread crumbs, grated lemon peel, finely minced garlic, salt and pepper, and brown until crispy in a small saute pan that was drizzled with olive oil. Sprinkle crumb mixture on top of fish rolls and another quick drizzle of olive oil. Bake 375F oven for 20 to 25 minutes or till fish flakes easily with a fork.

This can be served along with rice, a pasta with lemon sauce, or just a nice green salad.

Now that you have dinner covered, how about a Pear, Apple and Fig Clafoutis for dessert? Simple to put together because the batter is made with your food processor, takes seconds to whizz up!

A clafoutis is basically a custard rustic style baked dessert that traditionally has cherries in it, but really any fruit or berry will do, I even put a few dried figs in mine and that worked well also.

In food processor add; 1/2 cup flour, 1/2 cupsugar, 3T of ground almonds, a pinch of salt, 4 eggs, 1 1/2 cups of milk, (not skim) 1T vanilla, grated orange and lemon zest. Whizz everything together, then set bowl in frig while you’re cutting up some peeled and thinly sliced fruit of your choice, or whole berries.

Lightly butter a medium sized cast iron pan or bakewear of your choice. Pour 1/4 inch layer of batter in pan and place in a 350F oven until the batter sets. Pull out of oven, then layer all your fruit on top of that and pour remaining batter all over. Bake around 40 to 45 minutes. Dust with powdered sugar and serve immediately!

Enjoy and Buon Appetito!

Signature

Mini Cracked Egg Pizza

You know the old saying, ” Don’t knock it until you try it”, well all I can say is this, if you haven’t eaten a pizza with a cooked egg on top, you’re missing out! I know it may sound a little weird, but believe me it’s amazing!
Crunchy dough and savory tomatoes anchor one perfectly cracked organic egg along with toppings of smoked ham, fresh spinach, green onions and mozzarella cheese. A complete breakfast all in one, and because they’re mini, you can tailor the toppings to every one’s individual likings.

Wouldn’t this be great to serve to your special Valentine on Sunday morning? You still have time. You can make your own homemade dough or pick up some up from your favorite store or pizza place.
Before you begin though, make sure your dough is at room temperature. Get your oven nice and hot, at least 500F. Rub olive oil on your baking sheet and dust with polenta or cornmeal.
For the heart, take your time and shape it by hand, remember these are mini’s, but make sure you have enough room for the egg white to travel once it’s placed on top.
I like to precook my dough for 5 minutes before anything goes on top, this will also set the shape of the heart or any other shape for that matter.
Crack your egg into a small bowl before it goes on the pizza, you’ll have more control, then add whatever toppings you like. Bake until dough is crispy and eggs are cooked through. Now don’t you want to just stick your fork in that yoke and let it all ooze out?
Happy V-Day, and Buon Appetito!
Signature

Frizzelle

Frizzelle, I haven’t had them in years until a week ago when my friend Jean brought a platter full to our monthly Bunco get together. She stirred up so many good memories eating these as kids, and we all wondered why we stopped buying them! After one bite, I couldn’t wait to go out and get a bag!
Frizelle, sometimes spelled Friselle, are crispy Italian circular breads that have a hole in the center, it’s baked once, then cut in half, then rebaked on a very low temperature until completly dried and super crispy.
You can find Frizzelle usually at any good Italian market or bakery, they’re stacked in a bag, they come in whole wheat or white, small or large size, and they’re very inexpensive!

With just a few store bought ingredients you have the makings for a wonderful snack. This is what I made for Super Bowl Sunday, the husband was very happy!
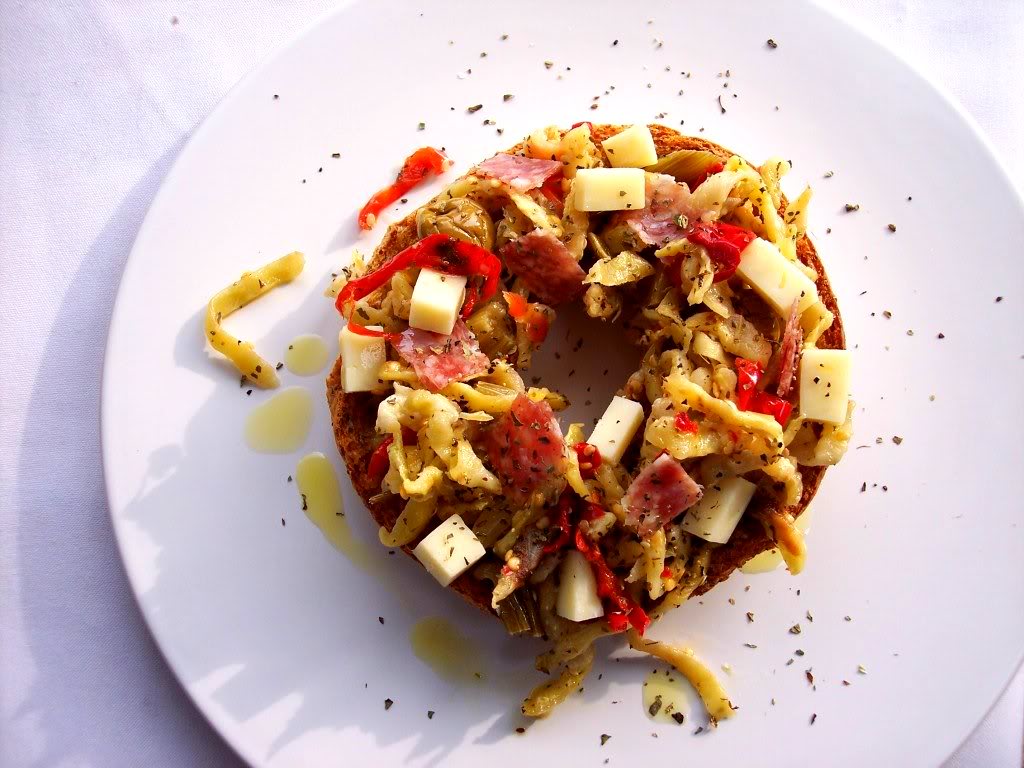
I ran over to my nearest Italian market and bought a bag of the smaller whole wheat ones, a jar of eggplant salad, which has sliced eggplant marinated in oil and spices, along with roasted red peppers, celery, capers, and smashed green olives, all in one jar, so good! a chunk of good aged fontinella cheese, provolone is just as good, and thinly sliced salami which I diced up when I got home.


Because they’re very crisp, many people like to sprinkle a little water over the top to soften them up. I never do that for mine, I like the crunch! Besides all your toppings soften them up anyway, but that’s just me.

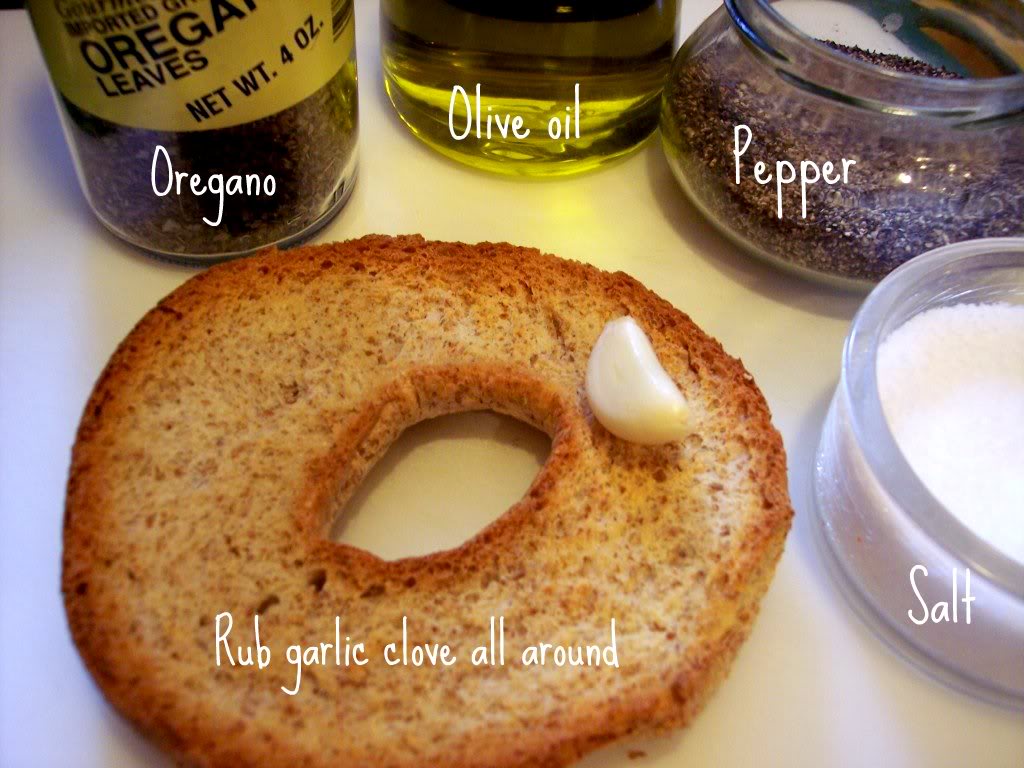
The key thing to do, I mean you have to do this, is take a raw garlic clove and rub it all over, the garlic flavor will fall between the crunchy grooves. Now drizzle olive oil on top of that, a little salt, black pepper, and another key ingredient is dried oregano, shake it all over!

See how everything soaks in? It’s even good to eat it just like this adding a little red wine vinegar drizzled on top.

But it’s much better like this, trust me!
I like to drain my eggplant salad, you don’t need all that oil, you’ve already prepped your bread with your good olive oil.
Play around and experiment with your favorite toppings, how about a ripe tomato salad spooned on top? It’s great to have a bag handy in your pantry when someone pops over for a visit. Quick, easy and so good!
Now go out and try to find these, you’ll be happy you did!
Buon Appetito!

Signature

Winter Risotto

In case you missed it the other day, Punxsutawney Phil saw his shadow, so according to him we still have 6 more weeks of winter, which means you still have plenty of time to make this warm and earthy risotto.

Any type of winter squash could be used in this recipe such as acorn, pumpkin, delicata and even sweet potatoes, but as I mentioned in my previous post I told you how much I adored butternut squash, so now pair that with spinach and earthy crimini mushrooms and you have the makings of a wonderful and hearty risotto!

I like to have my squash roasted and ready beforehand and towards the end of cooking the risotto I just toss it all in along with sliced mushrooms and fresh torn spinach. Kale would be good as well if you want to replace the spinach.

This easily could be a one pot meal or served as an individual side. Risotto is so easy to mold, while it’s warm it takes on the shape of whatever you place it in, whether it’s a tiny bowl or ramekin, I’ve even used a spring form pan to mold a whole pot of risotto, after it cools slightly you can release the spring and then cut it into wedges.

Here’s the ingredients:

1 1/2 cups of Arborio rice*** 4 cups of chicken or veggie stock, simmering hot on stove*** 2 cloves of minced garlic***1/2 of chopped onion***fresh thyme*** 1/2 cup white wine*** 3 cups of roasted medium diced butternut squash***1 1/2 cups of sliced crimini mushrooms*** 1 large handful of fresh torn baby spinach*** 1/2 cup of grated Parmesan cheese.

Here’s what you do:

In a heavy pot on medium heat, drizzle bottom with olive oil and 1 T of butter, toss in the onion and garlic and saute. Next toss in the rice and season with fresh thyme, salt and pepper, cook rice until you see a light golden color. De glaze with the wine, letting it cook down.

By ladle fulls, start adding stock stirring until it’s absorbed into the rice, keep adding stock and stirring. Towards the end, add in your squash, mushrooms and spinach, gently stirring until all stock is gone. Turn of the heat, toss in your cheese, and a little drizzle more of the olive oil. Taste for salt and pepper.

Enjoy and Buon Appetito!

Signature

Individual " Lighter" Chicken Pot Pies

Winter just wouldn’t be complete if I didn’t make at least one pot pie, lately I tend to shy away from them because normally they’re not the most healthy thing to eat, but this version is not only portion controlled but the sauce is made from a rue whisked with chicken broth infused with garlic and fresh thyme, and yes, there’s a piece of puff pastry on top but it was cut out with a small cookie cutter, so how bad can that be?

I can’t stress enough how absolutely delicious this combination of roasted chicken, roasted butternut squash and fresh chopped spinach is. Spinach and butternut squash is a match made in heaven, I’ve been making so many meals lately from those two ingredients, in fact my next post will be a lovely risotto minus the chicken, replaced with hearty crimini mushrooms. So good!
This recipe filled three 5″ ramekins, and I only used one large chicken breast for all three. I served my pot pies along side a salad of mixed baby greens, it all went perfect together.
Wouldn’t this be cute for a cozy little Valentine dinner, besides, you’d have plenty of room left for a decadent dessert!
Here’s the ingredients:
1. A previously roasted chicken breast, I seasoned mine with a drizzle of olive oil, thyme, salt and pepper.
2. A previously cut up and roasted butternut squash that was drizzled with olive oil, salt and pepper. You’ll have leftovers, but that’s a good thing, that’s what I made my risotto with!
3. A huge handful of fresh spinach, coarsely chopped.
4. Onion, garlic, fresh thyme.
5. Grated Parmesan cheese.
6. Puff pastry sheet defrosted, and shapes cut out with a cookie cutter.
Here’s what you do:
In a saucepan melt 1 tablespoon of butter and saute 2 minced garlic cloves and 1/2 of a small red onion.
Stir in 2 tablespoons of flour, season with salt and pepper and then whisk in a good 2 cups of chicken broth, maybe a teenie more, also add some fresh thyme, and a generous handful of grated cheese.
Note* If you want the sauce to look creamier stir in a tablespoon of milk or half and half, but you really don’t need it!

When the sauce thickens, turn off the stove and throw in your chicken, squash and chopped spinach. Scoop ladles full into your buttered ramekins and place your puff pastry cut out on top of filling, ( brush a little milk or cream on top to help get it golden brown).
Bake in a 400F. oven untill brown and bubbly, 15 to 20 minutes.
Hope you enjoy!
Buon Appetito!
Signature

Ricotta Dumplings in Broth

It’s still winter out there, in fact as I write this I’m looking at snowflakes falling. To me, there’s nothing like a bowl of hot steamy soup to warm me up, and this one fits the bill. Not only is it quick to make, providing you have all the ingredients, but it’s also very healthy and light, there’s not one bit of flour in these dumplings!

Cheesy ricotta dumplings flavored with fresh parsley, parmesan cheese and a hint of garlic bathing in a bowl of broth, doesn’t that sound good? You can even use a veggie broth if you like, and maybe even add a few fresh spinach leaves right into your bowl for extra color and flavor.

Heres the recipe:
Adapted from a 1998 La Cucina Italiana magazine
1 pound ricotta
3 cloves of minced garlic
Italian parsley minced
1 cup bread crumbs
7 ounces of freshly grated Parmigiano Reggiano
2 eggs
12 cups of good chicken broth, homemade or store bought, plus extra for cooking dumplings in.

Combine the first 6 ingredients into a bowl, make sure everything is incorporated. Roll spoonfuls of the mixture into cherry tomato sized balls, set aside. This recipe gives you at least 24 to 30 ricotta balls.

These little dumplings tend to puff up so try not to overcrowd them like I did in the photo above, otherwise they might hit each other and break up a bit. Simmer slowly in some of the extra hot broth until they’re cooked through. They rise to the top and double in size when they’re done.
The reason I like to cook my dumplings first separately in some of the extra broth, is because in case a dumpling breaks, or tiny pieces of dumpling break off it won’t cloud up all your broth, I think it just looks visually better that way.
Then carefully take them out with a slotted spoon, place as many cooked dumplings you want in their individual bowls and ladle some of the existing 12 cups of broth you have preserved, so the 12 cups should be enough to cover the 24-30 dumplings you will make, and you’ll need at least an extra 4 cups to pre-cook your dumplings in.
Enjoy and Buon Appetito!
Signature

Neck Bones and Gravy

A big pot of neck bones simmering on the stove is comfort food for my husband. I usually make this for him about once a year, sometimes with pasta, or sometimes just with string beans.

Neck bones to us is like Italian soul food, not fancy by any means, but gives you a warm and fuzzy feeling every time you eat them as you recall memories and smells of your childhood.

This is truely recession food, cheap eats that cost only a few bucks and feeds many.

Having run 6 miles that morning my husband justified the meal that was to come. He quickly called his brother and invited him over for dinner who became giddy with excitement. I cooked up some bucatini, made a salad, and warmed up some nice crusty bread.

No fancy china here, just two brothers sharing a meal together recalling memories of their mom.

The table wouldn’t be complete without a bowl for the picked over bones. You can get my family recipe here, but warning, you might need to wear a bib!

Of course there’s always room for dessert, and if you haven’t tried
Gina De Palma’s Ricotta Pound Cake you’re missing out. I’ve made this several times and it’s always a hit.
Buon Appetito
Signature

An Interview with Mary Ann Esposito of Ciao Italia

For many years I’ve enjoyed watching Mary Ann Esposito on public television, whether she was cooking in her studio or taking her show on the road to Italy, I always admired her down to earth no fuss approach to cooking. Mary Ann consistantly proves that with just a few quality ingredients we can all prepare delicious Italian cuisine at home with out difficulty.

Mary Ann Esposito is the author of Ciao Italia Five Ingredient Favorite: Quick and Delicious Recipes from an Italian Kitchen, and the creator and host of the long running PBS series Ciao Italia, celebrating it’s 20th anniversary in 2010. She is also the author of eleven other successful cookbooks, including Ciao Italia Slow and Easy and Ciao Italia Pronto!

Her new book draws on the Italian culinary tradition of simplicity. Her recipes are quick, easy, and economical without sacrificing any flavor!

Recently Proud Italian Cook, ( that would be me) was given the opportunity to ask Mary Ann a few questions, hope you enjoy!

Can you share with us some of the food highlights that you and your family enjoyed together over the holiday season?

Every year I begin making cookies on Oct 12, the traditional Columbus Day; by Christmas I have MANY different kinds that are wrapped and given out to friends and strangers as well. I also make the traditional panettone bread that we serve on Christmas morning and we make over 500 ravioli between Thanksgiving and Christmas to serve as the first course on Christmas day. For Christmas Eve, I always do a buffet spread.

This year you’re celebrating 20 years of hosting your PBS series Ciao Italia, what has been the key to your success?

Approachabillity and connection with the audience and drawing them in by making food that is doable, authentic and good.

Can you walk us through a typical day in the life of Mary ann Esposito from start to finish?

Exercise early in the morning, eat a good breakfast, work in office on email and on shows coming up, film segments of the series, do voice overs, make personal appearences, (not every day), Spend time on writing next book, blogs, articles for magazines, etc. Prepare dinner; spend time with husband.

Who influenced you the most, early on in your career?

My mother, a dietician and two native born Italian grandmothers both in the food business. They were three wise and wonderful women who cooked extremely well.

What do you consider as your defining moment professionally?

The first airing of the series Ciao Italia on national public television

What is your absolute favorite comfort food?

Ice cream

Name some ingredients that you can’t live without.

Parmigiano Reggiano cheese, extra virgin olive oil, pasta, pancetta, garlic, lemons, and gutsy red wine.

What is the motto or advice that you try to live by?

Don’t settle for mediocrity in anything you do!

Flipping through her new book I instantly saw one recipe I wanted to try, Mary Ann’s,”Cotolette di Maiale al Pistacchio” which translates as “Pistacchio-Dusted Pork Chops“. I love pistacchios, and paired with the earthy flavor of fresh rosemary sounded like a perfect match to use together as a coating for chops. I got all my ingredients together and in no time it was on the table! The chops were crispy with an amazing flavor.
Ingredients are:

2 large eggs
1/4 cup of finely minced fresh rosemary leaves
Fine sea salt
Fresh ground black pepper
4 bone-in pork chops
1 cup of natural pistacchio nuts, shelled, ground to a powder. I used my food processor for this.
Olive oil

Preheat the oven to 350 F.
Lightly beat the eggs in a bowl with the rosemary, salt, and grinding of black pepper.
Dip each chop then coat with the pistacchio dust and set aside.
Heat the olive oil in a stovetop-to-oven saute pan large enough to hold the chops without crowding them. I used my heavy cast iron skillet above.
Brown the chops on both sides, then slide the pan into your oven and bake until internal temperature reaches 160 F.

* Note*: Don’t be in a hurry to brown the chops, allow them to cook sufficiently on one side before flipping them over.
They’re ready to turn when the outer edges begin to brown.

Buon Appetito!

Visit the official website of Ciao Italia with Mary Ann Esposito here, and also The Ciao Italia blog here.

Signature

Keeping Up the Detox

I’m still on my healthy eating quest, eating soups and salads for over a week now. I think I used up every single vegetable in my house except for a bunch of peppers I still had. I finally feel detoxed!

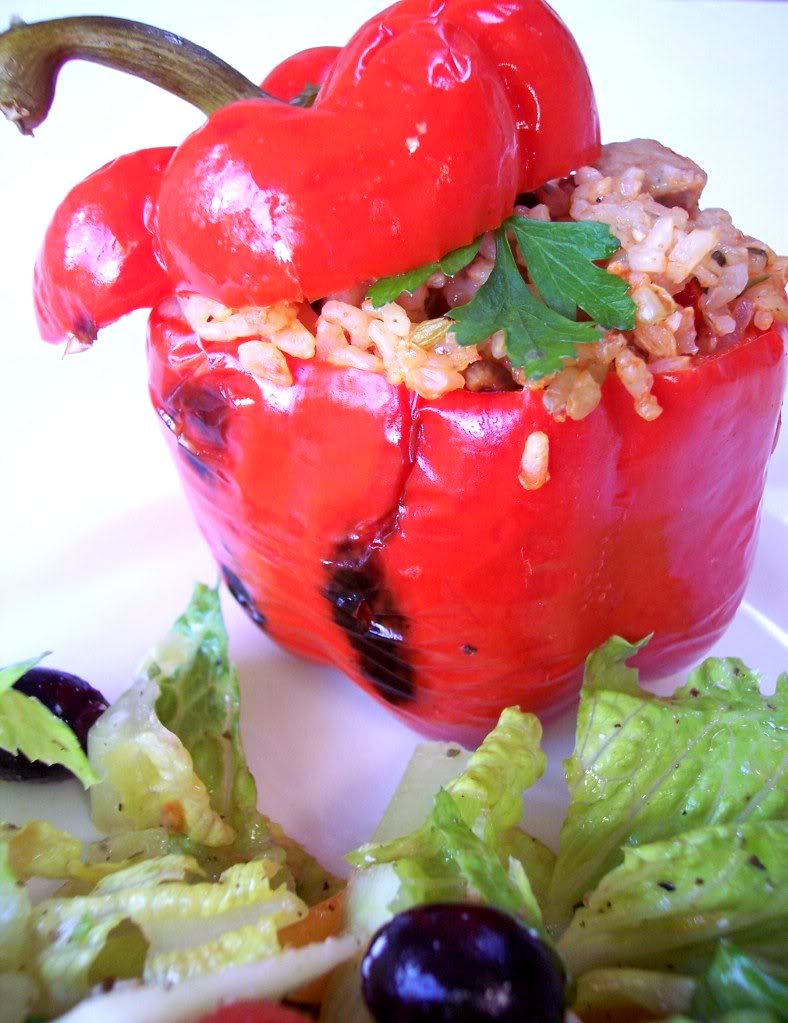
I have my husband detoxing along with me, and fortunately for me he will eat anything I put before him so having a Stuffed Pepper for dinner was just fine with him.

I had some leftover cooked brown rice that I sauteed up with onion and garlic, added a dollop of leftover marinara, parmesan cheese, fresh parsley and basil. I also added and sliced up a spicy chicken sausage link that I had, and then stuffed it all into a red peppers that were cored and precooked on my indoor grill. Place your stuffed peppers in a casserole dish, drizzle with olive oil, sprinkle with more cheese and bake at 375degrees until peppers are knife tender. Serve with your favorite Italian salad of course!

It’s very cold here today, I feel like I’m in the artic! More snow is due tonight, Gee I hope their wrong!

I had a little kitchen helper today, I propped her right on my counter in her Bumbo chair and she watched me the whole time I was cooking. I think she liked all the colors. We had a nice conversation about how good vegetables are for you!

This is a delicious and hearty Barley Salad that I made for lunch today, very healthy and good for you. . Cook your barley according to directions then let it cool. In the meantime, roast in a 450 degree oven, red, green and yellow peppers along with red onion, chopped eggplant and cook until caramelized and tender. When cooled add to barley along with garbanzo beans, sliced green or kalamata olives, fresh chopped parsley and basil, and a sprinkling of toasted pine nuts.
The Homemade Dressing is made by whisking up 1 cup of olive oil, 1/4 cup of red wine vinegar, the juice of 1/2 of a lemon, a teaspoon of Dijon, 1 minced garlic clove, salt, pepper and dried oregano. I only used a couple of tablespoons, you’ll have plenty leftover for other salads, just place in a jar and refrigerate!
Buon Appetito!
Signature

Nibbles for your New Year’s Eve Party!

As 2010 quickly approaches, I want to wish everyone of you a Very Healthy and Happy New Year!
A good friend of mine says “health is wealth” and that is so true and most important, but I can’t help wishing for just a little prosperity to go along with it!

Just a few ideas in case you want to add some other things to your New Year’s Eve table. I know its cold, but pull out your grill pan and grill up some eggplant slices, all your grilling can be done the night before. There’s still time!

Layer each slice with some roasted red pepper, a mixture of feta and herbed cream cheese, you can even use goat cheese if you like, top each slice with spinach or arugula, and then just roll them up and stick a skewer in each one.

A little drizzle of olive oil over the top, and you have a delicious combination!

Keep your grill pan out and make some Spiedini Di Mozzarella. Take 3 slices of a good quality country loaf or sourdough bread, brush each slice with olive oil, stack them on top of each other and place a slice of fresh mozzarella between each layer. Now cut the stack into quarters, and into each quarter stick one rosemary sprig. Grill until the bread is toasted and the cheese melts. Serve with your favorite pesto for dipping.

You can’t go wrong with Portobella Pizzas either! After cleaning and scraping out the gills of each mushroom, place them for 5 minutes on each side under your broiler until they become tender. Then fill them with whatever you like, I used Italian sausage that was already browned, and tomatoes. Top them with some fresh mozzarella and place back under the broiler a couple of minutes until the cheese turns golden brown. Vegetarian options are just as delicious, you can even quarter them and also serve with skewers.

Have a safe holiday and see you all next year!

Signature

I’ll Be Detoxing Until 2010!

I thought I’d leave you with a little visual of why I’ll be eating nothing but salads all week.
My refrigerator is stocked with all kinds of veggies and various forms of greens.

And these are some of the reasons why!

And it was all repeated the next day with the leftovers!


I won’t even mention the desserts and cookies!
See you all soon.

Signature

Ravioli with Artichokes, Sun Dried Tomatoes and Peas in a Champagne Cream Sauce

Making homemade ravioli each holiday season has always been a tradition in my family. I remember when my kids were young, mixing and rolling the dough by hand, and one by one placing hundreds of meat and cheese filled ravioli on a special white floured sheet that I laid across my bed. I can’t say they looked real uniform, as some were square and some came out rectangled, but they all were a labor of love.

Fast forward to now, and we have the convenience of food processors to help mix up the dough in seconds and ravioli forms to make them look picture perfect, and now I would never think of rolling the dough by hand without a pasta machine!

We still keep our family tradition going, but now we have a lot more hands to help in the process, and it becomes a day we all look forward to, usually we try to get them done before Thanksgiving. I wrote a previous post on our ravioli extravaganza last year here.
Here’s a couple of photos from this year. I love how the pasta machine gets the dough nice and thin.
My oldest Granddaughter is now part of the tradition, and before we know it our new little one will be joining in on the fun.

We even tried making whole wheat dough for the first time, it’s a little tougher to work with and a little harder to crank through the machine, but they tasted great!Back to the recipe. Normally we eat our ravioli with a basil and garlic flavored marinara sauce, but for a elegant way of serving them you have to try my roasted garlic champagne cream sauce. It’s not something you have everyday, but for a special occasion it’s the perfect dish, and besides you’ll have plenty of leftover champagne to sip while your eating. Don’t worry, you certainly don’t have to make your own homemade ravioli for this, you can use any good store bought kind that you like.


The sauce is simply made by sauteing 1/2 of an onion with 4 cloves of roasted garlic in some olive oil. Pop open your champagne and add in 1 1/2 cups. Cook until it reduces down then whisk in 1 1/2 cups of heavy cream. Simmer until it all thickens together.


While the ravioli are cooking, in a large saute pan add some frozen artichoke hearts, sun dried tomatoes and peas with a little olive oil. Add in your champagne sauce then add in the cooked raviolis, season with black pepper. Garnish with parsley and grated parmesan. The flavors are wonderful together.

On a side note!

I’ve been busy making pasta. The other day I decided I was going to make a bunch and give it out to a few of my friends for gifts.

I did this late at night.

Alone in my kitchen.

It was fun!

Happy Holidays to all my dear readers and friends out there! I know you’ll all be doing some good eating!

Signature

Savoy Cabbage, Sauteed and Stuffed

This side dish of savoy cabbage is one I’ve been making for as long as I can remember, it’s my absolute favorite way to eat cabbage. Simple, rustic, quick and easy, but the taste is phenomenal!
You start off toasting up some bread crumbs in olive oil in a small skillet, then you add in a generous amount of grated Grana Padana Parmigiano cheese, fresh parsley, salt, pepper, then set this all aside.

Meanwhile, take a larger skillet, drizzle in some olive oil, toss in minced garlic and sliced sweet onions, add in your partially precooked and sliced up savoy cabbage, keep tossing until tender and soft, then sprinkle in your toasted breadcrumb mixture, drizzle with more olive oil, and add more parsley. That’s it! This goes especially well with an herb roasted pork loin.
I love the mild sweet flavor of savoy cabbage, and just look at those vitamin enriched crinkled leaves. Did you know it’s considered one of the best for eating?

Not only good as a side dish, but equally delicious as a main course. I like to stuff mine Italian style and top it off with a spicy arrabiata sauce.

To remove the leaves, take the whole head, cut off the stem, turn it upside down in a pot of boiling water, cover it and cook for 10 minutes. Take the whole head out and let the steam continue cooking it until it cools down so you can touch it, then start to peel off the leaves, cutting the hard core off each one.

I decided to go healthy here and used cooked brown rice along with ground turkey that I had browned beforehand, adding in of course garlic and onion.

Fresh parsley was then added to the turkey rice mixture, along with fresh snipped basil, salt, pepper and grated Grana Padana cheese. I also spooned in in some of my arrabiata sauce to make the mixture a little juicy. Place a good size scoop on your presteamed leaves that have been cored, and place a couple cubes of fontinella cheese on top, provolone would work also. Of course you can use ground beef, white rice, or any red sauce that you like in place of what I used for this recipe.
Place your rolls in a greased casserole dish with sauce spread on bottom, place more sauce on top of your rolls, along with grated cheese and a drizzle more of olive oil. Bake covered with tin foil in a 375 degree oven until heated through.

All the flavors really come through in this dish, the sweetness of the cabbage, the distinct taste of each cheese, the fresh herbs, onions, garlic, and that mildly spicy sauce to top it all off. I think you’re going to love it!

Buon Appetito!

Signature