Roasted Veggie Overload!

Hi, My name is Marie and I’m a veggie-holic! Yes, when I’m in the produce isle I just can’t help myself, I have no control. Sometimes I get strange looks from people as I happily stroll by them with my grocery cart.  I’ve even had people say to me, “My, you do buy a lot of vegetables!” It’s not until I get home and start unpacking my bags that I realize, they might have a point!

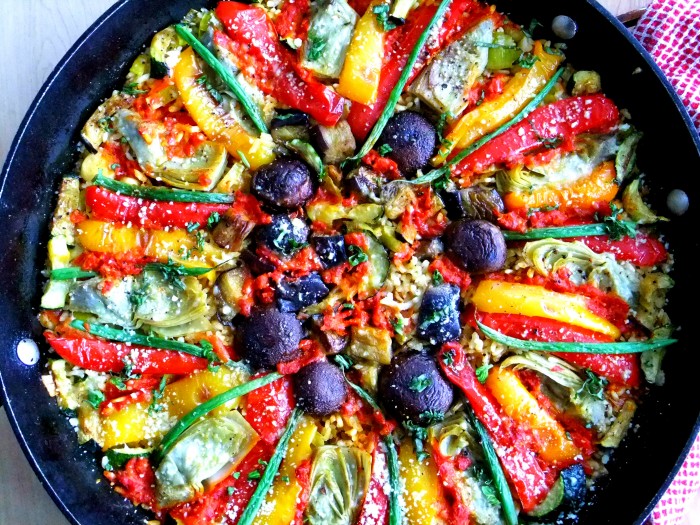
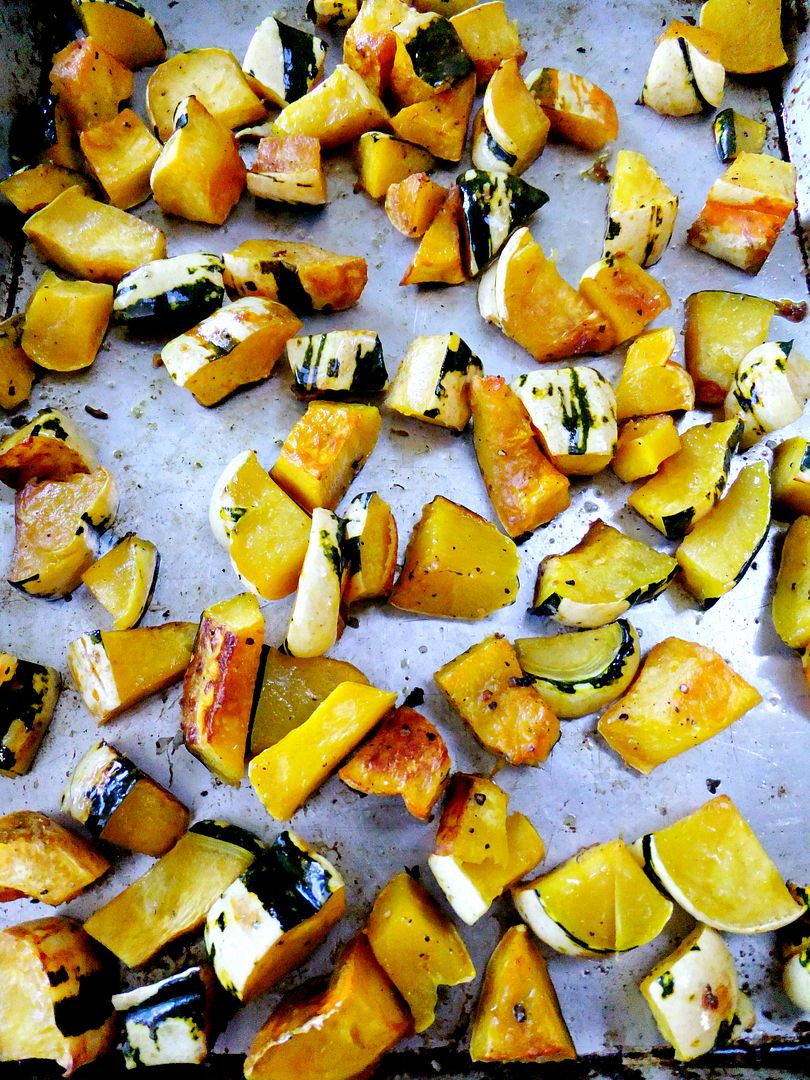
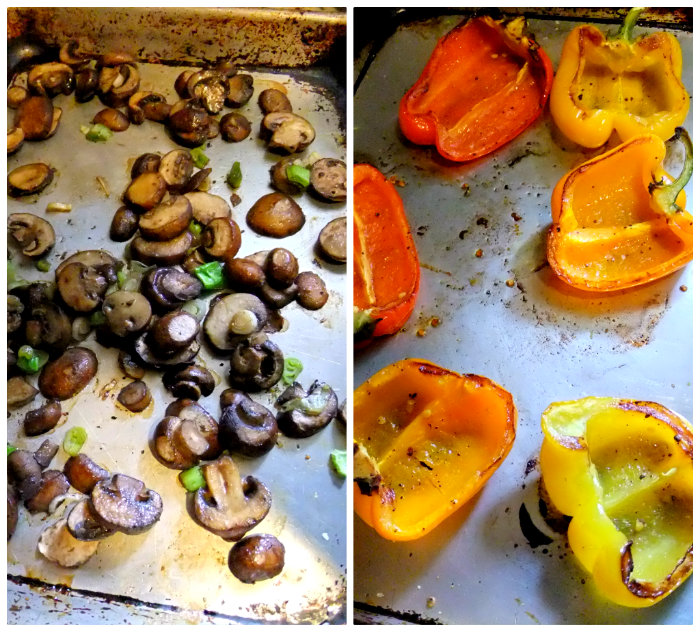
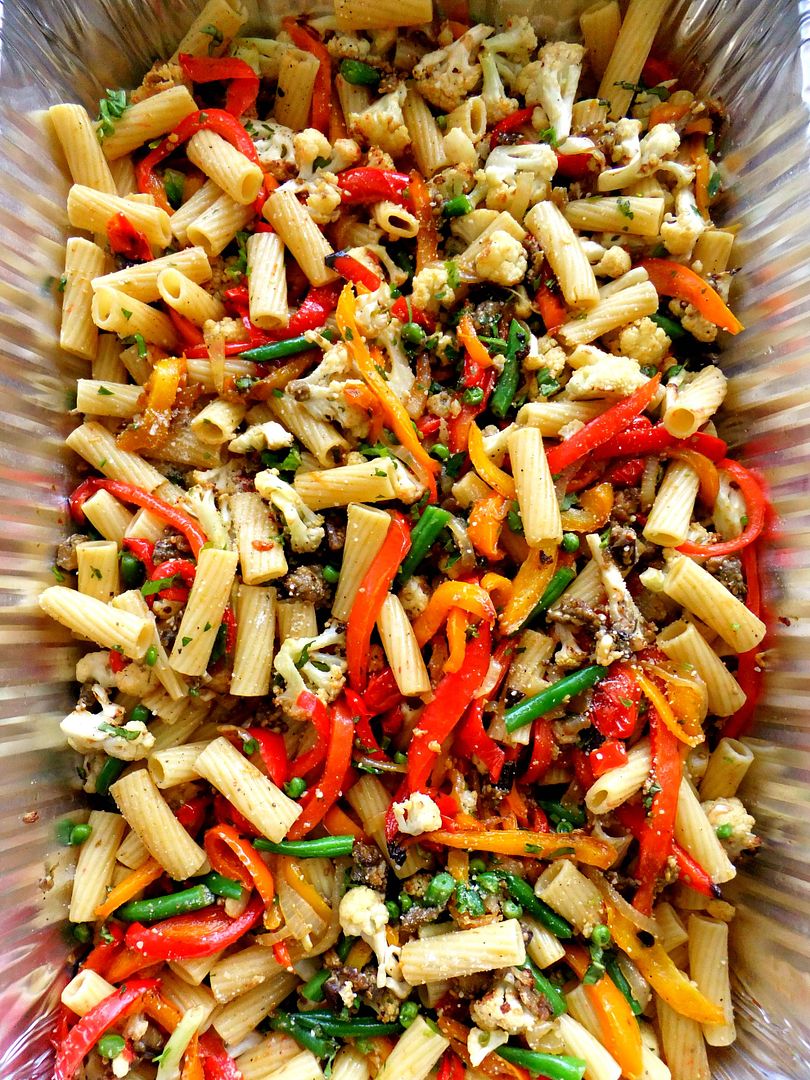
So when I feel like I have an overload of veggies hanging out in my fridge, I just roast them all, as in the photo above, and figure out what to do with them later.

I always roast my veggies at 400F, drizzled with a good quality extra virgin olive oil and lately, and actually more times than not I’ve been using this, the mellow roasted garlic flavor just enhances the veggies even more, I truly love that stuff!
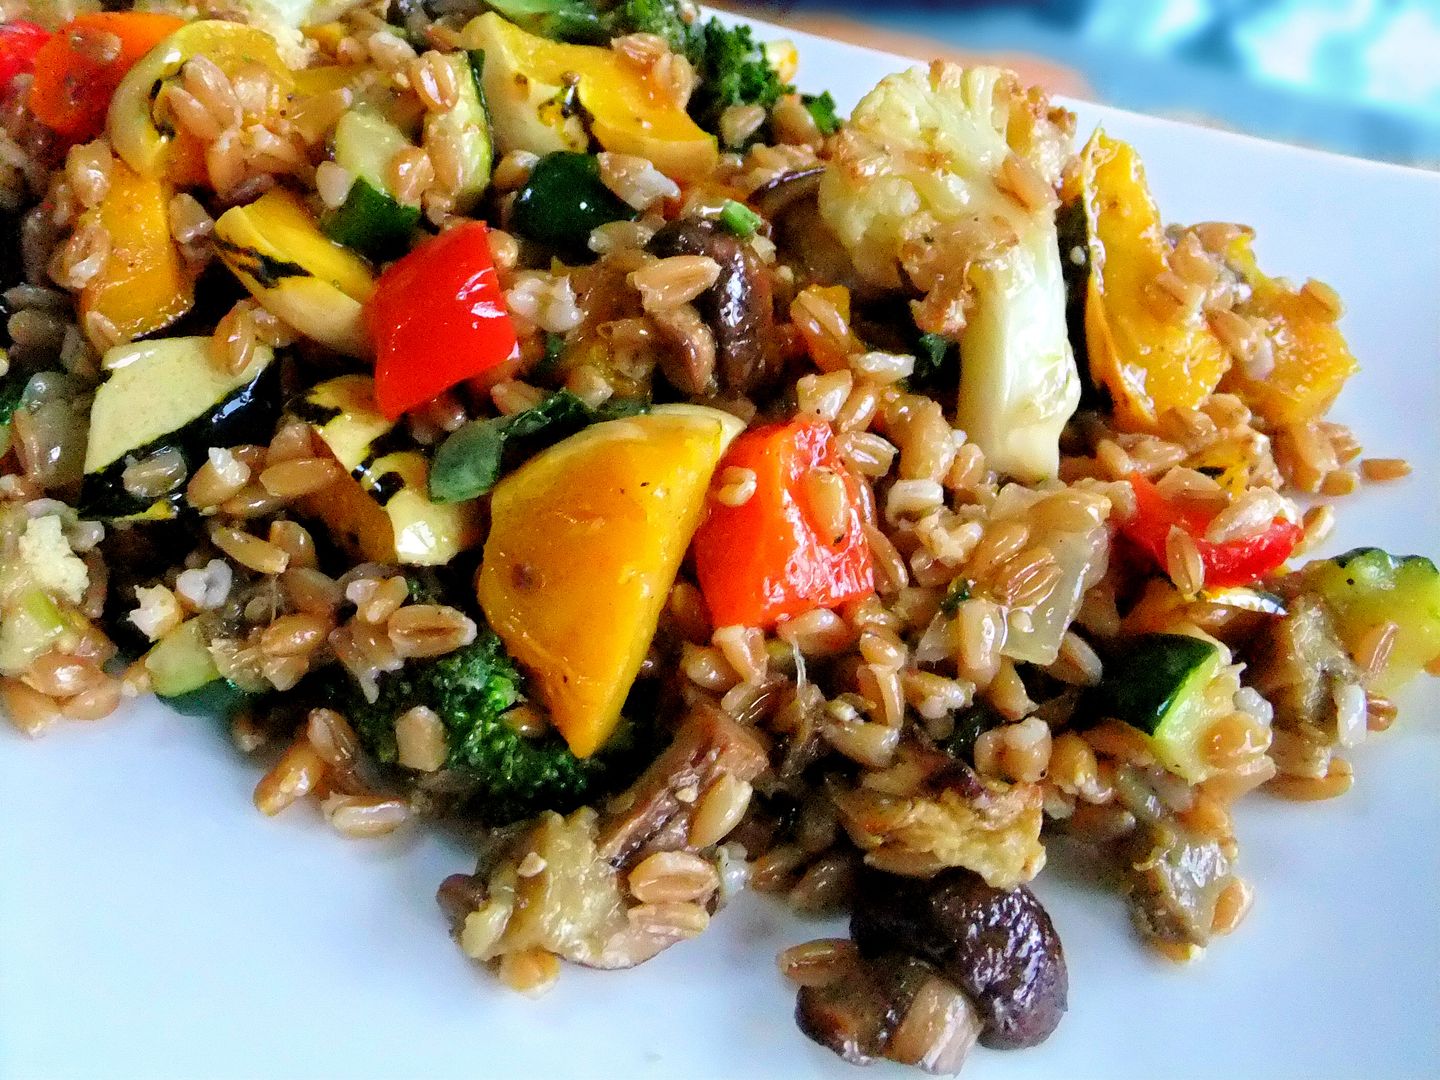
The thing about having roasted veggies handy is that you can quickly whip up a meal in no time, toss them into frittatas, pastas, grains, all sorts of things. I had a package of farro that I quickly cooked up and made this for a nice lunch but you could easily use brown rice, barley, couscous, you get the idea. For this I added a fresh lemon and olive oil dressing to it, along with fresh herbs.
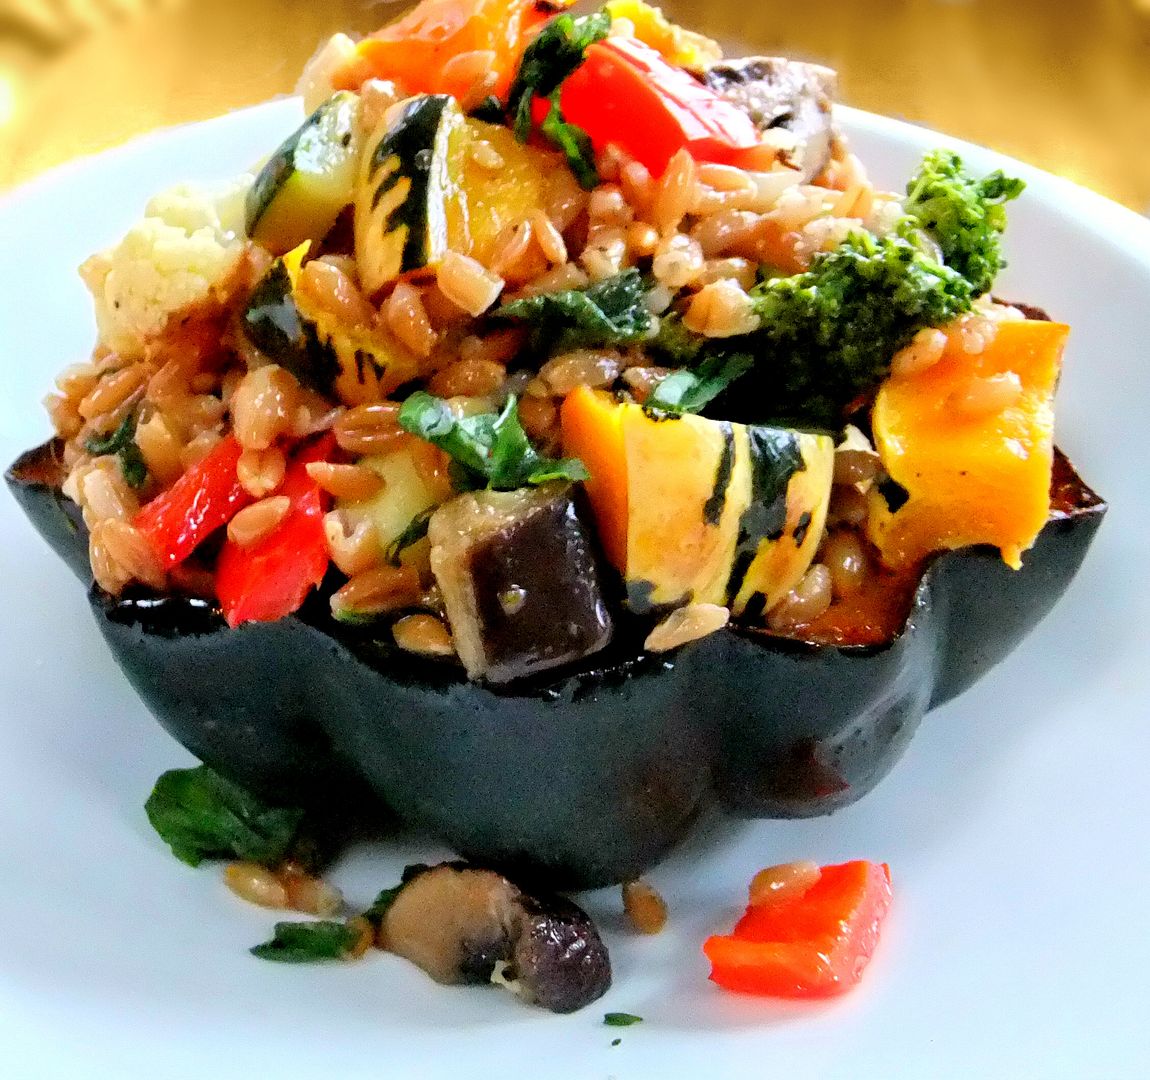
Want something a little more substantial? Stuff it all into a pre-roasted acorn squash and serve it with a salad on the side.
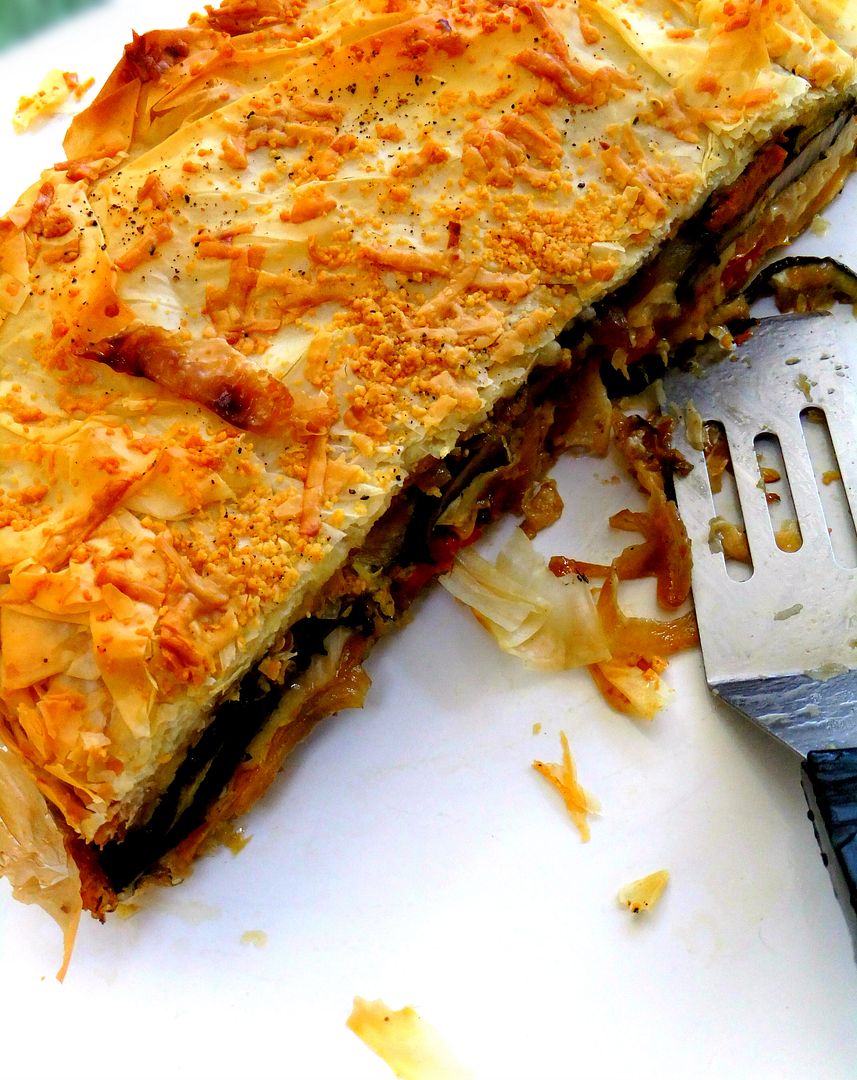
But I have to say one of my favorite ways to use up all my veggies is to stack them high layered into a springform pan all wrapped up in phyllo dough pie.
Every time I make this I get rave reviews, it’s great for a luncheon with the girls, a main course or even a side dish to bring to a party.
phyllo vegetable pie
The wedges cut perfectly because the layers are slightly “glued together” with some grated cheese, I like to serve mine with a little roasted red pepper sauce on the side, so good!
Roasted Veggie Pie Wrapped in Phyllo
 
Ingredients
  • Assorted roasted vegetables of your choice
  • Grated parmesan or romano cheese
  • grated asiago, mozzarella, or fontina cheese
  • Phyllo sheets
  • Olive oil
  • 9" springform pan
Instructions
  1. Brush springform pan with olive oil or olive oil spray
  2. Unwrap phyllo and cover with a dampened towel, keeping it covered as you work quickly
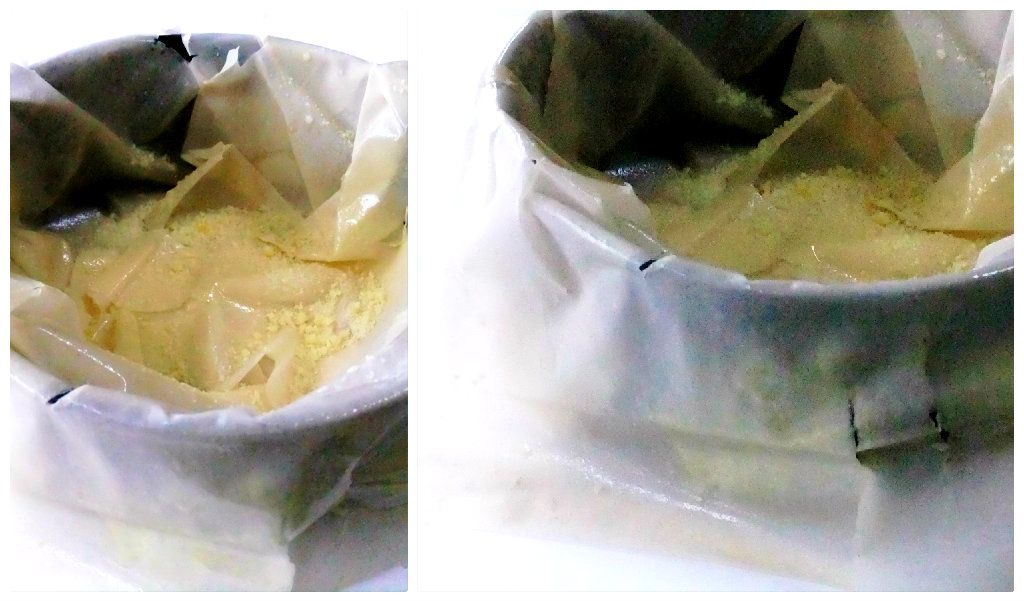
  3. Add 3 sheets into the bottom of the pan,1 at a time, spraying or brushing with olive oil and a sprinkling of grated parmesan or romano
  4. Fit one sheet partially on the bottom with the ends hanging well over the pan, spray or brush all over with olive oil
  5. Continue with the phyllo all the way around the pan, then do it all around 2 more times( phyllo is very thin) rotating pan so the sheets cover the entire rim
  6. Start layering your vegetables one layer at a time, in between the layers add a sprinkling of grated parmesan or romano and also your grated asiago, mozzarella or fontina, use enough to cover all around the vegetables,but not too much, pressing down lightly
  7. When you get to the top fold in the overhang of phyllo, making sure its sprayed or brushed with olive oil
  8. Add more phyllo sheets to the top to make sure all the veggies are covered
  9. Finish off by spraying or brushing with olive oil on entire top and a final sprinkling of cheese
  10. Place pan on a baking sheet lined with foil and bake in oven at 400 for around 20-25 minutes or until phyllo is crispy golden
  11. Let it cool down then cut into wedges with a serrated knife
  12. Note: No exact amounts here, just cover each layer with veggies and cheese, you could also use a smaller springform pan or a deep dish pie plate depending on how many veggies you have.
Signature

Pork Chops Marsala

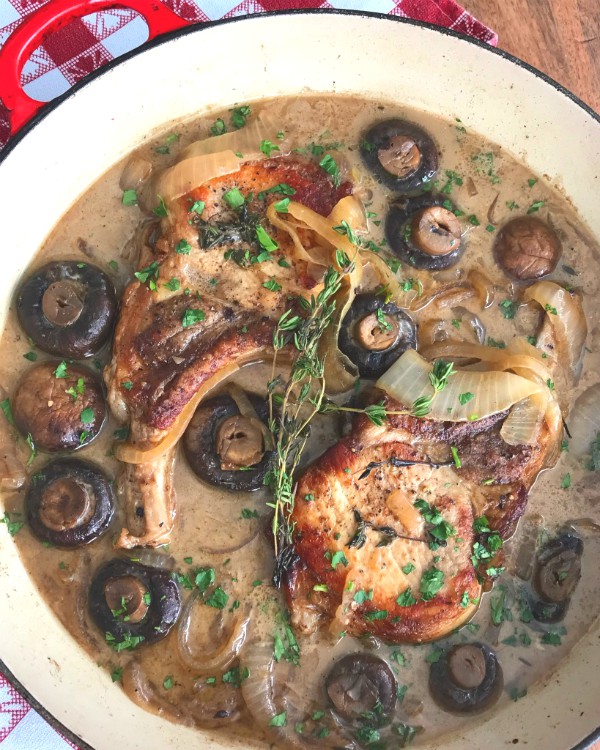
pork chops and marsala

Sweet Marsala wine sauce is like nectar of the gods, it transforms simple chicken, veal and beef into something extraordinary, and now I’m here to tell you it does exactly the same for pork, in fact pork chops marsala is becoming my new favorite.

marsala wine

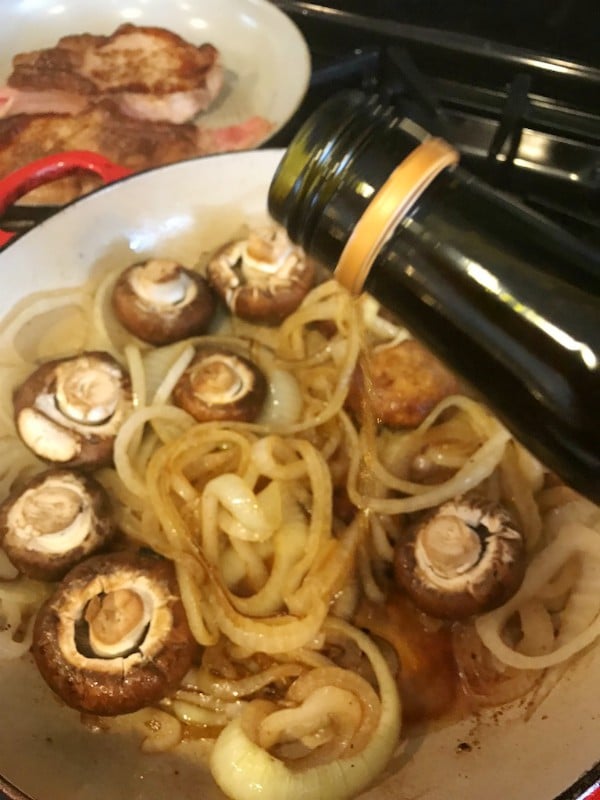
The second the Marsala wine splashes into the pan your kitchen will smell absolutely amazing, the aroma is deep, rich and bold and as it simmers down it gets even better. It doesn’t take much time at all to get this flavorful meal on the table so it’s really good for mid week as well as for guests, the other bonus is everything goes into one pan!

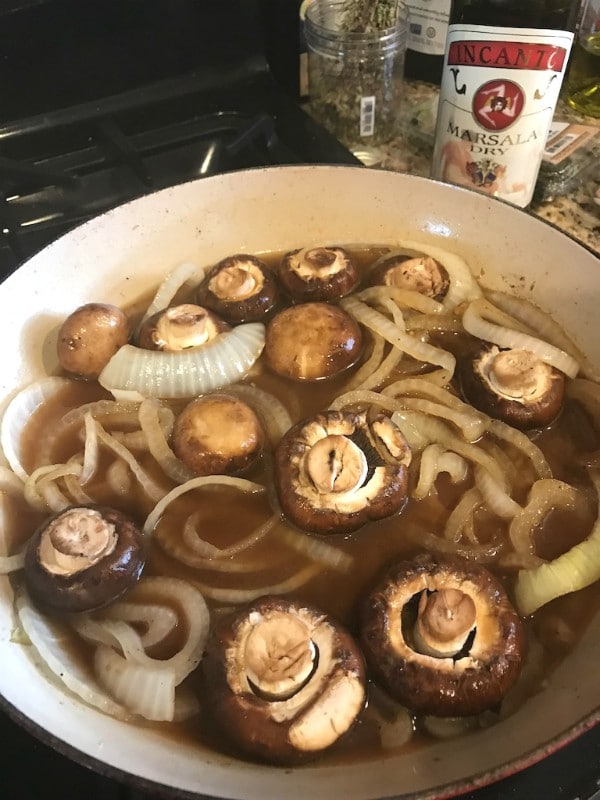
mushrooms and onions

You can serve this with angel hair pasta, it’s divine with garlic mashed potatoes, or if you prefer no carbs at all try it along side sautéed spinach or kale in garlic and olive oil. Which ever way you choose you can’t go wrong!

Dollops of mascarpone cheese gets whisked into the pot with the pork chops and Marsala, it thickens the sauce to the perfect consistency as it slowly cooks down, the end result is a sauce so rich and creamy that you’ll want to drink it!

The mascarpone really takes this dish over the top.

pork marsala

Pork chops Marsala is so full of flavor, the pork is tender and juicy, the sauce is creamy, it comes together quickly and you know what? The presentation is so elegant! Whats not to like?

Gather up all these ingredients and make this as soon as possible, this is what I call pure comfort food!


Pork Chops Marsala
 
Ingredients
  • 2-4 pork chops
  • 2 tablespoons olive oil
  • 2 tablespoons unsalted butter
  • 2 minced garlic cloves
  • 1 yellow or red onion cut into rings
  • 1 box of crimini mushrooms left whole, stems removed
  • ¾ cup sweet Marsala wine
  • ¾ cup chicken broth
  • 3 tablespoons mascarpone cheese
  • fresh thyme and parsley
Instructions
  1. Sprinkle chops with salt and pepper, add to a heated skillet with 1 tablespoon of melted butter and 1 tablespoon of olive oil, remove when brown.
  2. Add remaining oil and butter, brown your garlic and onion rings, remove.
  3. Add mushrooms and saute till all juices evaporate then add Marsala, deglaze pan and reduce by half.
  4. Add broth and a couple sprigs of thyme and let that reduce.
  5. Add chops and all juices back in the pan along with the mascarpone cheese, whisk in until melted, then cover and simmer until chops are cooked through and sauce has thickened.
  6. Garnish with chopped parsley and thyme.


Signature

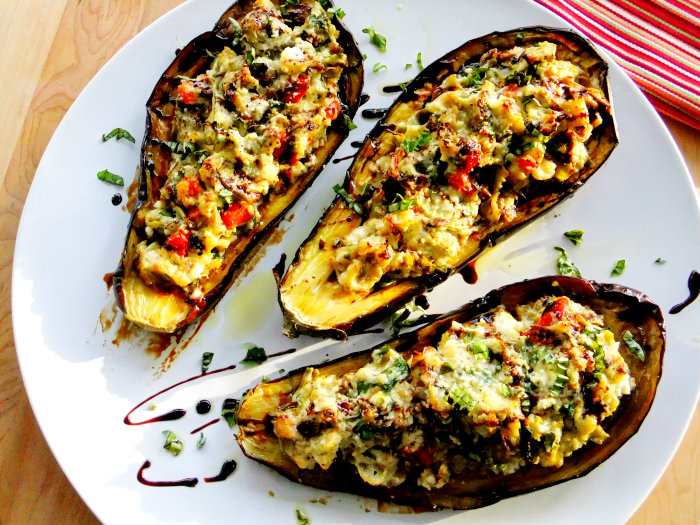
Stuffed Eggplant with Ricotta, Spinach and Artichoke

stuffed eggplant (7)

Have you ever been inspired by Pinterest? I have, many times.  I needed to cook up three eggplants before they went bad so I checked out Pinterest for a little inspiration, as I was wandering from page to page I saw an eggplant that was stuffed with spinach, ricotta and artichoke, that was it, that was my inspiration! The original recipe that was pinned had honey in it, I didn’t want to use honey but was inspired to make mine more Italian style, so that’s exactly what I did.

stuffed eggplant (9)

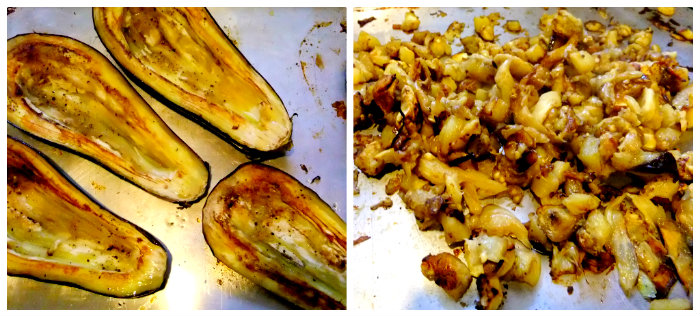
I started out by cutting my eggplant lengthwise then carefully scooping out the middle leaving a small border all the way around the eggplant half. Drizzled the inside with olive oil, salt and pepper, did the same with the scooped out eggplant, placed them all on a baking sheet in a preheated 400 degree oven until tender and cooked through.

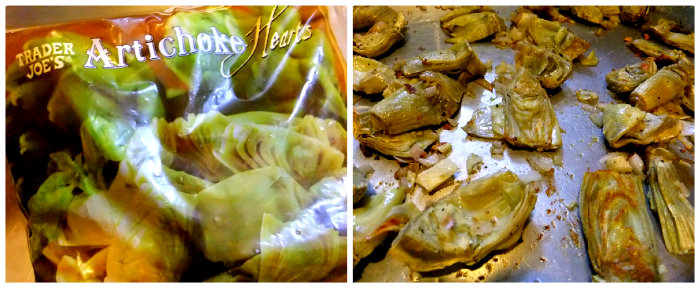
When the eggplant was finished cooking I removed it from the oven to cool down. On another baking sheet I placed one 12oz bag of frozen artichoke hearts, courtesy of Trader Joe’s (which I have in my freezer at all times) a shallot and 3 minced garlic cloves, drizzled everything with olive oil, salt and pepper. Roasted in the 400 degree oven until artichokes defrosted and became tender.

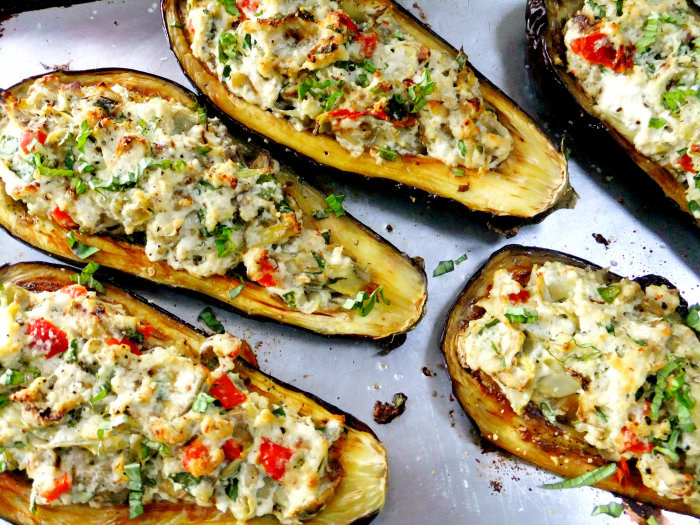
I then placed everything into a big bowl, the artichoke mixture, the scooped out cooked eggplant, 1 heaping cup of ricotta cheese, 1 chopped roasted red pepper, 1 cup of fresh chopped baby spinach, a heaping 1/2 cup of grated romano cheese, chopped parsley and basil.

Pile high the mixture into the scooped out portion of the eggplant and place back into the 400 oven until ricotta is heated through, about 15 minutes.

For a finishing touch I drizzled a rich balsamic glaze all over the stuffed eggplant which just intensified all the flavors even more so!

We had this as our main course served with soup and salad, but it would also be great as a side. Enjoy!

Signature

Welcome to My New Home on WordPress!

Welcome everyone! I’m finally here and settling into my new home on the web. I’ll have lunch for you in a minute but first I want to tell you about my journey here.

I’ve been wanting to do this for a long time, migrating my Blogger blog over to WordPress, but I never had the nerve, I heard horror stories in the past, pictures, posts, links being lost, etc. Not being a techie person at all this scared the heck out of me!

Even though Blogger was good to me in the beginning, as time went on many issues came up that weren’t getting fixed, things disappearing, problems with commenting and a ton of spam on a daily basis, and something that really bothered me was that you never really own your blog on Blogger, it’s free, they could delete it at any time.

I loved all the new features I was seeing on WordPress blogs, updated, modern, user friendly, I needed a new look, after 5 years I felt stale and old!

In comes my web designer, Jeni, The Blog Maven, who came highly recommended by Cathy of Wives with Knives, so I emailed her a couple of months ago and from the first time I spoke with her I knew I had the right person. I had a list of questions that she patiently answered one by one no matter how ridiculous some of them were, she even skyped me several times!  Jeni is very detailed and thorough, she considers all of your needs and finds the best way to incorporate them for you. The whole process went so smooth with no major glitches at all, I didn’t even stress once! I would highly recommend her for migration of your Blogger blog, design issues or any technical questions you might have.

I have to learn some new things to get around on the back end of my blog so I will most definitely be out of my comfort zone for a while so please bare with me, but honestly it’s already starting to feel like home here. Take a look around and let me know what you think so far, I’m loving my new visual recipe index!

Now, how about that lunch? I’m serving, Spaghetti Squash Stuffed Peppers!

Welcome to my new blog! (2)

Spaghetti squash, think of it as vegetable spaghetti, I know it’s not the real thing but when you roast it and rake up the strands with a fork it magically becomes a great substitute for the “white” stuff, and it tastes really good too! If you’re trying to lay off the carbs for a while replace this with any spaghetti dish you might be craving. I recently served it with mussels in a red sauce and it was delicious, the strands soaked up all the sauce, it was so good I’ll be making it again real soon.

Welcome to my new blog! (3)

This time I decided to stuff some peppers with it, making an all veggie meal. I roasted crimini mushrooms along with garlic and green onions and pre-roasted the peppers as well.

Welcome to my new blog! (4)

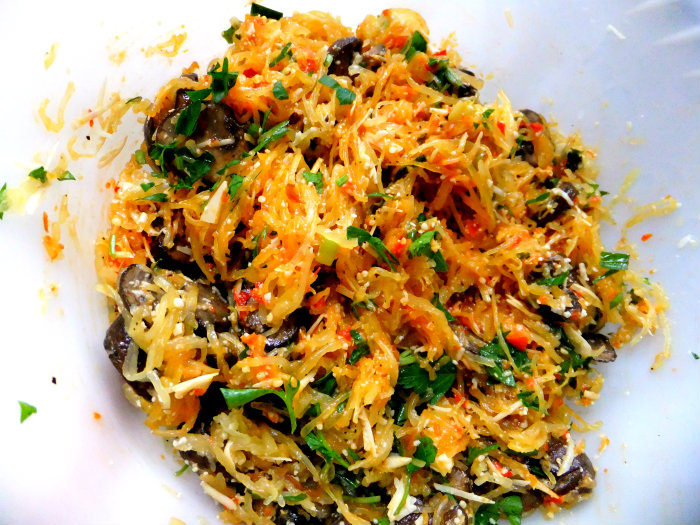
Then into a bowl I tossed the spaghetti squash, mushroom mixture, grated romano cheese, shredded asiago, parsley, basil, ( you could also add chopped fresh spinach or kale) a healthy drizzle of olive oil and a few tablespoons of roasted red pepper spread, courtesy of Trader Joe’s, but marinara sauce would work just as well.

Welcome to my new blog! (5)

Stuff your peppers, put them back in the oven until the cheese melts inside and they are warmed through.

Welcome to my new blog! (6)

Serve along side a green salad and you’ll have the perfect lunch or dinner. Thanks for stopping by my new digs!

Signature

Proud Italian Cook’s Twelve Most Viewed Posts of 2012

I thought it would be fun to take a look back at some of my most popular posts of 2012, it’s always fun to see what peaks my readers interest.
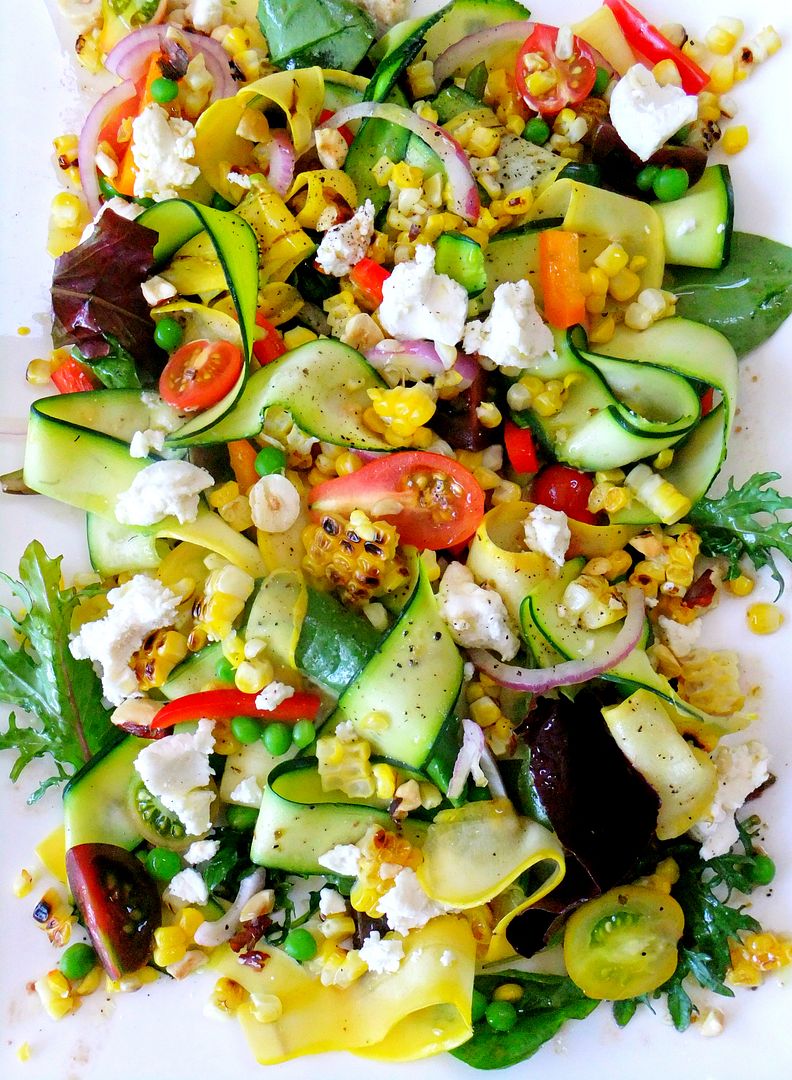
No name for This Salad which I made back in June, I’m a sucker for zucchini ribbons I just think they make every dish look pretty!
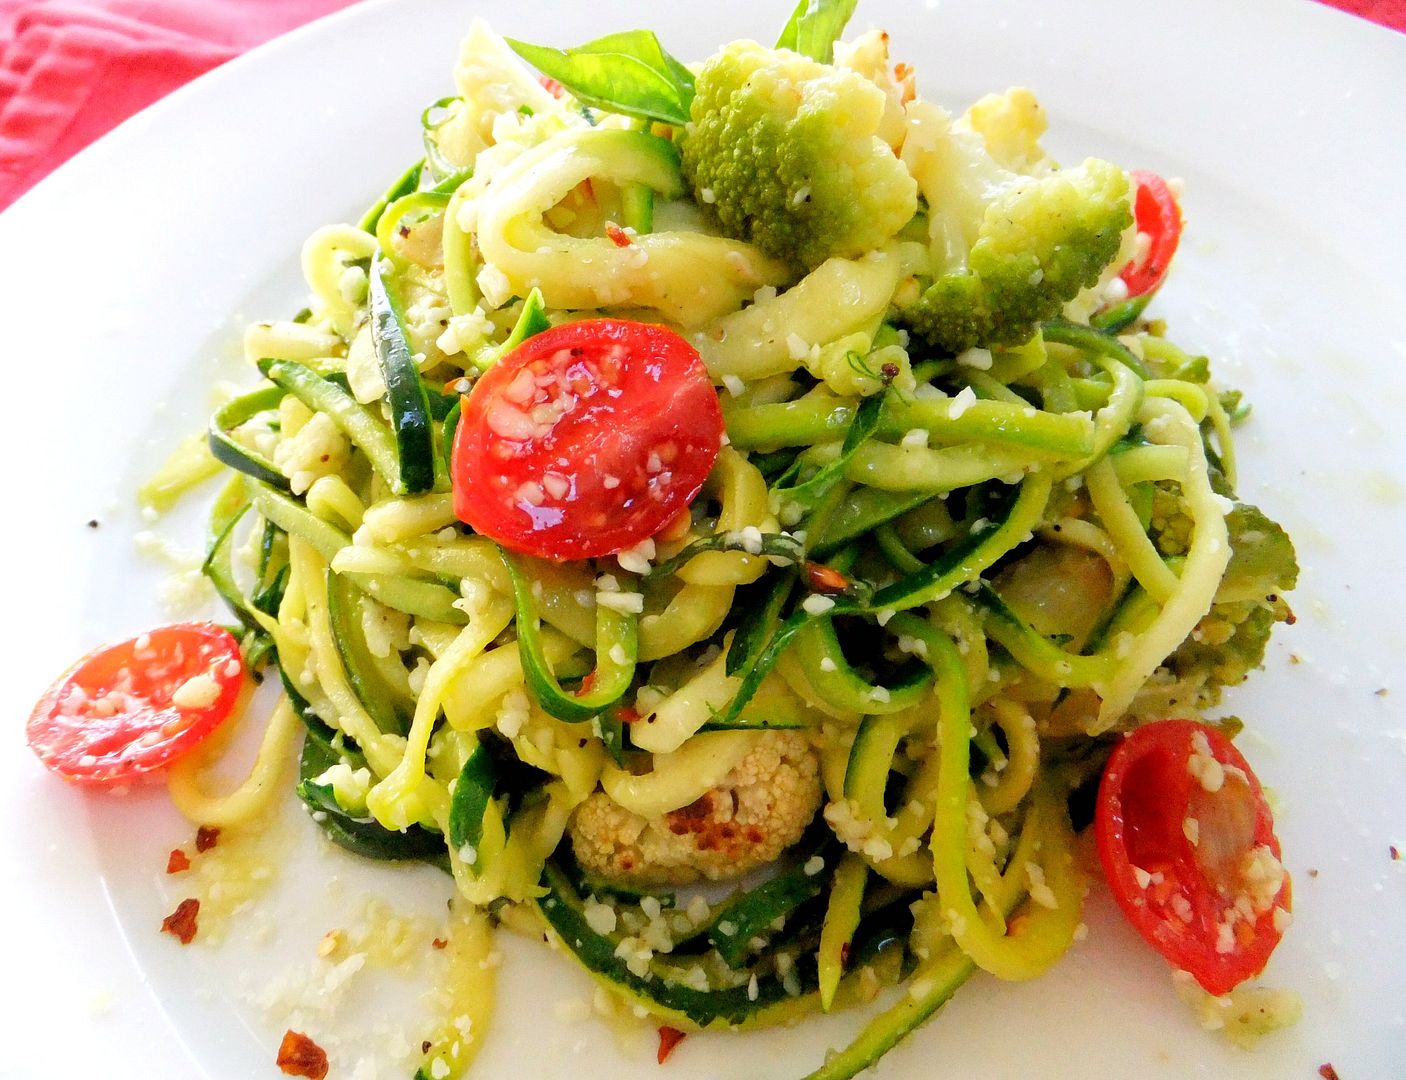
Faux Spaghetti, I made this last January when the reality of all the holiday eating hit me hard and once again I needed to go low carb, looks like I’ll be repeating this recipe real soon!
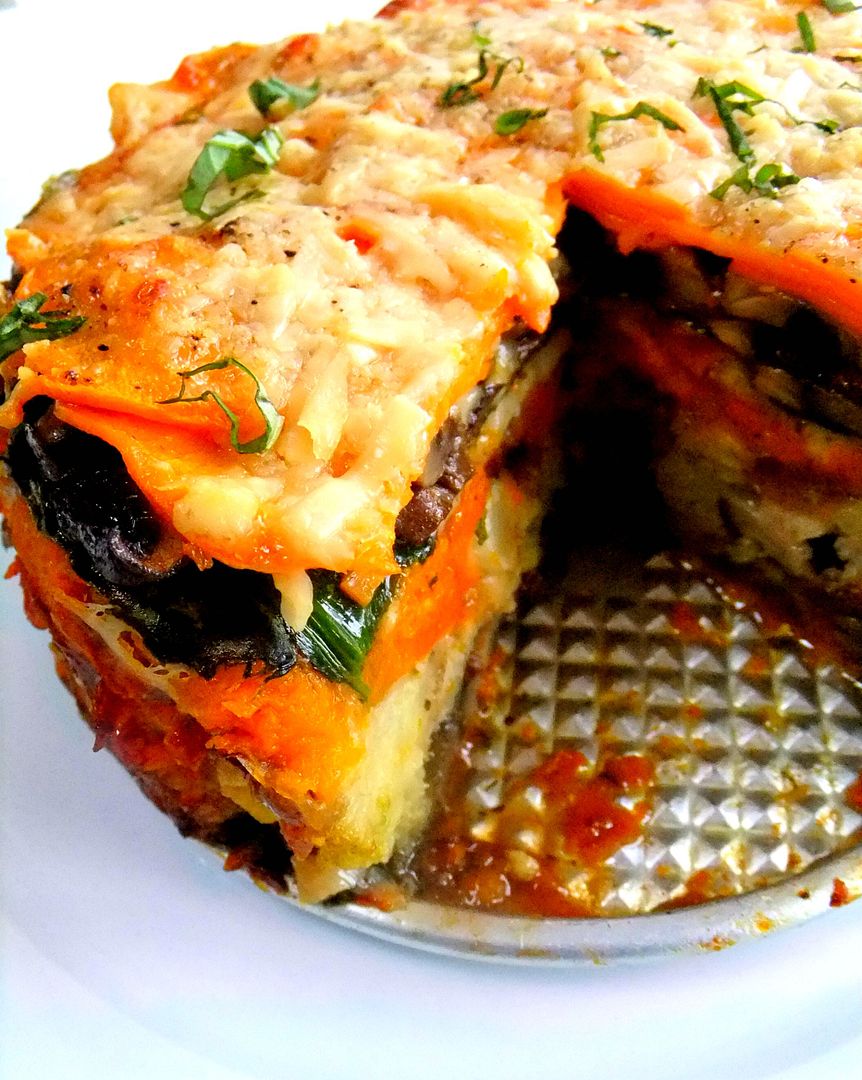
My Winter Veggie Torte, born from leftover veggies in my fridge and nicely formed in my trusty spring form pan. I think the sliced sweet potatoes on top gave it a nice colorful look.
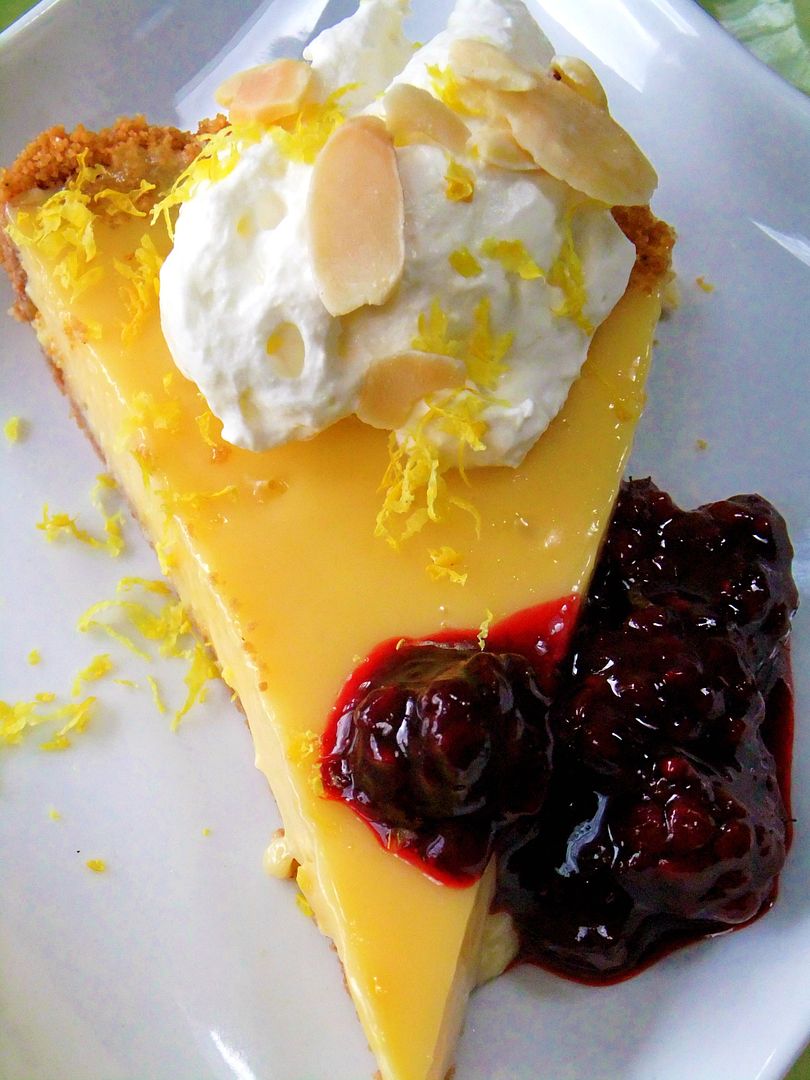
Limoncello Tart with Amaretto Cookie Crust and a Blueberry Blackberry Sauce.
Come on, need I say more?
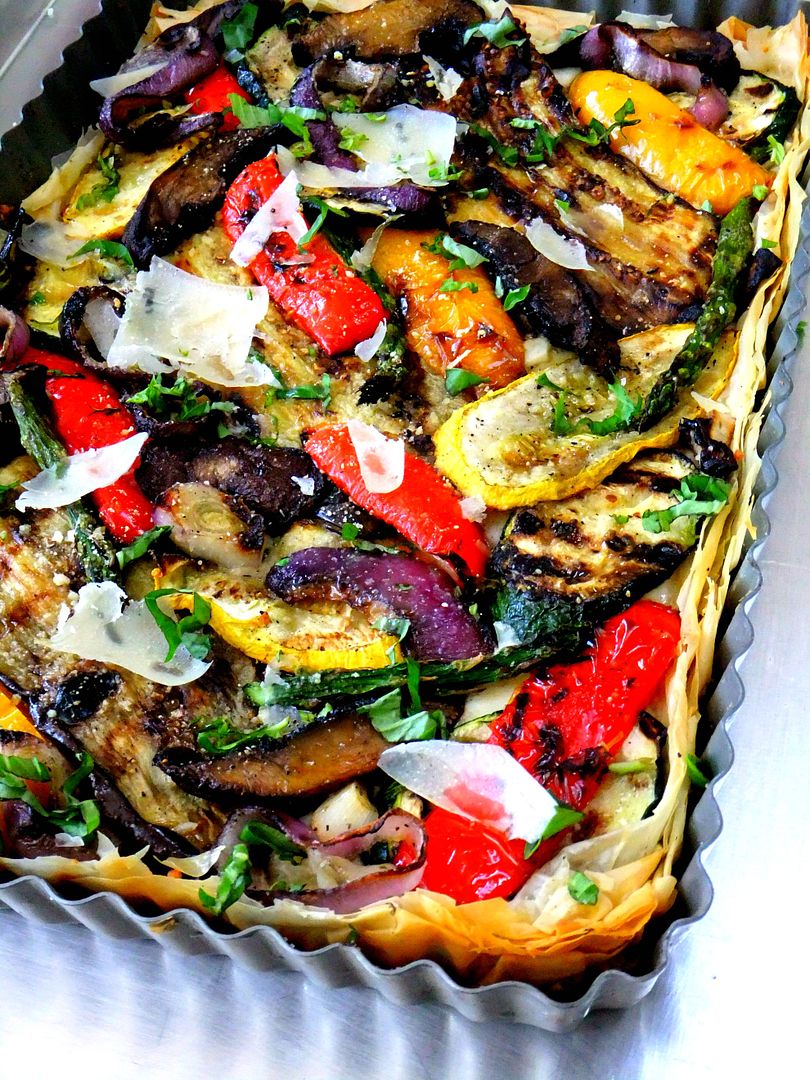
Grilled Vegetable Tart with Phyllo
I conquered phyllo and I’m proud of it!
As I sit here on a very cold night in Chicago I’m missing my grill big time!
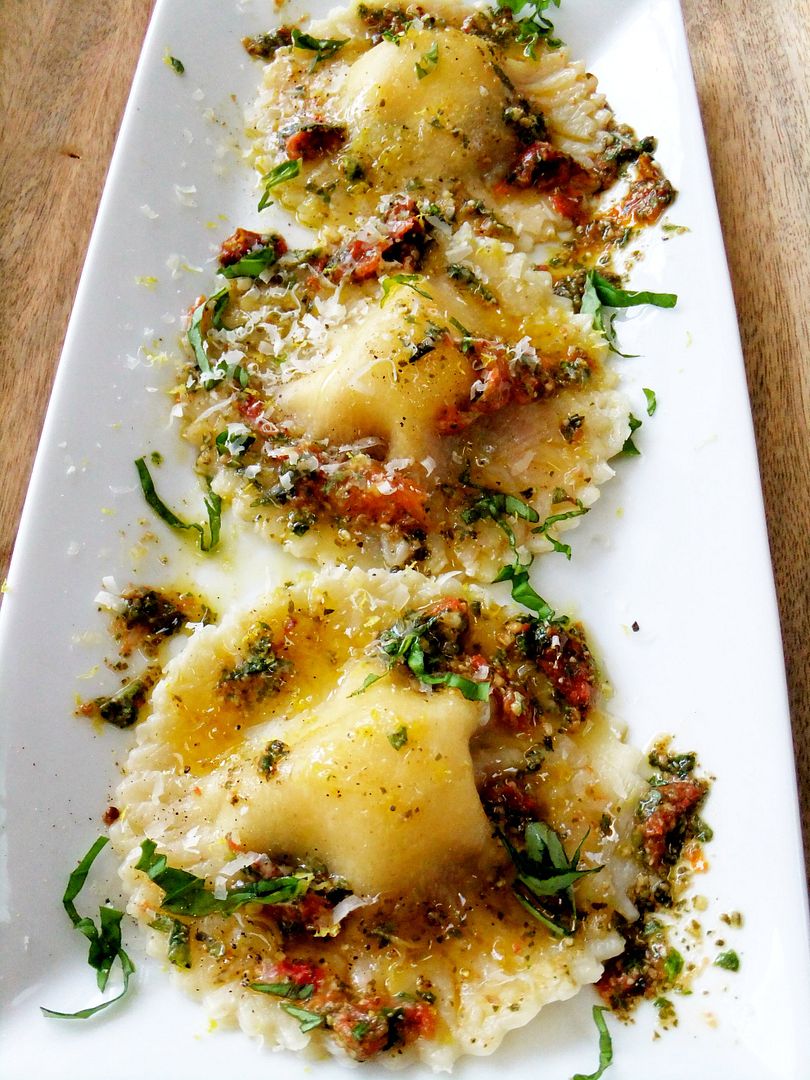
Caprese Ravioli
I made this back in April for an appetizer, simple to make if you can find good quality store bought pasta sheets.
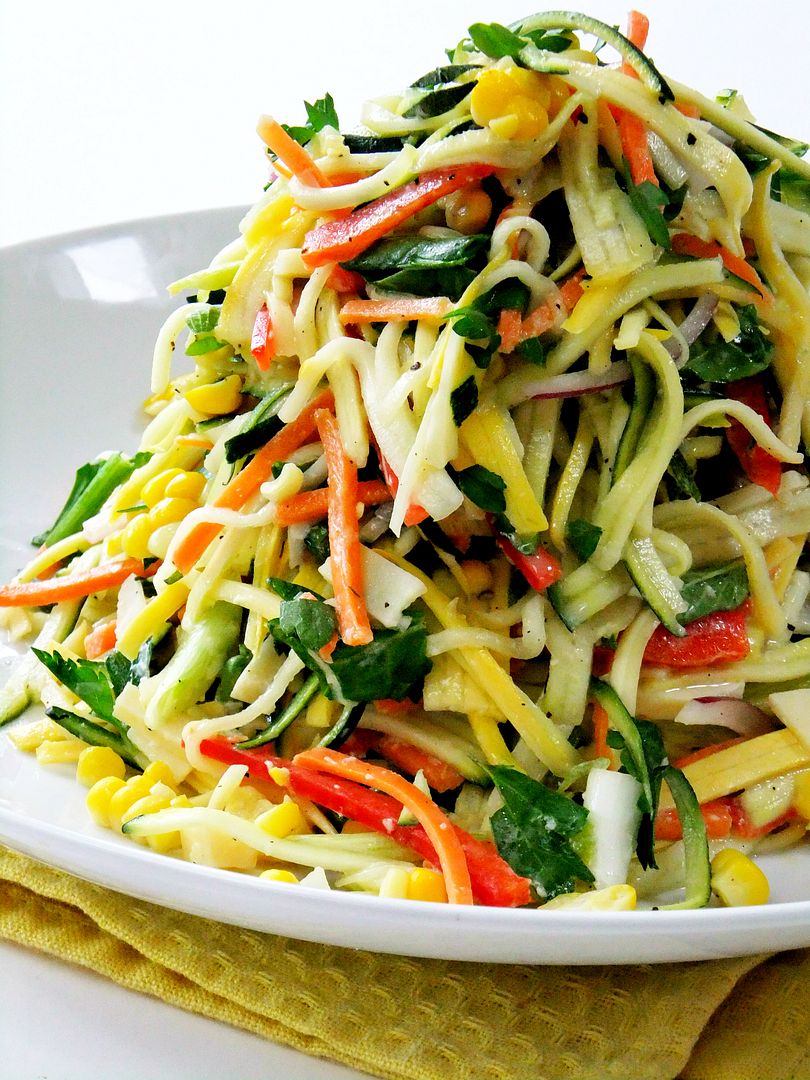
Summer Veggie Slaw
I made this deep in the heart of summer using the zucchini and herbs from our garden. This is a really good side dish with all your grilled meats, and everything is raw, so it’s quick to put together providing you have a julienne peeler!
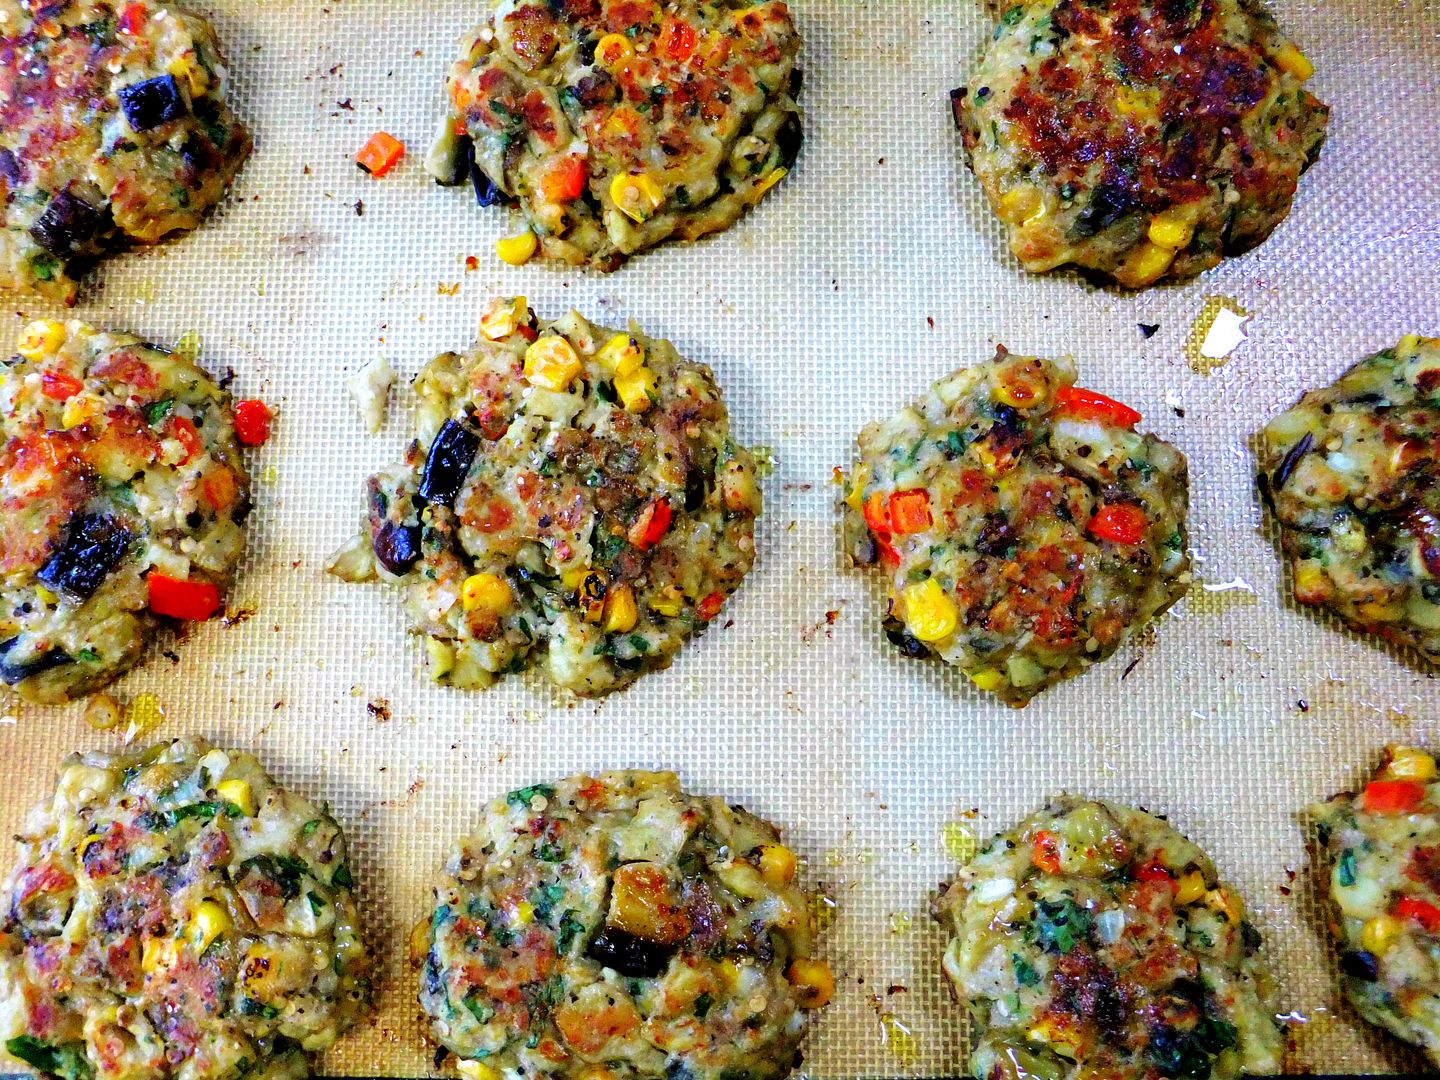
Eggplant Patties
Even though I posted these last August I still make them on a regular basis, I serve them topped with a little bit of roasted red pepper sauce, make a salad and dinner is served!
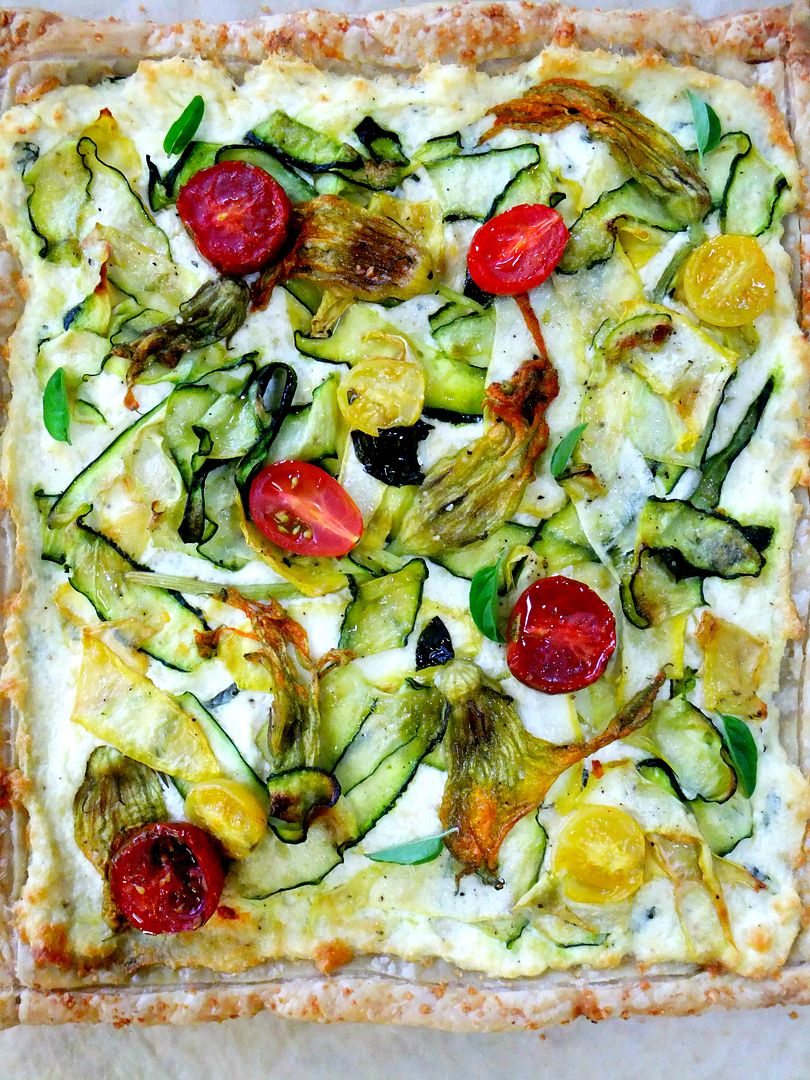
Summer Bounty Zucchini Tart
Here I go again with the zucchini ribbons, and some blossoms here too, this time pressed into ricotta on puff pastry none the less!
Roasted Veggie Pasta
I make this often, great for a crowd. Hmmm, veggies seem to be a theme here on my blog, don’t you think?
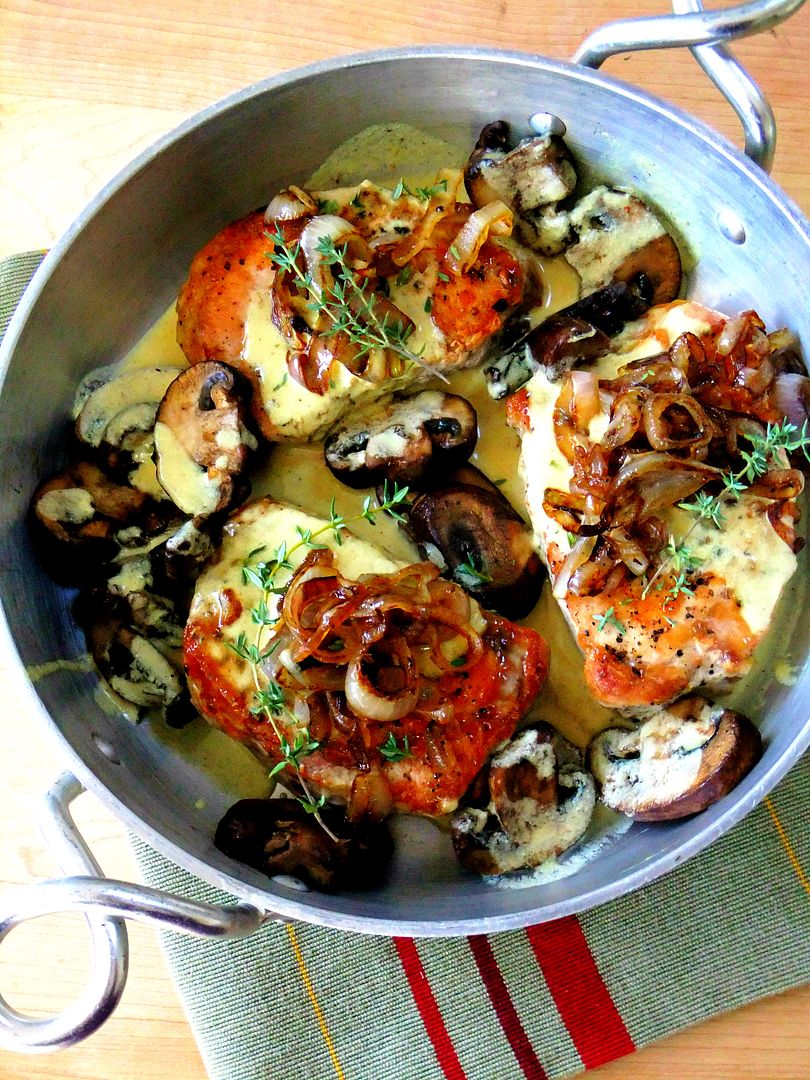
Boneless Pork Chops in a Creamy Mustard Thyme Sauce with Mushrooms and Caramelized Shallots.
Comfort food that’s quick to make mid week!
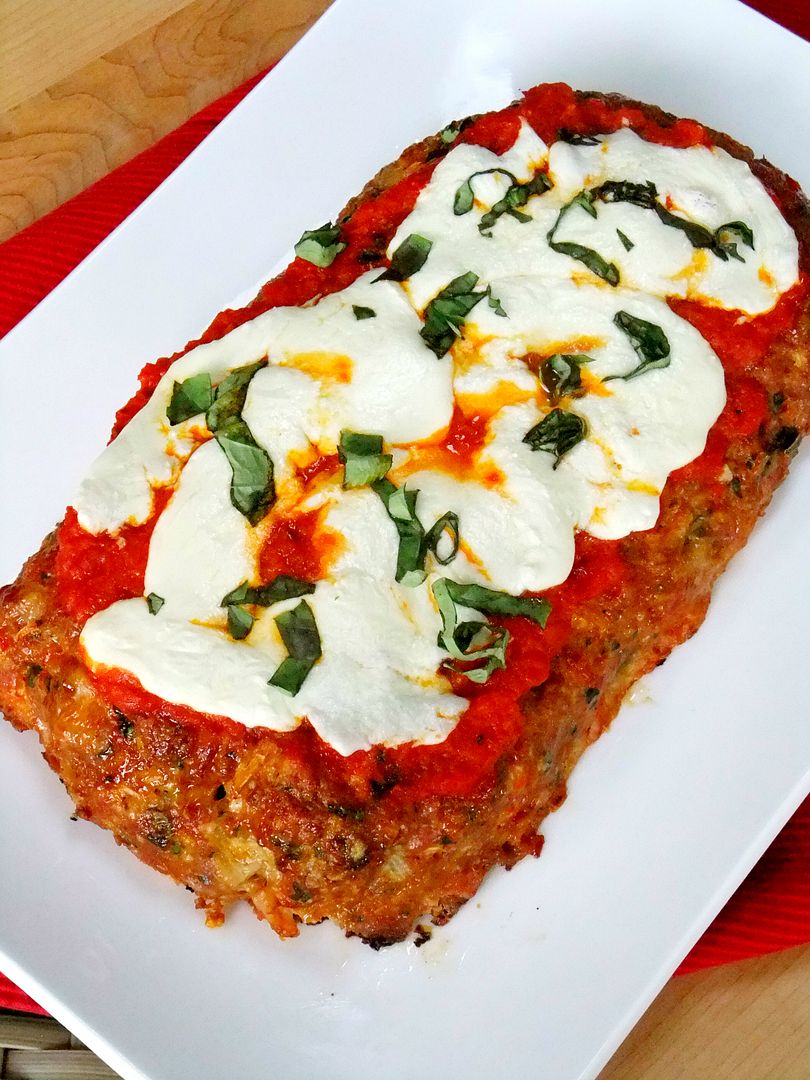
Chicken Parmesan Meatloaf
This is so good your house will smell amazing while it’s cooking in the oven, I like to change up the marinara for roasted red pepper sauce, let me give you a little tip my fellow Trader Joe lovers, they have the best jar of red pepper spread that I use all the time, It’s called Red Pepper Spread with Eggplant and Garlic, you really can’t taste the eggplant, but the red pepper flavor is outstanding.
I have 4 jars in my pantry and 2 in my fridge, I’m a horder, I smear it all over everything! If they ever stop selling it I’ll be devastated!As 2012 comes to a close my wish for you in 2013 is, HEALTH, HAPPINESS, PEACE, JOY, LOVE, LAUGHTER AND A HEALTHY DOSE OF AMAZING ITALIAN FOOD!

CHEERS!

Signature

Last Minute, Holiday Appetizers

If your looking for a quick holiday appetizer to pull together on a moments notice have no fear, these bite size bundles are the perfect thing!
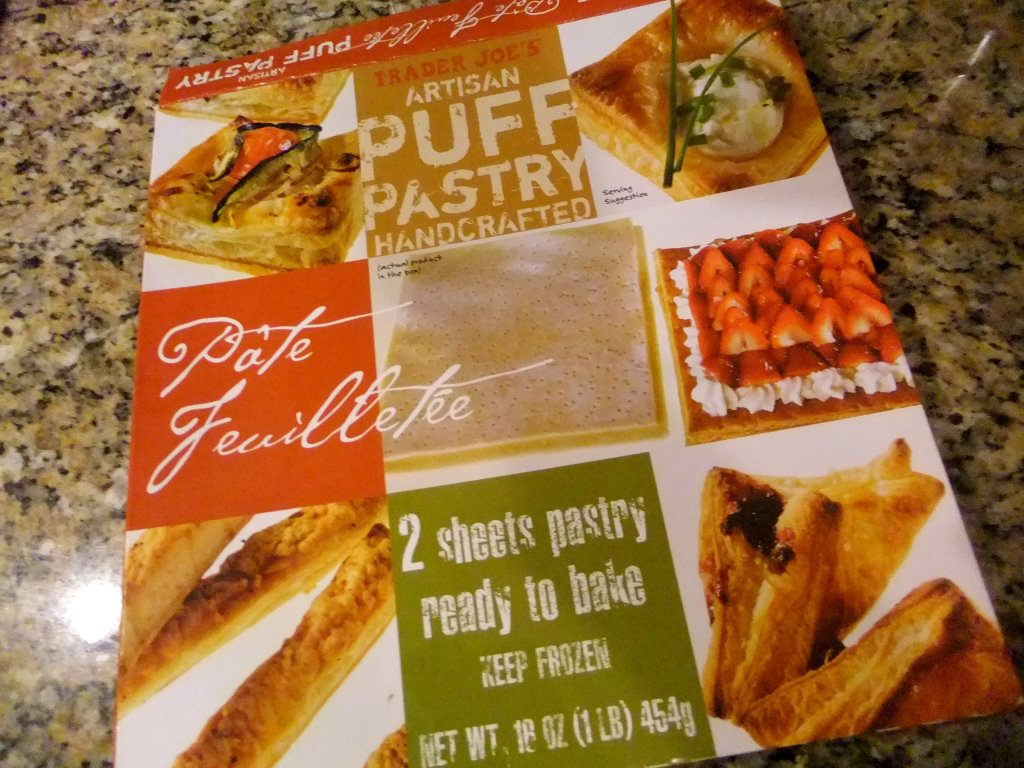
Providing you have a box or two of puff pastry tucked away in your freezer. You have some don’t you? If not you should!
Take it straight out of the freezer, lay it on your counter, in ten or fifteen minutes you’ll be able to separate the sheets. Then sprinkle a little flour on your counter and with a pizza cutter, cut the sheet into thirds, then each third into four slices, for a total of 12 per sheet, if you cut into the other sheet you’ll have a whopping 24 appetizers!
Now place each square into a mini muffin pan, I didn’t have to grease mine but it has been called to my attention that you might have to depending on the type of muffin tins you might have. My tins are not non stick but they are fairly new so maybe the butter in the pastry was just enough.
Now the fun begins, the fillings are endless! I had less than a cup of caramelized onions sitting in my fridge so I took a bowl and mixed the onions with gorgonzola cheese and toasted walnuts, that’s how I made mine here.
 Each puff pastry cup only requires a heaping tablespoon so you don’t need much filling at all.
Think, tomato, basil and goat cheese, roasted peppers and fontina, spinach, artichoke and feta, crabmeat and cream cheese, gouda and apple, roasted mushrooms with gruyere, Do you have a jar of fig jam or even chutney in your fridge? How about a little brie and fig? You get the picture, use what you have, it’s all good!
They take 20 minutes in a 375 oven, in the meantime open a cold bottle of wine, they’ll be done in no time!
I know this is a busy time for everyone, myself included, I’ve shopped, wrapped, planned my Christmas menu and baked my last cookie, with a little help from my granddaughter!
Puff Cookies, they’re tradition in my house! One bite brings back happy memories to me.
 Now if I could just stop at one bite, that would be a good thing!
But what I really wanted to do was to take this opportunity to thank you, all my readers, for the wonderful support you’ve given me, and to wish you all a very Happy Holiday filled with an over abundance of happiness, amazing food, surrounded by those you love!
xox

Signature

Dinner Party Worthy, Shrimp and Artichoke Risotto

I made this recently and it was such a big hit I wanted to share!  Succulent tiger shrimp with fresh artichoke hearts, sitting on a bed of creamy risotto.
The flavor was super enhanced by this fabulous roasted garlic olive oil I received from Colavita. I love their olive oils but I never tried their roasted garlic version, all I can say is you need a bottle of this in your kitchen! I had a few fresh artichokes ( you could use frozen, I wouldn’t use canned) that I cut, quartered and steamed, then tossed them into the garlic oil and placed them in a 375 degree oven for 10 minutes, the flavor is addicting!
I did the same thing with the shrimp, tossing them into the roasted garlic oil, sprinkling them with salt, pepper and a little peperoncino. I roasted the shrimp Ina’s way on a baking sheet for 5 or 6 minutes at 400 until the shrimp are cooked through. This method is full proof, cooks perfect every time!
The risotto itself was made with 1 box of chicken stock that was warmed in a pot on my stove and
 1 1/2 cups of arborio rice.
In a heavy bottomed pan heat 1 tablespoon of butter and 1 tablespoon of olive oil, sweat 1/2 diced onion. Add the rice, stirring and coating it with the butter and oil. Saute for a couple of minutes but don’t brown it, then add 1/2 cup of white wine and let it absorb. Add a ladle of hot chicken stock to the rice and let all the liquid absorb, then add another ladle and repeat the process stirring constantly.
I tossed in a handful of frozen peas along the way, added fresh snipped basil and parsley and a touch more butter in the end.
Pour your creamy warm risotto on a nice big platter and lay your roasted artichokes and shrimp all around.
The roasted garlic flavor took the risotto to another level, there wasn’t one grain of rice left!

Signature

Holiday Baking has Begun!

I don’t consider myself a baker, using exact measurements is a difficult thing for me to do, as regular readers of my blog well know, but there are certain things I must bake every holiday season and one thing is Italian fig cookies or Cucidati, they’re truly a family favorite.
I’ve posted them a few times before but since my blog chronicles my life in food I thought I’d share some recent pic’s of the day we made them. I say “we” because I never make them alone, always with family, we make a day of it, we start early, I usually always make a pot of soup or chili to eat for lunch because we go way beyond lunch time!

I have a big dining room table, I clear everything off and cover it with wax paper, after they cool on racks they get placed there waiting to be frosted.

There were four of us, we ended up making a little over 400, we started at 9:00am and ended at 4pm, not bad! We each took 100 plus for ourselves.
We started off drinking coffee as we worked.
But as the day went on we were sipping this! Have you tried? Dumante, it’s a pistachio liqueur, luxurious, smooth and might I add, it went very well with our cucidati taste testing!
I love it so much I made a zabaione with it a couple of days later, a light boozy custard usually made with marsala wine, but I replaced it with Dumante Verdenoce.
Here’s how you make it in case you happen to pick up a bottle.
1/4 cup of Dumante** 1/4 cup granulated sugar** 1/4 cup heavy cream** 3 egg yolks**
Set up a pan of simmering water** place a heat safe bowl on top of the water filled with all the ingredients** whisk the mixture continuously over simmering water, not boiling.** cook until you get a consistency of a thin pudding with the internal temp of 145 degrees** remove and continue whisking until you reach room temperature** if it’s too thick add cream or water.**
I make the same recipe every year for the fig cookies, it’s so similar to my mother-in laws except butter is replaced for the Crisco that she always used, here’s the link.
We never made them in the form of X’s but rather like above. You can change up the nuts, sometimes I use walnuts instead, and in place of orange peels I find a good orange marmalade to work wonderfully, you could also replace whiskey for the rum. As I mentioned before we never put chocolate in ours but it’s optional.
We always glaze them by using confectioners sugar mixed with water or milk, vanilla, and sometimes a little anise extract. Non- perils for sprinkling.
Happy Holiday Baking!

Signature

Tis The Season to Make Ravioli Again

A few days ago my cousin, sister-in-law and I spent the day together making ravioli for an annual party  that we’re having. This is a family recipe that my mother and aunt use to make. I have vivid memories of clean white sheets on dining room tables and beds filled with ravioli when I was young, and although I do things a little bit different then they did, I follow their recipe exactly, which I still have on a very yellowed index card.
They kept it simple, they would always make two kinds, a meat  and a cheese version. The meat ravioli were filled with ground round or sirloin, romano cheese, spinach and a little onion. The cheese version was always made with ricotta cheese, eggs, romano cheese and fresh parsley.
I like to make all my fillings the night before as it takes time to mix everything together, tasting and getting the flavors just right. After the meat cools down I like to pulse it in a food processor so it’s more uniform and not lumpy. I also like to put my fillings into disposable pastry bags, it goes much faster than a spoon when you’re filling the forms.
I know you can use many different flours but Ceresota unbleached flour was always their flour of choice, so that’s what I use!
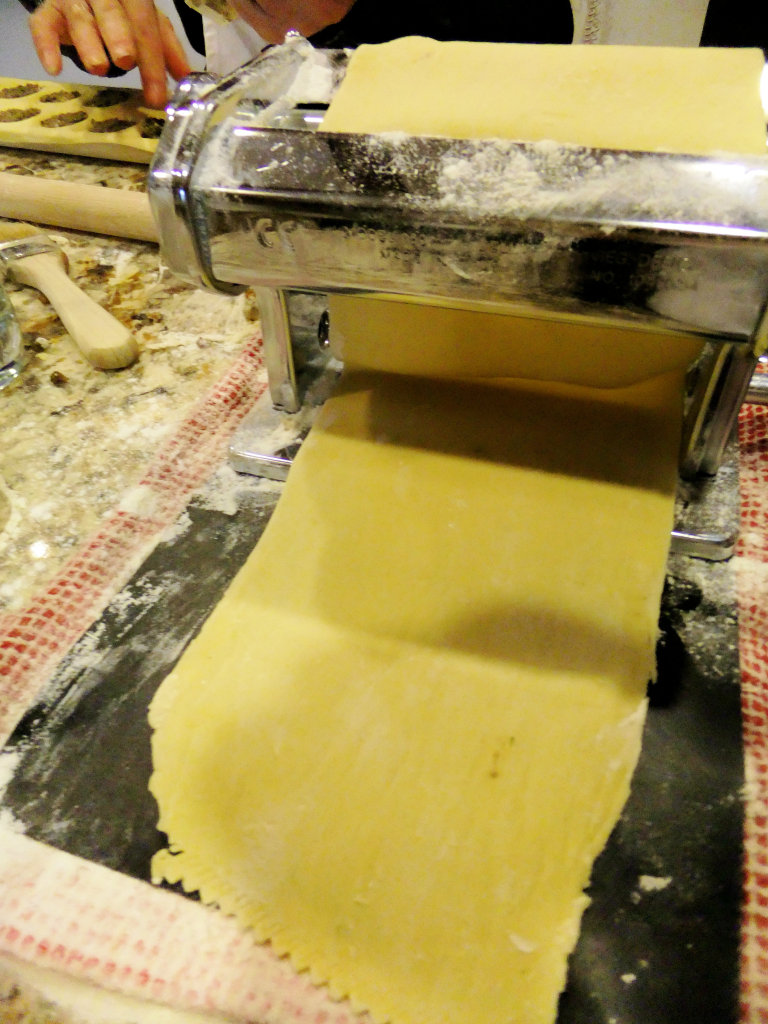
The morning we were making them I got up early, took my eggs out of the fridge (so they could get to room temperature) set up the pasta machine and everything else we would be using. Before they came I made 10 batches of dough, it’s very important to let the dough rest before you start rolling it.
I make all my dough using my food processor, I could never do the well method, for one thing I don’t have the patience, and I know I would have eggs dripping all down my counters, besides using the food processor is so quick and it always comes out perfect!
Ceresota flour, eggs, a tiny bit of salt, olive oil and a little bit of water creates the perfect dough for me, I didn’t have one problem with it all day!
We were in the zone, drinking coffee, listening to Christmas music, each one of us doing our specific jobs.
Squirting the cheese mixture into the the ravioli forms is super speedy with a pastry bag!
We were cranking them out left and right!
Aren’t they cute?
Because they will be cooked this weekend I froze all of them, which is very easy to do.
I lay them single layer on a baking sheet, stick the whole tray in the freezer, the meat ones take about a half hour to freeze and the cheese about 1 hour.
When frozen I take them off the tray and place them into zip lock freezer bags.
We ended up with 400! It took us only 4 hours, so that’s about 100 an hour, not too bad, although it took me 2 hours to clean my kitchen, flour was everywhere, but it was worth it because there’s nothing like homemade rav’s!
We had to taste test them to make sure everything was just right, so I heated up some marinara and boiled up a few, even in their frozen state they only take about 6 minutes to cook.

Soft pillows of tender eggy dough filled with the flavors of my youth!
Worth all the effort to make!


Signature

Post Turkey Day Detox Salad

Are you feeling a little guilty about all the Thanksgiving Day carbs you just had?  How about a little detox before you start baking those cookies!
This fresh, raw, spicy, sweet salad is the perfect remedy! I had this for lunch recently at Whole Foods, it was so good I copied down all the ingredients so I could make it at home.
Chopped kale, shaved brussel sprouts, shredded carrots, sliced celery, parsley, basil, dried cherries, shaved parmesan and toasted almonds.
The combination of flavors are heavenly together when tossed with the dressing!
I’m not at all embarrassed to tell you that almost all the ingredients came from a bag, thanks to my local Trader Joes, which means you can whip this up in the time it takes you to zip open the bag!
The pictures may not do this salad justice, all I can tell you is I made a huge bowl and my daughter and I couldn’t stop eating it, we had it for lunch and dinner, and it’s even good the next day.
No exact recipe here, just dump handfuls of chopped kale, shaved brussel sprouts, shredded carrots, dried cherries, celery, parsley, basil and toasted almonds into a large bowl.
For the dressing, whisk together some olive oil, fresh lemon juice, 1 smashed garlic clove, a good drizzle of honey and some red pepper flakes.
Toss everything together along with freshly grated parmesan.
Sweet, Spicy, Crunchy, Cleansing!

Signature

Decisions, Decisions!

I can’t believe it’s Thursday already and a week from today is Thanksgiving! This year just flew by to me. I’m usually very organized with my menu, but this year not so much. Oh course we’ll have the usual, turkey, gravy, stuffing balls, streusel topped sweet potatoes, garlic mashed, green bean casserole  (nothing coming from a can), corn casserole ( because my brother likes it), roasted parmesan creamed onions, cranberries and rolls.
We love to munch on a nice antipasto and pop open some good wine for starters.
It wouldn’t be Thanksgiving without watching The Godfather marathon some time during the day, in fact I like to have it on in the kitchen while I’m cooking. What happened to Al Pacino? He use to be so handsome, especially in Part 2!
I was thinking of adding this salad for a change, it’s really good, it has roasted acorn squash on top of leafy greens, medjool dates, red onion, whole pecans and goat cheese tossed in a vinaigrette. It looks really pretty set out on a platter.
Here is where my problem is, I can’t decide what kind of pasta dish I’m going to make this year. In our house we always have some kind of pasta dish included in our Thanksgiving meal, it’s tradition!
Butternut squash lasagne goes so well with the whole meal, but I’m thinking, maybe it’s too heavy!
But then I tell everyone to bring containers for leftovers anyway, so they can bring some home in their little care packages and have it the next day, which is just as good.
Or should I just make butternut squash gnocchi? It was a big hit last year. I have a huge squash on my counter right now in case I decide to go for it.
I also have a huge container of ricotta in my fridge, maybe Ill make ricotta gnocchi! Stuffed shells? Manicotti?  I’ll figure it out, I cook good under pressure!

Wishing you all a wonderful Thanksgiving, I’ll see you after!

Signature

A Virtual Pot of Pasta Fagioli Soup for my Friends

As I sit in the comfort of my home taking heat and electricity for granted, I can’t stop thinking about all those who have been affected by Hurricane Sandy. Lives were lost, homes destroyed, total devastation, many still without heat and power, and to make matters worse, snow is now on the ground.
I have friends who are affected by this storm, if I were closer I’d make them all a big pot of pasta fagioli soup, it’s warm, comforting, a complete meal with crusty bread and it feeds a bunch.
I stock up on cheese rinds in the winter, ( thank you Whole Foods) I always have them on hand in my freezer, so inexpensive but makes a world of difference in flavoring your broth, it makes the best soup ever!
Ditalini, my pasta of choice!
Ingredients for my soup are;
Garlic, leeks, onions, carrots, red potato, zucchini, white beans, swiss chard, crushed tomatoes, broth, pasta and cheese rinds, rosemary and thyme.
I wish I could tell you I measure but I don’t! I start out with a big pan, drizzle the bottom with olive oil then saute the first 6 ingredients ( generous amounts of all, just 2 crushed garlic cloves though) then open up and pour in 2 cans of white beans and a 14.5 oz can of crushed tomatoes. Add your chard then fill your pot to the top with broth, homemade or boxed, and throw in 3 cheese rinds and the fresh chopped herbs.
I cook my pasta, and keep it separate, adding as much as I want into my serving bowl. I never add it to the big pot, I don’t like when it blows up really big and gets mushy.
Let it simmer for a good hour or so until veggies are tender then add a generous handful of grated cheese and stir.
I can’t be near to help those in need, but by donating to the Red Cross I feel it’s the least I can do, and so can you, here’s the link!

Linda, Stacey, Pat, Maryann and Barbara, this pot’s for you! xox

Signature

Chicken Parmesan Meatloaf

I have to admit it was the name of this dish that first intrigued me! Sure I like chicken parmesan, so why wouldn’t I like it in a meatloaf form? I was convinced to try this after my sister-in-law from Florida gave it rave reviews recently while we were talking on Facebook.
What’s not to like, it’s tender, moist and loaded with so much flavor! You could definitely pin this under,
comfort food!
I served it with roasted veggies tossed in my favorite balsamic glaze, a delicious weekday meal it was!
What makes this meatloaf taste so good is a healthy scoop of marinara sauce mixed right into the meat,  then when it’s about 3/4 done, you spoon more marinara over the top and layer on fresh mozzarella, it’s a beautiful thing!
The husband loved it so much he wanted to eat the leftovers the very next day!

Ingredients
recipe adapted from Joelen
I used ground turkey and it was a little over a pound but you can also replace with ground chicken
2 finely chopped garlic cloves
1/2 chopped onion
2 eggs
panko crumbs, enough to just soak up the moisture
1/2 cup marinara sauce, homemade preferred, additional for top and to serve with.
3/4 cup of small cubed asiago cheese
a handful of grated romano cheese
fresh chopped basil and parsley
s&p, of course
Mix everything together and form into a loaf on a sprayed baking sheet. Bake at 375 for around 1 hour. Last 20 minutes spoon marinara over top and place fresh mozzarella slices over it. Garnish with fresh basil.

Signature

Pumpkin Gnocchi

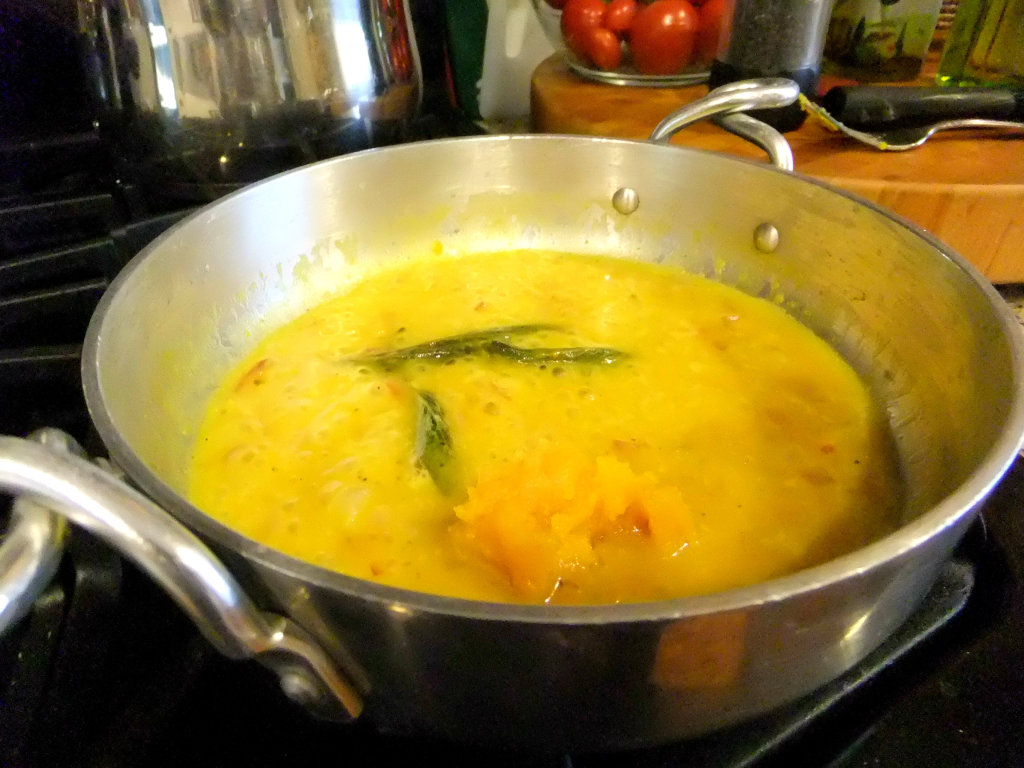
Gnocchi, humble little Italian dumplings, that when made right, taste like soft and fluffy pillows of dough. Tis the season for pumpkins so I got inspired to make Pumpkin Gnocchi!I often make butternut squash gnocchi during the fall season and lately I’ve been making a huge pan as a pasta side for Thanksgiving, and let me tell you, everyone of them gets eaten up!

I made my pumpkin gnocchi exactly the way I make my butternut squash gnocchi, all I did was replace the pumpkin for the butternut squash, so feel free to interchange them.
Here’s a link to a class I taught on making them.

I bought a sweet little pumpkin from Trader Joe’s, the kind you can make a pie with, cut it in half, seeded it and roasted it until tender. After it cools down, scoop out the flesh. You’ll notice that the pumpkin flesh is a little stringy, but that’s ok, because it all gets whirled in a food processor.
The key to a nice dough is not to overwork it too much, you might have to add a little more flour as you go but in the end it should feel semi firm to the touch.
I just love the color, it’s truly the most perfect autumn meal! Every bite is flavored inside with freshly grated parmesan cheese, they’re so addicting!
They’re ridiculously easy to make, no skills required, they don’t have to be perfect looking, in fact all you need is just a little patience!
They take only a few minutes to cook and then they’re ready to be sauced!
Speaking of sauce I wanted to try something different other than the traditional brown butter and sage so I searched and found this sauce inspired by Chef Frank DeCarlo.Saute 2 shallots in 1/2 stick of butter** add 1 bunch of sage and cook until shallots are golden** deglaze with 1/2 cup of chicken stock** whisk in 1/4 cup of pumpkin/ butternut squash puree, and 1/2 cup of cream** finish by adding 1/4 cup of grated parmesan, then season with salt and pepper.**
Luscious!

Ingredients for Gnocchi

  • 2 cups of  pureed butternut/ pumpkin squash
  • ½ cup Parmesan cheese
  • 1 tsp. salt
  • Pepper to taste
  • 2 eggs
  • 2+ cups flour

Instructions

  1. Preheat the oven to 375 degrees. Cut the squash in half. Remove the seeds, drizzle with olive oil, salt and pepper. Lay cut side down on parchment lined baking sheet. Roast the squash until soft—30 minutes or so.
  2. Scoop the flesh of the squash out and place it in the food processor. Puree until completely smooth.
  3. Mix the pureed squash with parmesan cheese, salt, pepper and eggs. Then add the flour into the mixture and work together by hand. It will be very sticky.
  4. Once smooth, flour work surface, Divide dough into 6 pieces and then roll each piece into a long strip, about ½ inch wide. Cut the strip into ¼ to ½ inch pieces.
  5. Using a gnocchi board, a fork, the back of a grater or just as is to create ridges. Place each piece on the floured wax paper and repeat with the rest of the dough.
  6. Bring a large pot of salted water to boil. Boil until all the gnocchi floats—about 5 minutes.
  7. While gnocchi is cooking have your sauces ready so you can toss right in, if not you can freeze them single layer on a baking sheet, when frozen place into bags.
From humble dumpling to mouthwatering perfection!
Signature

Individual Butternut Squash Lasagna with Infused Bechamel

Here is yet another version of a butternut squash lasagna in mini form, individually portioned. Round slices of butternut squash are layered in with a creamy ricotta and shredded mozzarella mixture and topped off with a sage, garlic and parmesan infused bechamel.
You can serve this as a main course along with a pretty fall salad, or as a side to something like a pork roast, so good!  I’ve done it both ways. This recipe uses no pasta at all and you won’t even miss it, I promise!
I can’t explain how good this is, you’re going to have to try it for yourself!
To make this, look for a butternut squash that is pretty much the same width from top to bottom as in my photo, my slices were about 4 inches round. If you can’t find one like that, get one with a long neck and then cut the slices about 1/4 inch thick.
Then just peel the squash, slice, and roast the slices on a baking sheet drizzled with olive oil, salt and pepper at 400 F until tender when pierced with a knife.
Mix up a pound of ricotta ( depending on how many squash slices you get, you’ll probably have some left over ) with 1/3 cup of grated parmesan or romano cheese, a good handful of chopped fresh spinach, kale or parsley and about a cup of shredded mozzarella along with 1 egg, salt and pepper. This will be spread in between your layers.
I like using 3 slices of squash per mini lasagna using maybe a tablespoon or so of the cheese mixture in between the layers.
For the bechamel sauce, melt 5 tablespoons of butter, whisk in 5 tablespoons of flour, cook until it bubbles a little then add 3-1/2 cups of milk, 1 1/2 cloves of minced garlic, 4 sage leaves and a handful of grated parmesan, whisk until smooth and thickened.
Spoon a layer of the bechamel on the bottom of your casserole dish first, then place your first slice down, a dollop of the cheese mixture, another slice, more cheese on top then top it off with the last slice and spoon some bechamel over the top.
Bake at 400 until ricotta mixture is hot and cooked through. Garnish with a sage leaf.


Signature

Afternoon Espresso

As a child I have vivid memories of my parents, aunts and uncles sitting around a table after a big meal smoking cigarettes, laughing, always having a cup of coffee in their hands.
 A very close aunt and uncle lived on the next block over from our house and they would often  just stop by for coffee, I remember my uncle would always say, “put the coffee on we’re coming over!”

Coming over for coffee was a reason to get together, it didn’t have to be a big meal all the time, coffee was enough, providing there was always something sweet to go with it, usually something homemade or purchased from a favorite Italian bakery.
One of the last memories I have of my favorite uncle Al was the week before he passed away, he was home and under hospice care at the time, on our way over we made a quick stop at the bakery to pick up a box of cannoli, he loved his sweets. Although he was weak and frail he insisted on us making a pot of coffee so he could sit at the table and have a cannoli with us. As he took a few tiny bites and sipped his coffee he talked about his family and how important we all were to him, he made us laugh and made us cry, he had such a positive attitude with no regrets, he was the best! 

Maybe that’s why I’m crazy about all things coffee, it’s ingrained in me from childhood. As far as I’m concerned there’s nothing better than the smell of espresso brewing in my house, it makes me happy!
I can drink it in the morning and into the wee hours of the night, which I often do.
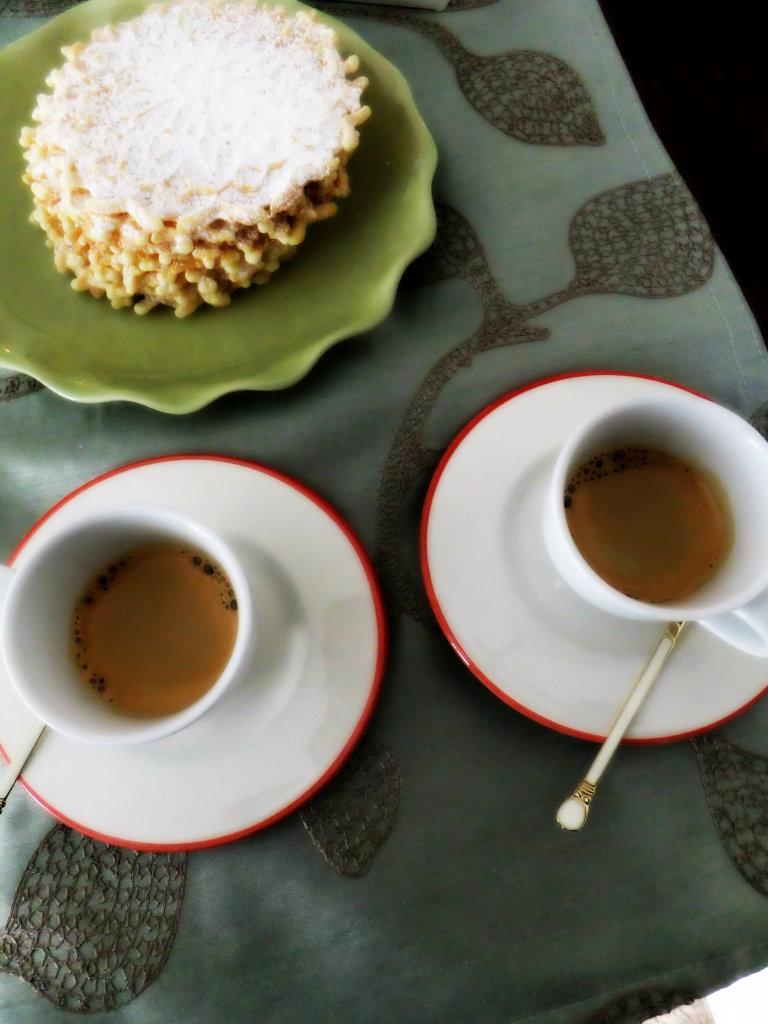
Even my friends and I meet together every Tuesday for coffee, we talk about each others lives and try to solve the worlds problems. My girlfriend Jean is a talented baker who specializes in Italian cookies, she often brings us all a goodie box filled with her sweet creations, recently she gifted me with her famous pizzelles, freshly made and crunchy!
Perfect timing because I had just received a brand new Philips Saeco Syntia Automatic Espresso Machine for review so I called my daughter who is an avid espresso drinker and suggested we get together for a little afternoon espresso.
This is a very sleek machine, it doesn’t take up much room and it looks absolutely gorgeous on your counter top, a far cry from my stove top moka pot!
It has all the bells and whistles you could think of, for one thing it’s easy to use, not complicated, no need to read a manual over and over again to figure it out. With a single touch you can have a shot of espresso, a long coffee, some steamed milk or hot water.
What I really love about this machine is that it automatically cleans itself, after each use you will find the compressed coffee disks right in the dump tray.
All the compartments are easily accessible, from refilling the beans and water to emptying the dump and drip trays. 
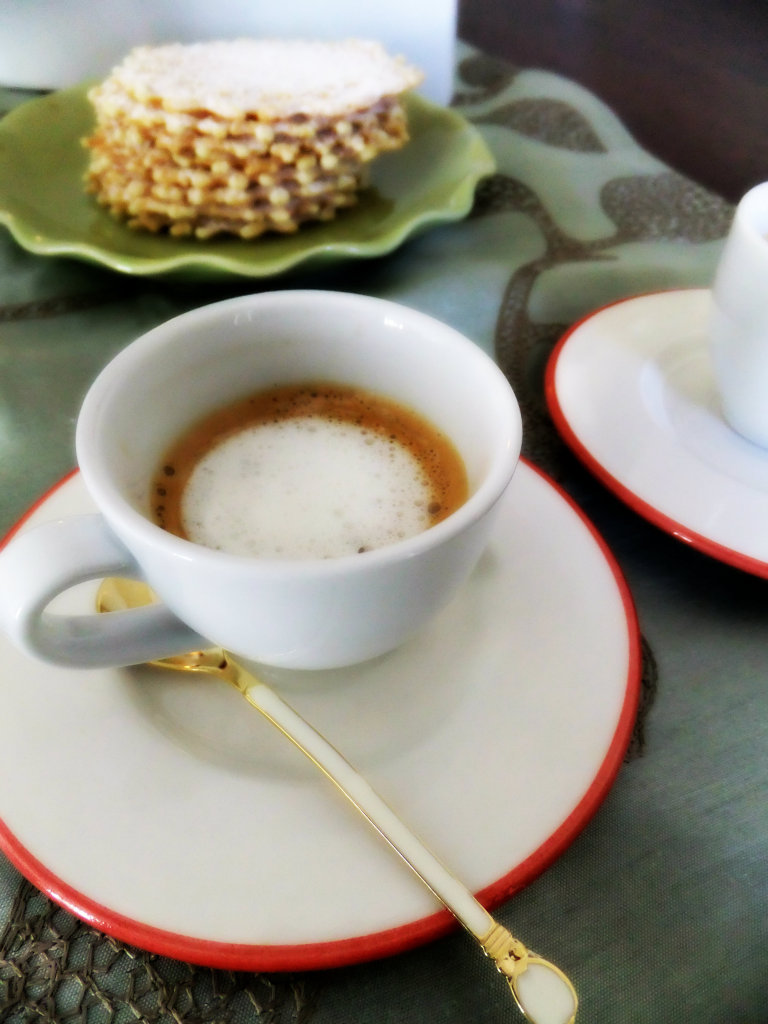
You might be wondering what the quality and taste is like, well for one month now it has been consistently brewing rich, complex and well balanced cups of espresso with beautiful caramel colored crema on top!
The pressure on the steamer has also worked consistently well, I only wish that the water tank was a little larger as well as the bean hopper.
I enjoy having an occasional macchiato, which is basically a shot of espresso with a dollop of foam on top, the Saeco Syntia produces the perfect cup!
Is it a little pricey? Sure, but if you frequent those popular coffee shops on a regular basis, add up what you’re spending over the course of a year you might feel justified to be your own barista at home, plus you can share the love with all your family and friends!

If you’d like to know more about Philips Saeco you can visit their website, as well as their Facebook page.

If you’re craving homemade pizzelles after this post, here’s a link to one’s I’ve made.

Disclaimer; I was provided a Philips Saeco Syntia machine for review, my opinions are totally my own.

Signature

Warm and Cozy Fall Dinners

The cooler weather is bringing out my urge to cook more comfort foods. When it’s damp, rainy and cold outside, like it happens to be today, a salad just isn’t going to cut it! I’m sharing with you two of a very long list of dinners that bring me comfort.  Neither take too long to cook, so both would be great for a mid week meal as well as for the weekend.
Boneless Pork Chops in a Creamy Mustard Thyme Sauce with Mushrooms and Caramelized Shallots.
Sound fancy or complicated?  It’s really not, providing you have some caramelized shallots or onions done ahead of time.

Season your chops with salt and pepper then brown them in a drizzle of olive oil.*** Remove chops, do the same with the mushrooms, then set aside as well.*** De glaze your pan with chicken stock enough to cover the bottom and let it bubble.*** Add two heaping tablespoons of grainy mustard, some fresh thyme and a cup or so of cream or half and half, whisking until smooth.*** Place the chops back in along with the mushrooms and simmer until meat is cooked through.*** Garnish with the caramelized shallots.
You’ll need to have something green on the side so, how about a little broccoli rabe? It goes very well with both the pork and the chicken. Here’s how I make it.
And speaking of chicken, I love making this Ricotta Stuffed Chicken. You’ll need a butterflied chicken, which means you need to remove the rib, back and breast bone of your chicken then flatten it out like a butterfly. I’ve tried to do it myself but it’s never a pretty site so I just let my butcher at Whole Foods do it for me, it takes him 2 seconds and it comes out perfect every time!
Gently loosen the skin all around the chicken with your fingers, be careful not to rip into it.

Saute in a small pan, 3 chopped green onions and 1 minced garlic clove.*** After it cools, place into a bowl along with 2 cups of drained ricotta cheese,*** 1/2 cup of chopped sun dried tomatoes in oil,***1/2 cup of grated romano cheese,*** the zest of 1 lemon,*** chopped fresh basil and parsley,*** salt and pepper. Mix it all together.
Take a spoon and shove the mixture all over underneath the skin that you loosened. Rub the outside of your chicken with olive oil and fresh herbs and roast in a 375 degree oven until internal temperature reaches 180.Get your sweater on and start cooking!


Signature

Savory Kale and Pumpkin Scones

The next time you have a pot of homemade soup simmering on the stove take the extra time and whip up a batch of these savory scones, don’t they just scream fall?
They’re  crunchy, cheesy, and filled with all things good, like pumpkin, kale and of course… a little bit of butter!
Make sure you buy a sweet pumpkin that’s for cooking and baking, or better yet, just use a butternut squash, it’s a lot easier to peel and cut, it tastes good, and you’ll still be getting that pretty orange color.
You can even make them ahead of time, stick them in the freezer and warm up as needed.
I used a wonderful aged cheddar in mine and added kale that is still growing strong in my garden.
These yummy scones came from, ” The Book of Kale” by Sharon Hanna, and the recipe has been reprinted here.
I followed her recipe exactly but also added in about 1/3 cup of grated parmesan cheese, why not?
Perfect with a steamy hot bowl of soup!

Signature

Veggie Napoleon

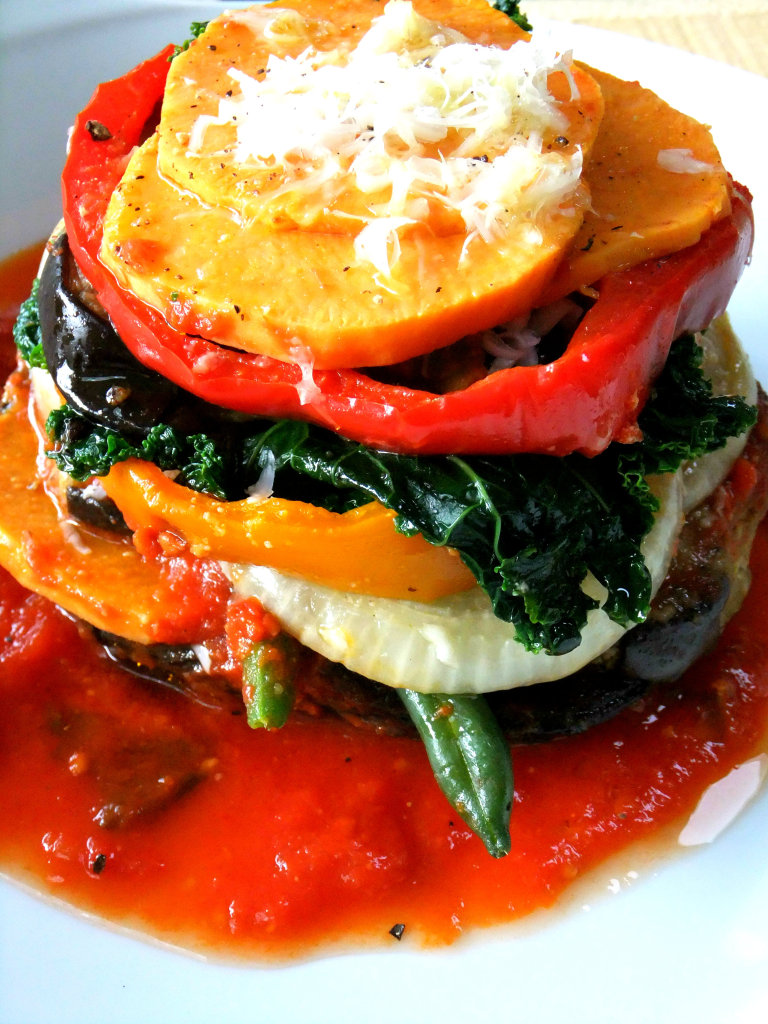
This is a savory version of a napoleon, layers and layers of your favorite vegetables all perched on top of a sturdy portobello base. These pretty bundles are the perfect side dish to any protein you make or a straight up main course served together with a salad.
This dish was inspired by something my sister in law ordered while on vacation, her portobello was filled with Yukon gold potatoes, caramelized onions, roasted red peppers and parmesan cheese.

I wanted to incorporate some autumn vegetables on mine so I added sliced sweet potatoes, kale and some nice fresh green beans I found.
Everything is precooked before you layer, I steamed the green beans and sauteed the kale but roasted everything else you see here, the eggplant, red and yellow peppers, the sweet potatoes and the onion slices all tossed with a little olive oil and placed in a 400 degree oven until golden and tender.

The portobellos, (I bought large ones) were scraped of their gills ( to give you lots of room for layering) and roasted for only 10 minutes along with everything else just to get them a little tender.

Then just start layering! In between the layers you want add some grated cheese that melts good like fontina or mozzarella, it sort of “glues” the veggies together so that when you cut into bundle, ( with a serrated knife please) they won’t fall apart.
Place them back in the oven for a couple of minutes just to let the cheese melt in between.
I think I was getting  a little over zealous here stacking them too high with too many layers in the beginning, I tend to over due it, just ask my kids!
 So I ended up making mine a little more compact with not quite as many layers as above but always ending with the sweet potato slices on top.
 Place your finished veggie napoleon in a nice big puddle of marinara and sprinkle with more cheese, delish!
Get creative here, the various veggie combinations are endless!! 

Signature

Scenes from Seattle

I just returned from my Seattle vacation and since I don’t have a stitch of food in my house or any desire to cook right now I thought I’d share some highlights of my trip.
The weather was beautiful all week, it only rained once for just 15 minutes.
We took a cruise all over Elliott Bay and Puget Sound.
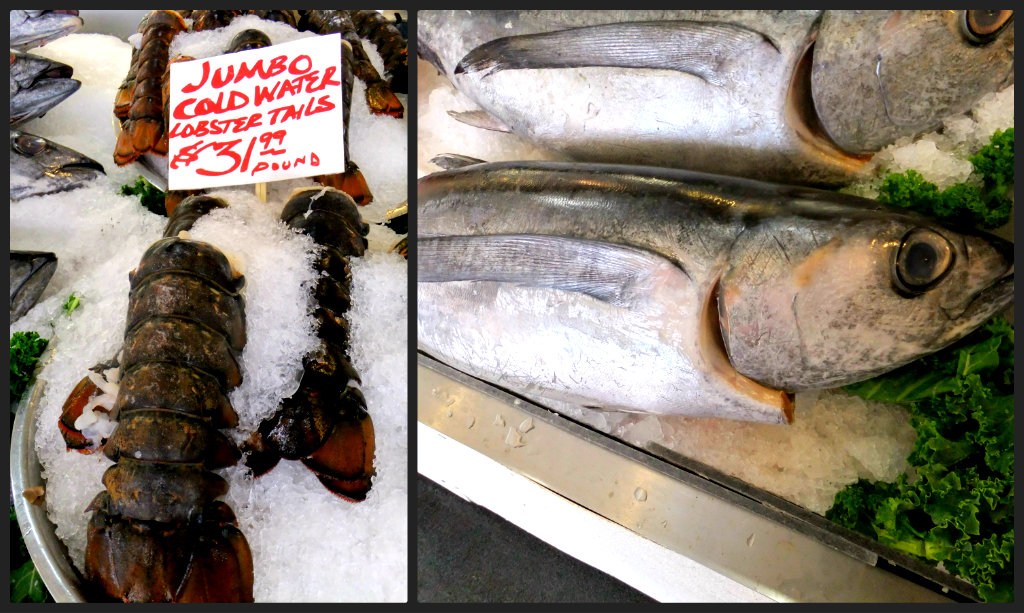
No wonder why they call Pike Place Market the “soul of Seattle”, aisles and aisles of the most beautiful local produce, flowers, artisan vendors and hand crafted gifts, over 100 places to indulge when hungry, and the most gorgeous fish this Midwesterner has ever seen!
And yes, they do throw fish there, in fact my husband caught a 20lb salmon that was thrown to him, thank goodness he caught it!
I’m a big fan of Dale Chihuly and couldn’t wait to visit Chihuly Garden and Glass to see his work up close. Glass artist extraordinaire, Chihuly is known for his large architectural installations, you might have seen the ceiling in the hotel Bellagio in Vegas where he installed over 2000 hand-blown glass elements.
One of my favorite exhibits he did was Chihuly over Venice, where he hung the most amazing glass chandeliers over the canals and piazzas in Venice, breathtaking! 
The picture really doesn’t do this justice, this boat was over 10ft long filled with magnificent glass works!
The museum has his works inside and outside in a garden and it’s located right near the Space Needle as you can see in the picture.
His colors are just amazing!
We went to wineries and waterfalls and visited the the beautiful Washington coast.
You know what I love about Seattle and the state of Washington? They’re coffee obsessed! Everywhere you look, virtually every corner you’ll see a coffee shop or hut like this one. We grabbed a cup and headed right down on to the sandy beach with our rental car gazing at the pacific and watching this couple make gigantic bubbles.
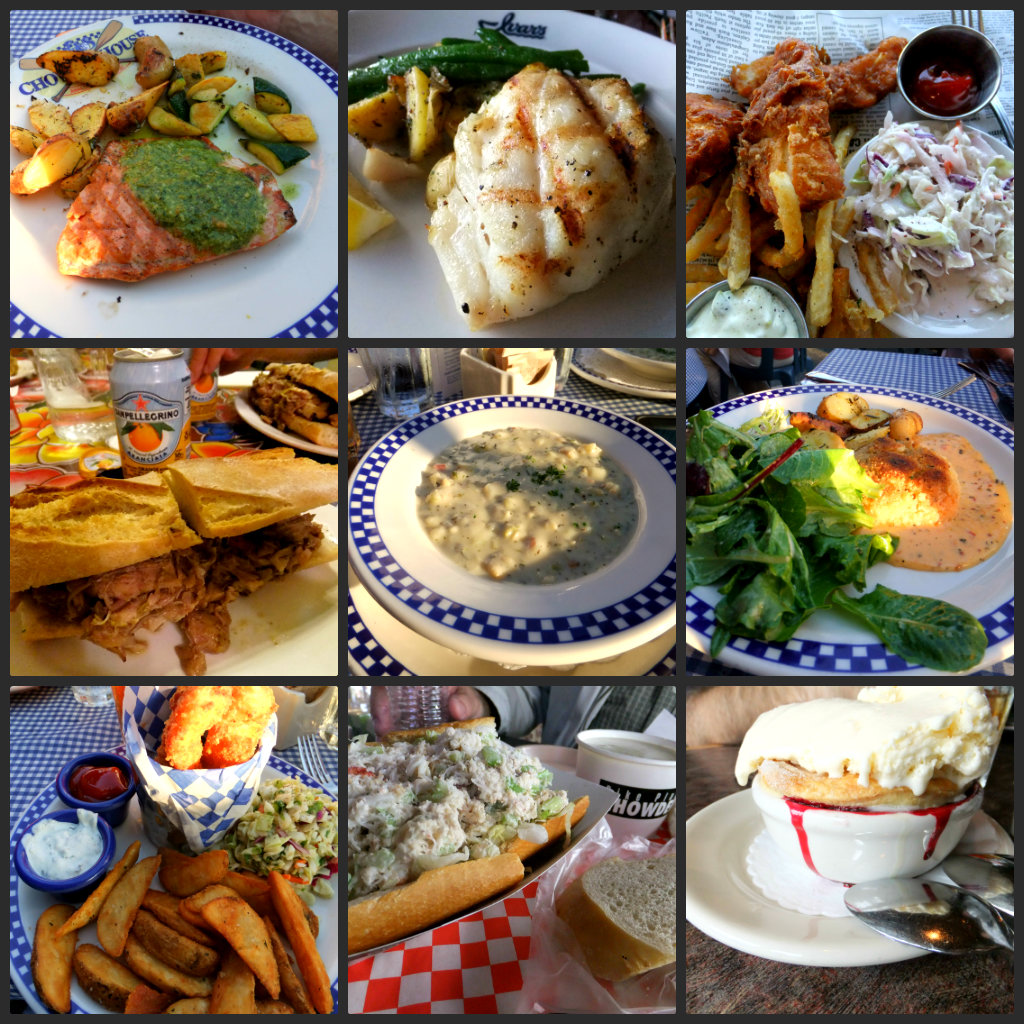
And how could I not talk about the food! This IS a food blog after all! Here’s a small glimpse of some of the food we consumed.
Fresh wild salmon, amazing halibut, ling cod, crab cakes, clams, fish and chips, fabulous crab sandwiches on sourdough, chowder, chowder and more chowder, marionberry pies, we even stopped in at Salumi and had porchetta sandwiches, but mainly we were all about the fish.
Would I visit Seattle again? Most definitely!

Signature

Kale and Almond Pesto with a Little Bit of Heat

We have three different varieties of kale growing in our garden, Cavolo Nero or tuscan kale, the curly and green-gray type and one that is a redish purple color with ruffled leaves, I love them all!
 Quite honestly I never thought of turning kale into a pesto, I’m such a basil person, until I saw the new Donna Hay magazine and then I got instantly inspired!
What a great way to use up all my kale!
What I loved was her addition of red chillies and toasted almonds, the chillies give a slight touch of heat and the toasted almonds add so much flavor to the pesto.
Blanching the kale for a few minutes and then placing it right into a bowl of ice water, helps to retain it’s vivid green color. I made mine about a week ago and it’s still bright green. 
If you’re a kale lover and you know just how good kale is for you, then you have to make this! Dare I say I’m liking this better than basil pesto right now, that’s how good it is.
The first time I made it I quadrupled the recipe.

I’ve been tossing and slathering it all over everything. Here I tossed it with roasted zucchini coins and orecchiette pasta.
Slathered over our weekend frittata, man was that good!
And my absolute favorite, ( thanks to Donna Hay) slathered over a warm, right from the oven, roasted chicken.
AMAZING!
I will be making many more batches of this before all my kale is gone… My family is thanking me!

Here is my adapted version, slightly different from Donna Hay’s because she used Manchego cheese and I used romano, she also added 1 cup of parsley in addition to the kale, I just used straight up kale.
2 cups of kale leaves stems removed, blanched and squeezed of moisture
1/3 cup of toasted almonds
2 red chillies
3 cloves of garlic
1/3 cup of grated romano
1/2 cup of olive oil
salt and pepper
Heat oven to 375F. On a small baking sheet place almonds, chillies, and garlic drizzle with olive oil and roast for 8-10 minutes or until almonds are golden brown. Deseed chillies.
Place the almonds, chillies and garlic in a food processor then add the kale and cheese, process until roughly chopped then drizzle in your olive oil.
Taste it for salt or more cheese or even more oil, the pesto should have a nice movement to it when stired.
Enjoy!

Signature

Champagne Grapes

Champagne Grape Cake, is a moist, not so sweet cake, made with a combination of olive oil and butter with hints of citrus and vanilla, the cake is crowned with tiny, miniature, champagne grapes that burst with intense flavor when you bite into them.
These intensely sweet pearl sized grapes are in season for a limited time right now and I was lucky enough to find a package at my local Whole Foods. They’re seedless with a deep blue black color and quite a bit smaller than a regular sized grape, as you can see above.
Champagne grapes are not to be confused with the variety of grape that they actually use to make champagne with, these are more “currant like”.
 See how tiny they are?
Get a pot of espresso going because this cake is the perfect ending to a meal and I just loved the combination of olive oil and butter, really delicious!
Here’s the recipe, it’s adapted from Patricia Wells at Home in Provence.
I had some grapes leftover so I decided to make a chicken salad with the remaining ones tossing it all together with this wonderful lemon flavored olive oil I received from Nudo.     
Ingredients were, leftover roasted chicken, celery, red onion, radish, apple, crushed hazelnuts, basil and of course, those luscious and juicy champagne grapes!
Grab a package if you can before they quickly disappear!

Signature

Tomato Harvest

I’m sure many of you are thinking up different ways to use up your garden tomatoes like I am, I’m not a caner so I try to use them as they start piling up. So far I’ve made numerous caprese salads, ( a stash of fresh mozzarella is a staple in my fridge lately).
Tossed them into pastas, made gratins with them, used them with grilled meats and fish, stuffed them, made quick sauces, dried them.
I’ve roasted cherry tomatoes by the pan full and graced many things with them, pizza, panini, tarts, omelette’s, I could go on and on and so could you I bet!Recently I made this Tomato and Corn Pie and of course It has a little Italian twist on it. My only regret is, I should have made more than one, it was that good and disappeared in a heartbeat!
I just used a good store bought refrigerated pie dough, placed it into my pie pan, brushed it with olive oil and sprinkled with black pepper, then I pricked the dough all around with a fork.
I layered the bottom with a mixture of shredded asiago, mozzarella and grated romano cheese.
On top of the cheese I scattered caramelized onions and fresh basil. Place fresh corn from the cob over that and add a quick drizzle of olive oil and more romano.
Arrange sliced tomatoes on top adding salt, pepper, dried oregano, fresh basil and another quick drizzle of olive oil. Bake in a 375 oven until crust is a nice deep brown. Let it cool down before you cut into it.
Serve this with a green salad and you have a fabulous meal!
I made this for breakfast last Sunday, Baked Eggs in Tomatoes.
Basically you cut a 1/2 inch off the top of a tomato, gently scoop out the seeds and inner membrane, being careful not to break through the flesh of the tomato. Season, drizzle with olive oil and layer the bottom with fresh corn. Place in a baking dish lined with parchment.
Whisk up one egg per tomato, I added basil, romano cheese and a bit of asiago and divide and pour mixture among the tomatoes. Top with romano and bake at 350 for 45 to 50 minutes. Serve warm.
Recipe adapted from Martha
Pop some toast in the toaster, have the coffee brewing and the Sunday paper near by and enjoy a leisurely breakfast!
Cheesey, eggy, tomatoey goodness, oh my!I was touched in so many ways. 


Signature

Has It really been five years?

It’s hard to believe that this is my fifth year of blogging! It seems like only yesterday that I walked out into my garden with my Kodak point and shoot camera and took a picture of my basil plants and came in and wrote my first blog post.
Sometimes I cringe at my old food photos that I took with my flash on, (an absolute no no in food photography) but I will always keep them there because it was all a part of my blogging journey.
And what a journey it has been! They say time flies when you’re having fun, and I can honestly say that that statement is so true. I’m still having fun, I never get bored blogging and I’m not ready to give it up, in fact, I’m gearing up for new and exciting things to happen with Proud Italian Cook in the future.

I could not celebrate this blogiversary with out expressing how extremely grateful I am to all my readers  who faithfully stuck with me, your comments always a source of encouragement. A big thank you to those who take the time to write me personal emails, my subscribers who send me kind words so often. To those who “like “me on Facebook, thank you. To all those who have “pinned” my recipes and photos on Pinterest, a gigantic thank you, I can’t believe how my traffic has increased because of it!
To my family and friends who put up with all my craziness, waiting patiently as I take photos at home and in restaurants, and thinks it’s weird if I don’t, and to my husband Tony, my number one fan who encourages me everyday and eats anything I put in front of him!

And lastly, to all my dear friends in this blogging community that we are all a part of, you know who you are, you’re friendship has been the best part of my food blogging journey, thanks to all of you!


Signature

Summer Bounty Zucchini Tart

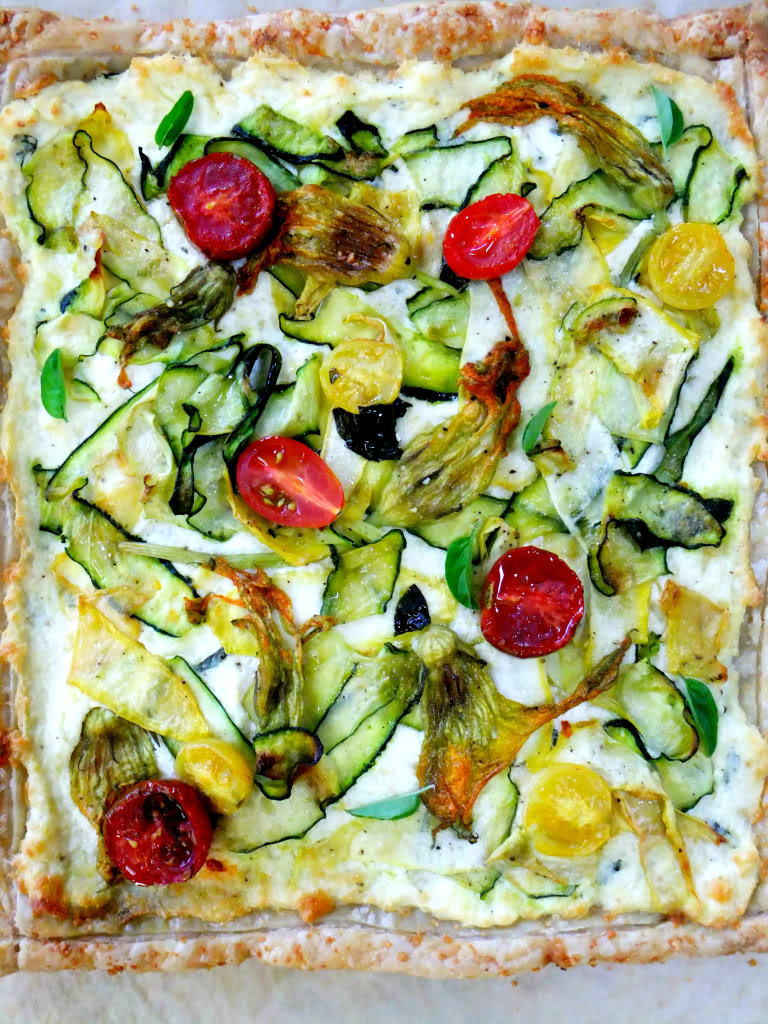
Delicate zucchini blossoms and thin ribbons of squash pressed into cheesey flavored ricotta highlight this summer bounty tart and it’s nothing short of perfection!Zucchini blossoms need to be showcased and this is the perfect canvas.
Thanks to convenient store bought puff pastry, it makes everything look so elegant when laid upon it and it tastes out of this world.
Crunchy, flaky, buttery!
Even if it sticks together because you might have left it out of the fridge too long and you couldn’t unfold it like you wanted to, ( cough cough),  it still looks pretty and no one would even have a clue that you had a problem.Here’s how you make it.

RICOTTA MIXTURE
In a bowl mix 2 heaping cups of drained ricotta
1 egg
fresh snipped basil
3 different shredded cheeses, I used romano, mozzarella and an aged chedder. At least 1/4 cup each or even more to taste. My advice, taste mixture before you add the egg.
Salt and pepper
TOPPING
In a saute pan with olive oil and 1 clove of crushed garlic, saute ribbons of zucchini, yellow squash and your zucchini blossoms for a quick minute or two until slightly wilted.
PUFF PASTRY
Line a baking sheet with parchment and unfold your cold puff pastry sheet right on to it. Lightly roll it till seams are flat and sheet looks even all around. Take a pairing knife and make a 1/2 inch border all the way around being careful not to cut through. Take a fork and prick the pastry all within the border so air can get through.
Just spread the ricotta mixture, (you’ll have extra to do another one) within the border and then lay your sauteed squash on top and dot with a few cherry tomatoes and a little drizzle of olive oil.
I like to brush my edges with olive oil and a sprinkling of romano cheese.
Cook in a 350 degree oven until edges are dark golden and crispy and so is the bottom, at least 1/2 hour could be more. Ovens vary so just check it.
ENJOY!
Signature

Eggplant Patties and Hot Weather Desserts

The extreme heat we’ve been having here has called for lighter meals, lots of veggies, salads, and fruit desserts.
So if you’ve gathered up a few eggplant from your garden or farmers market and are still thinking about what to do with them, consider making these eggplant patties.
You can eat them like a burger with a bun or without, either way they’re chock full of flavor in every bite!
They couldn’t be easier to make all you have to do is dice up 2 or 3 eggplants and place them on a baking sheet along with 2 minced garlic cloves, drizzle with olive oil, salt and pepper and roast in a 425 degree oven until soft with a little color, then let it cool down.
Place in a bowl the cooled down eggplant, grated romano cheese, 1/2 diced red pepper, 1/2 diced onion, 1/2 cup of fresh or defrosted frozen corn, fresh basil, parsley, 2 eggs and a handful of breadcrumbs. My advice is to taste the mixture before adding the eggs so you can adjust all ingredients to your desired tastes, I never measure romano, I just sprinkle it in by the handfuls.
Stir everything together, form patties and place on a silpat or parchment and drizzle the top with olive oil, bake at 425 until golden, turning over once.
These are so good you’ll want to make them again and again!
As far as desserts go, we have been obsessed with this grape salad, we had it at a party and it was a big hit, people go crazy for it, it disappears before your eyes! It’s so refreshing and cold, perfect for a hot summer day.
The most time consuming thing about making this is picking the grapes off the vines.
Use a mixture of green and red seedless grapes, make sure they’re really cold,  I had a bag of each. In a bowl add 1 heaping cup of full fat Greek yogurt, squirt some honey in to it and sweeten it up. Now add 1 heaping 1/4 cup of softened cream cheese with a teaspoon of vanilla and stir everything together and then fold in your cold grapes. You can make this the night before but when you’re ready to serve add a sprinkling of brown sugar and toasted walnuts for garnish.
Please make this for your next party, you’re guests will love it!
Melons, I could seriously eat everyday, so refreshing! Try making
cantaloupe ribbons they look so pretty on a platter with dollops of honey yogurt, blueberries, blackberries, sprigs of fresh mint and garnished with crunchy Marcona almonds.Cut a melon in half, scoop out the seeds, cut into wedges, trim off the rind then slice each wedge with a mandoline into ribbons. Do not use an overly ripe melon, the ribbons will be too watery, a little firmer is better.
Enjoy the last days of summer, before you know it we’ll be making big pots of hot soup!


Signature

Windowpane Pasta for a Celebration!

Today I’m doing something a little different here. I was invited along with four other bloggers to guest post over at my friend Lori Lynn’s beautiful blog in celebration of her 5th anniversary.
If you haven’t discovered Taste With The Eyes, you’re missing out on something extraordinary. Her warm and friendly blog showcases amazing food and photography beyond the norm!

Today I’m featuring on her blog the technique of making
Windowpane Pasta, sometimes referred to as Stained Glass or Silhouette, it’s a very simple way of transforming plain pasta sheets into something beautiful and very impressive!

I’m giving you the complete instructions for this technique today in my guest post, so please head over HERE.

If you’re a regular reader of mine you’ll know I don’t do anything too complicated, trust me, this is so easy to make, you’ll be amazed and impressed with yourself and so will your friends and family!
When you go over and visit I’ll also tell you two different ways that I like to serve this. So please, check out my guest post and share in celebrating my friends 5th year of Taste With The Eyes!

Speaking of 5 years, my fifth year anniversary is coming up in a couple of weeks, hard to believe, but it’s true. Time sure fly’s when you’re having fun! So stay tuned for my future celebration and a giveaway!

Signature

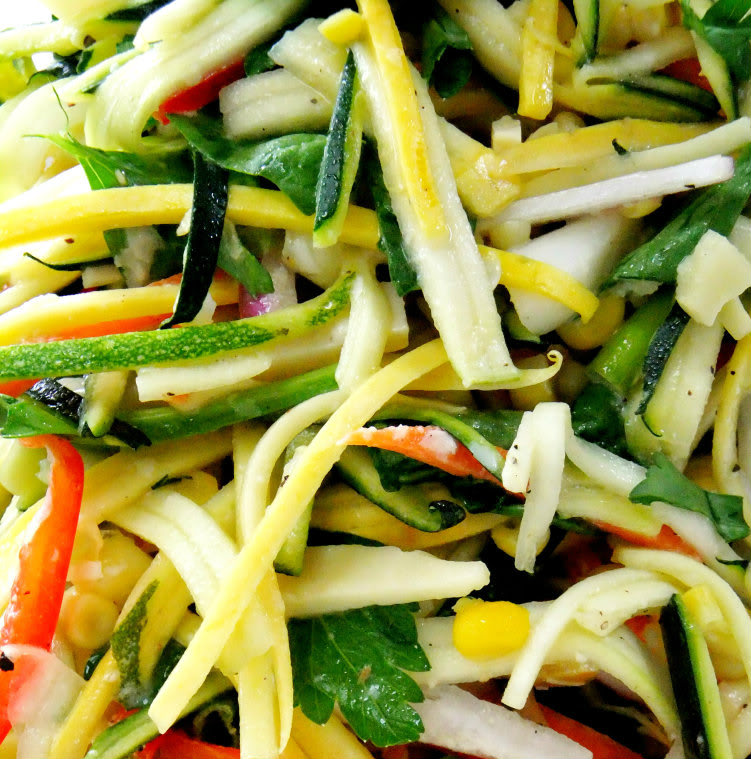
Summer Veggie Slaw

Here’s another way to start using up all the zucchini and other veggies and herbs that your garden is producing, just gather everything together and make this Summer Slaw!
It’s quite easy to do if you have this handy julienne peeler, otherwise a mandoline slicer would work as well.
Note: I cut my squash in the middle so that when I used my peeler I wouldn’t have long “spaghetti” like strips but rather shorter ones like in coleslaw.
The ingredients I used were:

  • Yellow squash
  • Zucchini
  • Red pepper strips
  • Match stick carrots
  • Radish, sliced and cut into strips
  • Green onions sliced diagonally
  • Red onion strips
  • Very fresh shucked corn or precooked
  • Fresh picked basil and parsley
  • Torn spinach leaves

No exact amounts here, just use what you have and place everything in a big bowl like I do, tossing and adding until you have a nice color balance with your veggies and herbs.

For added flavor I tossed in strips of Parmigiano Reggiano, but you can get creative and use any aged cheese you like, Fontinella and Provolone work as well because the cheese can easily be cut into strips.
For my dressing I used a simple olive oil and fresh lemon juice but if you wanted something creamier that would work also.
All the ingredients are raw except for the corn, I had two cooked cobs leftover, but feel free to use super sweet fresh corn straight from the cob uncooked.
Gently toss everything together, taste for flavor adding salt and pepper and a little grated cheese if you like, then pile high on a platter.  If I had pine nuts I would have added them.
After I took the photo I added in some slivered almonds and a little crumbled feta.This was a great side dish to my cedar planked salmon!
The perfect summer meal on a very hot day!


Signature

Cedar Planked Grilled Portobellos Stuffed with Summer Veggies

I normally use grilling planks for salmon or scallops but this time I thought I would try using vegetables, in particular big “meaty” portobellos!
Make sure you buy natural untreated wood that is free of chemicals, strictly sold for cooking, You wouldn’t want to use just any old type of wood from a hardware store, it could be very toxic!

 There are various cooking woods on the market, some of my favorites as well as the cedar are maple, cherry, alder, apple and mesquite just to name a few.

Just make sure you soak them submerged and weighted down in water for at least 2 hours before placing them on your grill, otherwise they will just burn up and you don’t want that.

While your wood is soaking you can be grilling up your veggies. I used yellow squash, zucchini, corn, and red, yellow and orange peppers. They were tossed with a little olive oil, salt and pepper then placed on the grill.

For the mushrooms, the gills and stems were removed, this will give you a nice flat surface for stuffing.

 Brush your mushrooms on the bottom with olive oil and only place them on the grill for 2 to 3 minutes just to get grill marks, caps up. Remove and let them cool completely. If moisture appears just pat with a paper towel.
 Remember, only grill them for a couple of minutes, they will continue to cook on the plank.

I filled my caps with shredded asiago cheese but you could use just about any cheese you want.  Now it’s time to layer your veggies making sure you can see all the different colors. Sprinkle a tiny bit of cheese on top then stick them on the plank!
Try to keep your grill temperature around 350, as their cooking you’ll hear the wood cracking a bit and the sweet smell of the cedar will fill the air.

 The cheese will melt underneath and the veggies will become a little more golden, mine took a good 15 minutes.

Garnish with fresh grilled corn, basil and a drizzle of olive oil.

 The portobellos were infused with a delicate smoky flavor that was so delicious and enhanced all the vegetables.

Trust me, you will love this!

Signature

Pasta Pizza

Last week when it was unbearably hot I threw this dinner together in minutes.
After looking into my fridge for something to make I remembered I had this small container of leftover angel hair pasta with veggies that I had made a couple of days before.
Instead of just reheating in my microwave I turned it into a “pizza”!
My leftover veggie pasta was made with, zucchini, yellow squash, eggplant, peas, artichoke hearts and cherry tomatoes, all were roasted beforehand and then tossed into hot angel hair pasta adding olive oil, fresh basil and grated romano cheese.
To create the “pizza” I just added 2 beaten eggs and more grated romano cheese right into the  leftover container, mixed it together, then poured the pasta mixture into a hot skillet that was drizzled with olive oil.
 When it turns golden on the bottom, place a plate on top of the pan and flip the “pizza” over to the other side and let it cook until golden and set, then slip it out on to your serving plate.
 Garnish with more basil and grated romano.
Cut into wedges and serve this with a nice salad, some crusty bread and a nice cold glass of your favorite wine and your dinner is good to go!

Who knew leftovers could taste so good!

Signature

Party Dipping

I want to share with you two of my favorite dips that I often make for parties.  The one above is a Pineapple Cream Cheese Dip I found over a year ago from The Healthy Foodie blog, I would give you the link but it keeps saying potential virus so I’m not going to give it to you.
Anyway, I just loved the presentation and it tastes really good too. Trust me you’ll get a lot of ooohs and aaahs when you bring this out!
It’s so simple to make, Just get a fresh pineapple and cut off the top, now split the top in half so it will lay flat. You just need the top, save the pineapple for eating later.
I’ve since tweaked the recipe a little, here’s my version.In a bowl add 2 blocks of softened cream cheese, reduced or full fat, whatever you like.
1/4 each of a red, green and yellow pepper, small diced.
1/2 cup of sliced black olives from a can, I just chopped them up.
1/2 of a large piece of celery, finely diced.
2 or 3 small green onions, finely diced.
2 tablespoons of parsley, plus salt and pepper to taste.
A heaping 1/4 cup of crushed canned pineapple, drained
2 heaping tablespoons of crushed pecans.
Stir everything together tasting for the correct seasoning adding more of the ingredients if you so desire. Now cover and refrigerate the mixture for a couple of hours, you can make this all the day before if you want.
When you are ready to assemble, plop the mixture on to your serving platter and shape it into a barrel, now go get the top of the pineapple that you previously cut and place it on top.
I used about 70 pecan halves, nice ones, not cracked. It sounds like a lot but I just bought an 8 ounce bag of raw pecan halves at Trader Joes and still had some leftover.
Place them all over in rows on top and along the sides.
You can serve this with your favorite crackers or baby carrots, it feeds a crowd!
You can even make the cream cheese mixture up to 3 days before, I’ve done it and  it tastes even better because all the flavors come together.
Now this is my absolute, go to, hands down, favorite appetizer dip! Rosemary Olive Oil Pita Strips with Tuscan White Bean Dip. I can’t tell you how many times I’ve made this for a party, the recipe comes from my friend Jean, you can make a ton for practically pennies!
The bean dip has flavors of garlic, parsley, and lemon all swirled with olive oil.
The pita chips are made my taking a piece of pita bread, cutting it in strips then snipping the tops off and separating the top from the bottom.  Then each strip is individually brushed with dried rosemary and olive oil then baked. You could make them up to 3 weeks ahead.I did a blog post on these a while back, here’s the link to the recipe on that page and here is the recipe on this post.

ROSEMARY OLIVE OIL PITA CHIPS WITH TUSCAN WHITE BEAN DIP: (Thanks Jean!)
First thing you do is soak some dried rosemary ( not fresh) in a bowl of extra virgin olive oil, you’ll be using this mixture for brushing on the pita’s. Let it soak for a good hour or so.
**1 15oz can of drained and rinsed cannellini beans.
**1/4 cup of fresh Italian parsley
**2T fresh lemon juice along with and the grated lemon peel of one lemon
**1 garlic clove
**salt and pepper
**1/3 cup of olive oil
Put everything in a food processor and stream in the olive oil until nice and creamy. So easy!
For the pita chips, buy a bag of fresh pita’s, take each pita and cut them into long strips, you should get six to 8 strips per pita. Now snip off the tips to square them off, and separate. After separation you should have around 16 individual chips then per pita. ( see why I say it makes a ton!) Brush each strip with the rosemary olive oil mixture on the rough side of the pita, the inner side, place on a baking sheet, sprinkle with kosher salt and bake in a 400F oven for about 7-8 minutes, or until golden brown. Let them cool on a rack, then place them in your cookie tin for storage.
NOTE: I would suggest not to put any rosemary in the dip at all, just the parsley, otherwise it would be too overpowering, the freshness of the zest, lemon juice, parsley and garlic is a great compliment. Feel free to double, triple, or whatever the recipe. I made 8 bags of pita with 6 cans of beans for my son and DIL’s baby shower!!!
Print Friendly
I hope you try these summer appetizers for your next party!


Signature

The Heat Is On!

The temperature is rising here in Chicago so lighter meals and salads are now on the menu.
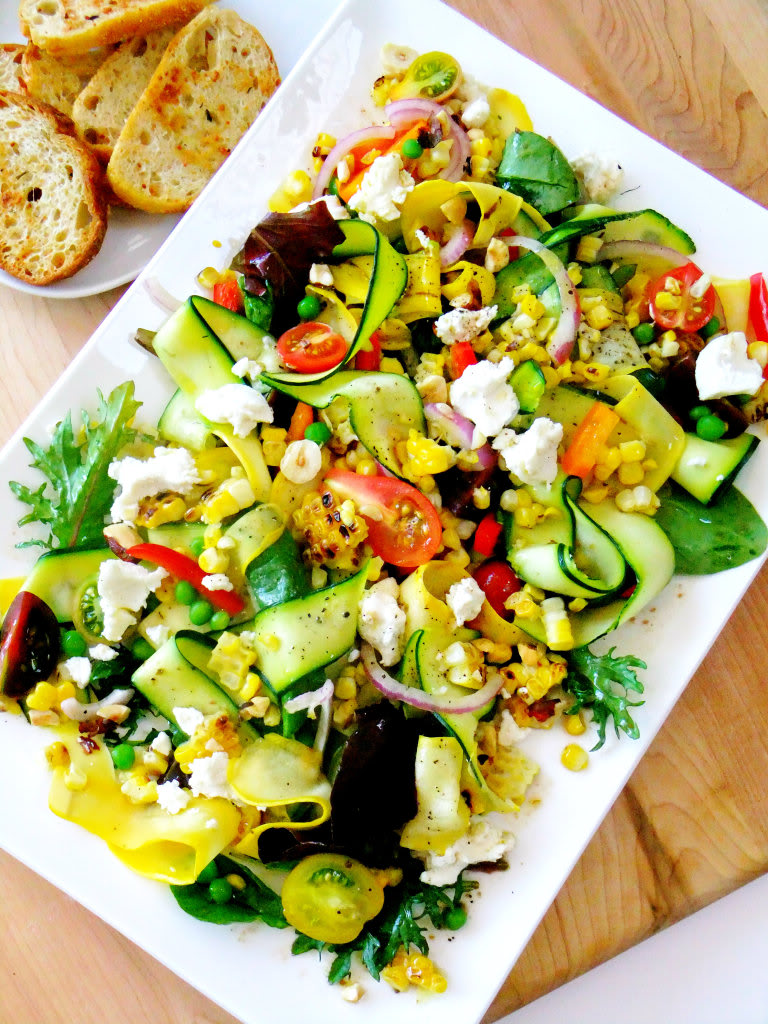
This extremely delicious salad just screams summer! It’s fresh and bursting with healthy vibrant color, how could you resist?
Ribbons of yellow squash and green zucchini take center stage on a bed of mixed greens tossed in a light vinaigrette.
 The other components are, sliced mini heirloom tomatoes of various colors, red and orange pepper strips, purple onion,
peas and grilled corn, ( which I grilled inside) finished off with dots of creamy goat cheese and crunchy hazelnuts and a drizzle more vinaigrette.

Crispy bread and a tall iced tea and your set for the perfect summer meal, of course feel free to add in some grilled chicken for a little heartier fare, but I was totally satisfied.
There are no exact ingredients here just add in as much as you want, you can’t go wrong. I layered a platter with mixed greens to start. For mine I used 2 zucchini and 1 yellow squash, the ribbons were made with a vegetable peeler.  It was way too hot to go outside and grill so I put 2 ears of corn in the microwave for 5 minutes then threw them on my grill pan inside to give them a good char.

It looks beautiful spread out on a big platter because of all the colors, so keep this in mind for your July 4th cookout, it would work great as a side.

Stay Cool!

Signature

Portobello Baked Fries with Red Pepper Aoli

About a month ago I went to a restaurant with my girlfriends, we ordered portobello fries for an appetizer and we haven’t stopped talking about them ever since! Trust me, if you’re a mushroom lover you will go batty over these, they’re so addicting you can’t stop eating them!
 Meaty portobellos with the perfect crunch all the way around enhanced even better with the dipping sauce served along side it.
Two of my friends already tried to recreate them at home using panko crumbs and frying them, I decided not to fry mine so I could eat more without guilt, here’s my version.
Go get some nice, large, firm portobellos, wipe them down and scoop out the gills, now slice them up.
Crack a few eggs in a bowl, whisk and set aside.
For my breading I used equal parts of unseasoned good quality breadcrumbs, polenta, and grated romano cheese. I added snipped fresh chives, salt, pepper and a little granulated garlic.
Dip each portobello slice into the egg mixture first then into the breading.
Have your oven at 425 degrees, place parchment paper on a baking sheet and drizzle it with olive oil, then place your breaded slices on top and drizzle with more olive oil. Bake until crunchy and golden, flipping once.
The sauce I made was so simple! Take a jar of roasted red peppers, drain and pat dry. Place them in a food processor with one small garlic clove, salt and pepper. Process until smooth keeping a few tiny lumps. Now toss it all into some real mayonnaise, start out small until you get the right creamy consistency. I added snipped chives to mine.  A match made in heaven!
The polenta provides a nice coating that really sticks to the portobellos, by adding the breadcrumbs you’ll get even more crunch, and the romano cheese just gives you tons of flavor.
 Now get ready to dip!

Signature

Crowd Pleasers

Are you hosting any parties this summer?  Here’s a few idea’s to help you feed the masses! Perfect for Father’s Day coming up this Sunday, a casual buffet or a backyard barbecue.

My family always enjoys a big pan of sausage with peppers and onions.

I buy my favorite Italian sausage and cook it up on the grill, because, lets be honest, grilled sausage has the best flavor!
When it cools down I slice it into two inch pieces on the diagonal.
 Five pounds will feed a ton of people!

For flavor and convenience I always roast my peppers and onions on a baking sheet drizzled and tossed in olive oil and seasoned with salt and pepper in a hot 425 degree oven, this way you can do large amounts and your stove doesn’t get all messy and splattered with grease, and personally, I think the flavor is so much better!
You can make this ahead of time, toss everything in a foil pan and heat it up right on the grill when you’re ready to eat for a few minutes just until warm.
Chickens marinated ahead of time in olive oil, garlic, lemon juice and lemon peel tossed with parsley, oregano or any of your favorite herbs. I like buying half chickens and then after they’re grilled I just cut them across the center to separate the leg and thigh and wing and breast.

 Five chickens will yield you twenty quarter pieces.

Everybody loves a pan of Baked Mostaccioli and it compliments the chicken and the sausage so well! 2 pounds of pasta goes a very long way especially when you are adding ricotta, grated romano cheese and fresh mozzarella to it.

I always like to have some vegetable sides like this pan of zucchini that I roasted with a little bit of olive oil in a 425 degree oven with thin sliced tomatoes and onions.
 When it all cools down, drizzle all over with more olive oil and fresh basil, you can eat this at room temperature.
Try to find and use the smaller zucchini for individual servings or you can just cut them in half.
Eggplant caprese stacks are a wonderful side dish, honestly they’re so good you’ll see them disappear quickly!
You can prepare the eggplant the day before or early in the day, slicing into rounds then breading and frying until crispy, then all you have to do is layer one slice of eggplant caprese style with a ripe tomato slice, fresh mozzarella and a basil leaf, then drizzle all over with olive oil. 
Place this mediterranean salad on a big platter and everyone will dig in! Tomato wedges, sliced fennel, red pepper strips, kalamata olives, red onion, crumbled feta cheese and drained canned cannellini beans, all tossed together with parsley, basil, lemon juice and olive oil, also delicious at room temperature.
And don’t forget nice crusty Italian bread to either make a small sausage sandwich or just to have it on the side.
Party on!

Signature

My Big Fat Thick Pasta!

Do you ever have the urge to try different pasta shapes? I do, all the time. In fact, if you were to look on my pantry shelf right now you would see quite a few out of the ordinary shapes and sizes.
 What can I say I get bored with the same old same old!
For my latest pasta shape adventure I tried Mezzi Ziti #9, it’s like bucatini on steroids! Thick and long but perfectly toothy tubular strands, it was an eating adventure to say the least.
 Don’t even think about trying to twirl this pasta around your fork, it’s not going to happen. But I guarantee you’ll be hearing a lot of slurping going on!
 My advice is to eat among those close to you!
My sauce was created with vegetables, it was light and very flavorful. I used cherry tomatoes that I roasted with generous amounts of garlic and olive oil, cooked on foil until they burst, then added in fresh basil. The tomatoes will create a great base for your sauce. To that I added in roasted eggplant, artichoke hearts, roasted red peppers and zucchini ribbons which were quickly sauteed just until they wilted slightly.
Cook your pasta according to directions then toss everything together making sure to scrape all the tomato juices off the foil lined pan. This is a light but still very substantial, meatless meal. 
If you want to be polite you could cut them with your fork as you eat, but it was much better slurping!

Signature

Grilled Shrimp and Lobster Gremolata

Gremolata is not just for garnish anymore! Here it serves as the main ingredient to intensely flavor  baby lobster and shrimp, then all is cooked rustic style in foil right on top of your grill. Perfect for summer entertaining or a special dinner for two.
Gremolata is so easy to make, I used my mini food processor or you can chop it all by hand. Start with four large garlic cloves and a full bunch of Italian parsley, process or mince them together. Place in a bowl, then add the zest of two lemons, the juice of one and enough olive oil to make the consistency loose. Rub the mixture all over your seafood and let it sit for about twenty minutes or so.

Have your grill heated on medium and make a “pan” out of heavy duty aluminum foil. Add your marinated seafood, a little red pepper flakes if you so desire, a handful of grape tomatoes, lemon slices and an extra drizzle of olive oil.

I had two baby lobsters that I precooked in boiling water for five minutes ( I wanted to make sure the lobsters would be cooked through)  and a pound of shrimp, you could use shrimp alone or even some scallops. May I suggest reserving some of the gremolata to toss into warm angel hair pasta, the perfect accompaniment for those flavorful juices!

Cook open faced, with no foil on top, just the lid of your grill down until juices are sizzling and the fish is cooked through.
The smell in my backyard was so enticing that my neighbors were all commenting!
You have to try this!
See what I mean about the pasta and the juices?

Happy Grilling!

Signature