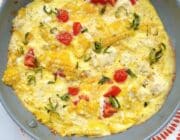
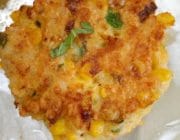
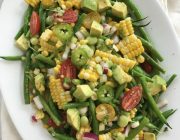
As soon as the weather turns cold I’m instantly in a “soup mood”. Nothing says comfort food more to me than a big pot of soup simmering on the stove. I make sure I have my kitchen stocked with everything I need so when I get the urge to make some, I’m good to go. Recently I made three different soups, some oldies but goodies and some new.
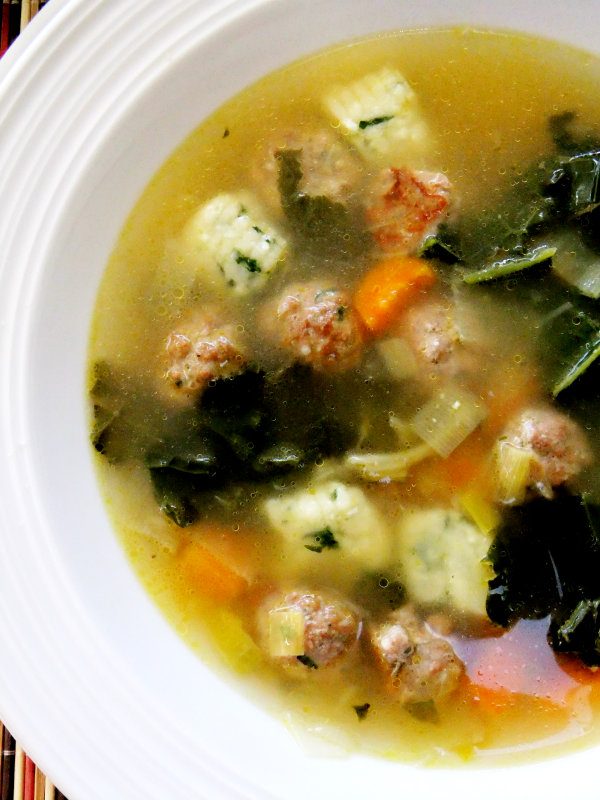 This recipe above is an old standby, it’s quick and it takes no time at all to make, but I’m always improvising depending on what I have in my fridge. This time I replaced the beans with mini Italian meatballs that I had tucked away and I substituted the pasta which I normally use, with some leftover kale gnocchi I made a while back. So now I’ll call it my Meatball and Gnocchi soup! For the greens this time I used kale, but spinach, escarole, or swiss chard would be just as good, plus you could even use a good store bought gnocchi, just use the basic recipe I linked to above for the base. It’s hearty and it screams comfort!
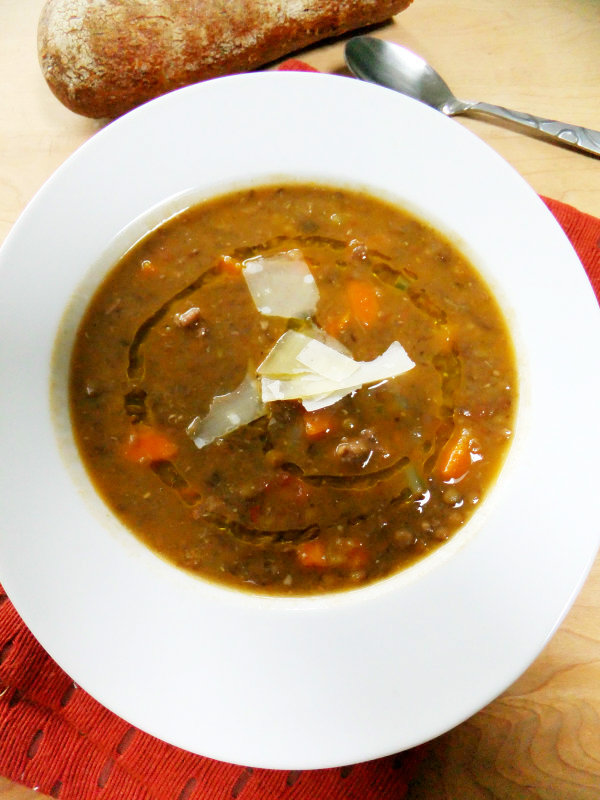 My next soup, Sausage and Lentil, is a huge family favorite. I put this recipe on my blog back in 2007 and nothing has changed except my photos, here’s the recipe. Please don’t let the brown color turn you off, the flavors are out of this world! A bowl of this, some warm crusty bread and dinner is served! I like to garnish with a drizzle of olive oil and shaved parmesan.
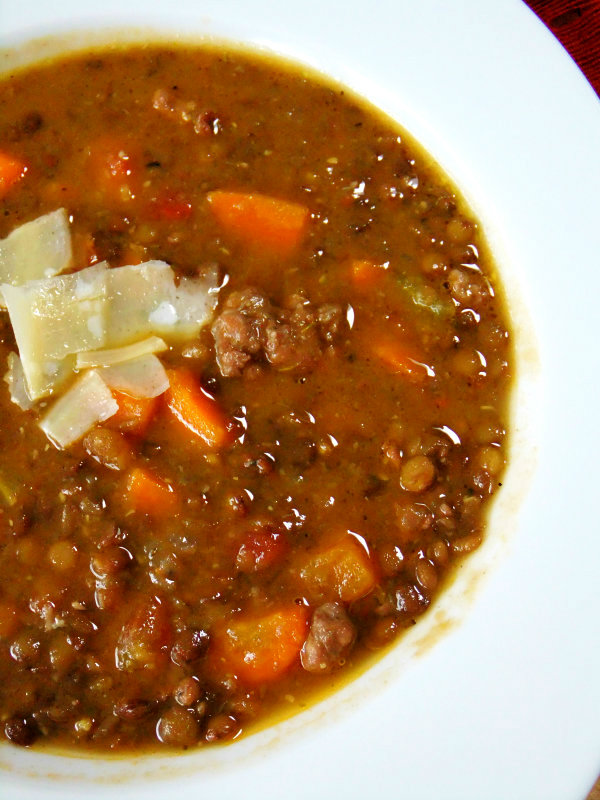 Italian sausage and lentils, a match made in heaven!
 I recently made a pot of Chicken Posole something I’ve never made before but became obsessed with after having a bowl of it from Panera. One bite and I was smitten with these puffed up little corn things, so much so I walked up to the counter and asked what it was and they said, HOMINY. Am I the only person in the world who never ate hominy?? It tasted like little polenta balls. I love this stuff, where have you been all my life? Since I never made Chicken Posole before I got the recipe here. To make things easy I used store bought rotisserie chicken, good boxed chicken broth and canned hominy, my new friend.
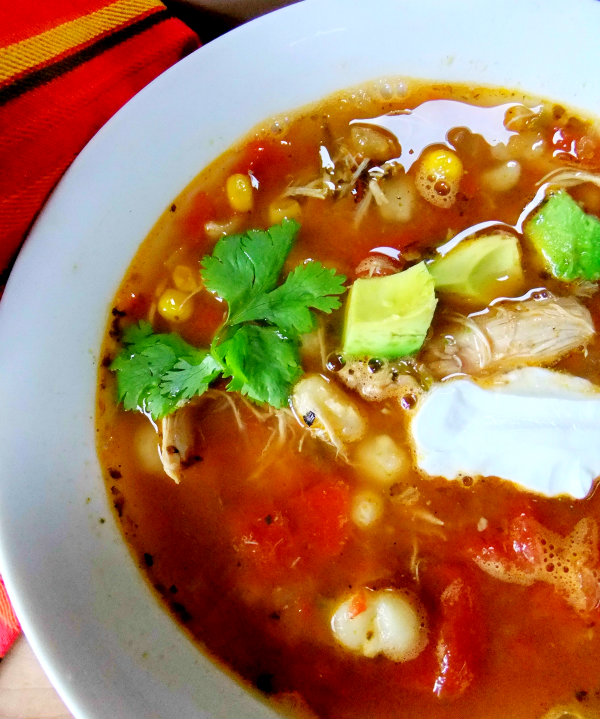 I will be making this over and over again!

 I always keep a box of phyllo in my fridge because I know I can create a quick and easy tart using whatever vegetables I have on hand. In this case I had a bag of shaved brussels sprouts that I got from Trader Joe’s and some leftover roasted butternut squash and before I knew it, a tart was born!
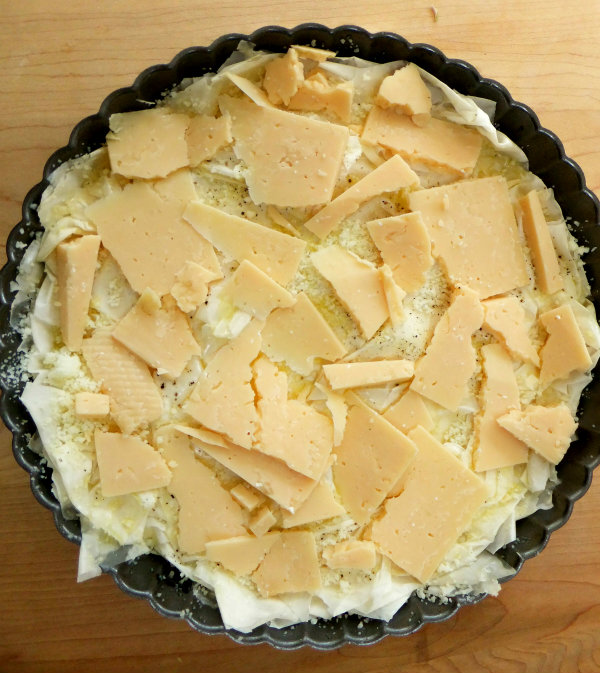 Phyllo is so forgiving and that’s why I like it, you can wing it, patch it and it still looks beautiful in the end. I usually use five or six layers for my 9″ tart pan, each layer sprayed with olive oil and sprinkled with grated romano or parmesan then topped with the cheese of your choice so that all the toppings can sink right into it. I like to use a cheese that melts really good like fontina, gruyere, mozzarella or asiago which happened to be the one I chose for mine. I recommend grating your cheese first then spreading it evenly all over the top, I got lazy as you can see, but it still worked!
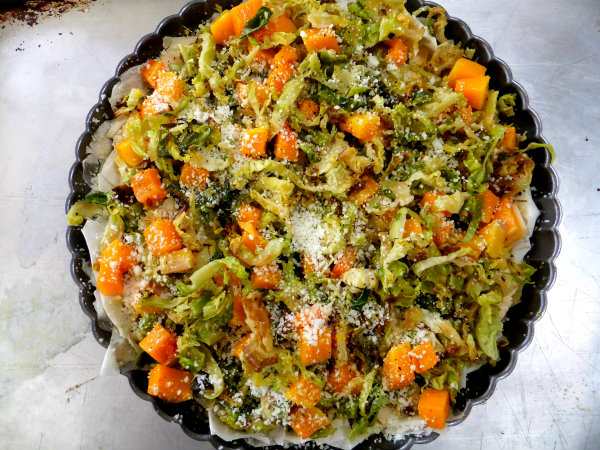 My squash was already roasted and the brussels sprouts were quickly sauteed in olive oil until they wilted slightly.
 Ready for the oven!
 The phyllo gives this tart a nice crispy, crunchy bottom which is a great base to hold all your toppings. The sky’s the limit on what to top your tart with, another favorite I love is caramelized onions, butternut squash and kale, try that next time around!
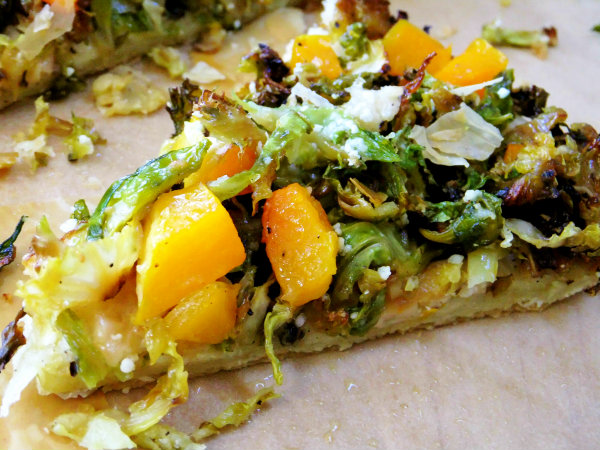 All you need is a salad or a bowl of soup along side this tart and it becomes the perfect dinner, lunch or brunch.
 I love making desserts using ricotta so when I first saw this recipe in the cookbook,
 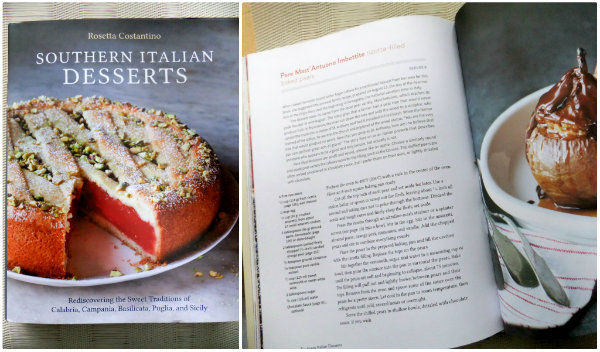 I received this book for review written by Rosetta Costantino she’s also the author of the acclaimed, My Calabria. I was instantly drawn in by the cover photo which was a beautiful watermelon pudding tart, I’ve never seen anything like it. When summer returns to Chicago and watermelon is back in season I’m definitely going to make that!
 For the stuffed pears I needed almond paste which I didn’t have, no worries she tells you how to make it in the book along with many other tips. It was actually quite simple to make, blanched almonds, sugar, water and a little almond extract whirled until it forms a paste in the food processor.
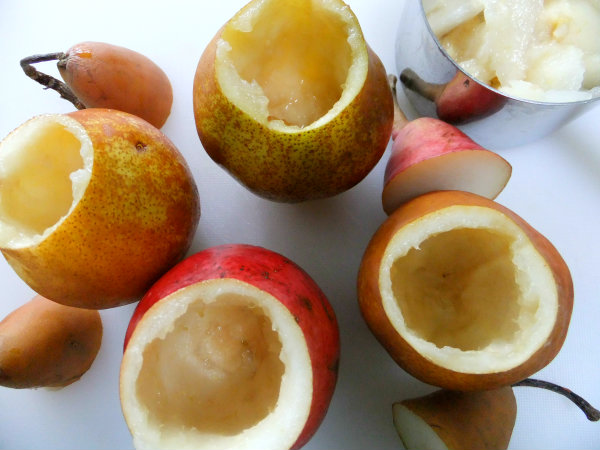 The key is to find firm but ripe fat bottomed pears so you’ll have plenty of room to stuff them with the ricotta mixture.
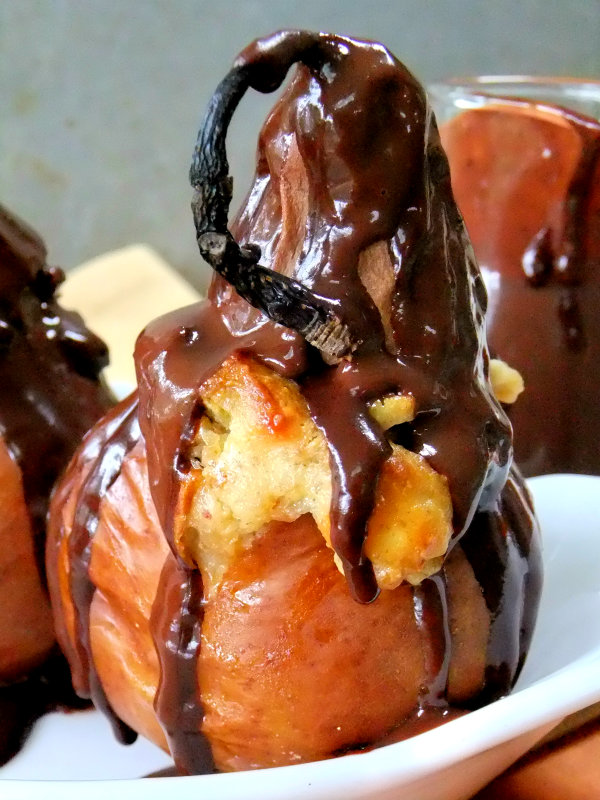
 As the pears are baking the ricotta mixture puffs up inside and over the top. The recipe gives you the option to then eat it as is, or to drizzle the pears with a chocolate sauce.
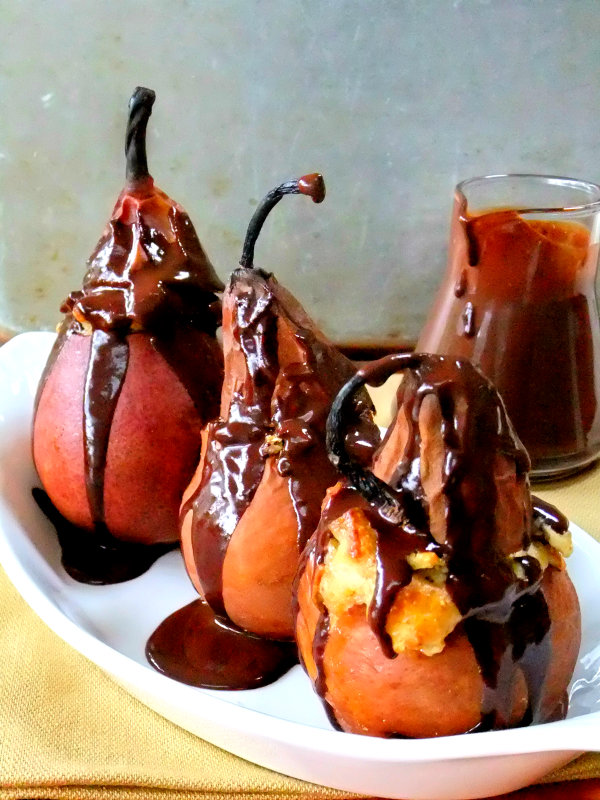 Obviously I went with the chocolate!
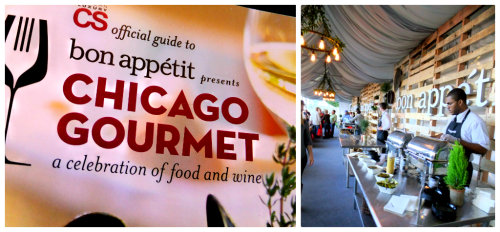 Beautiful weather set the scene for a perfect day at Millennium Park as I perused my way through
 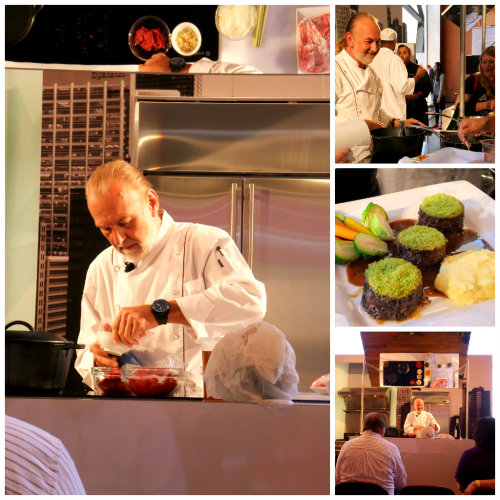 One of the things I really enjoy doing is attending the live cooking demonstrations, the venue where they have it is very intimate, up front and personal, not a bad seat in the house! Loved this one in particular with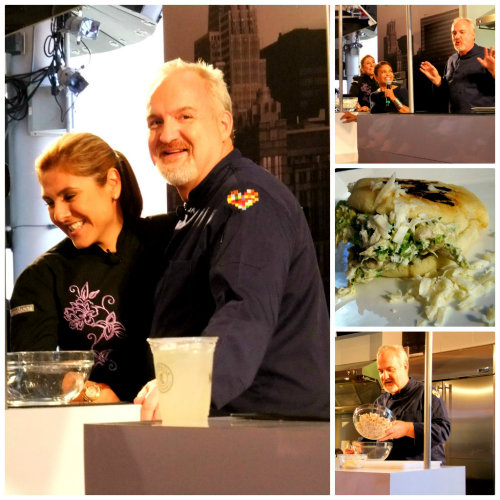
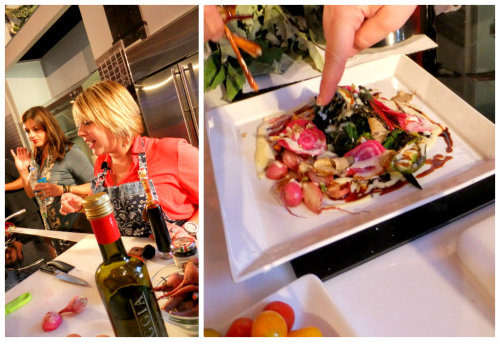
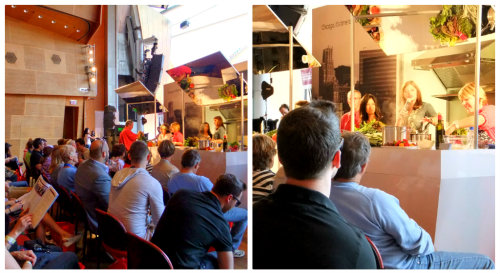 Here’s a view of the culinary stage, I seriously could have spent the whole day there, I really wanted to see
 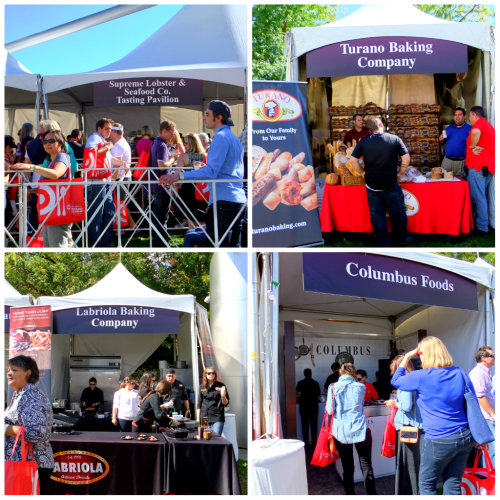 So many choices this doesn’t even scratch the surface, Mexican, Italian, Asian, Southern, French, American, Seafood, Brazilian, I could go on and on! There were several Chef Tasting Pavilions and yes, some had long lines but they seemed to move fairly quickly once they got going, besides it gave you a chance to slow down and digest a bit because in the tasting pavilions you would normally get anywhere from three to seven bites from the various restaurants featured.
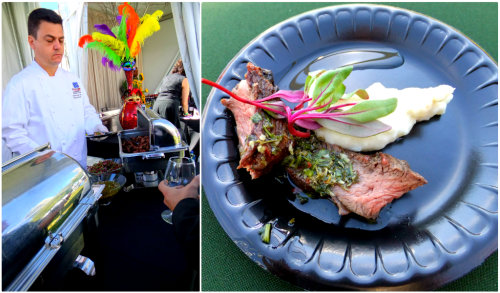 Why don’t I make chimichurri sauce more often? It takes a good piece of meat and elevates it to another level!
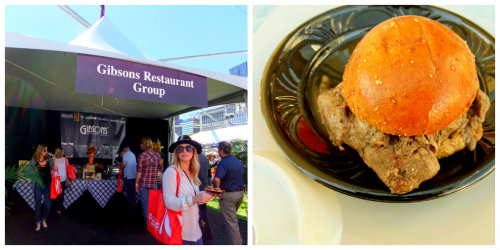 I’ve learned from the past in order for me to make it through the day when sampling, you must pull off all bread products and just take a few bites, that’s it!
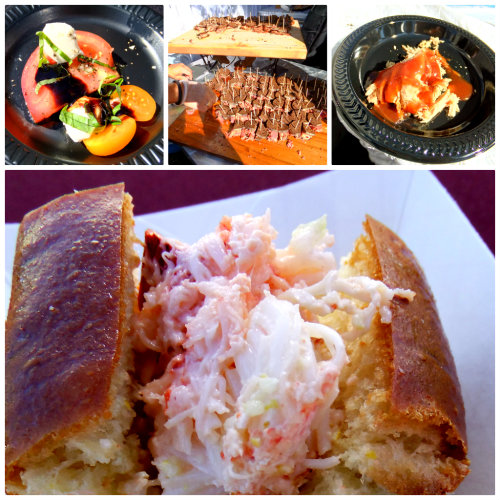 With the exception of a lobster roll!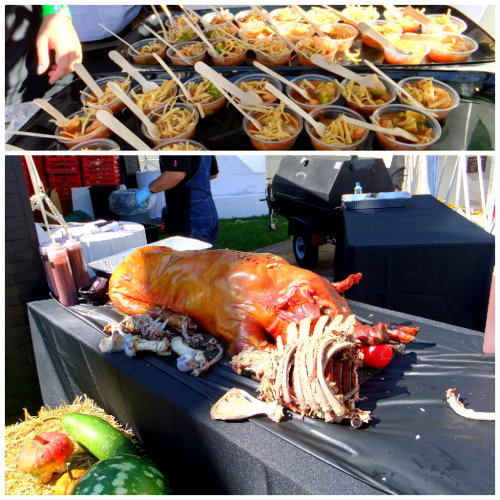
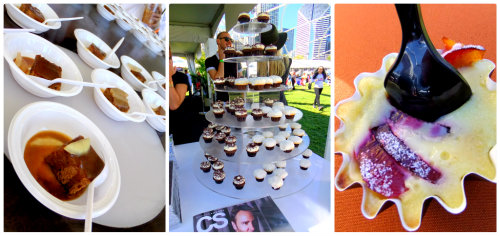 Desserts were everywhere, sticky toffee pudding, root beer floats, cupcakes, gelato, apple and plum creations along with a separate Dessert Tasting Pavilion, which I didn’t even enter into for fear I might never come out!
 There was plenty of charcuterie to nosh on while sampling your favorite drinks, small bites of proscuitto, salami and salty cheese, they even had a “protein bar” that was filled with cups of chili ready to go.
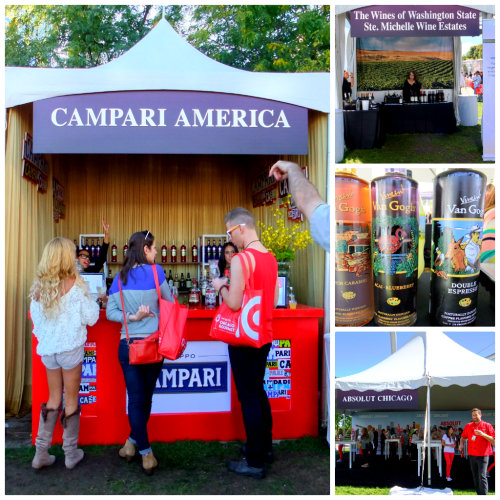
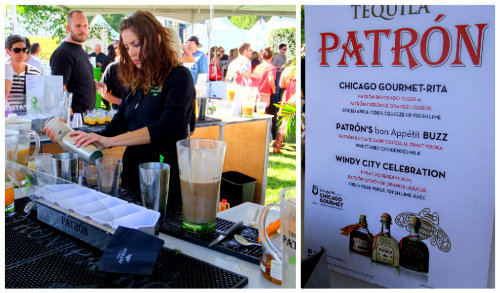 Wine of every variety, champagne, Patron, Stella, sake, whiskies, vodka, cognac, Grand Marnier, again I could go on and on. I encourage you to really sample what you like, mixing too many different things might not be such a good idea and remember to hydrate, there’s plenty of water stations all around.
 I’m partial to Prosecco and the two brands that stood out for me were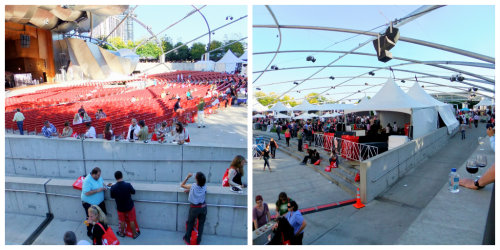
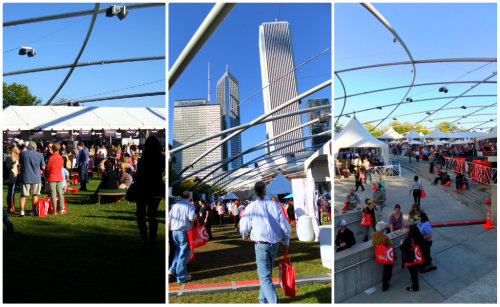 Deep blue skies in Chicago, great food and drink, nice crowd, entertainment and education, what more could you ask for on a beautiful Sunday afternoon?
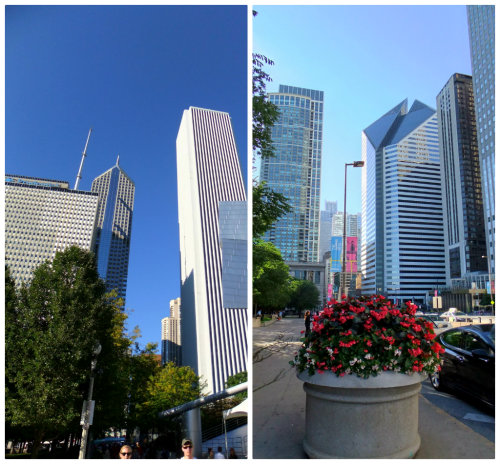 Hope to see you next year!
 I still have so much kale growing in my garden, I think it loves the cooler weather. I’ve already froze a bunch to put into soups, made my
 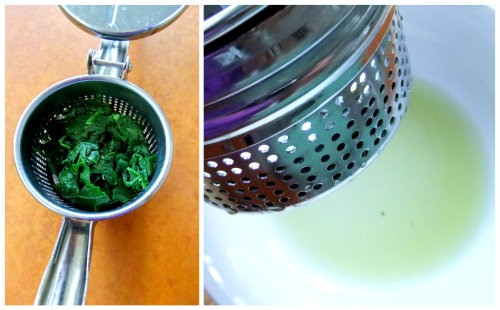 I don’t remember where I got this tip from but if you’re trying to squeeze out all the liquid from frozen or boiled spinach, kale, or any other leafy green, use a potato ricer! Even when I think I squeezed it all out by hand I’m so surprised how much more liquid comes out using the ricer, it’s amazing and it’s key to making this kind of gnocchi because you don’t ever want your dough to be really wet.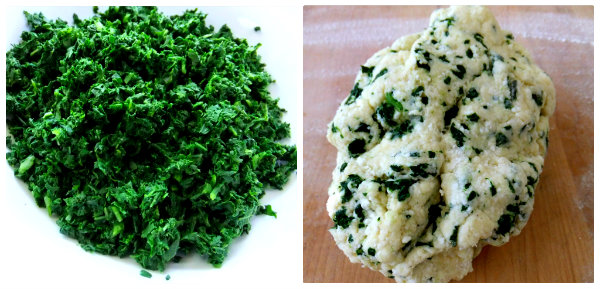
 I like to drain my ricotta in a strainer over a bowl that I keep in my fridge overnight, when your ricotta is nice and cold the dough comes together beautifully, if the ricotta is warm or room temperature it tends to be more sticky and you’ll keep adding more flour which in turn makes your gnocchi heavier, and we don’t want heavy gnocchi do we?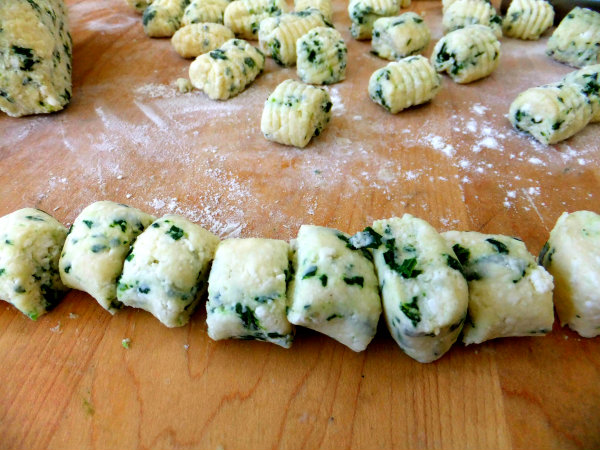
 Light and tender little pillows of dough filled with ricotta, parmesan or romano cheese and kale, surprisingly quick to whip up!
 I decided to make mine 2 different ways, pan-fried with butternut squash in a brown butter sage sauce, and the more traditional way, boiled and tossed into a light homemade marinara. Please, never use jarred sauce from the grocery store!
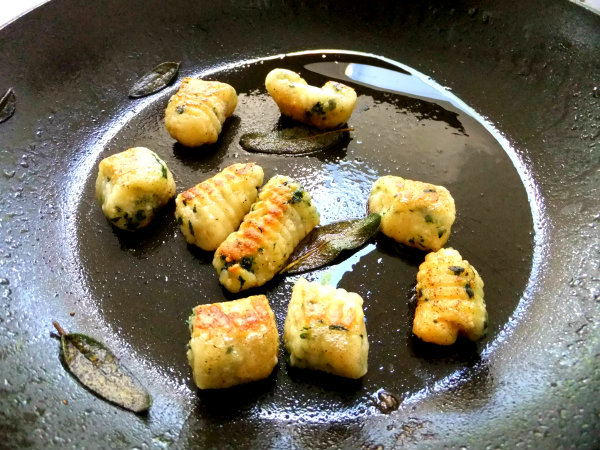 Gnocchi takes only a few minutes to cook, toss them into boiling salted water, give them one good stir, let them rise to the top and boil for an additional 2 minutes, scoop them out with a wide hand strainer. Never pour them directly into a strainer for fear they might break, you must be gentle and handle with care.
 This is a perfect dish for the fall season, I added small diced pre-roasted butternut squash and tossed it in with the gnocchi. Finish the dish off with freshly grated parmesan cheese scattered all over the top, perfection!
 Slightly crispy on the outside, tender on the inside and flavored so good, it doesn’t get better than this, one of my absolute favorites!

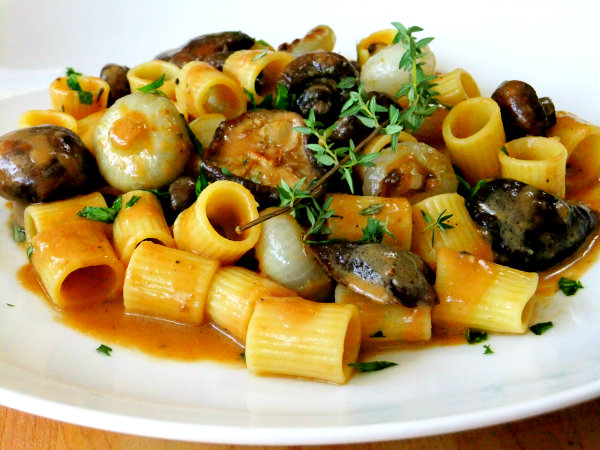 My husband is the official taste tester around here so when I see him take a bite, close his eyes, move his head from side to side I know I’ve made something really good, that’s exactly what he did when he tasted this dish! We’re all familiar with Chicken Marsala, Veal Marsala and I even make Pork Chop Marsala, but in this dish there is no meat and you won’t miss it one bit because the star of the show that gets to soak up the creamy Marsala sauce is the pasta, along with some wonderful earthy mushrooms and those adorable saucer shaped cipollini!

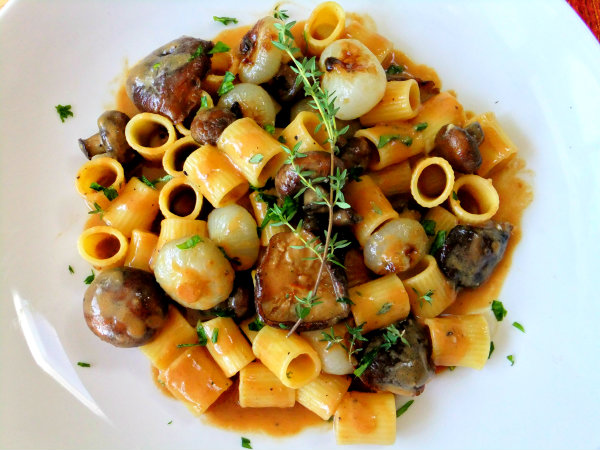
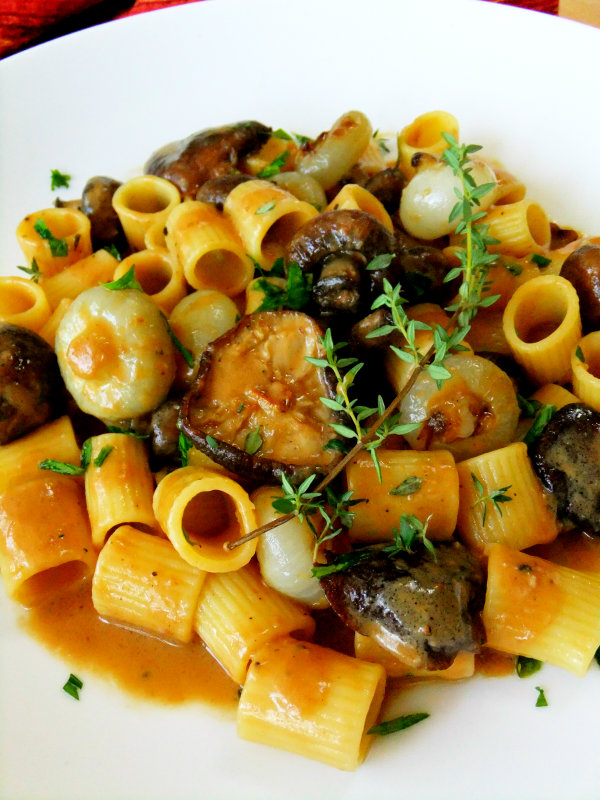 All drenched in creamy Marsala sauce, who needs meat?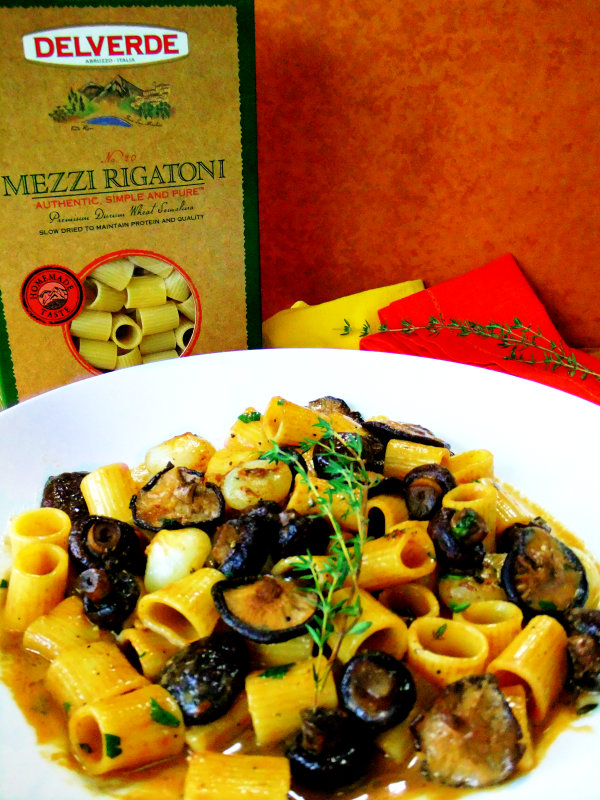
 It’s that time of year when you start seeing butternut squash all over the place, it’s my favorite kind of squash so I usually always have one on hand sitting on my counter ready and waiting for me whenever I need it. I’ve made
 Fresh ricotta, kale, parmesan and a little lemon zest gets mixed into the tender baked squash for a very flavorful filling.
 Try to get a hold of some good quality fresh pasta sheets, you could make your own if you like especially if your doing it for a crowd or for the holidays but this is my quick mid-week version. I like to cut my store bought pasta sheets in half, I find the cannelloni gets too doughy otherwise. So for every sheet of pasta I can make two cannelloni.
 Spoon on a generous amount of filling then roll them up and place each one seam side down on a buttered baking dish.
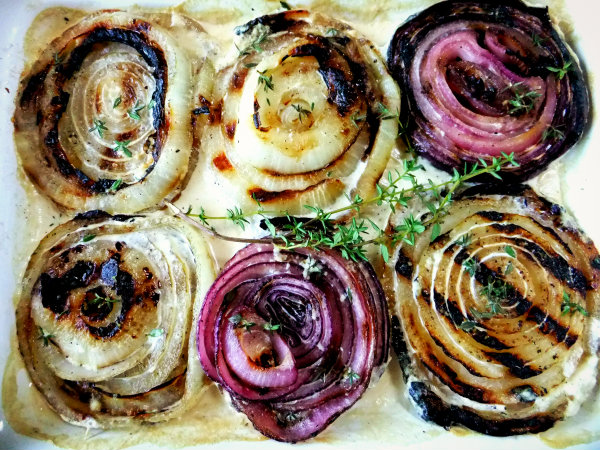 Even though summer is winding down there’s still plenty of time for grilling. I made these over the weekend, charred slabs of onions bathing in a shallow pool of cream and garlic. Pure decadence!
 What is it about onions and cream, they’re such a perfect combo! I’m now adding this to another favorite onion recipe that I adore and previously did a post on back in 2011, my
  The grilled onions become super sweet when caramelized and then you have the smokiness of the grill which gives this dish a whole other flavor dimension. Who would ever think that the humble onion could transform into something so luxurious! Don’t stress about the cream, for 12 slices you only use 1/2 cup!
 Did I mention they are wonderful as a side with steaks or burgers?
 Got zucchini coming out of your ears? No problem, make a huge platter of Zucchini Carpaccio! Thinly sliced raw zucchini that gets slightly “cooked” by a lemon and olive oil dressing. I recently brought this to a party on the biggest platter I could find. It looks very impressive, quite the show stopper with all the zucchini slices neatly layered on top of each other. I think I used 5 zucchini and 1 yellow squash. Try and pick squash that is similar in size, it will visually look better on the platter.
 I used a mandoline to slice all the squash nice and thin, then shaved Parmigiano Reggiano all over the slices, I added chopped fresh basil, parsley, and a little salt and pepper.
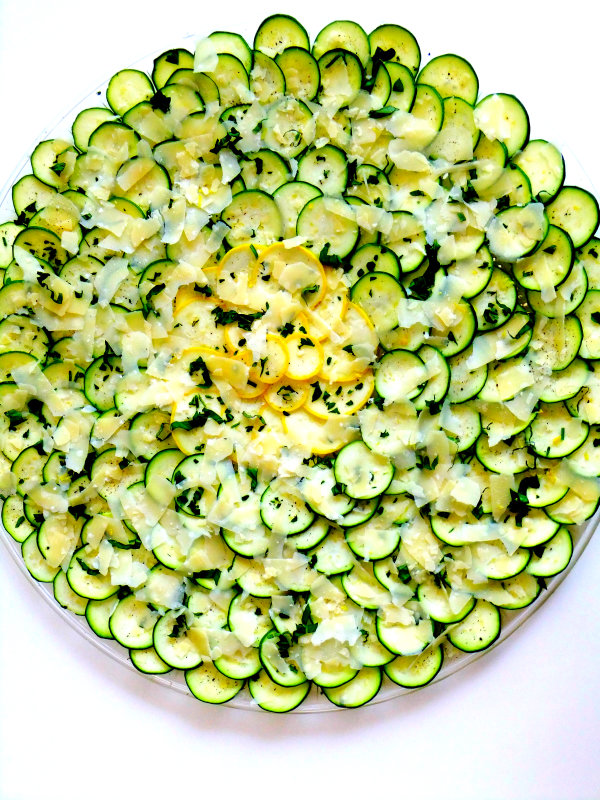 When I got to the party I dressed the whole thing with a fresh lemon and olive oil dressing that I had pre-made in a jar and brought along. It was a big hit and a great way to use up my zucchini!
 Whether you grow your own corn or just buy a ton like I do during the summer, this is something you just have to make! Grilled Corn Planks with Creme Fraiche and Tarragon. Three simple ingredients that go so amazing together, we just can’t get enough of it, it’s that good!
 Use a good serrated knife and cut off your kernels in a sawing motion to assure nice “planks” of corn.
 Even if you don’t quite care for tarragon, ( I admit I was one of those) I promise you, it makes the whole dish spectacular, I can’t imagine it with out!
 I found this in Fine Cooking magazine,
  I’m ending this post with kale, Grilled Kale, we grow a ton of it. I’ve froze some, made a bunch of salads,
  It only takes a few minutes to cook down and you’ll have a large bowl full to do whatever you want with it. It’s a great way to cook up massive amounts and besides, the nice smoky flavor adds another dimension.
 I like to saute shaved garlic in olive oil, add a pinch of red pepper flakes, pour it over the grilled kale and toss. Finish it by squeezing fresh lemon all over. I’m going to miss all this goodness!
 You might be wondering, what does The Wizard of Oz have to do with pizza? Well just keep reading and I’ll explain it all to you.. This past weekend was my granddaughter’s 4th birthday and a very special guest attended her party, it was Dorothy and she even brought her little dog Toto too!
 She came complete with her sequined studded ruby red slippers! My granddaughter is a huge fan of The Wizard of Oz, she can tell you the whole story from beginning to end, sing all the songs with much enthusiasm , so it was no surprise that she wanted that to be the theme of her birthday party.
 Dorothy even brought along her ipod so she would have background music to sing some songs with her. My granddaughter dressed in full Dorothy garb was mesmerized! The expressions on her face were priceless!
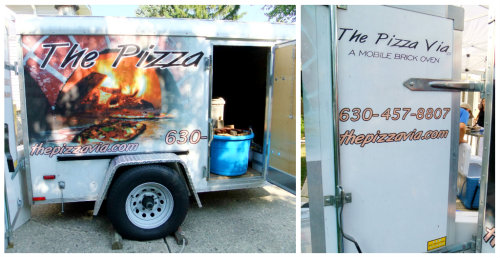 Here’s where the pizza comes in. My son and DIL hired a company called
 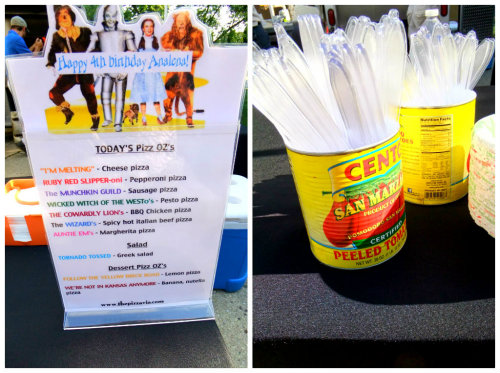 Even the names of the pizzas went along with The Wizard of Oz theme. We had,“I’m Melting”- Cheese Pizza, Ruby Red Slipper-oni- Pepperoni Pizza, The Munchkin Guild- Sausage Pizza, Wicked Witch of the Westo’s- Pesto Pizza, The Cowardly Lion’s- BBQ Chicken Pizza, The Wizard’s-Spicy Hot Italian Beef Pizza, Auntie Em’s- Margherita Pizza, and a few others that were custom made.
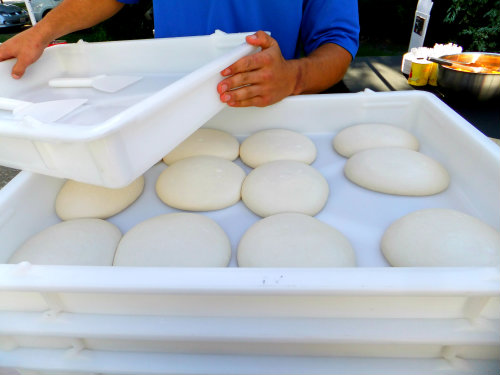 The balls of dough were pre- prepped and ready to go, which were made with Caputo “00” imported flour.
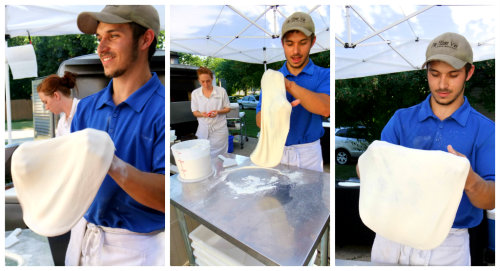 Alex Ciciora is the Head Chef who’s earned certificates in Neapolitan and classic Italian pizza. This guy knows how to throw dough!
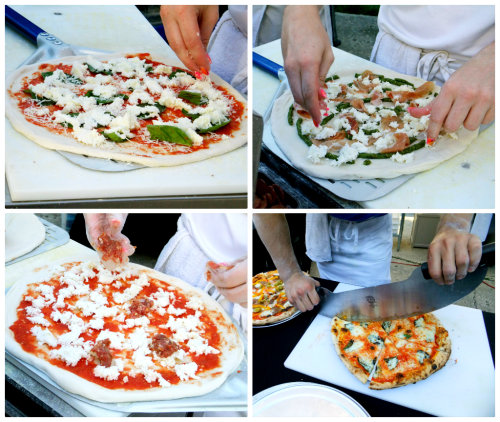 Anticipation was brewing as the pizzas were being assembled with the freshest of ingredients.
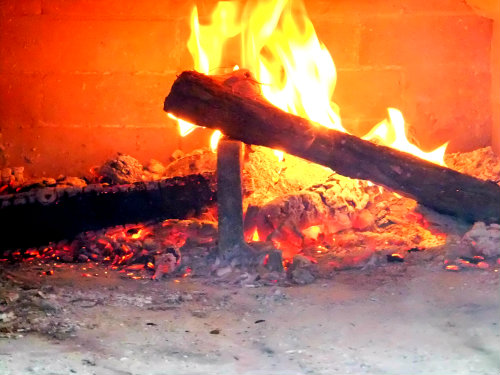 The wood fire was at the perfect temperature, 1,000 – degrees, it was time to start cooking. Each pizza only takes a mere 90 seconds to cook up.
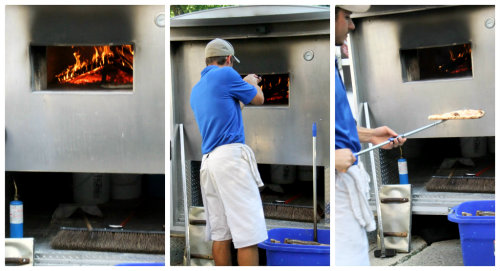 Chef Alex was quickly cranking them out one by one. The smell in the driveway was out of this world between the aroma of smoky wood and all that dough and sauce cooking together!
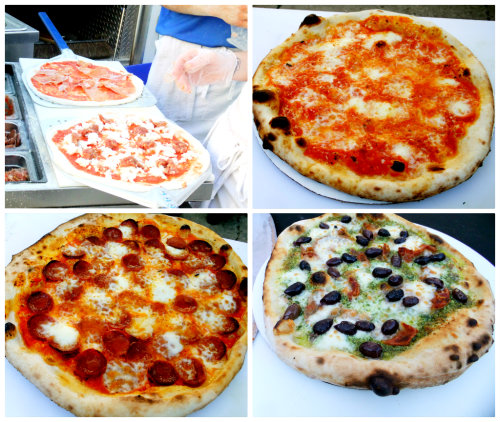 The crust was perfect, delicate and crisp on the outside, tender on the inside. One of the pizzas I really liked was the pesto, prosciutto and olive pizza, so good!
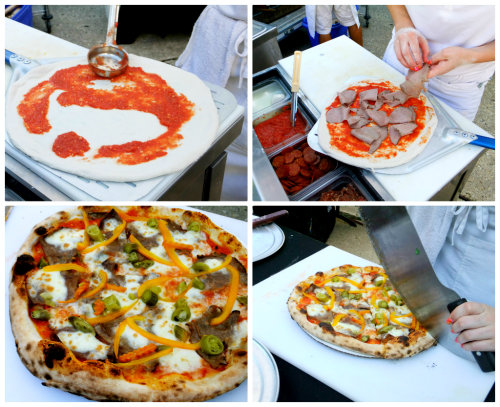 But of course the Chicago style Italian beef and peppers pizza smothered with hot giardiniera was also a huge hit, us Chicagoans love our Italian beef!
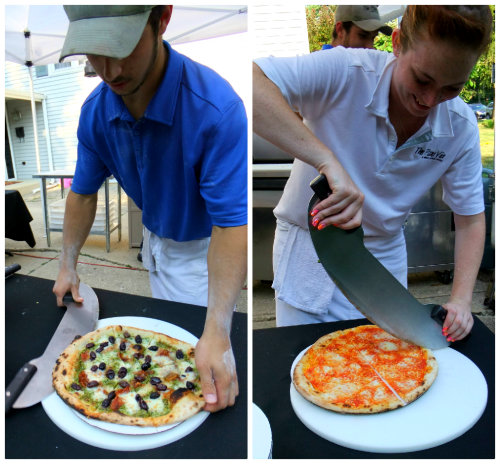 Actually they all were a hit, it’s really hard to choose a favorite because each one was unique in it’s own way. I confess, we loved them all!
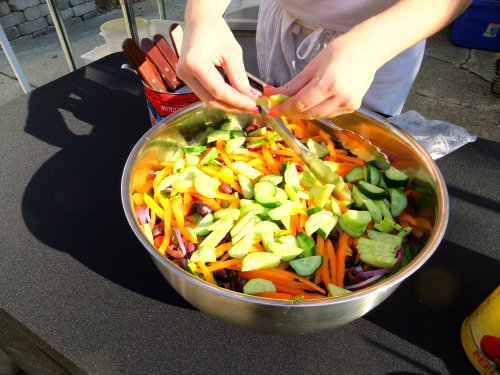 They even made a “Tornado Tossed” Greek Salad for us with an amazing feta dressing.
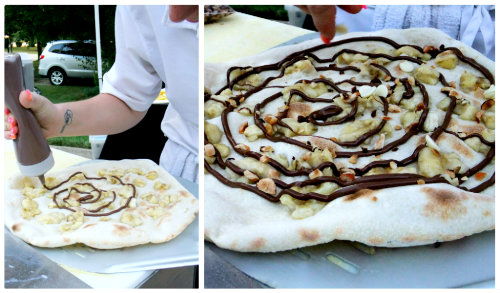 And then came dessert! “We’re Not in Kansas Anymore”- Banana Nutella Pizza, with toasted hazelnuts and white chocolate chips, need I say more?
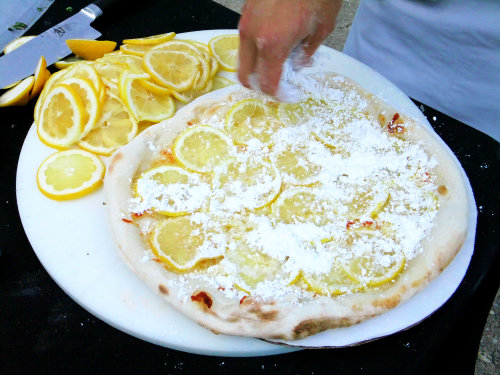 But this pizza shown above was a real crowd pleaser because no one had ever tried anything like it before, it was called, “Follow the Yellow Brick Road” – Lemon Pizza. Thinly sliced lemons baked on top of a crust dotted with butter, when it came out of the oven Chef Alex generously sprinkled powdered sugar all over it. He suggested we wait until it cooled down to eat it for optimal flavor, but no one could wait! We’re still talking about that lemon pizza!
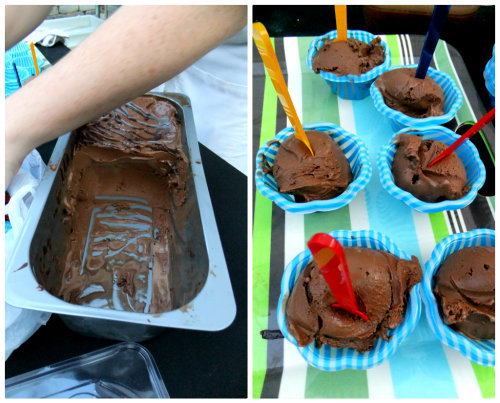 Dark chocolate gelato along with the birthday girls cake ended our pizzeria feast!
 For those of you who live in the Chicagoland area I highly recommend The Pizza Via for your next party or event, it’s something out of the ordinary and your guests will love it! Chef Alex and his assistant were a wonderful, fun, hardworking team, they even made extra pizzas for everyone to take home. For a very unique party experience call Chef Alex at
 It’s hard to believe that 6 years ago today I started this food blog called Proud Italian Cook and what a journey it has been from day one! It still continues to be one of the joys of my life. I’m honored to be a part of a wonderful community of bloggers, many of whom I can truly call my friends. To all my readers, I can’t tell you how much I appreciate your support with all your comments and personal emails that you’ve taken the time to write. Thank you to all those who “liked” me on Facebook, and a thank you to all my loyal subscribers and those of you who have “pinned” any of my recipes on Pinterest. And last but not least my close family and friends!
 This past year has been full of change for Proud Italian Cook, I really moved out of my comfort zone complete with a makeover! I took the leap and left a free blogging platform and moved forward on to one that I own, and I’m so happy I did! With it came many modern updates that I so wanted to give all my readers. The other thing I did, (and I still can’t believe it myself), I wrote my first e-book on Italian Sauces. Inside you will see what I cook for my own family, special recipes and stories that bring me back to my own traditions from childhood. For all of you who bought my book, thank you, I appreciate it. For those of you who might be considering it, it’s always available for purchase right here on my blog.
 One of the absolute joys of summer for me is to walk out into my garden and pick fresh basil leaves when ever I feel like it. I have basil growing all over my backyard, in pots and in the ground. Our seasons are so short here that I have to get it while I can. I’m not the gardener in my family, the husband is, but he takes great direction from me concerning how many plants I want even if I go a little overboard!
 This was a stellar year for basil, all the leaves were vibrant and lush, perfect for pesto and my new found love, basil infused olive oil!
 Making basil oil is so simple and the end result is so amazing, trust me you’ll want to drizzle it all over your fish, meat, vegetables, eggs and crusty toasted bread! I had my sweet granddaughter help me in the process picking the leaves, check out her green toes!
 All it takes is just a few short steps and you’re finished, and a little goes a very long way. Put some in a pretty glass bottle and hand it off to your friends and family, they will love it!
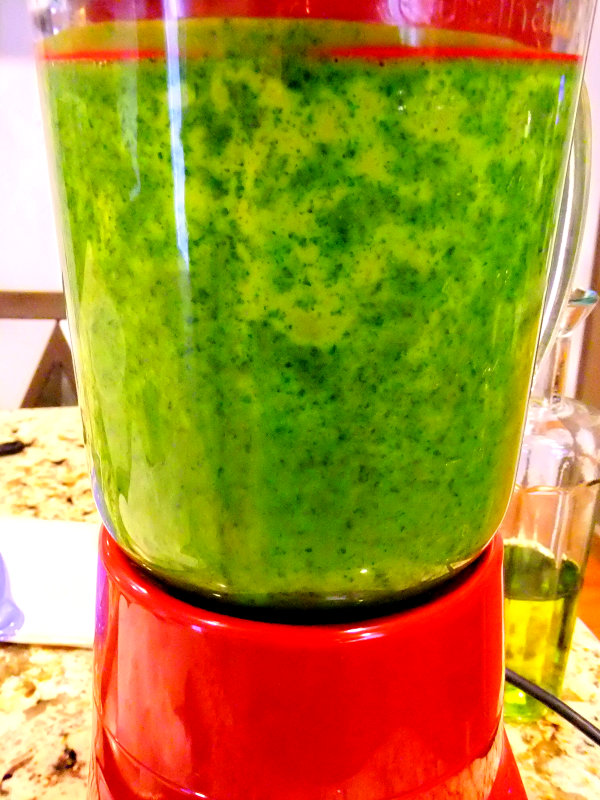 Give the 3 ingredients a quick whirl in a blender or a food processor until nice and pureed. Check out that beautiful color you can tell by looking at it how good it’s going to taste!
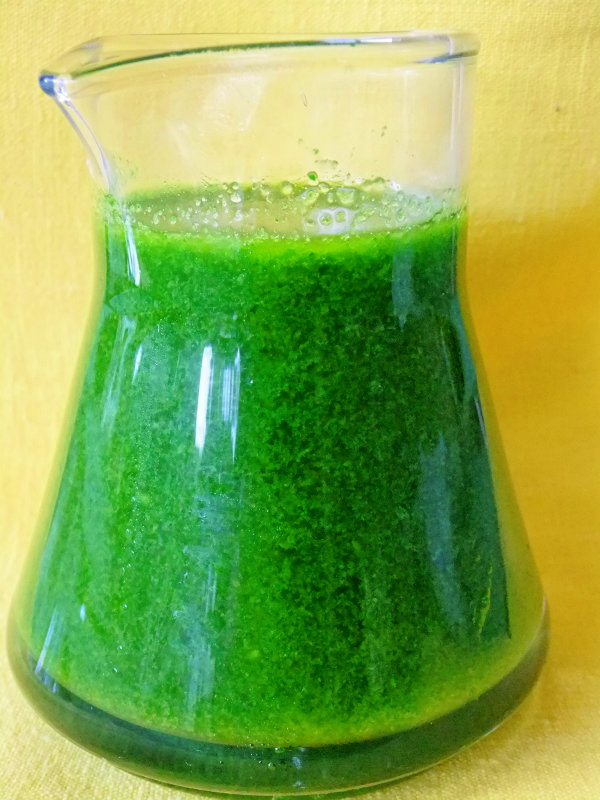 When it’s finished you can choose to strain it through cheesecloth for a more refined and clear result or just leave it as is, I did it both ways to show you, but either way the flavor is dynamic!
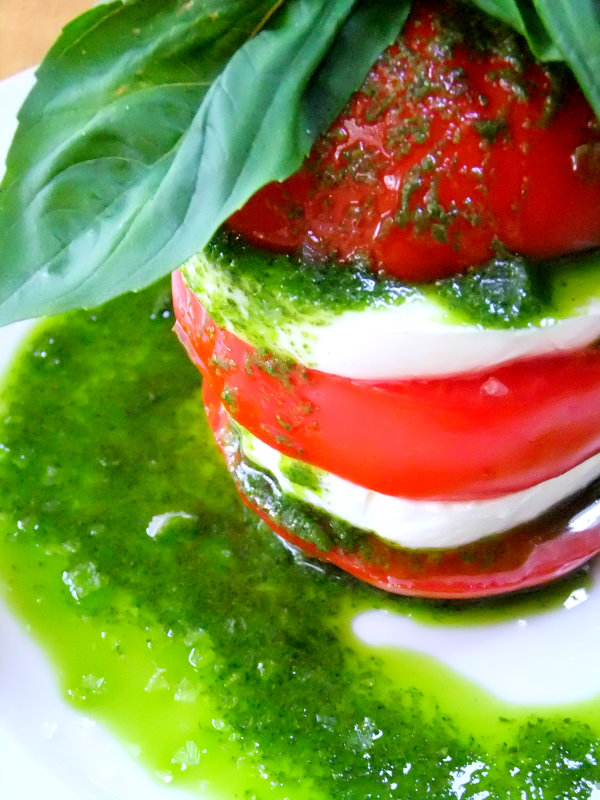
 Here it is not strained dripping over a tomato and mozzarella stack sprinkled with flaky sea salt. To-die-for!
 And here it is pictured above strained through cheesecloth, clear and still vibrant green. I made this for breakfast the other day, crusty toasted Italian bread drizzled with basil oil, layered with bacon, sliced tomatoes and a sunny side up egg drizzled with more basil oil. Another to-die-for! Thanks M-A for the inspiration!
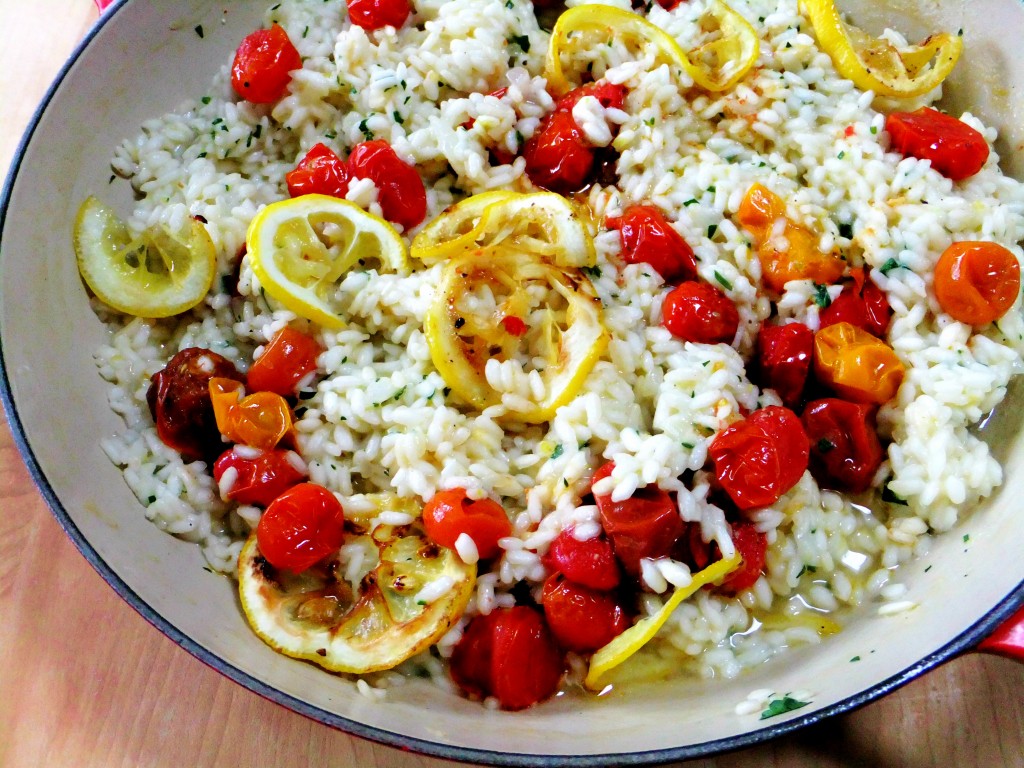
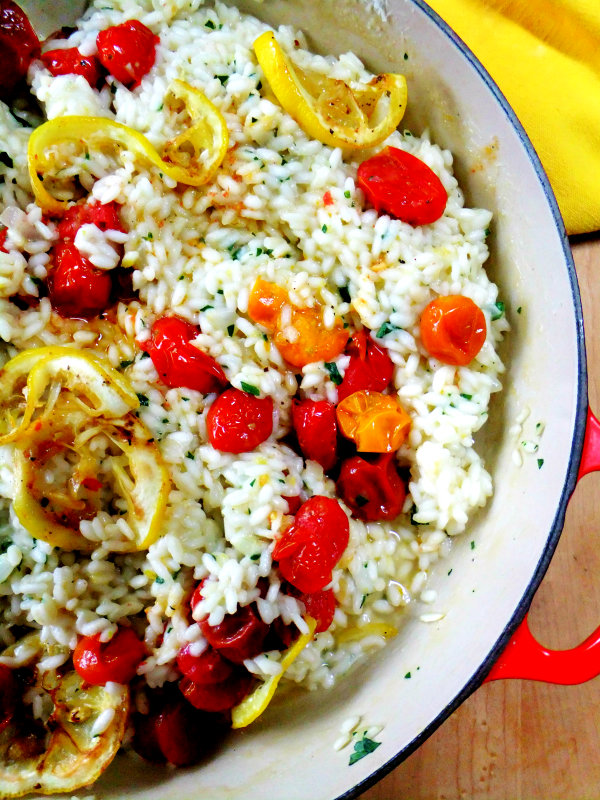 Here’s a wonderful summery risotto filled with bright flavors of lemon that has roasted cherry tomatoes folded inside, it’s the perfect side dish for any type of grilled fish!
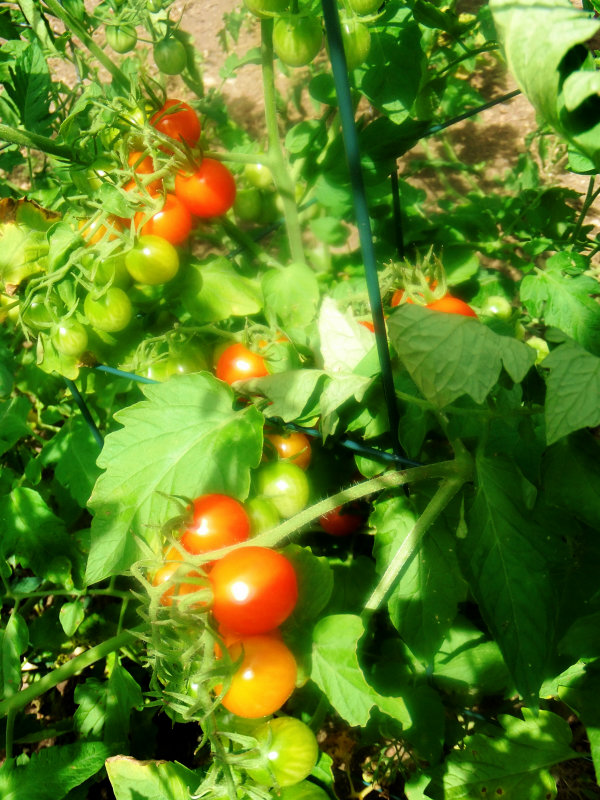 Also a brilliant way to use up some of those cherry tomatoes you might have exploding in your garden like me. I’m guaranteed a bowl full everyday from my garden so I’m constantly thinking of different ways to use them up.
 That’s why I was thrilled when I came across
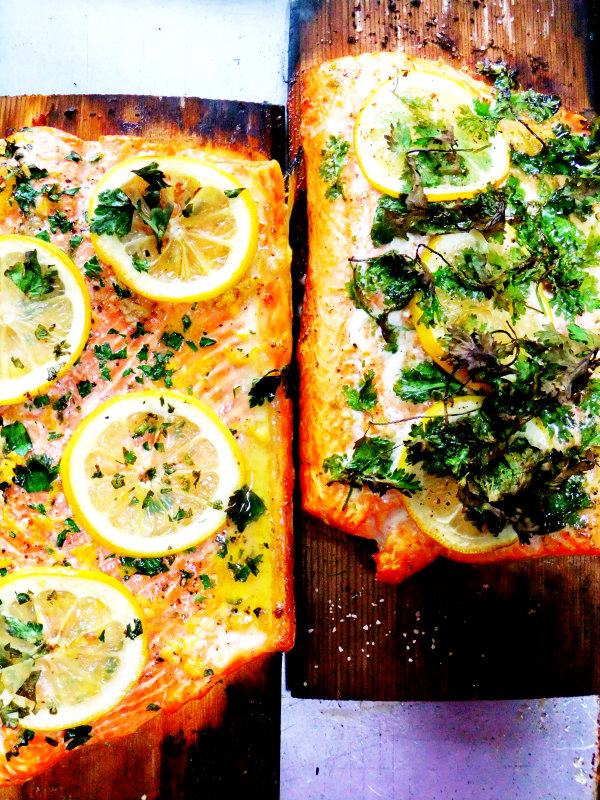 I served the risotto with cedar planked salmon, the bright citrusy flavors paired so well with the smoky salmon.
 My daughters favorite way of preparing salmon is brushing it with coconut oil and topping it with salt, pepper, lemon slices and fresh cilantro.
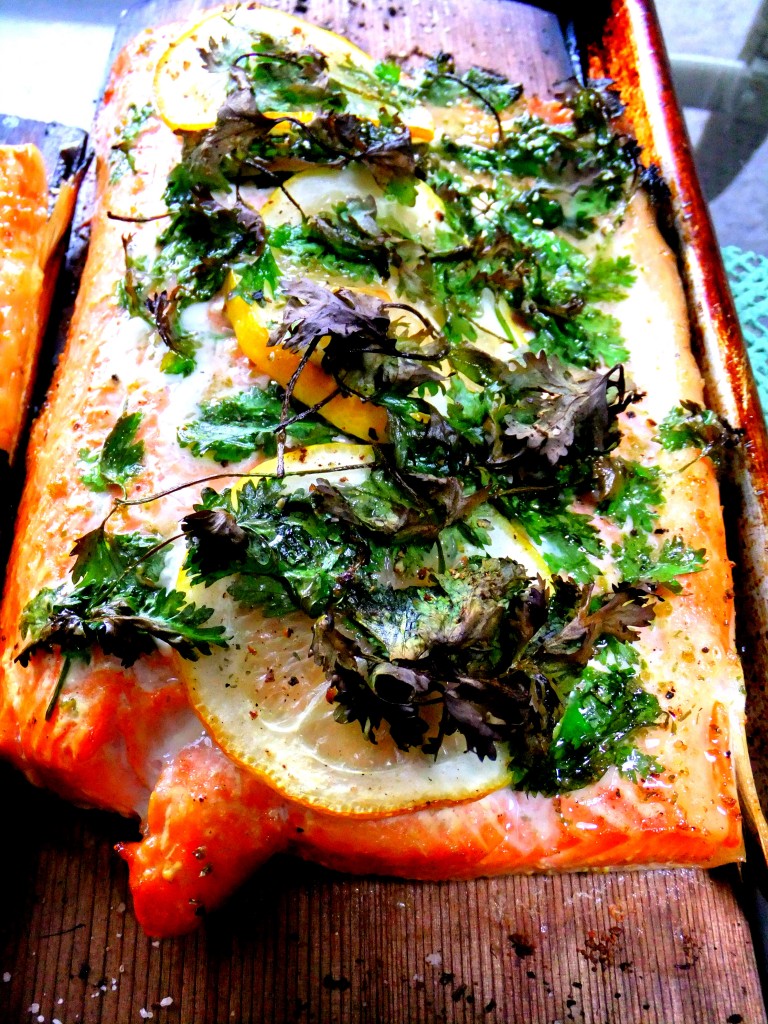
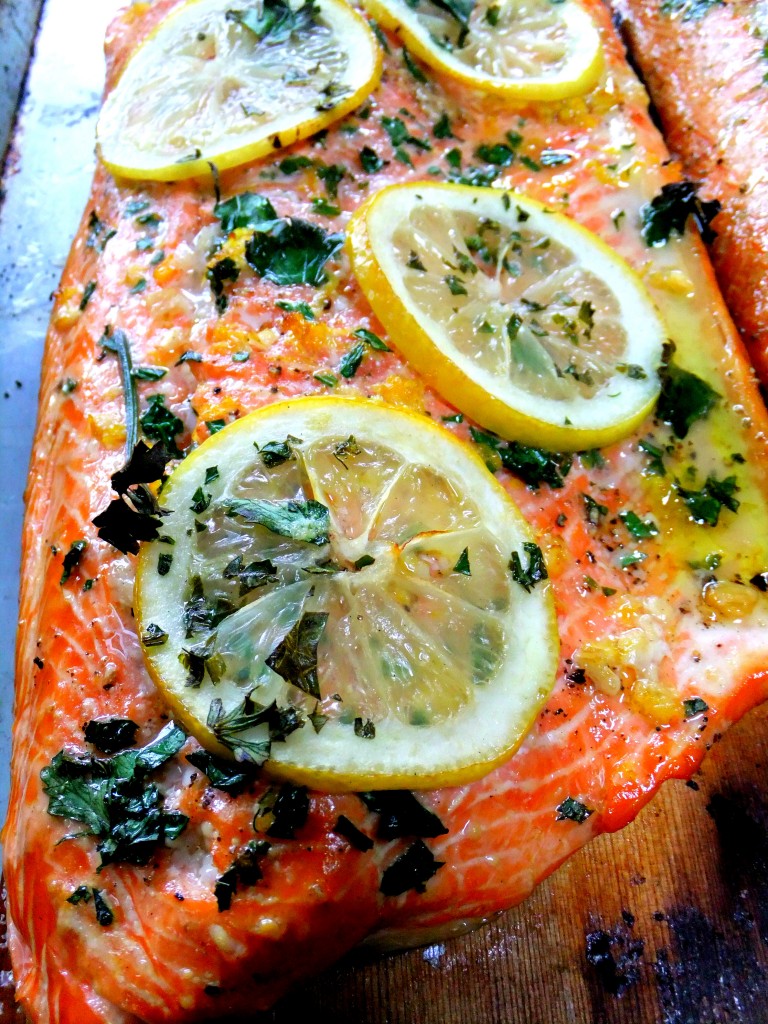 This one was brushed with olive oil, finely smashed garlic, salt, pepper, lemon zest, lemon slices and chopped fresh parsley. Soak your planks for a few hours beforehand then keep outdoor grill around 400 degrees, the time it takes will depend on the size and thickness of the fish.
 Who knew you could grill kale? I didn’t. It wasn’t until I saw this technique done in a book called, Hero Food by Chef Seamus Mullen’s, that I got inspired to do it. Actually, the minute I saw it I knew I had to try it, why not, I grill everything else!
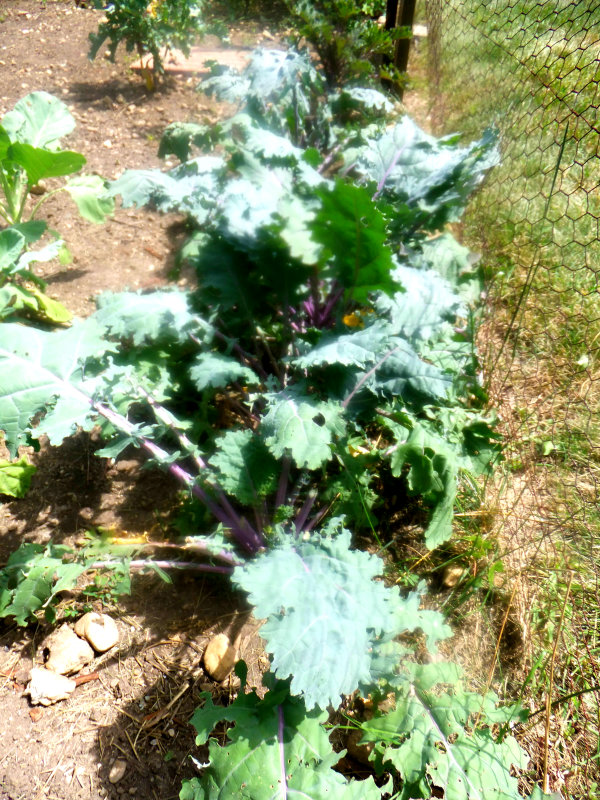 We grow a ton of kale, we have it all over our garden, three different varieties so I’m always thinking of ways to use it up, as it keeps growing well into the fall. I’ve made kale chips in the past and I have to admit I didn’t like them at all, but I’ve since realized it was the way I made them, they lacked flavor. With a little more seasoning and a little more olive oil I’ve come to love those crispy little chips, maybe it’s an acquired taste I don’t know, but they’re very addicting if they’re made right!
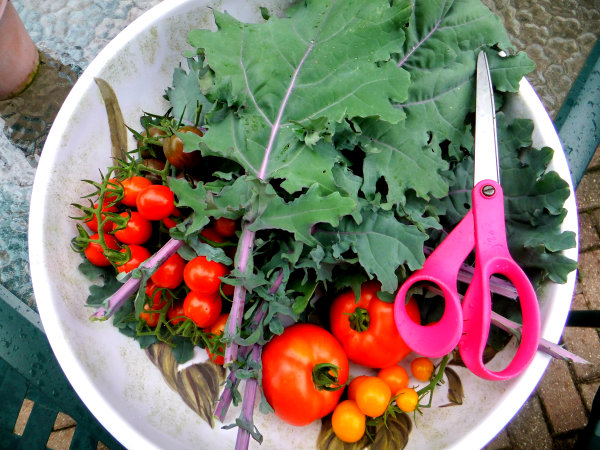 Our tomatoes are finally getting red, it’s exciting to walk out into the garden everyday to see what kind of loot we have vine ripened and ready to pick.
 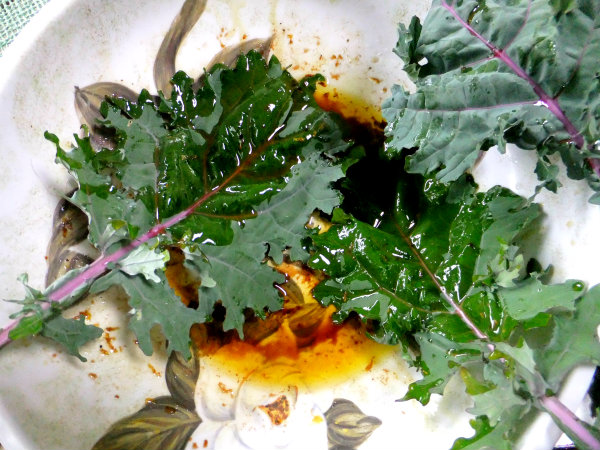 Tossing the kale in a mixture of olive oil, balsamic, lemon zest and garlic gives you a nice base for a salad or just to eat as is.
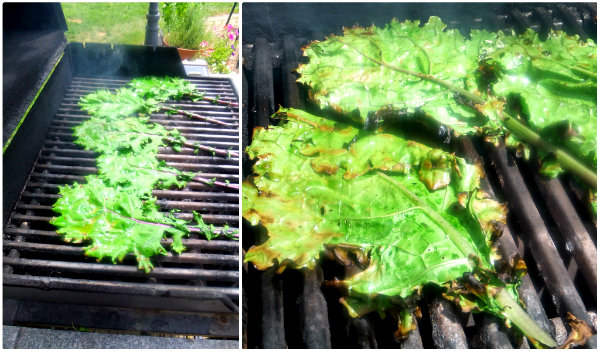 The kale leaves hold up very well on the grill with the stems and all. Don’t walk away because it just takes one to two minutes per side. You could grill up a large platter in a few minutes!
 Grilling brings out a rich smokey flavor with a texture that is crunchy and chewy at the same time, and it looks quite unique on a platter, something you don’t see often.
 As I said you could eat it right off the grill as a side dish to fish, poultry, beef or pork or you might want to break it up and toss it into a salad like I did.
 For my grilled kale salad I used vegetables that I had previously grilled, eggplant, zucchini, yellow squash, corn, yellow and red peppers. In addition to that I added fresh cherry tomatoes and goat cheese to the salad with an extra drizzle of my vinaigrette over the top. Summertime freshness that is so good for you!
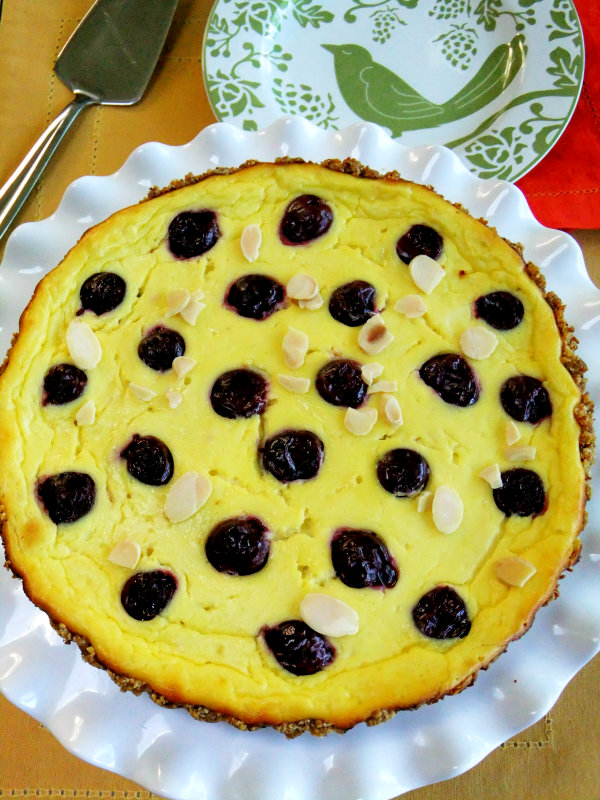 As promised, I said I was going to post my Cherry Studded Ricotta Tart, so here it is! Creamy, light, slightly sweet and bursting with cherry flavor, all nicely baked into an almond crust. It’s the perfect summer dessert to have out on the patio with a cup of espresso!
 Deep into summer cherries are bountiful here right now, so if you don’t mind pitting fresh cherries go right ahead, you’ll need around 23 or so for a 9 inch tart. I must confess pitting is not my favorite thing to do so I cheat a little bit and use these yummy dark Morello cherries I discovered from Trader Joe’s. All you have to do is open the lid, pour them into a strainer and drain them really good.
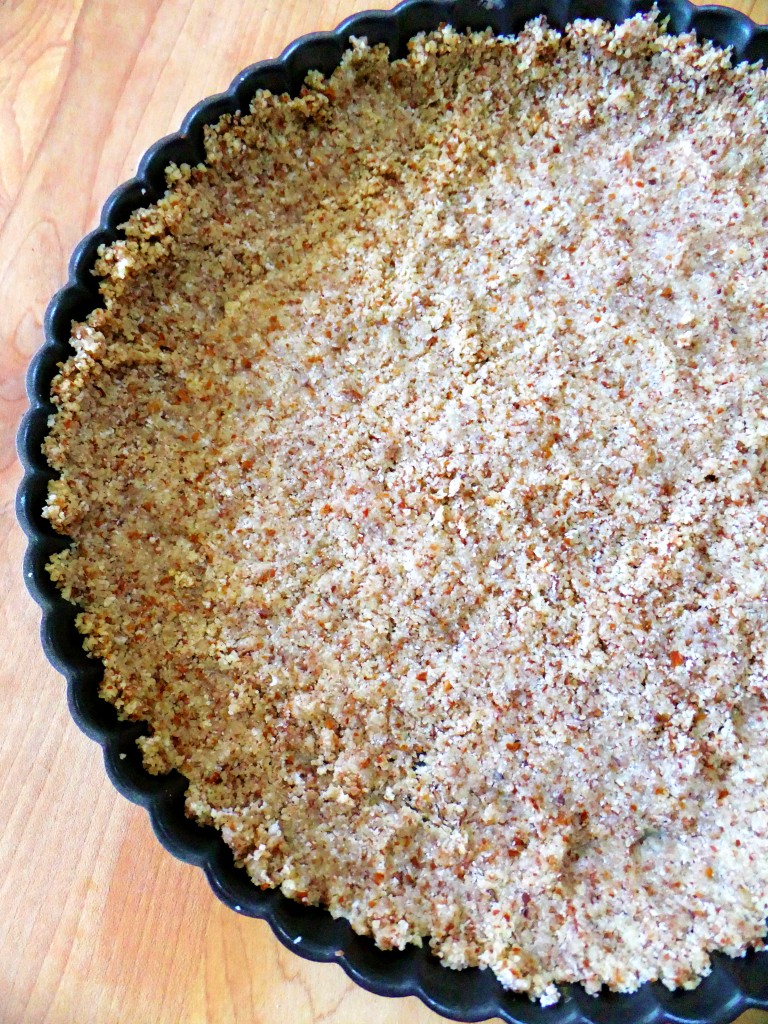 Normally I would make a graham cracker crust for this tart but I thought I would change it up this time and make an almond crust, since almonds and cherries go so well together.
 It was a great choice if I do say so myself!
 Just look at that crunchy, nutty crust!
 Put the espresso on, grab a slice and enjoy!
 This past weekend we had relatives from out of town visiting, they wanted to go into the city to see Millenium Park and “The Bean” so we drove down, parked our car and walked all over town.
 It was a gorgeous summer day, the perfect temperature to dine outside and enjoy the views.
 The river looked exceptionally beautiful that day, the sun was glistening on the water, even the buildings were shining! If your visiting Chicago take the architectural boat tours it’s one of the best ways to see the city.
 We made it to “The Bean” then sat and people watched by the fountain, I highly recommend it!
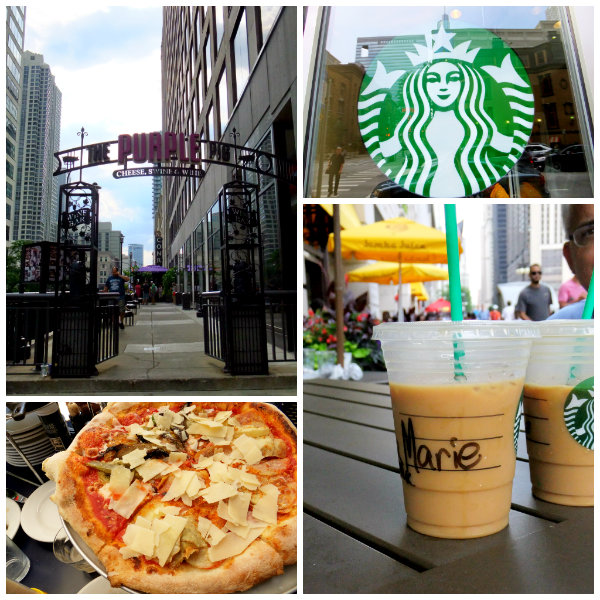 Of course eating and drinking along the way makes it even more fun!
 Sometimes on a hot summer night or when I’m just being lazy, I’ll put together a nice antipasto platter and we’ll have that for our main meal. My refrigerator is never without a variety of olives and cheeses and either salami or prosciutto of some sort, so it’s pretty quick for me to whip this up. This is casual dining at it’s best, just open a chilled bottle of wine, add some crusty bread then relax and enjoy!
 Over the weekend I went to our local farmers market and couldn’t resist taking home a bag of these tiny saucer shaped squash and a few 8-ball zucchini, even though I had no clue how I was going to prepare them!
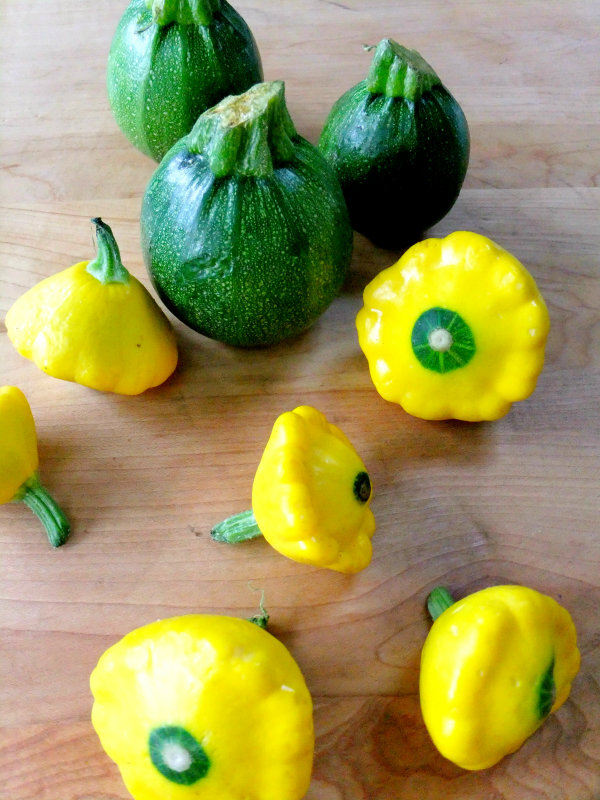 I’ve seen these tiny squash stuffed before and roasted, but because it’s been so hot outside I decided to make mine carpaccio style, raw uncooked thin slices tossed in olive oil and lemon with shaved parmesan and parsley, it was the perfect addition to my cool and refreshing antipasto platter. I just love the scalloped edges and the tops on the patty pan squash, it’s all edible and it makes for a nice presentation.
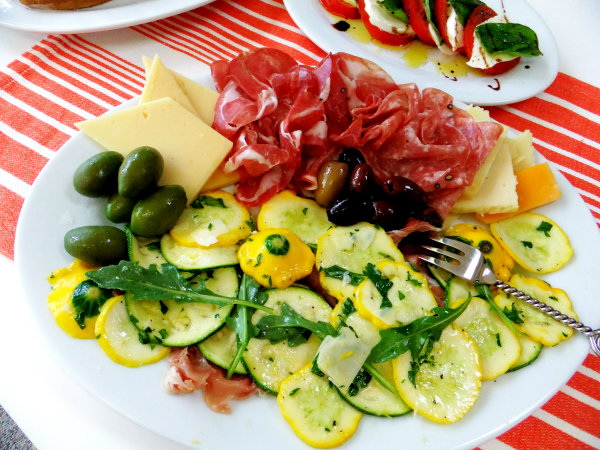 I also made a caprese salad to go along with everything, because in the summer that’s a staple at my house and besides I have basil growing like crazy all over my backyard!
 Aaaah summertime, when the living is easy! Don’t you love it?
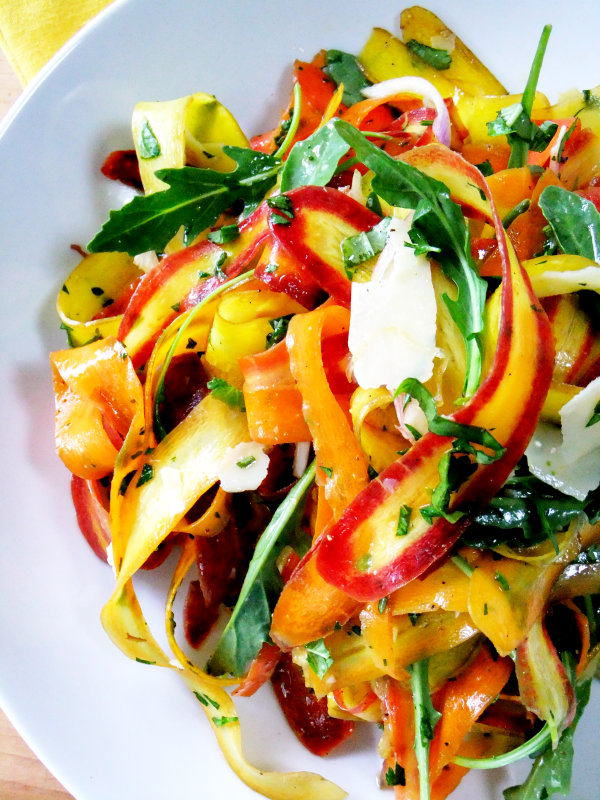 I couldn’t resist these beautiful rainbow carrots the other day while I was shopping, I quickly stuck them into my cart not knowing what I was going to make with them, but I was inspired by their vibrant colors!
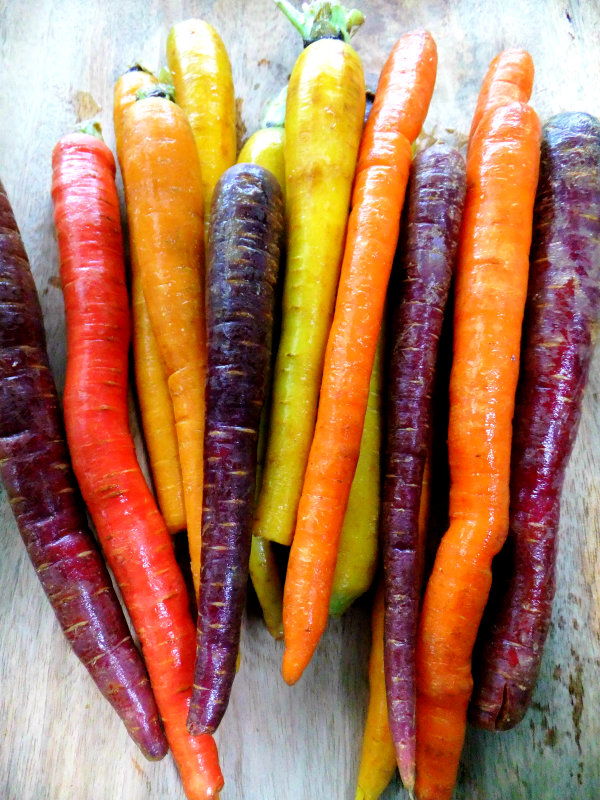 Just look at these beauties! The colors are amazing, deep purple, yellow, red, white, peach and of course orange. I decided to make a salad, shaving the carrots into ribbons using my vegetable peeler so I could showcase all the gorgeous colors inside.
 As I was shaving them their deep rich colors were even more pronounced, my favorite was the purple with the yellow center.
 Surprisingly their flavor isn’t all that much different, some of the carrots might taste slightly sweeter than the others but you sure can’t beat the visual! Imagine this on a large platter as a side dish. I served it with grilled salmon, a beautiful healthy meal that needed nothing else!
 Works of art for under five dollars, your guests will be impressed, it’s turns the humble carrot into a very sophisticated dish!
 Of course I had to make my salad Italian style with ribbons of Parmigiano Reggiano tossed inside, I also added arugula which balanced the sweetness of the carrots perfectly.
 Fresh basil, parsley and slivers of red onion added and tossed with my homemade vinaigrette, I’m telling you there wasn’t one ribbon left on the platter!
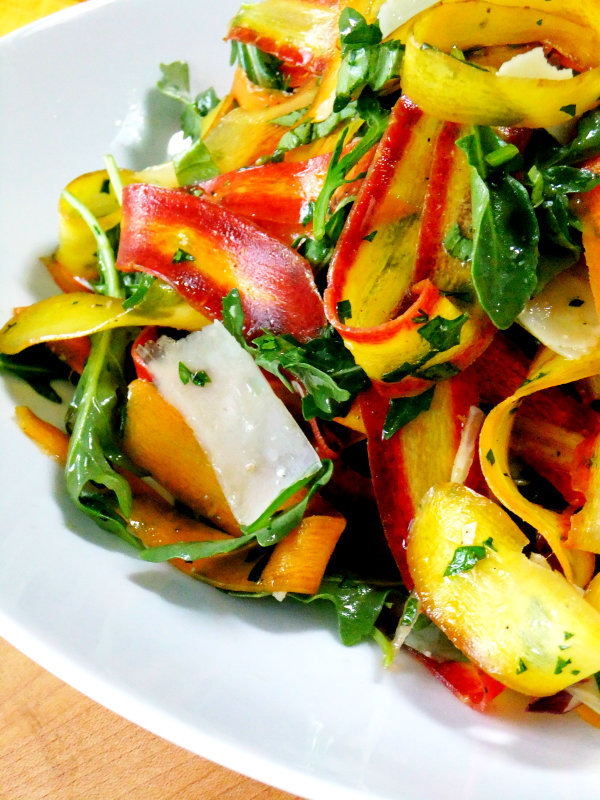 Don’t pass these babies up!
 No recipes today, just relaxing and sipping sangria, enjoying the beautiful weather here in Chicago, and wishing winter never comes back!
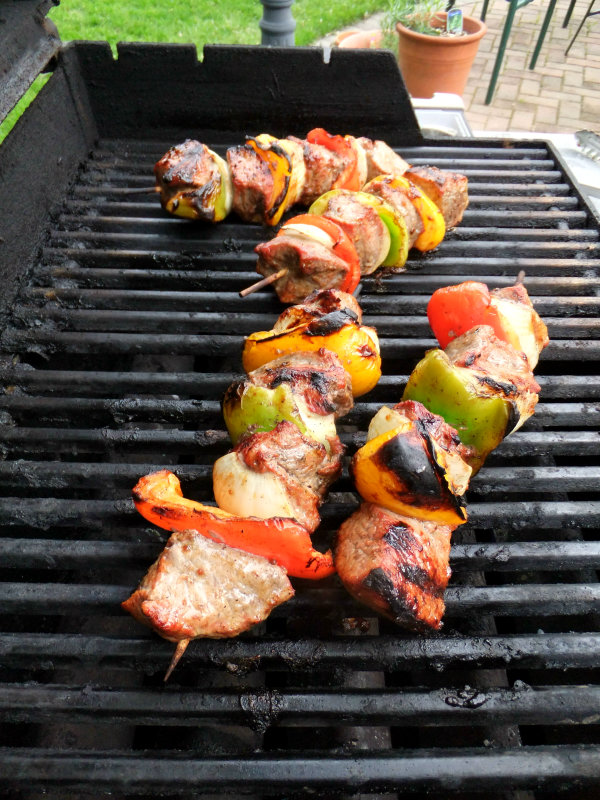 Many grills will be fired up and good smells will be in the air, some of the things we enjoy grilling are, steak kabobs. It’s not summer without a kabob of some sort!
 Of course ribs are a given. We make no claims here to be rib masters, we just cook them low and slow then slather on some really good bbq sauce.
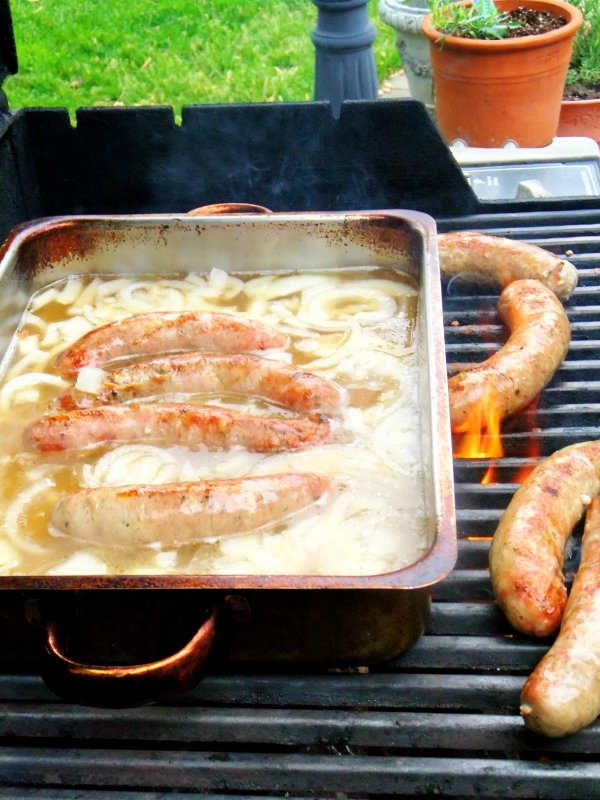 The hubby makes his famous beer brats. Sweet onions, butter and beer flavor perfectly grilled brats! A nice side for all this would be my
 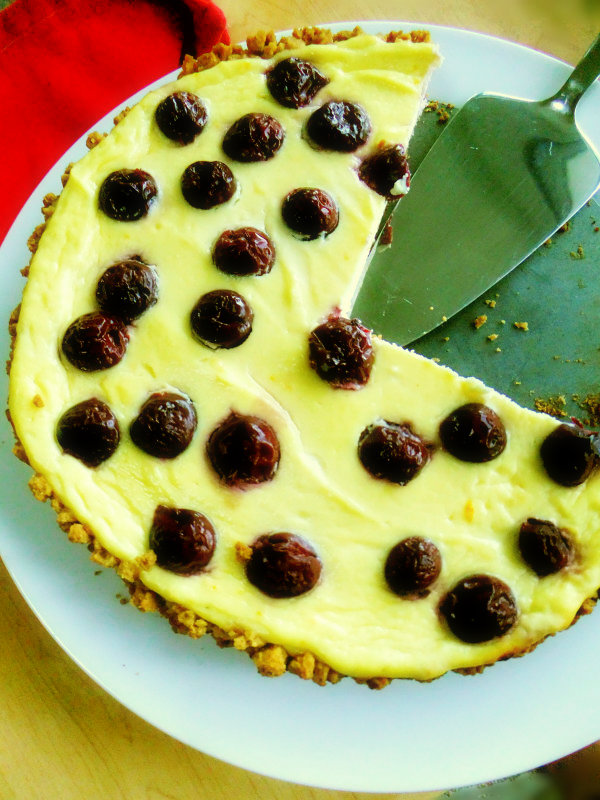 After a heavy meal a nice light dessert goes well like my cherry studded ricotta tart, I promise I will get this recipe on the blog soon, it’s that good!
 Have a great day and enjoy the fireworks!
 Next time you’re making fish consider wrapping and cooking it in foil. You can either bake it in the oven or stick it on the grill, which ever way you choose you’ll love how these foil packets lock in all the moisture and flavor of the fish, and clean up is a breeze!
 I bought a beautiful fresh filet of Alaskan cod the other day from Whole Foods, I’ve always been a fan of cod I love the texture, the mild flavor and those big moist flakes. I’ve made cod
 After a little Google research I got my inspiration from a
  I placed my olive crusted fish on top of a layer of zucchini ribbons then drizzled the whole thing with a lemon and olive oil dressing that I whisked together. Extreme flavor!
 It was a hot day and I didn’t want to turn on my oven so I decided to make individual foil packets for the grill, something

 I love the large portobello mushroom caps because basically you can stuff them with almost anything you want resulting in a beautiful meal that you created in no time. You don’t need a bunch of ingredients to make them and you feel totally satisfied after you’ve eaten them.
 We often eat these as a main course during the week along with a nice big salad but if you want to make them as a delicious side dish next to grilled chops or a steak, I’m here to tell you they go perfectly together!
 One of the reasons this tastes so good is that you cut and prepare your cherry tomatoes ahead of time letting them sit in a bowl for a few minutes with your olive oil, fresh basil, salt and pepper, letting all the flavors meld together. I also like to scrape out the gills, it gives you more room for all the toppings, and of course good tomatoes are the key!
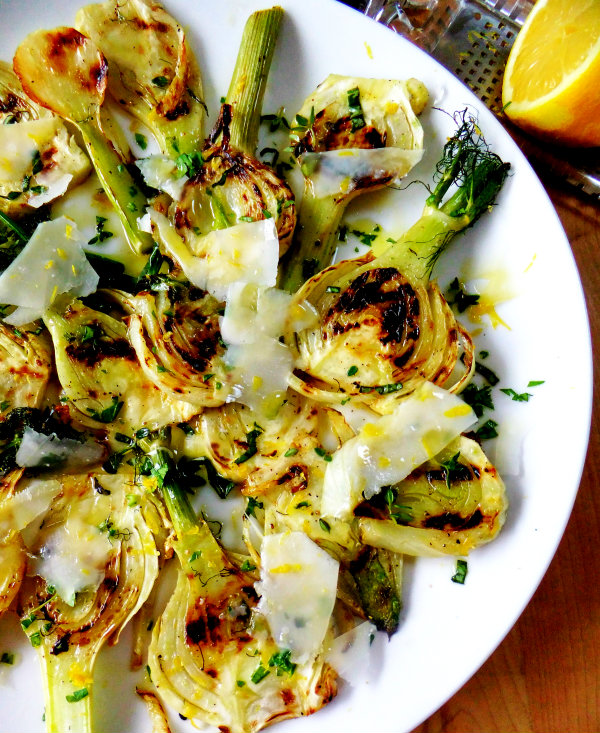 Will you be firing up the grill for Father’s Day? If so, I’d like to suggest a platter of grilled fennel as a side! It goes wonderful with steaks, chicken, fish and my absolute favorite, a
  Cooked fennel doesn’t taste licoricey at all, it’s delicate and mellow and has a natural sweetness with a texture that is similar to bok choy.
 Fresh herbs combined with lemon, lemon zest, olive oil and shavings of Parmigiano Reggiano makes for the perfect topping to enhance the flavors even more.
 You can grill your fennel ahead of time either outside or on an indoor grill, just don’t flip them until you get a nice char on each side and they’re tender to the touch. I like to keep my grill on medium, watching closely. They take about 5 minutes per side.
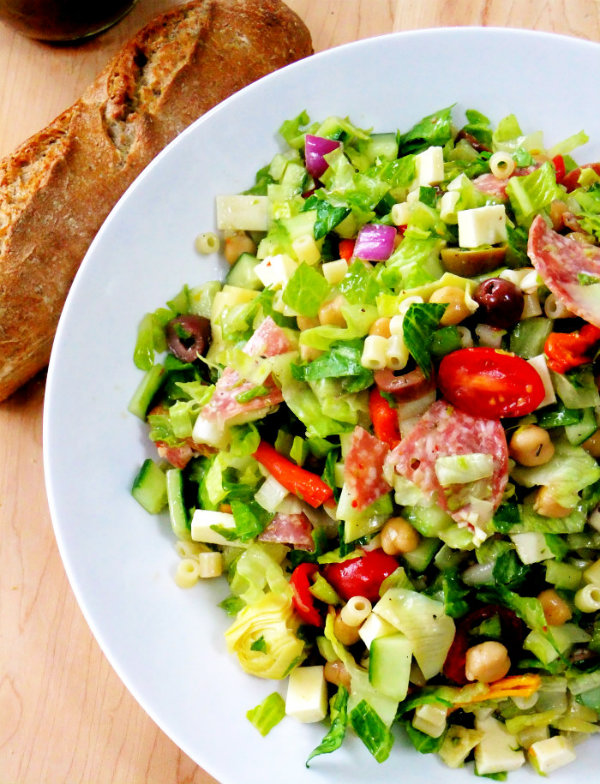 If you’re having a BBQ then your going to need some side dishes, here’s a few that I’ve been making lately. When I make a salad I don’t fuss about exact measurements, I just grab a bowl or a platter, the size of which is always determined on how many people I’m feeding, then I just start cutting and tossing in all my favorite ingredients. If you love artichokes like me then add more, if you’re not crazy about onions, don’t add any. If I’m adding chickpeas I might want to start with a handful at first adding more as I go. That’s how I make a salad, so for these four salads I’m featuring I’m giving you the combination of ingredients I used but not the exact amounts, you can be the judge according to your tastes!
 ZUCCHINI RIBBON SALAD with ASPARAGUS and CORN. Everything here is raw except for the grilled corn, After you dress it let it sit for an hour so all the flavors meld together. It includes yellow squash and zucchini ribbons, (
  GRILLED RED POTATO SALAD. This is a tasty side for steaks, ribs, pork and chicken. Pre-grill some red potato slices by cutting the top and bottom off of the potatoes then cutting into planks, toss in olive oil and place on your grill until tender. Grilled red, yellow and orange peppers, chopped bite size, Nicoise olives, sliced grape tomatoes, chopped green onion and fresh parsley. Vinaigrette dressing.
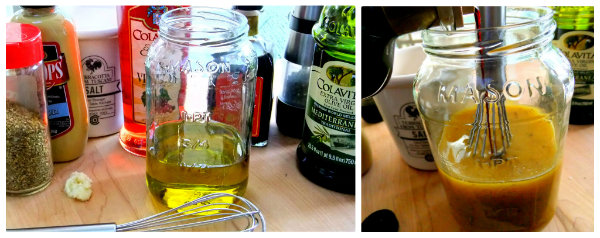 I get asked many times how I make my Vinaigrette so here it is, 3 parts good olive oil to 1 part wine vinegar, a splash of balsamic, 1 smashed garlic clove, a dollop of dijon mustard, 1 teaspoon of oregano, 1 teaspoon of kosher salt, ground pepper to taste. Whisk everything together. I always have a jar sitting in my fridge at all times!
 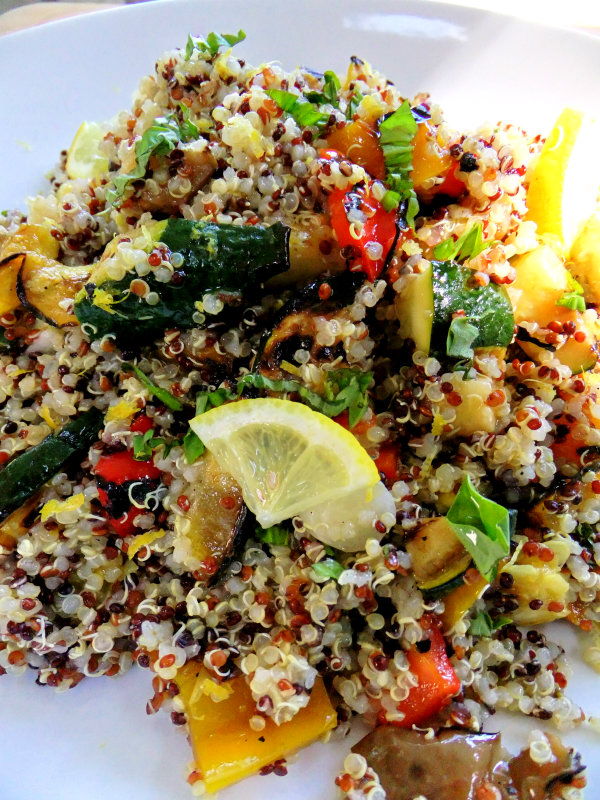 Grilled Veggie Quinoa Salad. A great healthy lunch as well as a side. For this I used a tricolored quinoa that I precooked according to the package then I just added assorted and chopped grilled veggies, yellow squash, zucchini, onion, eggplant, red, yellow and orange peppers, chopped basil and lemon zest. Lemon slices for garnish. Lemon and olive oil dressing.
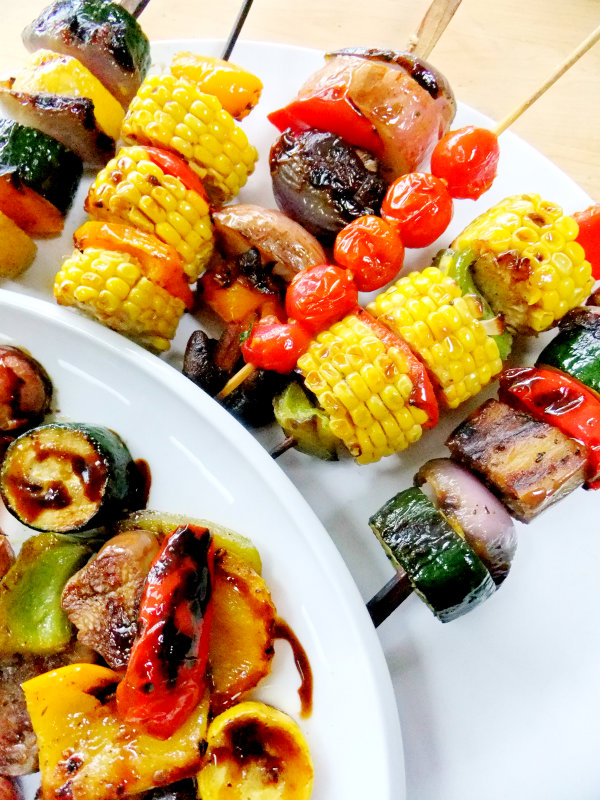 Grilling vegetables is nothing new but when you put them together on a skewer they transform into an eye-catching little side dish! Who could resist all those colors and combinations? They look so pretty on a platter and a little goes a long way!
 Assemble them in any order that appeals to you, you can get very creative with all the different colors. I parboil the potatoes just a little ahead of time so they won’t take so long to cook on the grill. Cook on a medium turning often until slightly charred and cooked through.
 Veggie skewers are the perfect option for entertaining because you can assemble all your skewers way ahead of time, even the night before. Refrigerate until you’re ready to throw them on the grill.
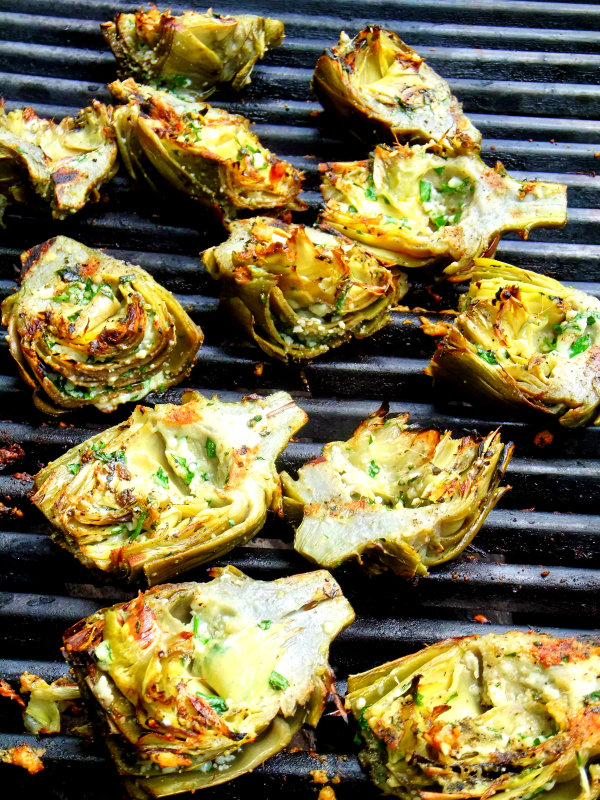 Of course at my house we always make extra room on the grill for my
 I served my veggie skewers with grilled shrimp that I marinated in olive oil, garlic, lemon zest and juice, a pinch of red pepper flakes and fresh parsley. I love those
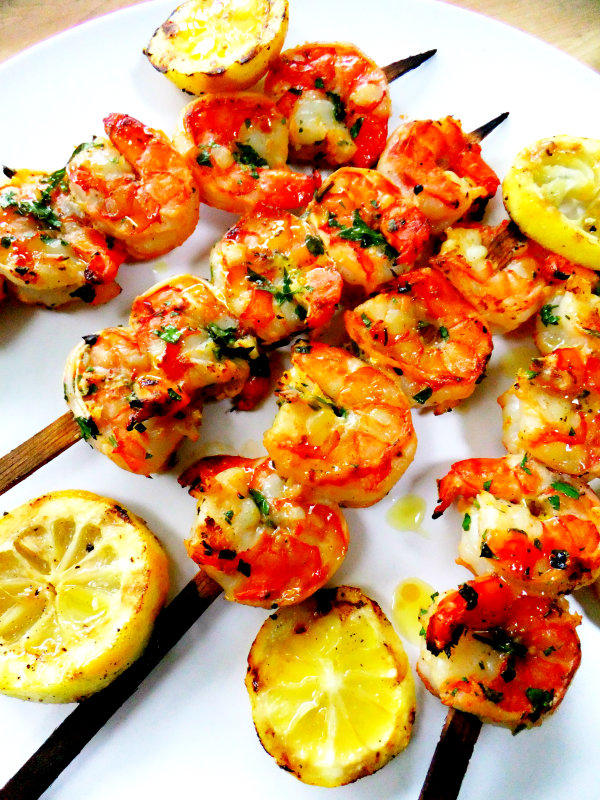 A touch of grilled lemon squeezed over the top was the perfect finish to the shrimp.
 The finishing touch on my veggie skewers will always be
  I’m a big fan of plank grilling, I love the subtle smoky flavor that the different woods infuse. I’ve
 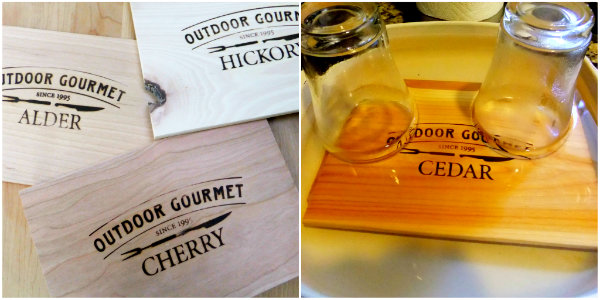 Whatever flavor board you decide to use just make sure you soak them really good, I went with cedar and maple since I wanted to do a a sweet and savory version. Make sure you anchor the boards under the water, I soaked mine for 3 hours and I never got a flare up thanks to
  I had every intention of using some sort of an Italian cheese for my first try, I already knew that a wheel of Brie would work but I was afraid I might have puddles of cheese dripping down the board. I wanted a cheese that was a little more sturdier so I asked my cheesemonger who gave me quite a few suggestions one being a special romano, but then he insisted I try this Brun-Uusto cheese from
  I purchased everything so it was easy to put together, I bought a jar of sour cherry preserves for the sweet topping and for the savory I picked up a container of sundried tomatoes that were tossed in olive oil, garlic, oregano and capers. I toasted a loaf of crusty bread and bought assorted crackers and a brioche toast.
 This cheese melts perfectly, it doesn’t ooze out all over it stays contained but yet it’s still creamy and soft with a nutty flavor and the cedar infusion takes it over the top!
  Crusty toasty bread, warm creamy cheese plus savory tomatoes makes this a match made in heaven!
 For the sweet version I used a maple board which added a delicate smoky flavor to the warm cheese.
 The sour cherry topping combined with the nutty warm cheese spread on brioche toast was truly amazing!
 I think this was my favorite!
 This is such a great lunch or even a light dinner. You could use leftover veggies either roasted or grilled and all you’ll need is a box of phyllo, a little bit of cheese and some muffin tins. Crunchy on the outside with cheesy flavorful veggies on the inside.
 I always have roasted veggies in my fridge and now that the weather is staying warm I’ll be stocking up on grilled instead. Any combination will do, use whatever you like, you’ll only be using 1/2 cup per muffin.
 In the past I was always afraid to use phyllo dough, but now I never go without a box in my fridge and use it for both sweet and savory dishes. I love to work with it because it’s so forgiving. My kind of dough!
 I also like the free form look of the finished product, no matter how you fold the phyllo up over the veggies it always looks pretty in the end. Serve with a nice salad and some roasted red pepper sauce on the side, so good!
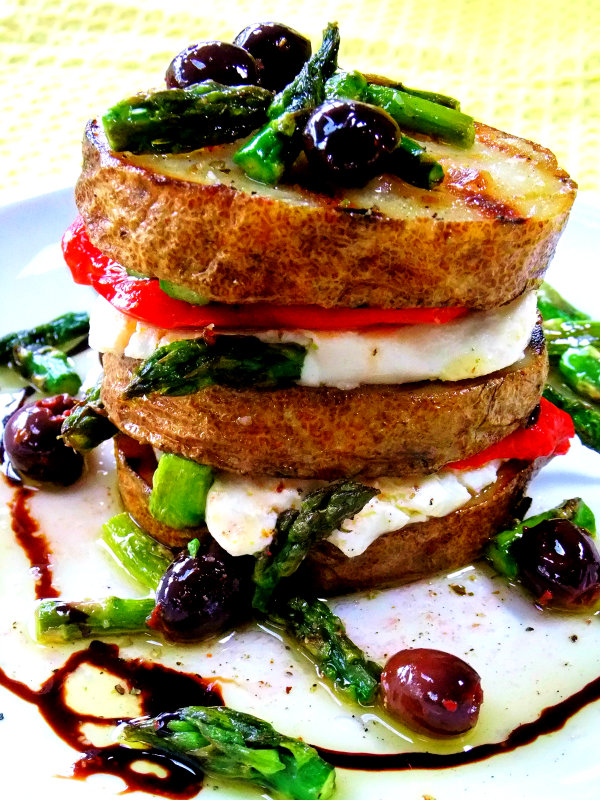
 Grilled asparagus, grilled red pepper slices layered together with creamy and slightly tangy goat cheese slathered in between thick grilled potato slices then topped off with nicoise olives and a rich drizzle of balsamic glaze, perfect for swiping everything into it.
 I did three stacks of potato slices here but two stacks would work as well especially if your serving a bunch of other side dishes. It looks impressive, the flavors are amazing, it’s a win, win!
 Have you ever been instantly attracted to the title of a recipe? It happened to me the second I read the words olive oil and Chardonnay pound cake, and ever since I’ve been obsessing about making this cake!
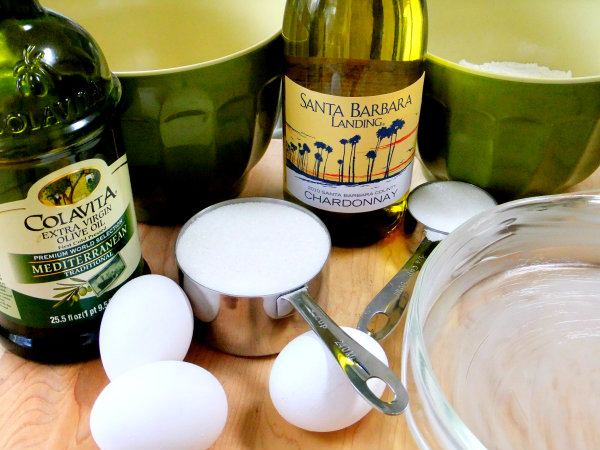 And the best part is it’s such a breeze to make! Easy prep with few ingredients, my kind of baking!
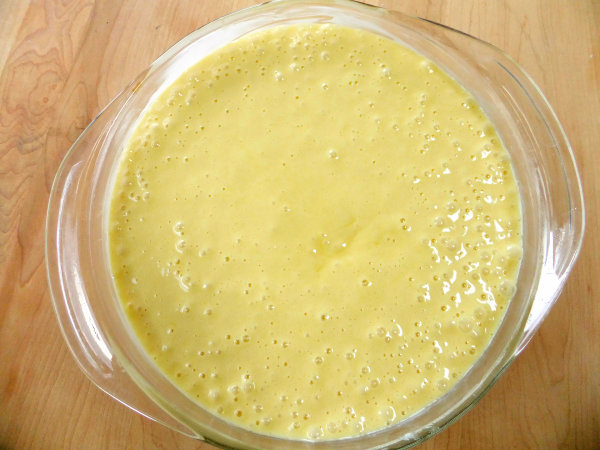 It’s a nice bubbly batter created by the chardonnay addition and you can actually smell the chardonnay as it’s baking in the oven, your kitchen will smell so good!
 I found this recipe on the Jordan Winery website, the original recipe finishes the cake off by brushing it with cognac, I wanted to try something different. Since chardonnay has notes of citrus and vanilla I decided to make a glaze using the zest of a lemon, lime and a mandarin orange along with vanilla. If I do say so myself I think the glaze took this cake way over the top!
 The flavors all blend amazing together, this is a cake for special summer events. It’s golden brown with a nice moist crumb and the chardonnay and citrus compliment each other perfectly. It’s very impressive!
 I will be making this cake over and over again!
 The spring weather reached havoc here in the midwest with major flooding all around us last week. As I drive through my neighborhood I see piles and piles of peoples belongings in dumpster after dumpster, many homes are uninhabitable just a few blocks from me, one of them a close friend of mine. For some reason my house was spared and not a drop of water came in. I feel guilty and grateful all at the same time.
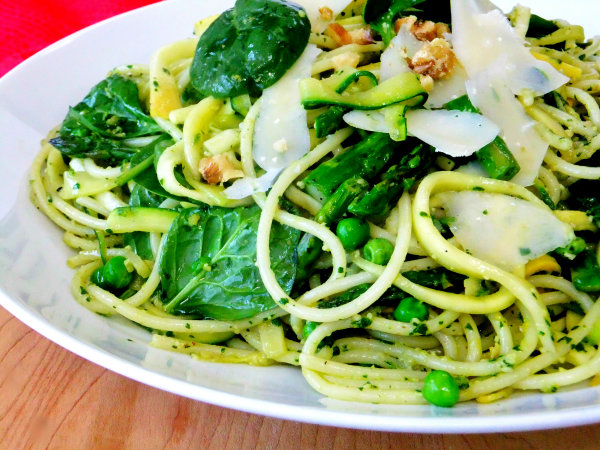
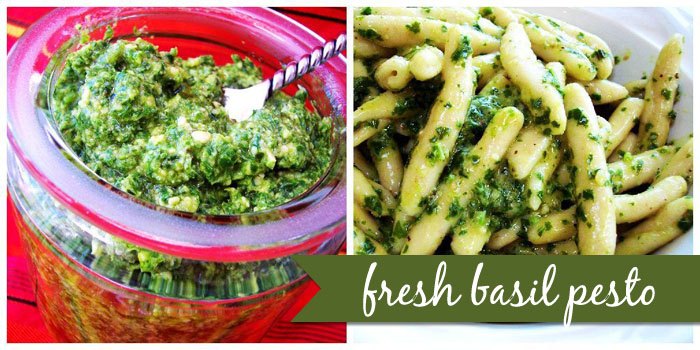
 Yesterday was a comfort food kind of day, something simple and easy but full of bright flavors. The key to this pasta dish is the parsley walnut pesto. Fresh parsley, toasted walnuts, grated parmesan cheese, garlic, lemon zest and juice all swirled with extra virgin olive oil, you could slather this on anything and it would be good!




 This past weekend the weather finally felt like spring so it was time to clean the grill and fire it up for the first time since winter.
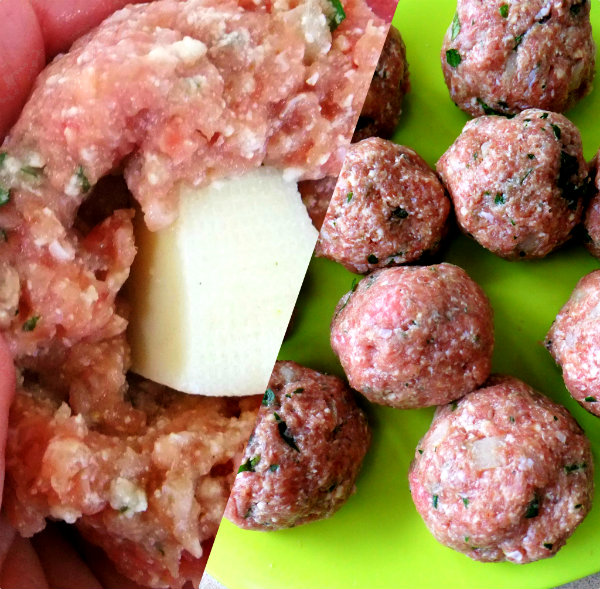 I decided I was going to try grilling meatballs, I’ve been wanting to try it, something different. I mixed them up the way I always make them minus the breadcrumbs. I cubed up some Fontina cheese and placed a hunk right in the middle. For my grilled meatballs I used ground turkey because that’s what I had, but you could use any ground meat mixture that you like.
 Just make sure your grill is nice and clean, rub some oil on the grates and because I used ground turkey I sprayed my meatballs beforehand with olive oil. I had no fancy gadgets I just plopped them right onto the grill, but here’s the thing, don’t get anxious and start moving them, let them form a crust on the bottom. For extra precaution I checked the bottom using a sharp edged spatula before I flipped them over.
 I made a roasted tomato and garlic sauce to serve with my meatballs, a great combination that enhanced all the flavors of the entire dish. We loved how they tasted! The slightly smokey flavor the grill added was a plus along with the nice crispy outer crust that formed. Moist and flavorful inside with gooey Fontina cheese oozing out. This would be great for a party, you could even make them as kabobs!
 And now for my exciting news! I wrote an ebook/cookbook! I can hardly believe it myself but I really did! Within a couple of days I will be releasing it here on my blog. So please come back and read all about it, I can’t wait to share it with you!
 Over Easter weekend I made three different frittatas, one with potatoes and eggs and another with every vegetable you can think of, but this spring vegetable frittata is by far my favorite one of the moment!
 Everything about it reminds me of spring, fresh shaved asparagus, tiny fresh peas and those cute baby zucchini. I also like to add in tomatoes and chopped green onion, delicate flavors that really pack a punch!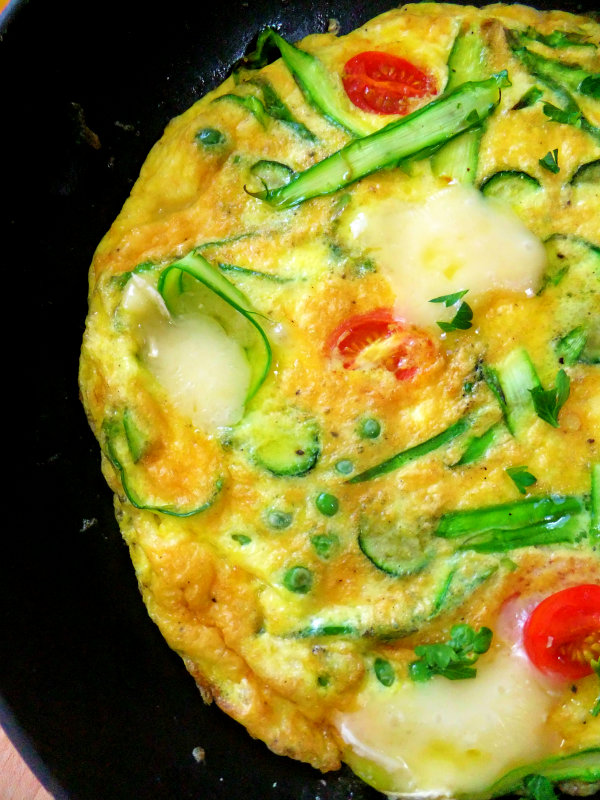
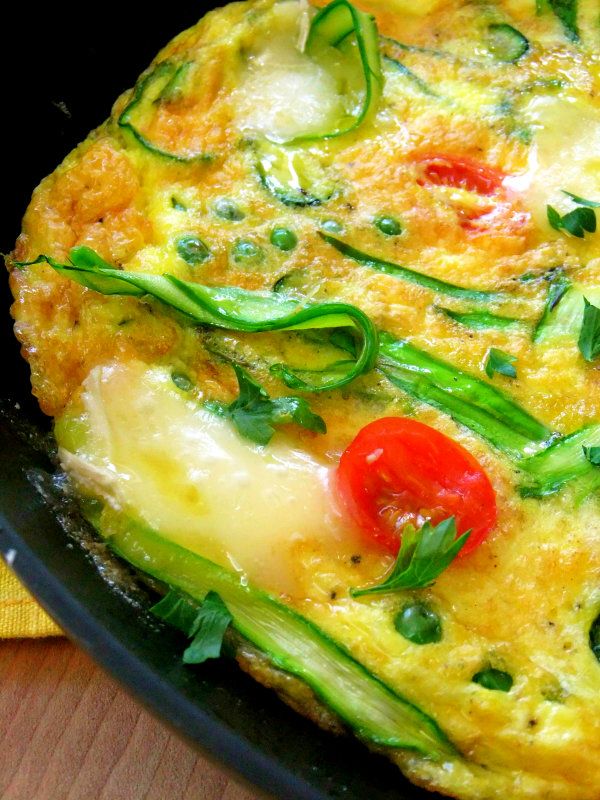 I always flavor my eggs with grated parmesan or romano it gives a nice base for all of the other ingredients, and with the addition of Brie here it really takes it over the top!
 By placing it under the broiler for a few minutes your frittata will become perfectly golden as well as puffy and fluffy and that’s exactly what you want!

 Oh my, I’m so excited to share this cookie recipe with you! If you don’t have a bottle of limoncello in your home right now please go out and get one so you can make these cookies for Easter. Let me see if I can describe them to you, buttery, crunchy, refreshing, bright with an explosion of lemon flavor! The perfect cookie to welcome in spring.
 Fortunate for me I still had a bottle of homemade limoncello that my daughter, her friend and her cousin made back in September. It was quite a project and fun for me to watch since I’ve never ever made it myself. Much planning went into it beforehand, she was on a mission to find the best organic lemons she could find, lemons free of chemicals and wax because the peels would be soaking in alcohol for weeks.
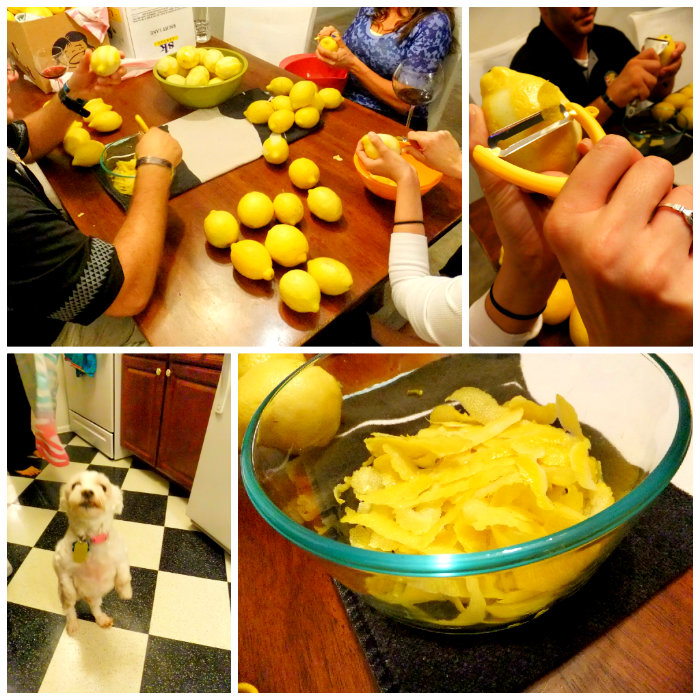 Peeling the yellow skins off the lemons take time and patience, it’s something you can’t rush because you have to be careful not to get any of the white pith beneath it otherwise your end result will be bitter, and you don’t want bitter limoncello. Their goal was to have it all completed and ready to sip for the holiday season. I’m happy to say they reached their goal.
 The essential oils of the lemon peels infusing with the alcohol is such a dynamic combination, creating the most vibrant liqueur. I don’t want to sound like a bragging mother but this was the best limoncello I’ve ever had! It tasted so fresh with a wonderful smooth finish to it. After giving out some bottles as gifts they now have people begging them to make more.
  I hoarded one last bottle, it was hidden away in my freezer, making limoncello cookies was a good excuse to bring it out!
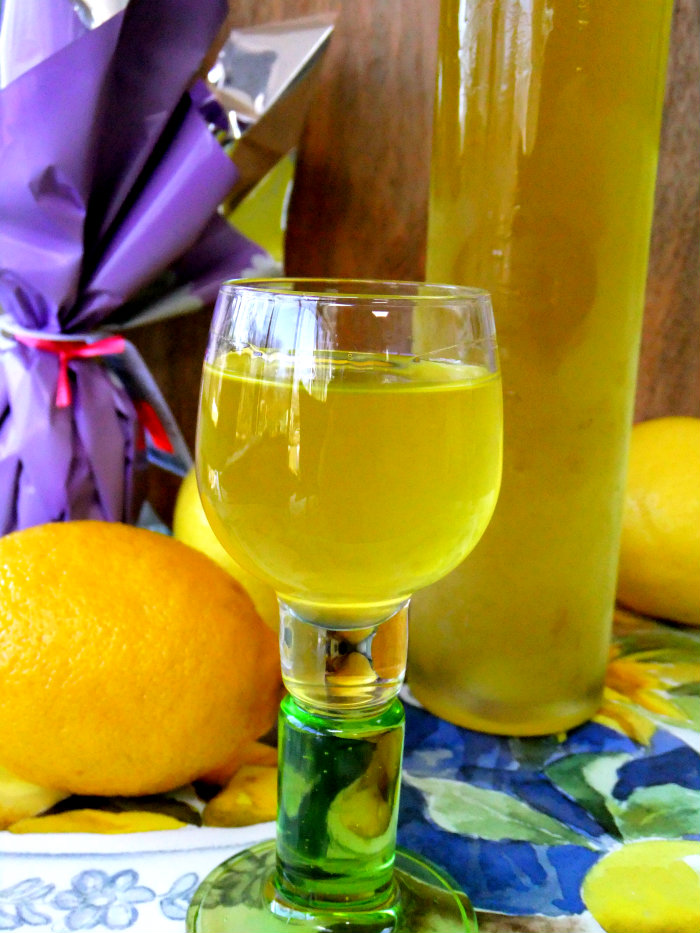 Of course I had to sip some while I was baking!
 Look at that color, liquid gold, slightly thick and perfectly sweet. It screams blue skies and sunshine!
 The limoncello is mixed right into the frosting so with every bite you take you’ll have a burst of lemony flavor. I promise you, these will be devoured if you make them for Easter, but you need to double or triple this recipe for sure!
 The dough is shaped into a log then refrigerated for a while, sliced and baked. I tried to shape my log into an oval so they would look like eggs, or you could just cut them rounds.
 Melt in your mouth goodness! Happy Easter to all!
 You can make your own pizza dough which is provided in the recipe or buy a good quality one like I did to make it really quick.




 I’m Marie, a wife, mother, mother-in-law, and gramma of two beautiful girls. My passion is food, clear and simple but especially Italian food, hence the name of my blog, Proud Italian Cook. I want you to feel right at home here so grab a cup of coffee, I’ll get the pastries, take a look around and enjoy your visit! {