Winter Panzanella Salad With Roasted Vegetables

veggie panzanella

A panzanella salad traditionally is made in summertime with fresh tomatoes and bread, but today I’m featuring a winter version of a panzanella salad. I promise you will love it and you’ll be surprised just how easy it is to make.

Go take a look inside your fridge and see what veggies you have in there, any combination would work, this is truly a freeform type of recipe.

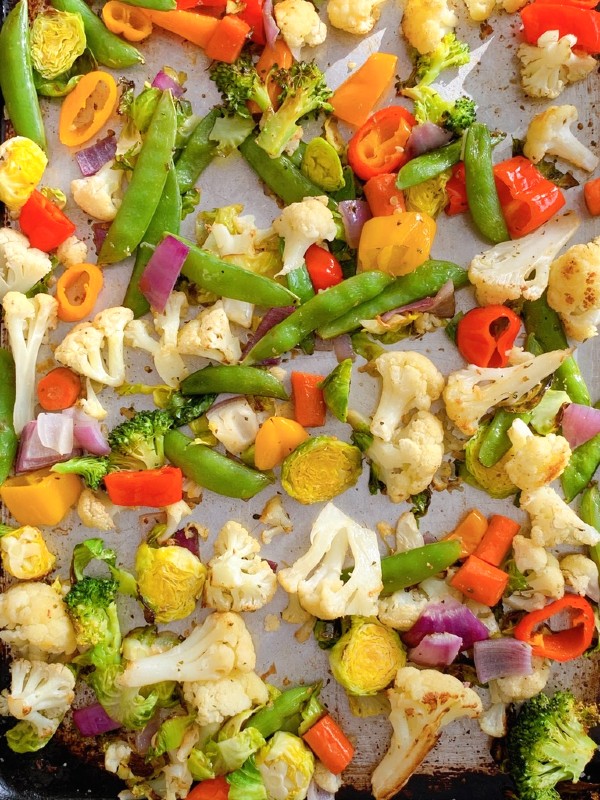
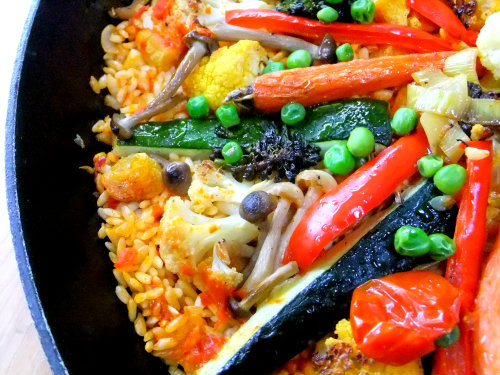
Below is exactly what I had in my fridge.

uncooked veggies

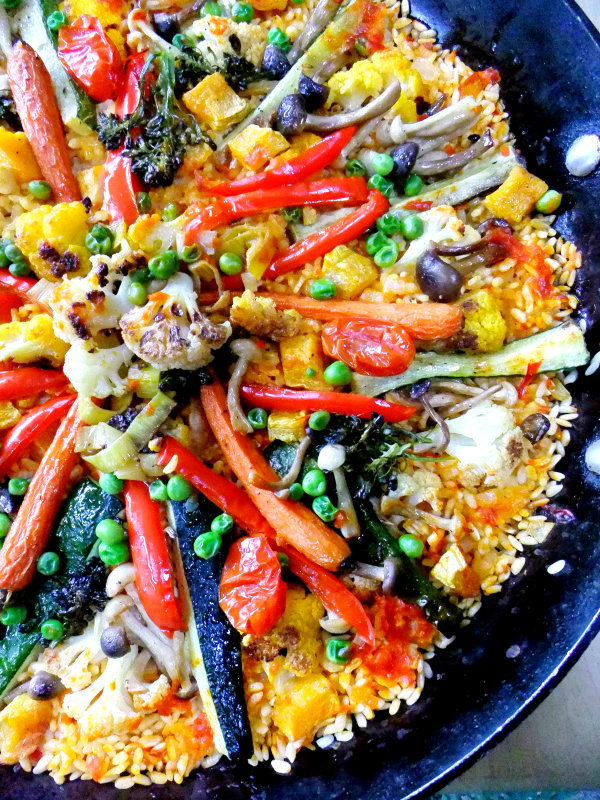
I had a mix of broccoli, carrots, onion, peppers, brussel sprouts, sugar snap peas and cauliflower. If I had squash I would have added that, whatever you have will work.

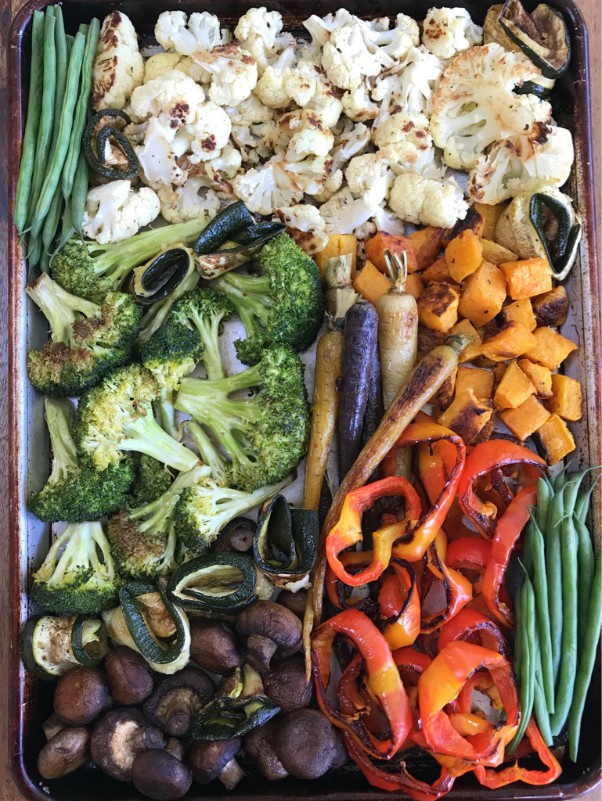
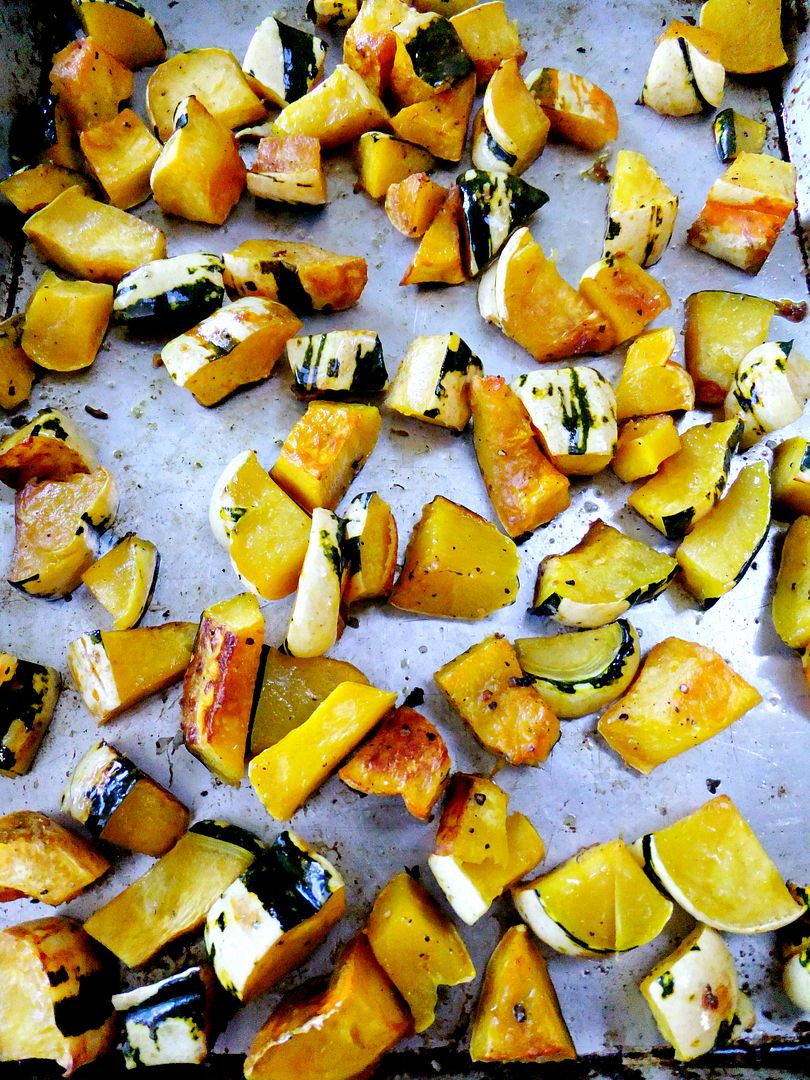
Don’t be afraid to fill a whole sheet pan full of your favorite veggies like I did. Then drizzle them all over with olive oil, add salt and pepper and roast at 400 degrees until golden, with still a little bite. Make sure you don’t over cook them, you don’t want mushy vegetables here.

homemade croutons

Another important component to this salad is homemade croutons. I can’t stress enough how important it is to make your own, store bought ones do not compare.

I used a stale hunk of ciabatta for mine but any crusty bread would do. Just chunk it up, place on a baking sheet, drizzle and toss them with a generous amount of olive oil, pepper and I had a rosemary salt that I added.

You’re going to put those bread cubes into a 400 degree oven until they get golden and crispy, they don’t take too long so keep watching and tossing them.

vinagrette

Then the final important elements are a homemade vinaigrette and fresh bocconcini, ( fresh mozzarella). Again I stress homemade is best, so please don’t use a bottled dressing of any kind, making your own vinaigrette is easy to do and makes a world of difference to the taste and over all deliciousness of this salad.

I will add my vinaigrette recipe below at the end of the post.

roasted veggies

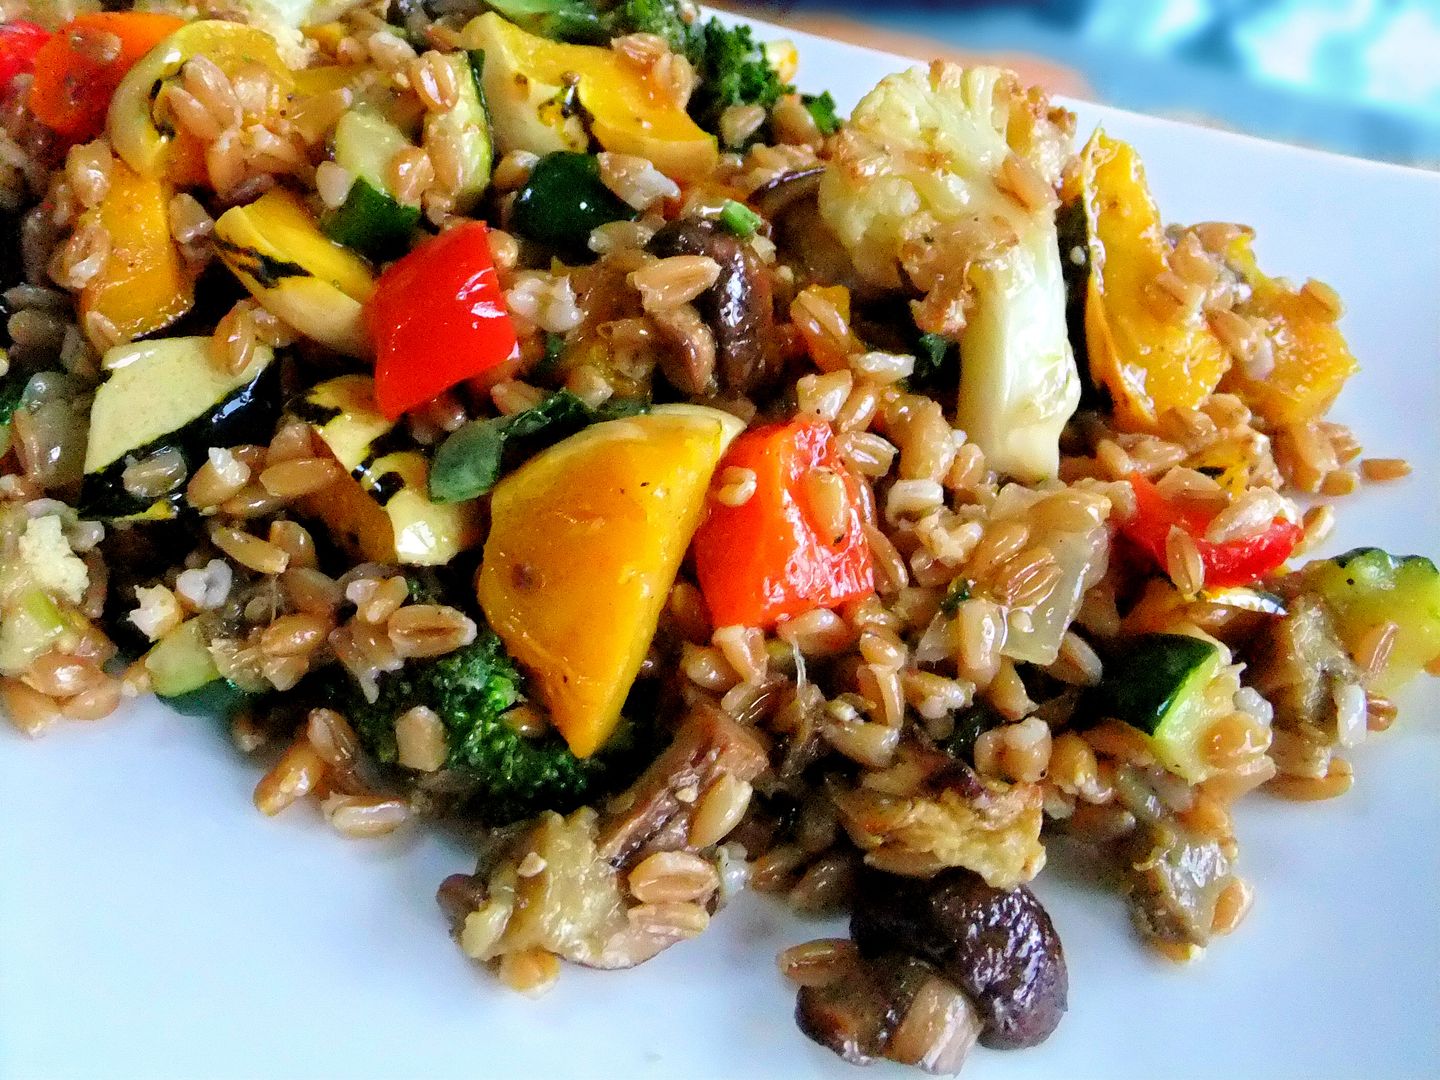
After the veggies have been roasted and cooled down and the croutons and vinaigrette is made, it’s time to put this winter panzanella together.

winter panzanella

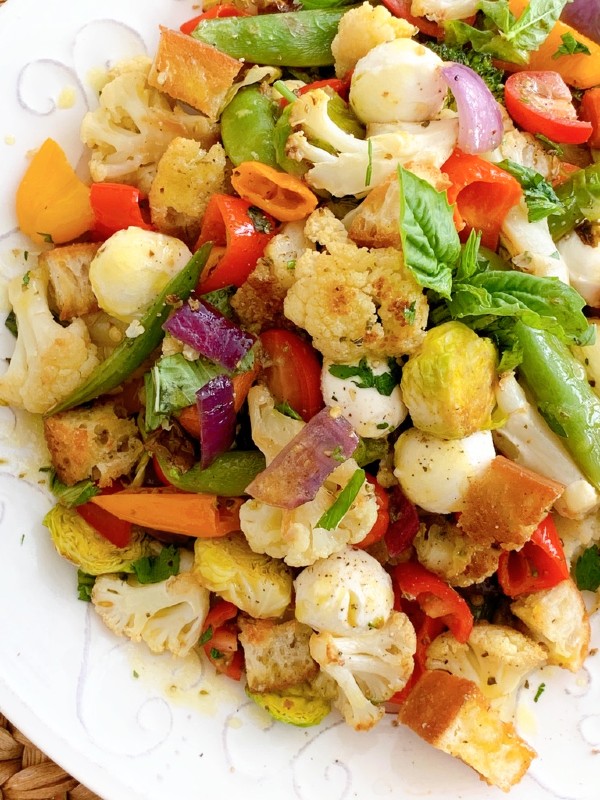
Grab a pretty bowl, add the roasted veggies, torn basil and chopped fresh parsley. Toss in your croutons and bocconcini, use as much as you want and add in a few sliced cherry tomatoes for freshness. roasted veggies

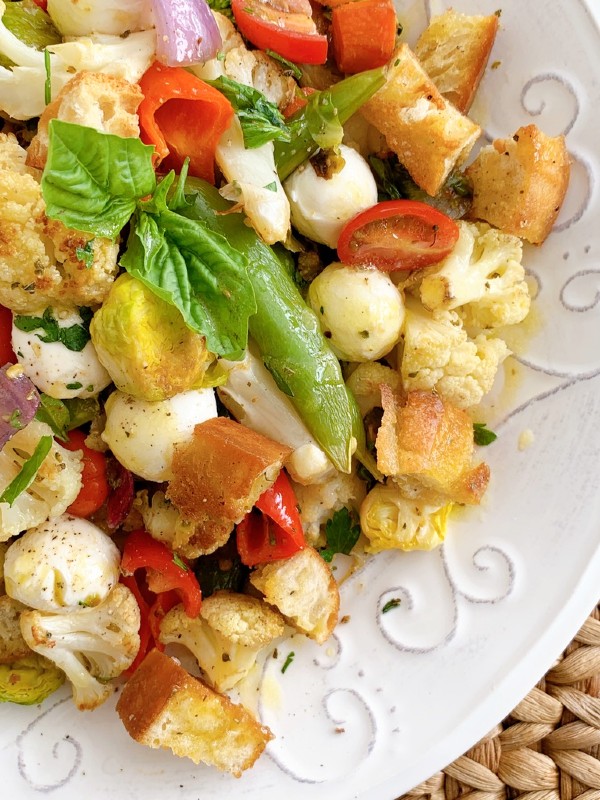
All that’s left is to spoon that vinaigrette over the top and dig in! This could serve as a lunch, side dish or if you just feel like eating a bowl of goodness!

I hope you try this winter version of a panzanella salad.

5.0 from 2 reviews
Homemade Vinaigrette
 
Author:
Ingredients
  • 1 part white balsamic vinegar
  • 3 parts olive oil
  • a dollop of dijon mustard
  • 1 small garlic clove, grated
  • a pinch of salt and pepper
  • a pinch of dried oregano
Instructions
  1. Place all the ingredients into a jar that has a lid.
  2. Shake well until it all emulsifies together.
  3. Store in the fridge when not using.


Signature

How To Make A Savory Veggie Strudel

veggie strudel

Crispy layers of phyllo pastry is the perfect wrapper to hold in tender roasted veggies and creamy, melted cheese to create this savory veggie strudel. This dish could be a served as a veggie main course, a starter or even a side.

It’s easier to make than you think and I’m going to show you how!

roasted veggies

First of all you can use any combination of vegetables that you like, all is good. Maybe you have some odds and ends leftover in your fridge, or some that need to be cooked  before they go bad, or like me maybe you just went a little over board when shopping for produce.

It doesn’t matter what combination of vegetables you have, the only thing you need to do is to precook them so they can be ready to assemble, they can be either grilled or roasted, I roasted the majority of mine except for the beans which I steamed.

phyllo pastry

The next thing is get yourself a box of phyllo pastry, you’ll find it in the frozen section, it’s very accessible these days. Don’t be intimidated by it, it’s so easy to work with and so forgiving, trust me. I always defrost mine overnight in the fridge and then take it out of the box to warm up to room temp before rolling it out, leave it in the plastic wrap though.

Phyllo needs to be covered while you’re working with it, it tends to dry up fast so it’s important that you cover it with a damp kitchen towel when you unfold it from the roll.

roasted veggies

To further prep for this veggie strudel you have to make sure all the vegetables are cut into bite size pieces, so cut them up and set them aside.

roasted veggies

There are six layers of phyllo here, the first five are sprayed one sheet at a time with olive oil spray then sprinkled with grated cheese like pecorino or parmesan and a few grinds of black pepper all over. Then you’ll want to continue layering the same way with each five sheets until you reach the sixth one, the top.

Next you’re going to spread your chopped veggies all around the pastry sheet, whatever combination you have, fill up the space like I did above leaving a border of a little over an inch on all four sides.

Dice up fresh mozzarella into cubes and add that on top of the mixed vegetables, equally distributing it all around, then grate more pecorino or parmesan on top of it. I also had a very small chunk of fontina cheese and I grated that onto the mixture as well, you get the picture, you don’t have to be so precise.

Any cheese combo will do, but it helps if you have at least one good melting cheese in there because it will help bind the veggies together.

rolled phyllo

Then your filled veggie strudel gets rolled up and baked seam side down until it gets nice and golden.

cooked strudel

Let it rest before cutting!

veggie strudel

Layers of crispy phyllo, tender roasted, savory mixed vegetables with warm melty cheese inside, oh yes, you’re going to love this!

veggie strudelveggie strudel

Add a little dipping sauce and you’re good to go, enjoy!

Follow prouditaliancook on Instagram to see what else I’m cooking up during the week.

How To Make A Savory Veggie Strudel
 
I always roast my veggies in a 400F oven, drizzled with olive oil, salt and pepper, making sure the moisture is roasted out.
Author:
Ingredients
  • 6 sheets of frozen phyllo pastry, defrosted according to the box and set out to get to room temp before using.
  • roasted veggies, cooked and cut into bite size pieces, enough to spread out onto a 14x18 sheet of phyllo, choose your favorites with a variety of color.
  • fresh mozzarella cut into small cubes enough to spread all over the top of the veggies
  • pecorino or parmesan for spreading on each layer
  • an additional small amount of cheese to crumble on for added flavor like blue, fontina, goat, or feta
  • olive oil spray
  • granulated garlic
  • italian seasoning
  • FOR DIPPING SAUCE;
  • Roasted red peppers and a little marinara
Instructions
  1. Heat the oven to 400F.
  2. Place parchment paper onto a half sheet pan with rimmed sides.
  3. Carefully place one sheet of phyllo onto the parchment, while making sure the others are covered with a damp kitchen towel.
  4. Spray phyllo sheet all over with olive oil spray then sprinkle with grated cheese and black pepper.
  5. Repeat above on each remaining phyllo sheets including the last one, the top.
  6. On the top layer spread out your veggies leaving an 1-1/2 inch border all around.
  7. Sprinkle lightly with granulated garlic on the veggies for added flavor.
  8. Spread the diced mozzarella all around, evenly distributing it.
  9. Add the small amount of the additional cheese of your choice.
  10. Looking at the sheet pan horizontally, fold the left and right sides of the phyllo where you made a border onto the veggie mixture.
  11. Then gently start at the bottom and slowly start to roll it up making sure the sides are still tucked in and covered.
  12. Place the rolled strudel seam side down.
  13. Spray the top with olive oil, black pepper, some Italian seasoning and some shredded cheese.
  14. Bake for 20-30 minutes or under golden and crispy.
  15. Let it rest before cutting then gently cut with a serrated knife.
  16. RED PEPPER DIPPING SAUCE;
  17. I whirled roasted red peppers and a little marinara in a food processor to make my sauce.


Signature

Summer Stacked Vegetable Caprese

stacked vegetable caprese

Healthy summer vegetables roasted then layered and stacked together along with all the makings for a caprese salad, that best describes this Summer Stacked Vegetable Caprese. The flavors of summer all stacked into one lovely bundle.

This can be served as an appetizer, a light lunch or even a side dish, it’s colorful and it tastes amazing, like a caprese on steroids!

aloha peppers

I was lucky enough to find these beautiful Aloha peppers when I made my veggie/caprese stacks but you can certainly use a mix of yellow and red bell peppers to get the same color effect.

roasted vegetables

I roasted all my vegetables but you can certainly grill them as well. I used eggplant that had the skin peeled off in a zebra effect, some left on and some peeled off.

The peppers were cut around 3/4 of an inch thick to keep them sturdy enough to hold the other veggies. You’ll also want to reserve and cook the tops for use in the presentation, slices of zucchini were also roasted.

All vegetables were roasted at 400F. on a baking sheet drizzled with olive oil, salt and pepper, cooked until lightly golden until tender but not overcooked.

Slice up some ripe summer tomatoes and have your mozzarella sliced and ready to go.

Fresh basil is a must, along with basil pesto for added yummy flavor.

stacked vegetable caprese

Then it’s all about the stacking, so find a pretty plate and first add the pepper ring, inside the ring stick a eggplant slice and swipe a little pesto on it.

Next, add your sliced mozzarella with a basil leaf on top.

Top the mozzarella with a ripe tomato slice swiped with pesto and a drizzle of olive oil.

Repeat with another pepper ring and this time add the zucchini and swipe the top with pesto.

Then another mozzarella slice with a fresh basil leaf.

Repeat with another tomato slice swiped with pesto and a drizzle of olive oil.

Place the pepper top that you reserved to cap it off, place a skewer right down the center to keep it nice and secure then add some pesto on the top.


stacked vegetable caprese

You can decorate the plate with swirls of pesto and balsamic glaze, serve this with a knife and fork and enjoy!

Follow me on Instagram to see what else I’m cooking up during the week.

Signature

Loaded Farro Salad

loaded farro salad Here’s a loaded salad that’s filled with roasted veggies and delicious chewy farro, this is not a wimpy salad by any means! This loaded farro salad is filled with veggie goodness featuring, asparagus, zucchini, yellow squash, peas, red, yellow and orange peppers, artichoke hearts, green onions, basil and parsley then tossed in a bright lemon and olive oil dressing.

loaded farro salad Delicious at room temperature so it’s party perfect. You can serve this as a meatless meal, as a light lunch, a healthy main course or a side dish for grilled fish, shrimp or any meat of your choice.

Did you know that farro can be pre-cooked ahead of time then kept frozen? Sometimes I cook a whole bag, let it cool down and place portions into freezer bags so they’re ready to go when I want to make this.

The frozen farro will keep for up to six months in the freezer, but I assure you it won’t last that long, there are so many different ways to prepare it, here’s a summer version I like to make as well.

loaded farro salad

Keep in mind you can add or subtract any veggie you like, anything goes, this will not disappoint!

You can follow Proud Italian Cook on Instagram to check out what I’m making during the week.

4.5 from 2 reviews
Loaded Farro Salad
 
Author:
Ingredients
  • 1½ cups of farro
  • 4 cups of water
  • 1 teaspoon, salt
  • 1 bunch of thin asparagus, cut diagonally
  • 1 to 2 zucchini and yellow squash, cut into bite size pieces
  • 1 each of red, yellow and orange peppers cut into bite size pieces
  • 1 cup frozen petite peas
  • 1 cup of frozen and defrosted artichoke hearts
  • 3 green onions sliced
  • a handful each of fresh basil and parsley chopped
  • juice of 1 lemon
  • 2 small garlic cloves grated on a microplane
  • olive oil
Instructions
  1. Combine the water and the farro into a medium saucepan, add the salt then bring to a boil over high heat.
  2. Reduce heat to medium low then cover and simmer for 25 to 30 minutes.
  3. Drain well then transfer to a big bowl to cool down.
  4. In the meantime heat your oven to 425 degrees then roast all you veggies on a large sheet pan, (except the peas, just let them defrost and the green onions, just have them ready to go) that have been drizzled all over with olive oil and seasoned with salt and pepper.
  5. Cook them until there is still a little bite, do not over cook and let them get mushy. You'll have to keep checking and tossing them., maybe total 10 minutes, but ovens vary.
  6. Let all the veggies cool off when out of the oven before combining them with the cooled farro.
  7. Toss and fold everything together including the defrosted peas.
  8. Whisk the juice of 1 lemon together with the grated garlic and enough olive oil to your tasting.
  9. Add the chopped parsley, basil and sliced green onions.
  10. Pour the dressing on, toss gently and season with salt and pepper.


Signature

Layered Roasted Vegetable Torte

layered roasted vegetable torte

If you’re a fan of vegetables then you’re going to love this recipe! Layers of your favorite veggies stacked into a springform pan and “glued” together by tasty shredded cheese, it’s a show stopper and it could work very well as a side dish to your holiday table.

The only thing you’ll need to do ahead of time is pre-roast your veggies, then it’s all about the assembly, which is really quite simple.

layered roasted vegetable torte

I used a 9 inch spring form pan which would give you six nice sized wedge portions. If you want to go for a bigger spring form pan, don’t be afraid, I’ve done it and it works great, just roast more veggies, add more cheese and you’ll be fine.

layered roasted vegetable torte

The key to a successful un-molding is to let it rest for at the very least 30 minutes, but an hour would be better, you could even make it the day before then take it out hours ahead of serving and allow it to reach room temperature.

layered roasted vegetable torte

By letting it rest properly you’ll be able to cut it into perfect wedges and everything will stay in tact.

layered roasted vegetable torte

I made a different version here, a few years ago, you can check it out to get an idea of other veggies you might want to use, but really just use your imagination!

I’m also on Instagram where you can follow me and see what else I’m cooking up!

4.8 from 4 reviews
Layered Roasted Vegetable Torte
 
Colorful layers of roasted veggies stacked into a torte, a great presentation for your table.
Author:
Ingredients
  • For this recipe I used a 9" spring form pan, that I brushed inside with olive oil
  • 1 butternut squash with a long neck, remove skin and slice thin. ( I only used the neck of the squash so I could get flat slices) you could also use the bulb part just slice thin also
  • 1 medium head of cauliflower, which I take my knife to and make slices
  • 1 head of broccoli, just the crown, sliced like the cauliflower
  • 1 delicata squash cut into half rings
  • a few collard green leaves, which I just happen to have, but you could use spinach or kale
  • grated asiago, grated mozzarella and grated romano for "glue"
Instructions
  1. Have all your veggies pre-roasted at 400 degrees until golden on each side. Depending on the size of your veggies and the size of your pan you might have some left over, but that's a good thing!
  2. Then take your oiled pan and place it on a foil lined baking sheet that's rimmed, it's going to leak a bit at the bottom and this will be such easy clean up.
  3. Start layering, I like to put something substantial on the bottom and top so I started with the slices of butternut squash, fill the whole bottom of the pan, try to have no gaping spaces.
  4. After each layer, sprinkle some of each cheese all around.
  5. Next layer, the cauliflower, place it all around filling all the open sides and spaces.
  6. Repeat with sprinkling of all cheeses.
  7. Another layer of butternut squash, then more cheese.
  8. Next layer the broccoli, more cheese, at this point gently press down the torte with the back of a tablespoon to make sure the layers are nice and compact.
  9. Next will be the delicata squash rings, then repeat with cheese.
  10. Next will be your something green, kale, spinach or collard leaves. ( you might want to wilt those in the microwave for a minute before) repeat with cheese.
  11. Last layer for the top I used butternut squash again, but you could also used roasted sweet potato.
  12. Top with cheese and place foil on top to cover.
  13. Bake in a 400 degree oven for 20 minutes, then take foil off and bake another 15.
  14. Remove and let it rest for at least 30 minutes at the very least, an hour even better, very important so everything sets and you'll be able to cut into nice wedges.
  15. Then go around the edge of pan with a knife making sure nothing is sticking, then release spring on pan and remove and place on a platter with bottom of pan still in tact.
  16. You can make this the day before, just take it out several hours before serving to reach room temperature.


Signature

It’s Paella Time Again….My Way

vegetable paella This is not the first time I’ve made and posted a vegetable paella here, I think it’s been about a year and a half since I made my  first one, but I just love making them because you can be as creative as you want with all sorts of vegetables, especially what is currently in season right now.

The rice is your blank canvas, so everything you place on top of it just makes the whole dish come alive!

vegetable paella ingredients This was not a planned recipe what so ever, these were the actual veggies that I had in my fridge the other day, so before they went bad I decided to roast them all, which I do quite often.

Roasting vegetables dramatically enhance their flavor, It’s a simple method where the vegetables are tossed in olive oil, sprinkled with salt and pepper then placed in a 425 degree oven and roasted until nicely golden and tender.

I usually have a few rimmed baking sheets going at the same time because I like to roast the vegetables individually according to their kind instead of mixing them all together. As you can see I had quite a variety!

I used red pepper, broccolini, yellow squash, zucchini, leeks, butternut squash, baby thin carrots, fennel, yellow and white cauliflower and those cute little enoki mushrooms. I also added roasted cherry tomatoes and a sprinkling of frozen peas.

The point is you can make it your own with whatever vegetables you have on hand, don’t be afraid, anything will work. The more color the better, just play around with it and have fun, and besides, eating more color brings many health benefits to us, and that’s a good thing!

vegetable paella  The instructions for paella and starting the rice can be found here in my previous post, just change out the veggies and make it your own, of course mine is not so traditional but made with an Italian flare.

It’s a one pan meal you can pull together during the week,( especially if you roast your vegetables ahead of time) or special enough to serve to your guests at a dinner  party. Any leftovers you might have taste equally as good the next day!

roasted vegetable soup with chicken and beans I guarantee you’ll have extra roasted veggies left over so why not make a hearty minestrone with them like I did.  I mixed homemade broth with a good boxed broth, simmered it for a while with a few parmesan rinds ( or grated cheese) that I always keep in my freezer plus a can of cannellini beans, some kale, leftover chicken if you have it and cooked pasta if you like.  When the broth is nice and cheesy  place some of those leftover veggies into a bowl and ladle the broth right on top. So good, and so good for you!


Signature

Veggie Bundles Wrapped in Phyllo

veggie bundle in phyllo
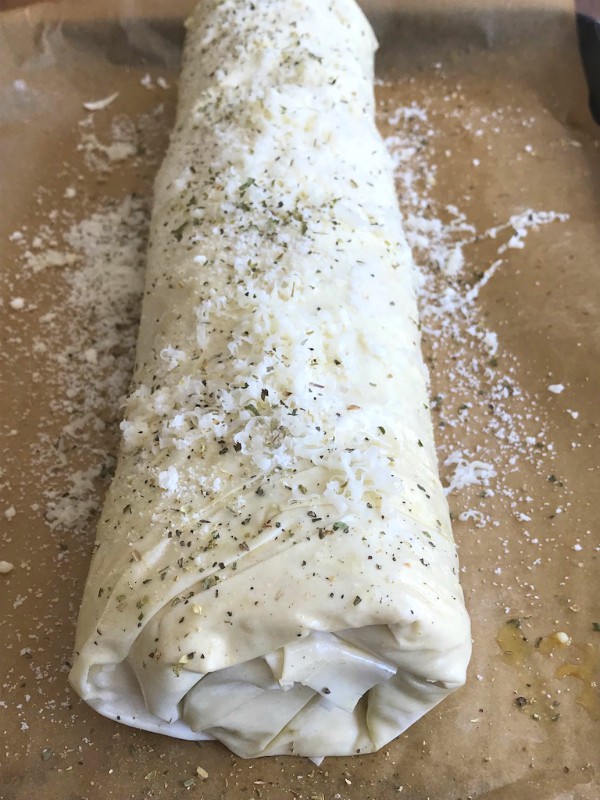
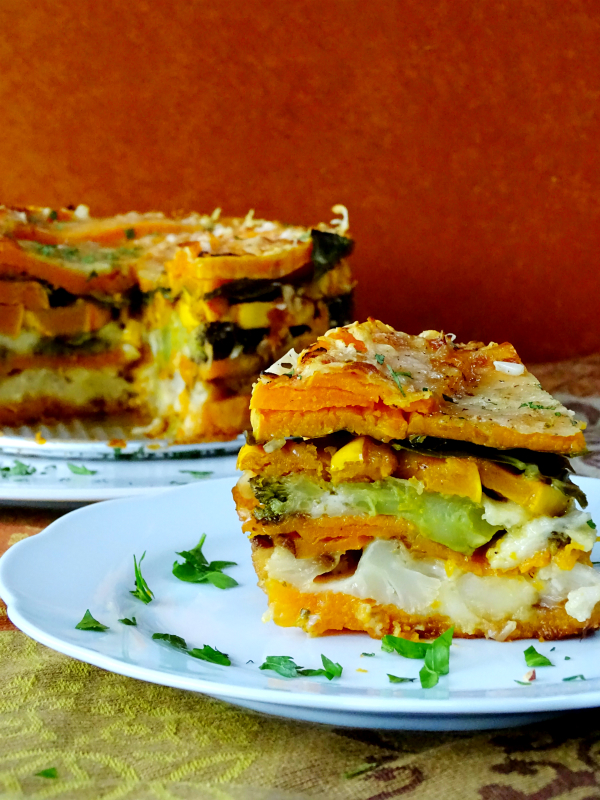
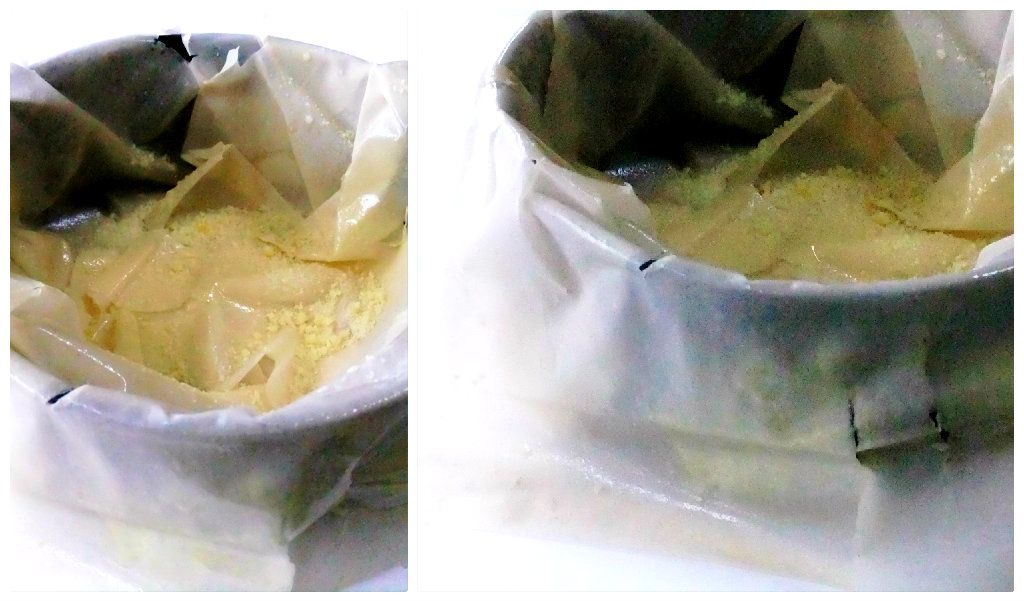
This is such a great lunch or even a light dinner. You could use leftover veggies either roasted or grilled and all you’ll need is a box of phyllo, a little bit of cheese and some muffin tins. Crunchy on the outside with cheesy flavorful veggies on the inside.

It’s an individual take on something I make quite often at my house, which is this.
roasted vegetables I always have roasted veggies in my fridge and now that the weather is staying warm I’ll be stocking up on grilled instead. Any combination will do, use whatever you like, you’ll only be using 1/2 cup per muffin.

veggies in phyllo
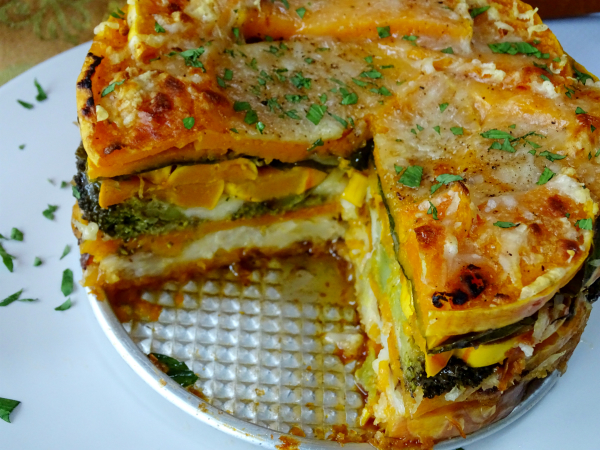
In the past I was always afraid to use phyllo dough, but now I never go without a box in my fridge and use it for both sweet and savory dishes. I love to work with it because it’s so forgiving. My kind of dough!
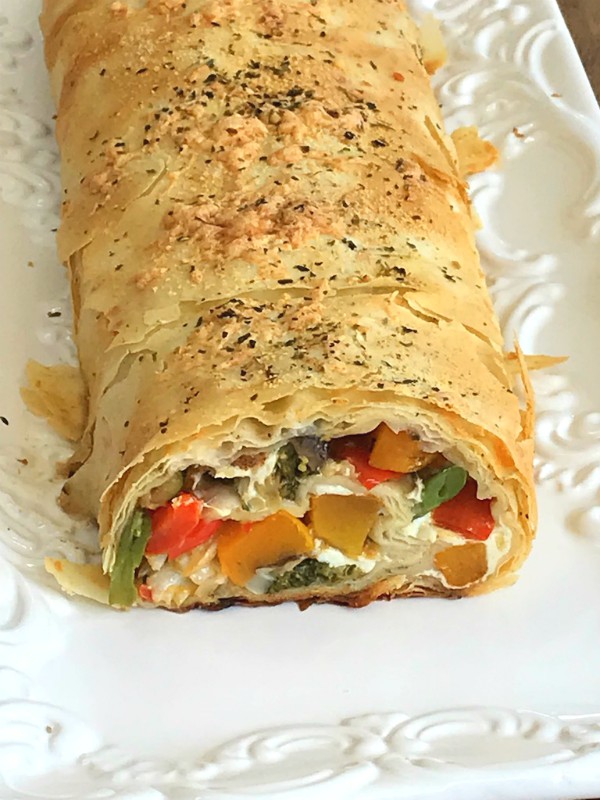
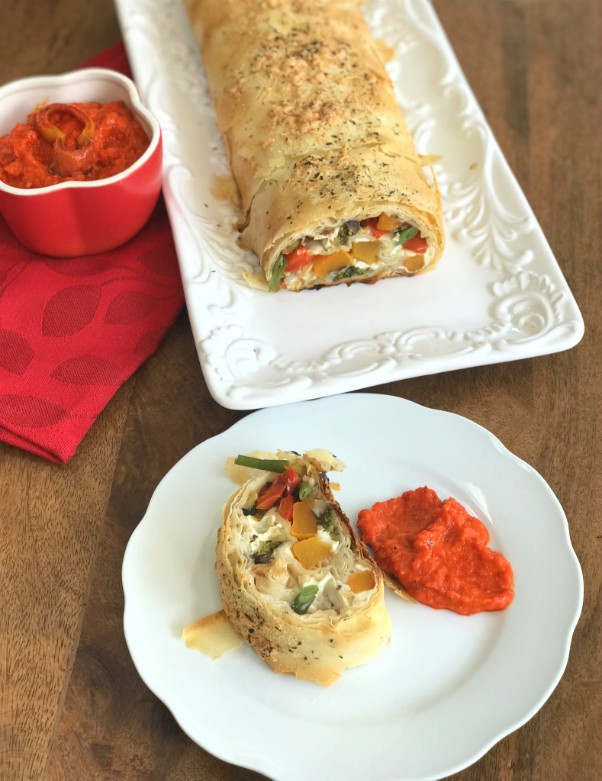
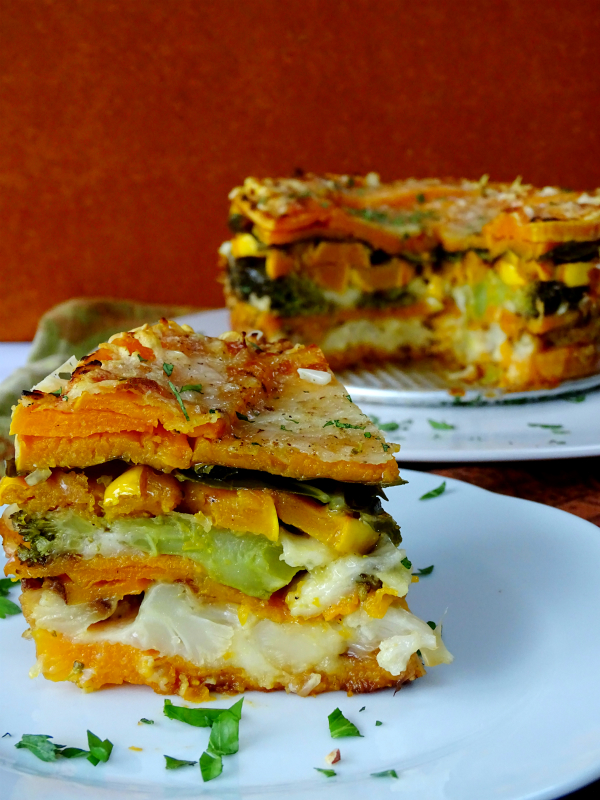
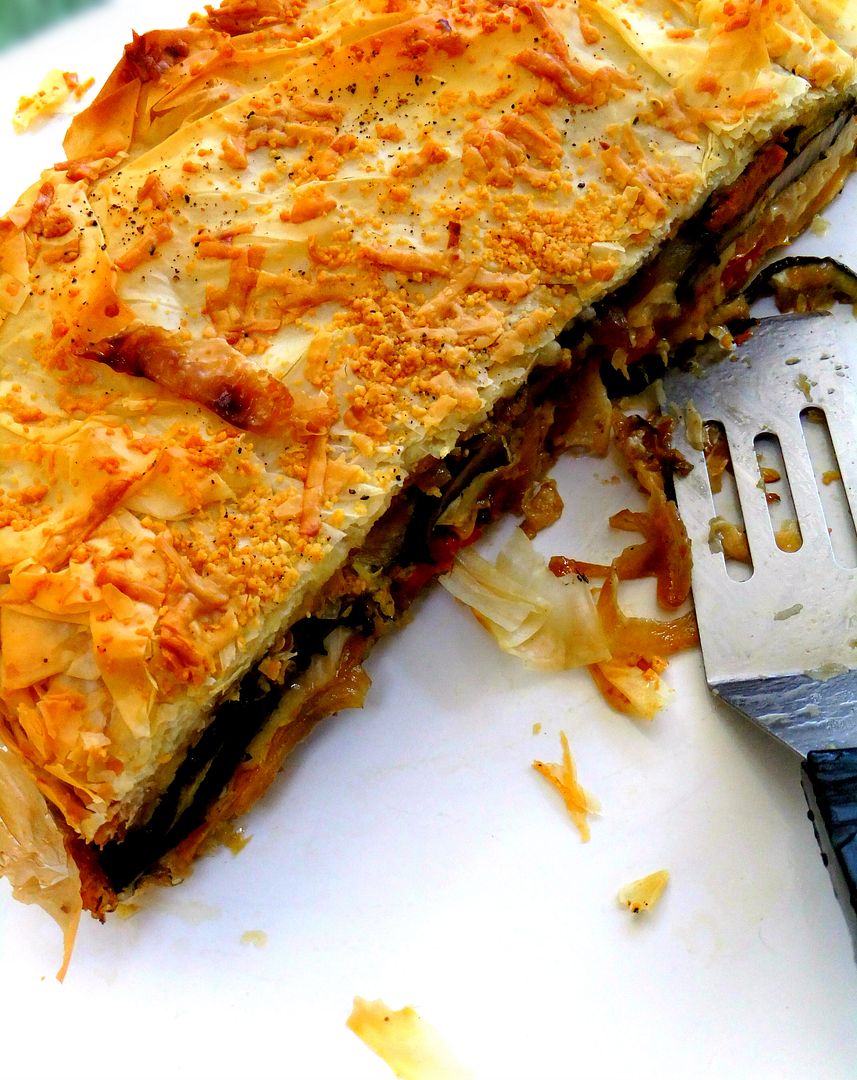
 I also like the free form look of the finished product, no matter how you fold the phyllo up over the veggies it always looks pretty in the end. Serve with a nice salad and some roasted red pepper sauce on the side, so good!


Veggie Bundles Wrapped in Phyllo
 
Ingredients
  • precooked grilled or roasted veggies of your choice
  • 5 sheets of phyllo
  • 1 cup of shredded cheese like asiago, mozzarella or fontina
  • olive oil for brushing
  • roasted red pepper sauce or marinara for swiping bundle in
  • muffin tin
  • makes 6
Instructions
  1. Lightly oil muffin tins.
  2. Layer 5 sheets of phyllo on top of each other brushing olive oil on each individual sheet.
  3. Cut into 6 squares.
  4. Press one square into each muffin cup and fill with ½ cup veggie mixture.
  5. Top with grated cheese, then fold over the corners to secure filling.
  6. Brush tops with olive oil and sprinkle with cheese.
  7. Bake at 375F until golden, around 30 minutes.
  8. Cool for 5 minutes, then serve warm or at room temperature.
  9. Best eaten same day or otherwise reheat in a 400F oven until crispy again.

Signature

Roasted Veggie Overload!

Hi, My name is Marie and I’m a veggie-holic! Yes, when I’m in the produce isle I just can’t help myself, I have no control. Sometimes I get strange looks from people as I happily stroll by them with my grocery cart.  I’ve even had people say to me, “My, you do buy a lot of vegetables!” It’s not until I get home and start unpacking my bags that I realize, they might have a point!

So when I feel like I have an overload of veggies hanging out in my fridge, I just roast them all, as in the photo above, and figure out what to do with them later.

I always roast my veggies at 400F, drizzled with a good quality extra virgin olive oil and lately, and actually more times than not I’ve been using this, the mellow roasted garlic flavor just enhances the veggies even more, I truly love that stuff!
The thing about having roasted veggies handy is that you can quickly whip up a meal in no time, toss them into frittatas, pastas, grains, all sorts of things. I had a package of farro that I quickly cooked up and made this for a nice lunch but you could easily use brown rice, barley, couscous, you get the idea. For this I added a fresh lemon and olive oil dressing to it, along with fresh herbs.
Want something a little more substantial? Stuff it all into a pre-roasted acorn squash and serve it with a salad on the side.
But I have to say one of my favorite ways to use up all my veggies is to stack them high layered into a springform pan all wrapped up in phyllo dough pie.
Every time I make this I get rave reviews, it’s great for a luncheon with the girls, a main course or even a side dish to bring to a party.
phyllo vegetable pie
The wedges cut perfectly because the layers are slightly “glued together” with some grated cheese, I like to serve mine with a little roasted red pepper sauce on the side, so good!
Roasted Veggie Pie Wrapped in Phyllo
 
Ingredients
  • Assorted roasted vegetables of your choice
  • Grated parmesan or romano cheese
  • grated asiago, mozzarella, or fontina cheese
  • Phyllo sheets
  • Olive oil
  • 9" springform pan
Instructions
  1. Brush springform pan with olive oil or olive oil spray
  2. Unwrap phyllo and cover with a dampened towel, keeping it covered as you work quickly
  3. Add 3 sheets into the bottom of the pan,1 at a time, spraying or brushing with olive oil and a sprinkling of grated parmesan or romano
  4. Fit one sheet partially on the bottom with the ends hanging well over the pan, spray or brush all over with olive oil
  5. Continue with the phyllo all the way around the pan, then do it all around 2 more times( phyllo is very thin) rotating pan so the sheets cover the entire rim
  6. Start layering your vegetables one layer at a time, in between the layers add a sprinkling of grated parmesan or romano and also your grated asiago, mozzarella or fontina, use enough to cover all around the vegetables,but not too much, pressing down lightly
  7. When you get to the top fold in the overhang of phyllo, making sure its sprayed or brushed with olive oil
  8. Add more phyllo sheets to the top to make sure all the veggies are covered
  9. Finish off by spraying or brushing with olive oil on entire top and a final sprinkling of cheese
  10. Place pan on a baking sheet lined with foil and bake in oven at 400 for around 20-25 minutes or until phyllo is crispy golden
  11. Let it cool down then cut into wedges with a serrated knife
  12. Note: No exact amounts here, just cover each layer with veggies and cheese, you could also use a smaller springform pan or a deep dish pie plate depending on how many veggies you have.
Signature

Veggie Napoleon

This is a savory version of a napoleon, layers and layers of your favorite vegetables all perched on top of a sturdy portobello base. These pretty bundles are the perfect side dish to any protein you make or a straight up main course served together with a salad.
This dish was inspired by something my sister in law ordered while on vacation, her portobello was filled with Yukon gold potatoes, caramelized onions, roasted red peppers and parmesan cheese.

I wanted to incorporate some autumn vegetables on mine so I added sliced sweet potatoes, kale and some nice fresh green beans I found.
Everything is precooked before you layer, I steamed the green beans and sauteed the kale but roasted everything else you see here, the eggplant, red and yellow peppers, the sweet potatoes and the onion slices all tossed with a little olive oil and placed in a 400 degree oven until golden and tender.

The portobellos, (I bought large ones) were scraped of their gills ( to give you lots of room for layering) and roasted for only 10 minutes along with everything else just to get them a little tender.

Then just start layering! In between the layers you want add some grated cheese that melts good like fontina or mozzarella, it sort of “glues” the veggies together so that when you cut into bundle, ( with a serrated knife please) they won’t fall apart.
Place them back in the oven for a couple of minutes just to let the cheese melt in between.
I think I was getting  a little over zealous here stacking them too high with too many layers in the beginning, I tend to over due it, just ask my kids!
 So I ended up making mine a little more compact with not quite as many layers as above but always ending with the sweet potato slices on top.
 Place your finished veggie napoleon in a nice big puddle of marinara and sprinkle with more cheese, delish!
Get creative here, the various veggie combinations are endless!! 

Signature

Springtime Farro Salad

Farro is an ancient grain that has become quite popular these days, it has a rich nutty flavor with just the right amount of chewiness with great health benefits as a bonus! It’s easy to prepare with no fuss at all, just cook up some vegetables to add to it and it becomes the perfect main or side dish!

I made this salad over the weekend to serve alongside some grilled meats but it was just as good eaten all by itself for lunch the next day. Bursting with color, it makes you think of spring doesn’t it?

Cooking the farro is super easy, cover the grain with water, add a little salt, bring it to a boil then cover and simmer for about 20 – 25 minutes, drain, then spread it out on a baking sheet to cool down.

I roasted red, yellow and green peppers, red onion, asparagus, minced garlic, zucchini, artichokes hearts and peas, all in a 425F oven tossed in olive oil, salt and pepper until tender but not mushy. You can use any vegetables you want just make sure to cut them into bite size pieces.

When everything cools down toss the farro with the vegetables into a large bowl and add chopped fresh parsley and basil, a couple of sliced scallions, if you have some lemon olive oil drizzle some of that all over or make your own by whisking fresh lemon juice with olive oil, add salt, pepper and a generous amount of freshly grated Grana Padana cheese. I like to toss and taste to see how everything is flavored adding a little more of this and a little more of that!

Happy Spring!

Signature

AUTUMN SIDES

These are two very easy sides to make, because your oven does all the work! The hardest thing would probably be cutting up the vegetables! Preparing your veggies with a drizzle of olive oil, salt and pepper, and then roasting them at 400F gives a nice carmelization to them all. And if your lucky to have a “convection roast” setting on your stove, that’s even better.

Roasted Sweet Potatoes and Green Beans, Dried Cranberries, Toasted Hazelnuts, all tossed with Brown Butter and Sage. I saw this combination in a magazine and loved it ever since! I think it was shown with whole pecans, which would be equally delicious!

Brown butter and sage, is simply made by melting some butter on medium heat, tossing in some fresh sage, heat until the white milk solids turn brown, and sage is crispy.

Balsamic Glazed Roasted Acorn Squash

Taking balsamic vinegar and simmering it down until it becomes a dark, sweet rich syrup, and then pouring a generous drizzle over your squash, makes it irresistibly good!!!
Have a great day, and Buon Appetito!!

Signature