Chicken and Feta Phyllo Pie

chicken and feta phyllo pie

This is a gorgeous savory pie that’s filled with chicken, feta and parmesan cheese, fresh herbs, onions and garlic, and the best part is it’s nestled between a crunchy crust of phyllo dough.

I said it before and I’ll say it again, don’t be afraid to use phyllo, it’s so easy to use and so forgiving, even if you tear a piece no worries, no one would even know, trust me on that!

chicken phyllo pie ingredients You’ll need some precooked chicken which you can either roast yourself or to save time you can even buy a rotisserie chicken. Good quality Greek feta and parmesan cheese is a must for exceptional flavor.

chicken and feta phyllo pie 
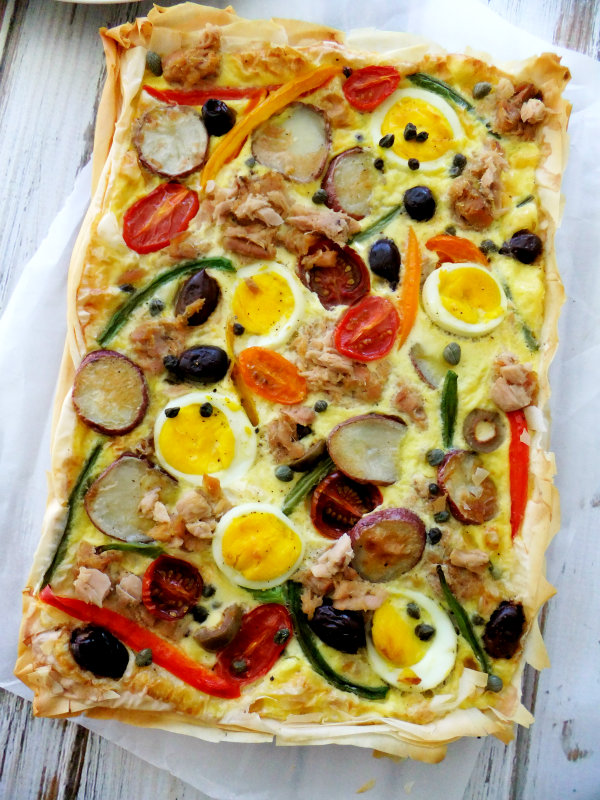
The crunchy crust against the creamy, savory filling is such a delicious match, it’s rustic and fancy all at the same time.

chicken and feta phyllo pie

Serve this with a nice green salad and you’re good to go!

Don’t forget you can follow me on Instagram to see what else I’m cooking up during the week!

5.0 from 1 reviews
Chicken and Feta Phyllo Pie
 
Author:
Recipe type: Recipe adapted from Mediterranean Cooking
Ingredients
  • 1 lb and ½ of precooked chicken meat, preferably white meat chopped or shredded
  • 2 cups of chicken stock, boxed, low sodium, warmed
  • 8 ounces of feta cheese, crumbled
  • ½ cup of grated parmesan
  • ⅓ cup all purposed flour
  • ¼ cup each of parsley and basil
  • a few sprigs of thyme
  • 5 tablespoons butter
  • 1 small onion, finely chopped
  • 3 or 4 green onions, sliced
  • 3 garlic cloves, minced
  • 4 eggs, slightly beaten
  • 8 sheets of phyllo pastry
  • olive oil
Instructions
  1. Melt butter in a saucepan, add onions and garlic, stir until onions soften.
  2. Add flour and stir together for 1 minute then gradually pour in the warmed stock cooking over medium heat until it thickens. Remove from heat and let it cool down for 15 minutes.
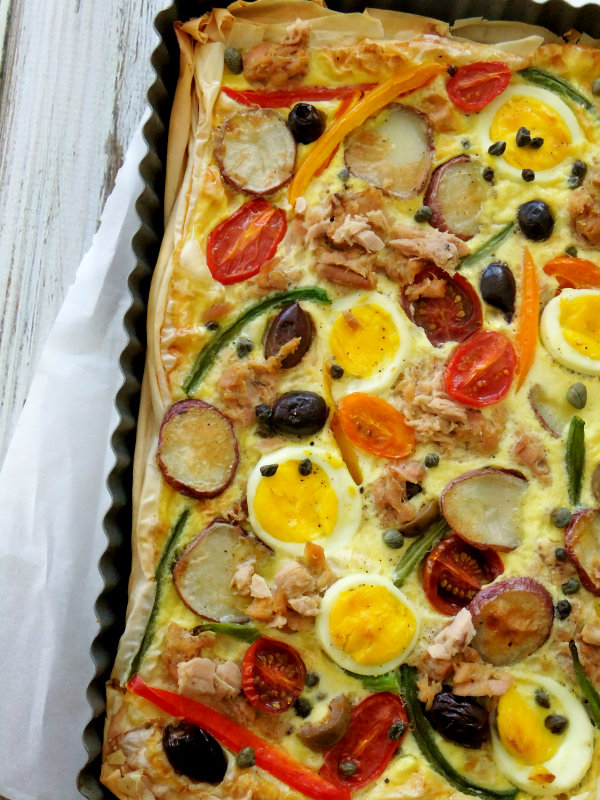
  3. Preheat oven to 350 degrees and oil a 10 inch springform pan.
  4. In a large bowl place all the chicken, the cooled down sauce, eggs, all the cheese and herbs. Mix together until well combined.
  5. Brush 1 sheet of phyllo with oil, line the pan then top with remaining sheets which have all been brushed with olive oil as well.
  6. Pour in the chicken filling then roll the edges of the pastry and tuck down the side of the pan.
  7. Bake pie for about i hour and 15 minutes. Let it rest for at least 15 minutes befor releasing the pan and serving.


Signature

Tuna Nicoise Tart with Phyllo

tuna nicoise tart Here’s a twist on the traditional Nicoise salad, same ingredients used, but instead of a salad it’s put into a tart form that has a crispy phyllo dough crust. This is wonderful for a brunch or light dinner served with a green salad on the side.

The inspiration for this tart came after I received a beautiful Mediterranean basket filled with Genova tuna and lots of other goodies.  I’ve always been a big fan of Genova  tuna and have it stocked in my pantry on a regular basis, so I was excited to try this.

Genova tuna is certified wild-caught yellowfin, and it’s poached in pure olive oil and has no preservatives or additives, it’s all good!

ingredients for tuna nicoise tartGenova Tonno The rich olive oil flavored tuna enhances this tart along with the other ingredients I used, tomatoes, green beans, olives, capers, peppers, hard-boiled eggs and roasted red potatoes.

tuna nicoise tart Layered phyllo dough is the base for all the ingredients which get baked into a creamy egg and mustard mixture, this is over the top good!

tuna nicoise tart Make this for your loved ones they’ll be glad you did!

tuna nicoise tart And for your added pleasure, swipe a little pesto on top for a nice finish!


Tuna Nicoise Tart with Phyllo and a Giveaway
 
Ingredients
  • I used a 7½ x 11½ inch tart pan with removable bottom, if you use a smaller one just adjust the ingredients.
  • 1 can of Genova brand tuna packed in olive oil
  • 3 hard-boiled eggs, sliced
  • yellow, orange and red bell pepper, ¼ each, sliced thin into strips
  • olives, pitted and sliced, kalamata or green, a good ½ cup
  • capers, 1 or 2 tablespoons sprinkled about
  • green beans, precooked, steamed, a good handful
  • cherry tomatoes, sliced ½ cup to ¾
  • tiny red potatoes, sliced the same size and roasted until slightly golden, 8 or 9 or enough to scatter about the tart pan.
  • 6 to 8 layers of phyllo dough, each layer sprayed or brushed with olive oil
  • FOR THE CREAM MIXTURE
  • 3 large eggs
  • 1 cup half and half
  • 1 heaping tablespoon Dijon mustard
  • salt and pepper to taste
Instructions
  1. Spray tart pan with olive oil, layer first sheet of phyllo, fitting it in around the tart pan. Spray or brush layer with olive oil, repeat until all 6 or 8 layers are used, if using a smaller tart pan adjust, keep in mind you want a nice crust that will hold all the ingredients.Place tart pan on top of a baking sheet for easy oven removal.
  2. Whisk eggs, cream and Dijon together then pour mixture into the tart pan.
  3. Arrange the ingredients on top of the creamy egg mixture, placing clumps of tuna all around. Arrange as you wish to fill in your pan, pressing down ingredients slightly to anchor into the mixture.
  4. Bake at 400 degrees for 25 to 30 minutes or until egg mixture has set and phyllo is a nice golden color.


Signature

Spring Vegetable Ricotta Tart with Phyllo

spring vegetable ricotta tart What do you do with a bunch of asparagus, some artichoke hearts, a handful of fava beans, a leek and a few cherry tomatoes? You make a tart of course!

I always buy a pound or two of ricotta every week and I like to keep a box of phyllo dough handy at all times, it’s amazing what you can do with it, it’s so easy and forgiving to work with, and besides, I love the crunch factor it gives!

spring vegetable ricotta tart The ricotta cheese is pumped up and flavored with a hint of garlic, fresh basil, grated romano, asiago and fontina cheeses and an egg which makes for a creamy and very flavorful filling  to have on top of the crunchy phyllo.

spring vegetable tart

Press your pre-roasted vegetables right into the ricotta mixture and bake until the phyllo reaches a rich golden brown and the ricotta sets up.

All you’ll need is a salad on the side and your spring meal is complete!

avocado and tomato salad This is the salad I served with my tart, a combination of tomatoes, avocado and olives on a bed of arugula with a lemon and olive oil dressing.

Dig in, you won’t even miss the meat!

Spring Vegetable Ricotta Tart with Phyllo
 
Ingredients
  • I used an 11½" x 7½" rectangle tart pan with removable bottom so the recipe will reflect that size pan, but feel free to adjust the recipe if using a 9 or 10 inch round tart pan instead.
  • 4 cups of ricotta, drained
  • 2 eggs
  • 2 garlic cloves, finely minced
  • handfull of chopped fresh basil
  • ½ cup of grated romano cheese
  • ½ cup of grated fontina
  • ½ cup of grated asiago
  • salt and pepper to taste
  • 8 sheets of phyllo dough
  • olive oil, preferably in spray form
  • 1 bunch of asparagus, cut in half diagonally
  • a large leek, cleaned thoroughly and sliced into rounds
  • ½ cup cooked and shelled fava beans or replace with peas
  • 1 heaping cup or so of artichoke hearts
  • 1 cup or so cherry tomatoes, cut in half
Instructions
  1. Pre-roast all veggies except the tomatoes, if using fava beans have them preboiled with skins off, if using peas instead, frozen and defrosted is fine.
  2. In a bowl whip the romano, asiago, fontina along with the basil, garlic and eggs into the ricotta until well incorporated.
  3. Layer each sheet of phyllo one by one into your olive oil greased tart pan fitting it in around the bottom and sides and spraying or brushing each sheet with olive oil as you go, if it rips don't worry it will look fine in the end.
  4. When finished layering each sheet spread the ricotta mixture all over.
  5. Press your veggies all around into the ricotta.
  6. Drizzle the top of the tart and sides of dough with olive oil, sprinkle with romano and bake.
  7. Bake in a 400 F. oven, keep checking after 15 minutes, make sure the crust is deep golden and ricotta is set.
  8. Let it cool down before you cut into it.


Signature

Shaved Brussels Sprouts Tart

brussel sprout tart
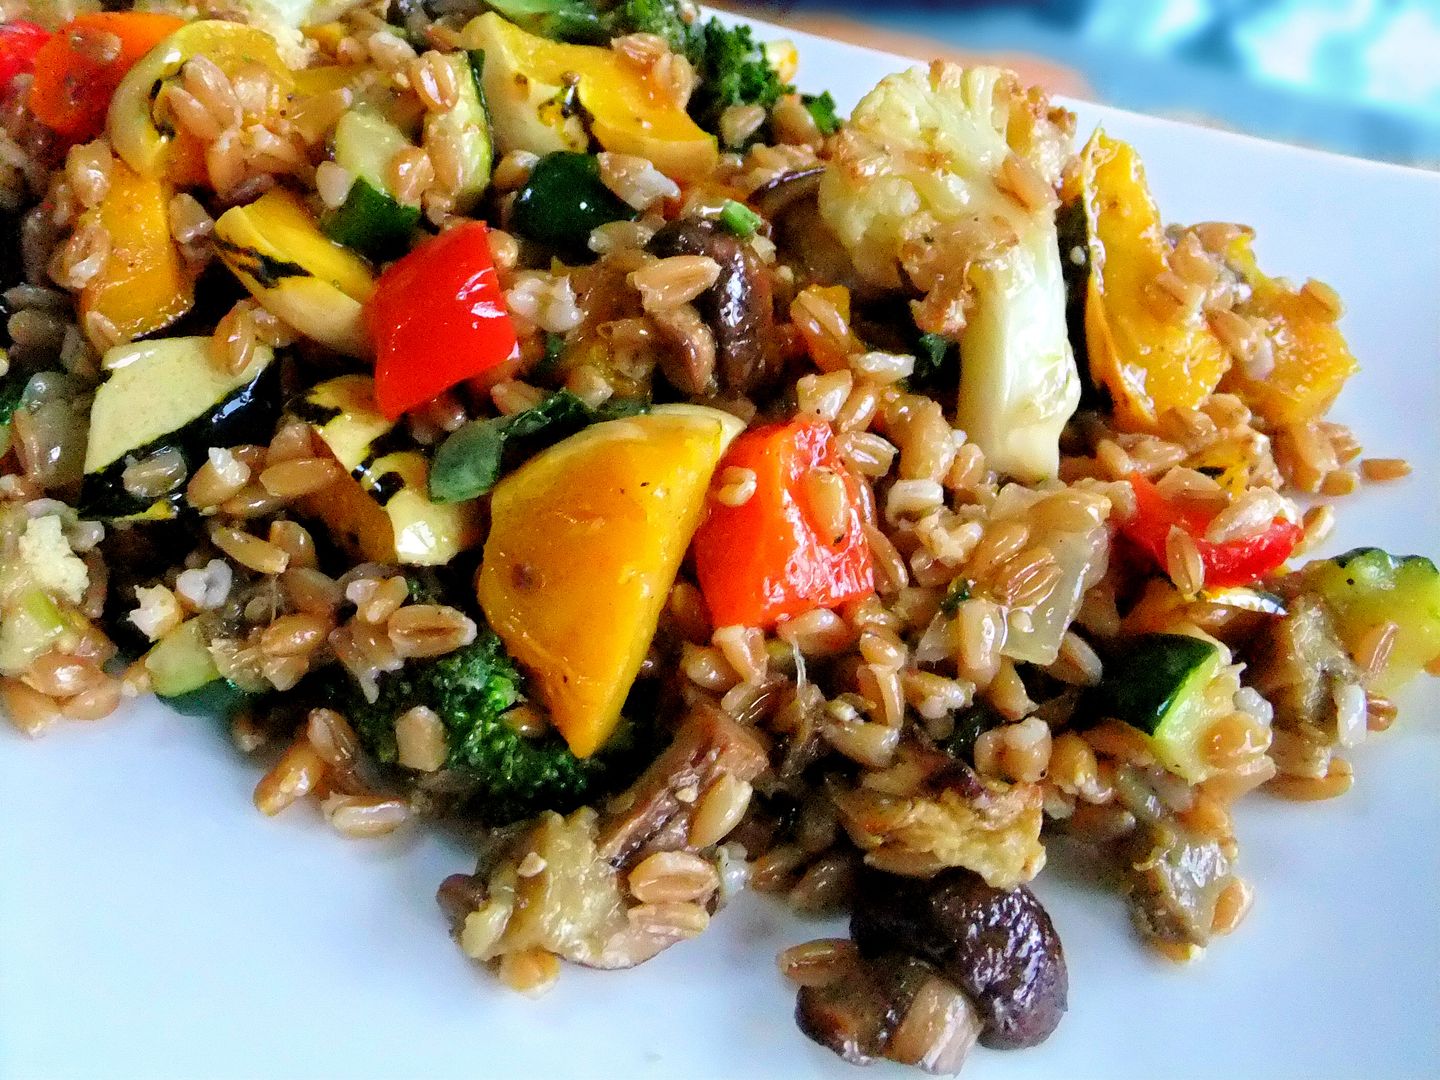
I always keep a box of phyllo in my fridge because I know I can create a quick and easy tart using whatever vegetables I have on hand. In this case I had a bag of shaved brussels sprouts that I got from Trader Joe’s and some leftover roasted butternut squash and before I knew it, a tart was born!
brussel sprout tart prep 
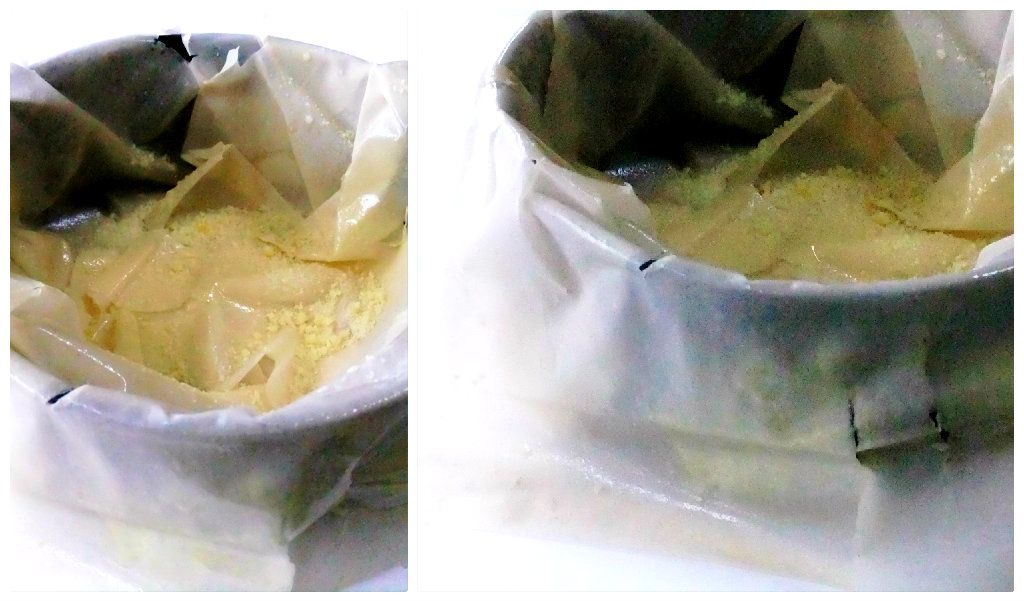
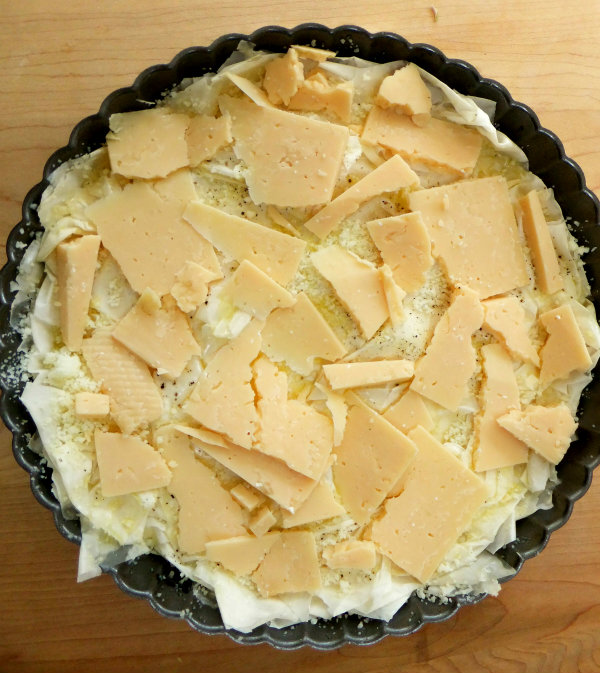
Phyllo is so forgiving and that’s why I like it, you can wing it, patch it and it still looks beautiful in the end. I usually use five or six layers for my 9″ tart pan, each layer sprayed with olive oil and sprinkled with grated romano or parmesan then topped with the cheese of your choice so that all the toppings can sink right into it. I like to use a cheese that melts really good like fontina, gruyere, mozzarella or asiago which happened to be the one I chose for mine. I recommend grating your cheese first then spreading it evenly all over the top, I got lazy as you can see, but it still worked!

brussel sprout tart
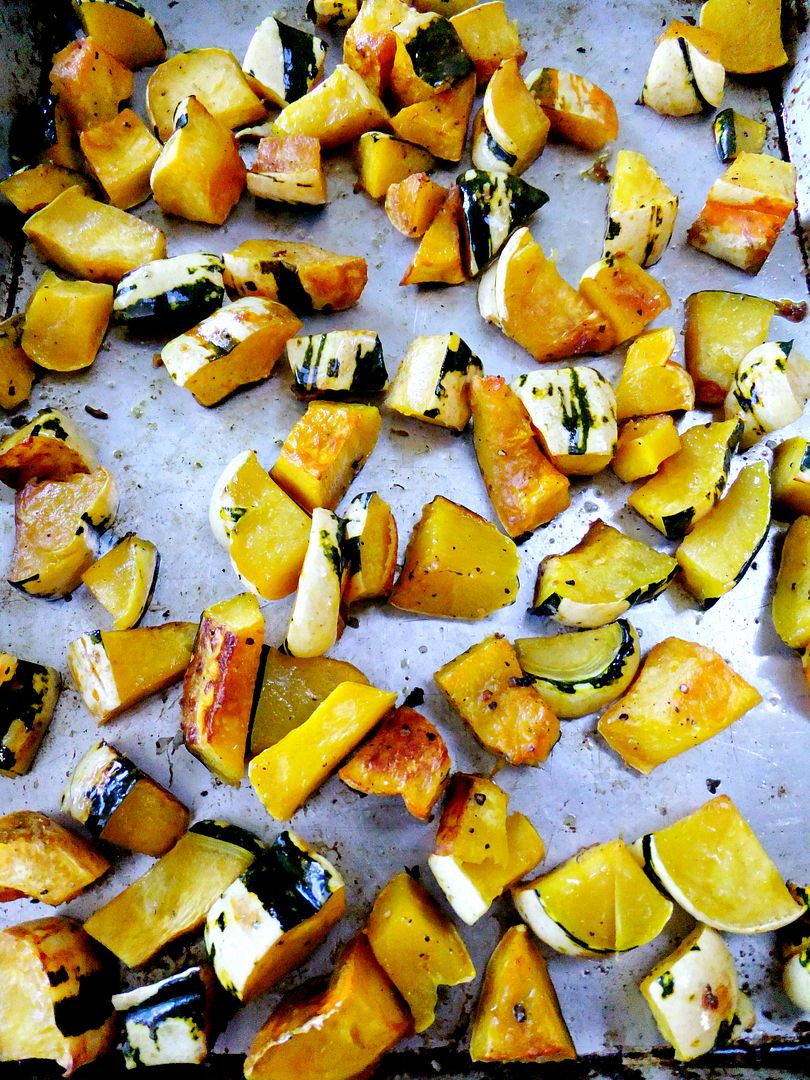
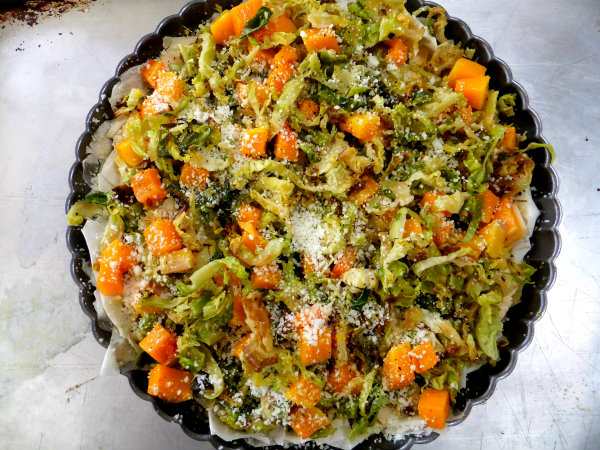
My squash was already roasted and the brussels sprouts were quickly sauteed in olive oil until they wilted slightly.
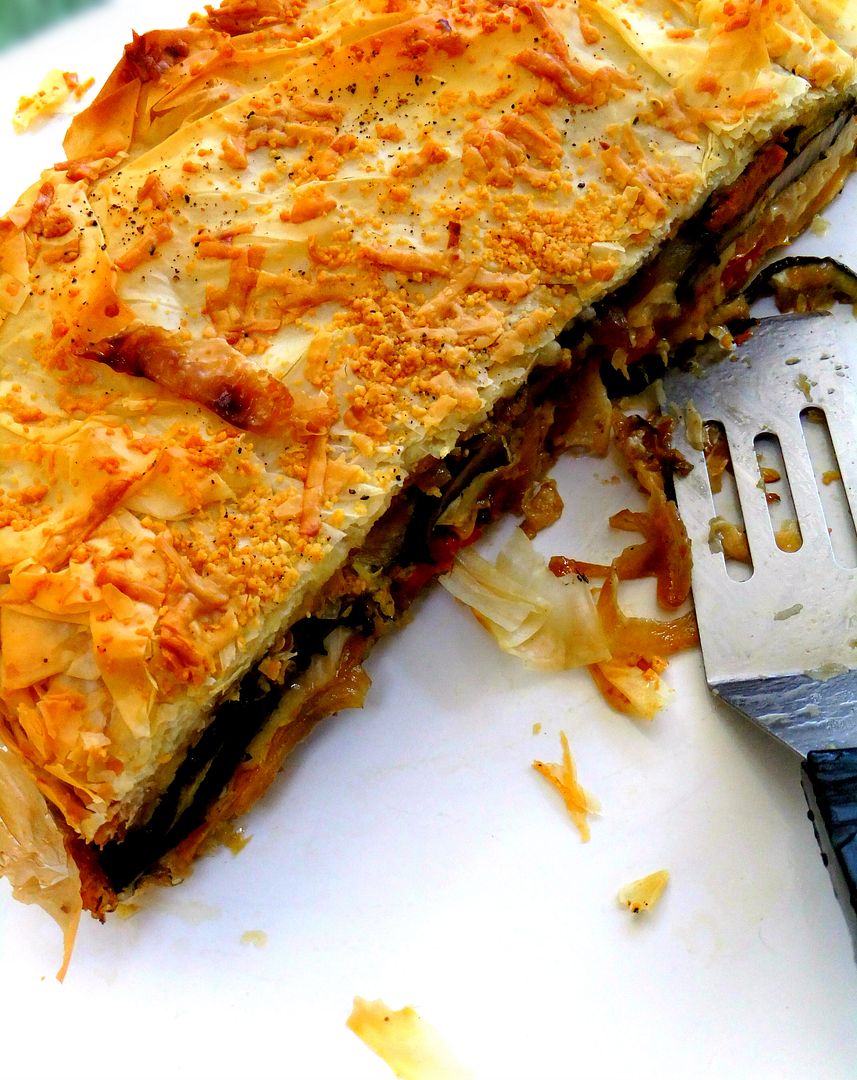
brussel sprout tart Ready for the oven!

brussel sprout tart
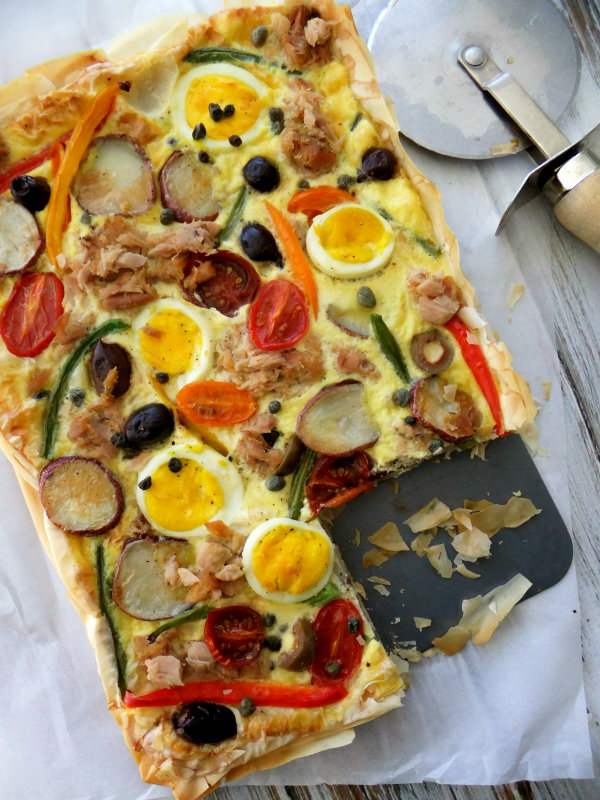
The phyllo gives this tart a nice crispy, crunchy bottom which is a great base to hold all your toppings. The sky’s the limit on what to top your tart with, another favorite I love is caramelized onions, butternut squash and kale, try that next time around!

brussel sprout tart 
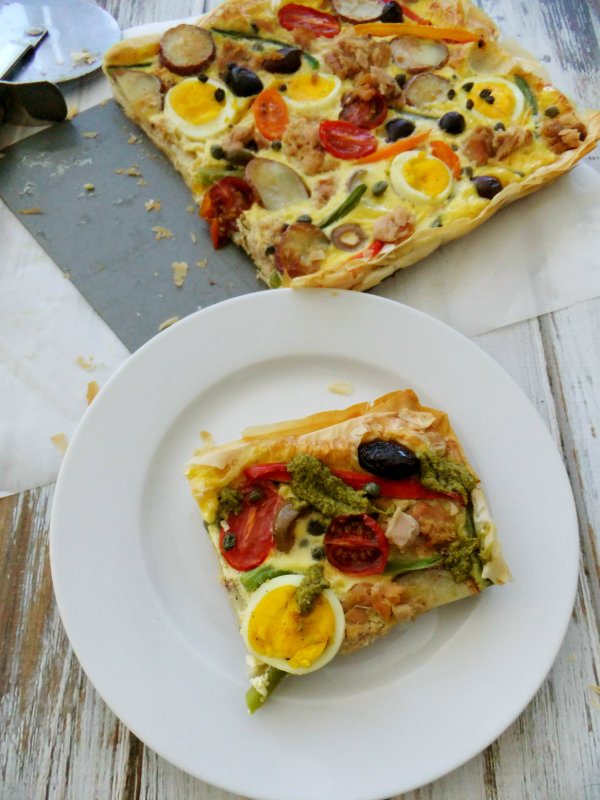
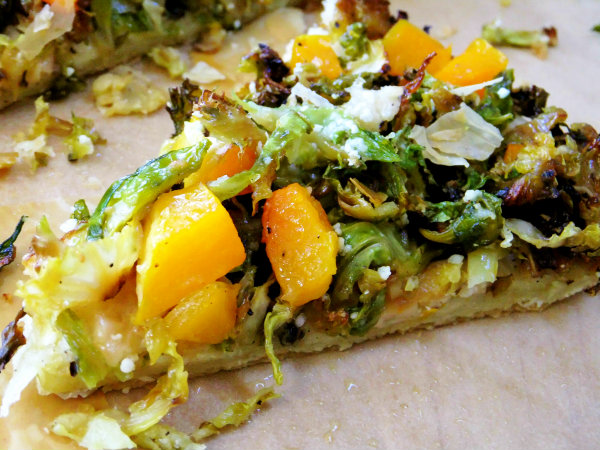
All you need is a salad or a bowl of soup along side this tart and it becomes the perfect dinner, lunch or brunch.

Congratulations to Terri of Terri’s Table, you’re the winner of my giveaway and the book, SOUTHERN ITALIAN DESSERTS!

Shaved Brussels Sprouts Tart
 
Ingredients
  • 9" removable bottom tart pan, sprayed or brushed with olive oil
  • 6 sheets of phyllo dough
  • 10 oz. bag of shaved brussels sprouts or shave your own by using the slicing disk on your food processor.
  • 1 cup of diced and pre-roasted butternut squash
  • shredded asiago cheese, enough to completely cover tart pan
  • ½ cup or so, grated romano or parmesan cheese
  • olive oil
Instructions
  1. Preheat oven to 400F and prepare tart pan by brushing or spraying with olive oil
  2. You need to wilt the brussels sprouts by either placing them in the oven on a roasting pan drizzled with olive oil, salt and pepper or stove top just for a few minutes.
  3. Place the first sheet of phyllo into tart pan, press down and fit it in, spray or brush sheet with olive oil then sprinkle with romano and black pepper, repeat remaining 5 sheets the same way making sure to always cover your phyllo with wax paper while working with it so it doesn't dry out.
  4. Distribute shredded asiago all over.
  5. Spread the sprouts all over the shredded cheese then dot with the pre-roasted butternut squash.
  6. Drizzle top of the tart with olive oil and sprinkle more romano cheese all over.
  7. Place in oven 20-25 minutes or until phyllo is nice and golden.
Signature

Roasted Veggie Overload!

Hi, My name is Marie and I’m a veggie-holic! Yes, when I’m in the produce isle I just can’t help myself, I have no control. Sometimes I get strange looks from people as I happily stroll by them with my grocery cart.  I’ve even had people say to me, “My, you do buy a lot of vegetables!” It’s not until I get home and start unpacking my bags that I realize, they might have a point!

So when I feel like I have an overload of veggies hanging out in my fridge, I just roast them all, as in the photo above, and figure out what to do with them later.

I always roast my veggies at 400F, drizzled with a good quality extra virgin olive oil and lately, and actually more times than not I’ve been using this, the mellow roasted garlic flavor just enhances the veggies even more, I truly love that stuff!
The thing about having roasted veggies handy is that you can quickly whip up a meal in no time, toss them into frittatas, pastas, grains, all sorts of things. I had a package of farro that I quickly cooked up and made this for a nice lunch but you could easily use brown rice, barley, couscous, you get the idea. For this I added a fresh lemon and olive oil dressing to it, along with fresh herbs.
Want something a little more substantial? Stuff it all into a pre-roasted acorn squash and serve it with a salad on the side.
But I have to say one of my favorite ways to use up all my veggies is to stack them high layered into a springform pan all wrapped up in phyllo dough pie.
Every time I make this I get rave reviews, it’s great for a luncheon with the girls, a main course or even a side dish to bring to a party.
phyllo vegetable pie
The wedges cut perfectly because the layers are slightly “glued together” with some grated cheese, I like to serve mine with a little roasted red pepper sauce on the side, so good!
Roasted Veggie Pie Wrapped in Phyllo
 
Ingredients
  • Assorted roasted vegetables of your choice
  • Grated parmesan or romano cheese
  • grated asiago, mozzarella, or fontina cheese
  • Phyllo sheets
  • Olive oil
  • 9" springform pan
Instructions
  1. Brush springform pan with olive oil or olive oil spray
  2. Unwrap phyllo and cover with a dampened towel, keeping it covered as you work quickly
  3. Add 3 sheets into the bottom of the pan,1 at a time, spraying or brushing with olive oil and a sprinkling of grated parmesan or romano
  4. Fit one sheet partially on the bottom with the ends hanging well over the pan, spray or brush all over with olive oil
  5. Continue with the phyllo all the way around the pan, then do it all around 2 more times( phyllo is very thin) rotating pan so the sheets cover the entire rim
  6. Start layering your vegetables one layer at a time, in between the layers add a sprinkling of grated parmesan or romano and also your grated asiago, mozzarella or fontina, use enough to cover all around the vegetables,but not too much, pressing down lightly
  7. When you get to the top fold in the overhang of phyllo, making sure its sprayed or brushed with olive oil
  8. Add more phyllo sheets to the top to make sure all the veggies are covered
  9. Finish off by spraying or brushing with olive oil on entire top and a final sprinkling of cheese
  10. Place pan on a baking sheet lined with foil and bake in oven at 400 for around 20-25 minutes or until phyllo is crispy golden
  11. Let it cool down then cut into wedges with a serrated knife
  12. Note: No exact amounts here, just cover each layer with veggies and cheese, you could also use a smaller springform pan or a deep dish pie plate depending on how many veggies you have.
Signature