Anginetti, Italian Lemon Knot Cookies

anginetti, Italian lemon knots

Iced Italian cookies, lemon drops, lemon knots, wedding knots or anginetti, whatever your family calls them you’ll be sure to find these traditional Italian cookies at many special occasions and holiday cookie trays. Like most Italian cookies the cookie itself is not too sweet, it has a nice moist crumb and by frosting it you’ll get a more intense lemon flavor, which is a good thing!

anginetti, Italian lemon knot cookies

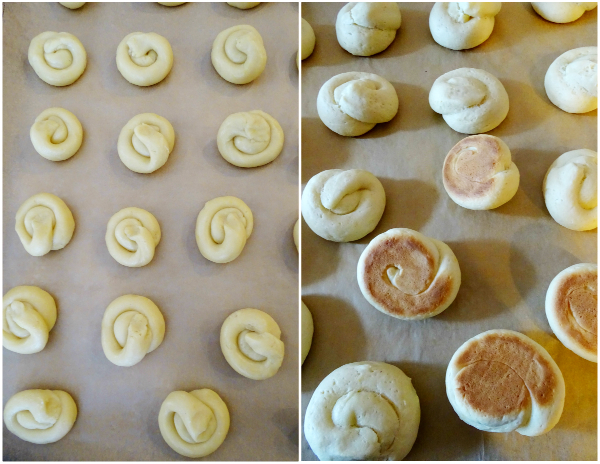
They’re like little puffs, they look the same color from the raw to baked state except they’ll get puffier and golden brown on the bottom.

anginetti, Italian lemon knot cookies

Honestly, there are so many variations to this cookie, just do a Google search and you’ll see what I mean, but the general idea remains the same. In the past I’ve made them with Crisco shortening, that’s what they used back in the day, then I tried some Organic non-hydrogenated vegetable shortening, which quite honestly turned out a little drier, I think if I upped the amount they would have been better, but this time I used all butter.

NOTE: Keep that dough cold! I actually made the dough the night before we baked them, then refrigerated it. Then as I started to form the cookies the dough started to warm up so I even threw it in the freezer for 10 minutes or so to get it cold again, it makes it much easier to form the cookies when it’s really cold, because of the butter and the warmth of your hands the colder the better.

You’ll also see other flavorings used such as almond and anise as well as different colored frosting’s and sprinkles, but my family always sticks with lemon.

anginetti, Italian lemon knot cookies

Instead of colored sprinkles which I normally use, this time I wanted  to do a white on white look by using tiny white non-parells and white sparkling sugar and a little lemon zest for garnish, but you can just stir some zest into your frosting instead.

Speaking of frosting, this time I tried a limoncello frosting which was very good but the traditional with extract, lemon juice and zest is just as good!

anginetti, Italian lemon knot cookies

It’s time to get baking!

5.0 from 3 reviews
Anginetti, Italian Lemon Knot Cookies
 
A traditional Italian cookie served at holidays and special occasions.
Author:
Ingredients
  • 5 cups of all purpose, unbleached flour
  • 5 teaspoons of baking powder
  • 1 cup sugar
  • 3 eggs
  • one and one half cups of melted butter that has cooled down, not hot. Or you can use a vegetable shortening of your choice
  • 1 cup of milk
  • a pinch of salt
  • zest of 1 lemon for cookie and zest of 1 lemon for icing
  • 1 1oz. bottle of lemon extract
  • sprinkles of your choice
Instructions
  1. If you prefer, dough can be made the day before which makes it nice and chilled to work with, or you can start scooping them right after you make the dough but probably you will have to chill it for a while as you're making the cookies and the dough stays out. I sometimes stick it in the freezer for a few minutes to get it to firm up again.
  2. In a large bowl, cream butter and sugar together until fluffy, add eggs one at a time, then the extract and zest.
  3. In a smaller bowl whisk the flour, salt and baking powder, then slowly add to the creamed mixture alternately with the milk, you might not have to use all the milk.
  4. When everything is incorporated, let the dough rest for 5 minutes or wrap and chill overnight.
  5. Heat oven to 350 degrees. and place cookies on a parchment lined baking sheet.
  6. To form the knots I like to use a cookie scoop so all will be similar in size, then take the scoop of dough and roll it into a log about 5 or 6 inches, it's the length of a bench scraper, that's how I measure mine.
  7. Then take one side of the log and spiral it into a circle, you can tuck the other end down or up, it doesn't matter.
  8. Bake for 12 to 15 minutes according to your oven, mine took exactly 12 minutes, you want the underneath to be golden brown, not dark brown.
  9. Cool on racks.
  10. LIMONCELLO ICING
  11. One and one half cups of powdered sugar
  12. Five tablespoons of limoncello Liqueur
  13. zest of 1 lemon
  14. TRADITIONAL LEMON ICING
  15. One and one half cups of powdered sugar
  16. zest of 1 lemon
  17. One half teaspoon of lemon extract
  18. and lemon juice to get the right consistency.
  19. I always taste my icing to make sure it has the right amount of lemon, you can always add more, and I also like to brush my icing on instead of dipping., personal preference.
  20. After frosting immediately put your sprinkles on and then let the whole cookie dry for about an hour.
  21. You can keep them in tins with wax paper in between, or you can freeze them in an airtight container right after they bake and cool down, then frost them a day or two ahead before you'll be eating them.


Signature

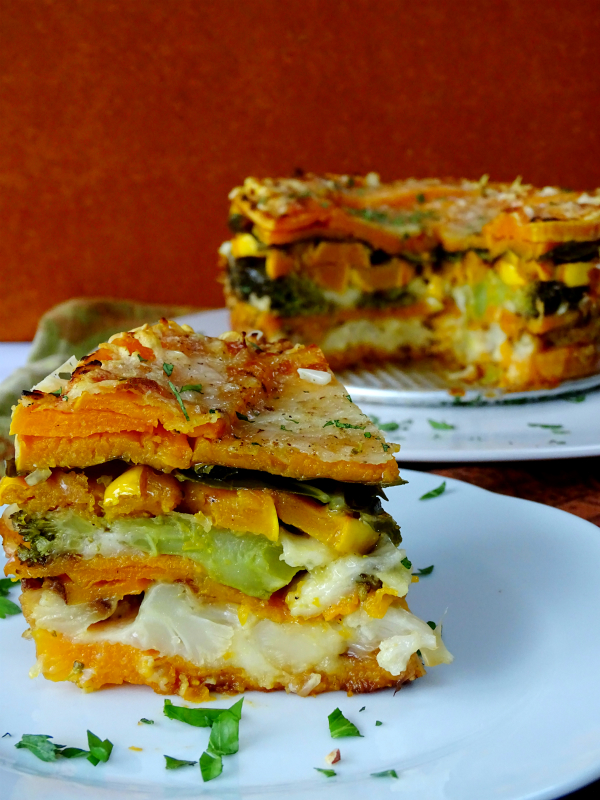
Layered Roasted Vegetable Torte

layered roasted vegetable torte

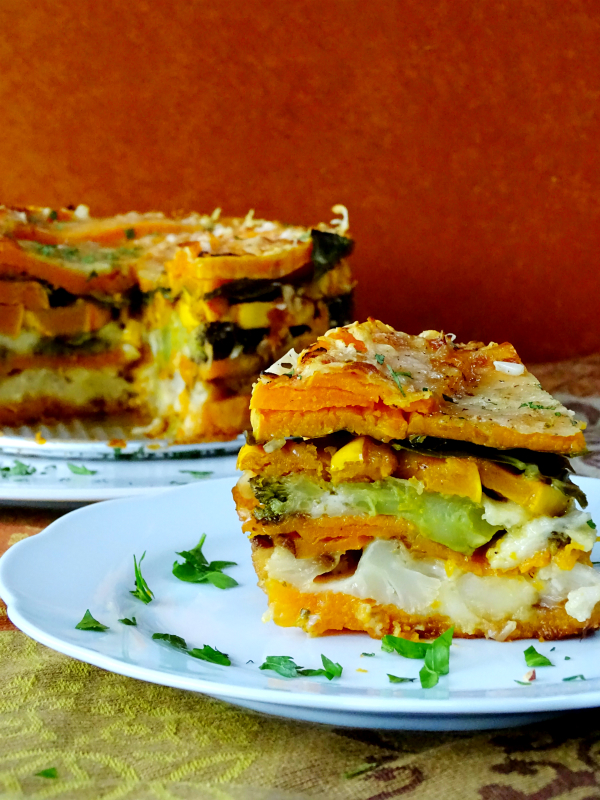
If you’re a fan of vegetables then you’re going to love this recipe! Layers of your favorite veggies stacked into a springform pan and “glued” together by tasty shredded cheese, it’s a show stopper and it could work very well as a side dish to your holiday table.

The only thing you’ll need to do ahead of time is pre-roast your veggies, then it’s all about the assembly, which is really quite simple.

layered roasted vegetable torte

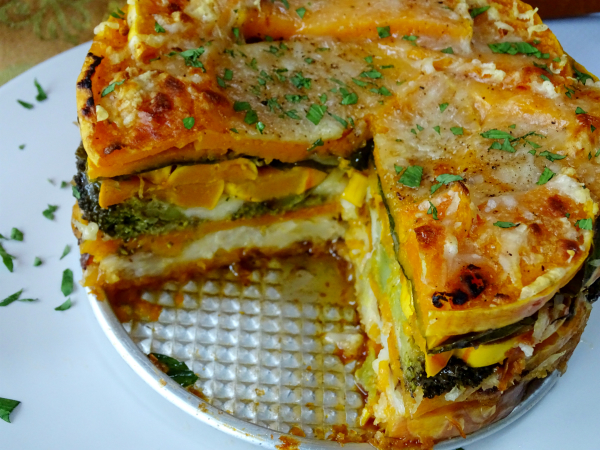
I used a 9 inch spring form pan which would give you six nice sized wedge portions. If you want to go for a bigger spring form pan, don’t be afraid, I’ve done it and it works great, just roast more veggies, add more cheese and you’ll be fine.

layered roasted vegetable torte

The key to a successful un-molding is to let it rest for at the very least 30 minutes, but an hour would be better, you could even make it the day before then take it out hours ahead of serving and allow it to reach room temperature.

layered roasted vegetable torte

By letting it rest properly you’ll be able to cut it into perfect wedges and everything will stay in tact.

layered roasted vegetable torte

I made a different version here, a few years ago, you can check it out to get an idea of other veggies you might want to use, but really just use your imagination!

I’m also on Instagram where you can follow me and see what else I’m cooking up!

4.8 from 4 reviews
Layered Roasted Vegetable Torte
 
Colorful layers of roasted veggies stacked into a torte, a great presentation for your table.
Author:
Ingredients
  • For this recipe I used a 9" spring form pan, that I brushed inside with olive oil
  • 1 butternut squash with a long neck, remove skin and slice thin. ( I only used the neck of the squash so I could get flat slices) you could also use the bulb part just slice thin also
  • 1 medium head of cauliflower, which I take my knife to and make slices
  • 1 head of broccoli, just the crown, sliced like the cauliflower
  • 1 delicata squash cut into half rings
  • a few collard green leaves, which I just happen to have, but you could use spinach or kale
  • grated asiago, grated mozzarella and grated romano for "glue"
Instructions
  1. Have all your veggies pre-roasted at 400 degrees until golden on each side. Depending on the size of your veggies and the size of your pan you might have some left over, but that's a good thing!
  2. Then take your oiled pan and place it on a foil lined baking sheet that's rimmed, it's going to leak a bit at the bottom and this will be such easy clean up.
  3. Start layering, I like to put something substantial on the bottom and top so I started with the slices of butternut squash, fill the whole bottom of the pan, try to have no gaping spaces.
  4. After each layer, sprinkle some of each cheese all around.
  5. Next layer, the cauliflower, place it all around filling all the open sides and spaces.
  6. Repeat with sprinkling of all cheeses.
  7. Another layer of butternut squash, then more cheese.
  8. Next layer the broccoli, more cheese, at this point gently press down the torte with the back of a tablespoon to make sure the layers are nice and compact.
  9. Next will be the delicata squash rings, then repeat with cheese.
  10. Next will be your something green, kale, spinach or collard leaves. ( you might want to wilt those in the microwave for a minute before) repeat with cheese.
  11. Last layer for the top I used butternut squash again, but you could also used roasted sweet potato.
  12. Top with cheese and place foil on top to cover.
  13. Bake in a 400 degree oven for 20 minutes, then take foil off and bake another 15.
  14. Remove and let it rest for at least 30 minutes at the very least, an hour even better, very important so everything sets and you'll be able to cut into nice wedges.
  15. Then go around the edge of pan with a knife making sure nothing is sticking, then release spring on pan and remove and place on a platter with bottom of pan still in tact.
  16. You can make this the day before, just take it out several hours before serving to reach room temperature.


Signature

Sage Embossed Fingerling Potatoes

sage embossed potatoes

Ok, I just want to say that I’m absolutely giddy about this recipe, well honestly it’s not a recipe but more like a simple how to, but imagine how gorgeous a platter of these pretty sage embossed potatoes would look on your holiday table!

I saw this in a BHG magazine on party foods, and I think this would be the perfect side dish to one of your holiday parties, it’s so eye catching!

fresh sage

First, get some fresh sage, I still have a ton growing in my garden, so I just went out and grabbed some.

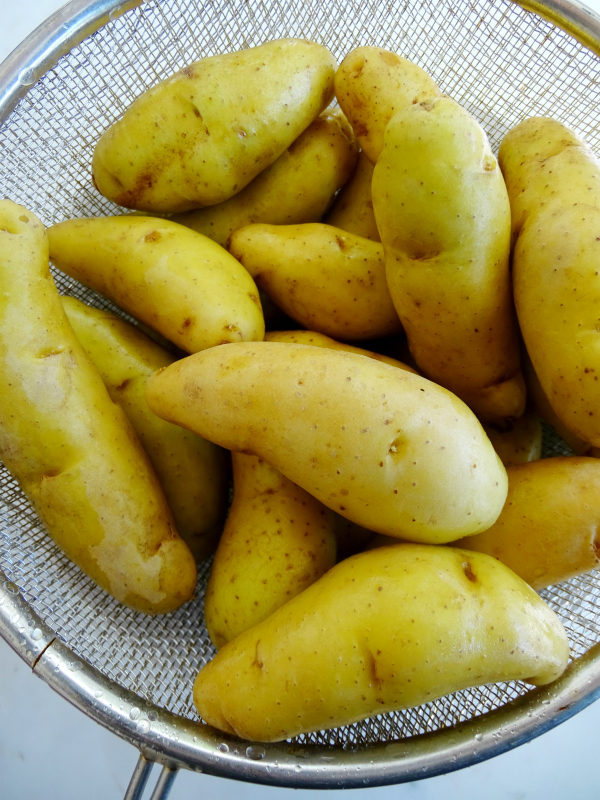
fingerling potatoes

Next, buy a bunch of those cute fingerling potatoes, wash them, pat dry, then cut in half lengthwise.

Toss them into a bowl and coat with olive oil, a little pepper and some good flaky salt like Maldon.

I had sixteen potatoes, thirty two halves and I used 2 tablespoons of olive oil.

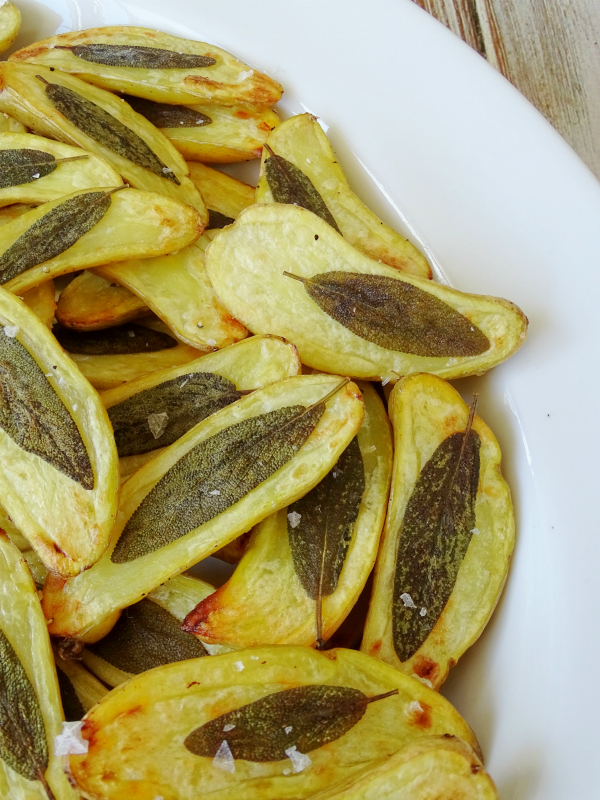
fingerling potatoes with sage

Take a baking sheet and line it with parchment paper, very important, you must line with parchment, now place one sage leaf on each potato half then quickly flip it over onto the parchment, the sage leaf will stick as it cooks.

Bake at 425 degrees for 15- 20 minutes, depending on your oven.

sage embossed potatoes

You’re looking for tender and golden, so lift a few up and check for that nice color just to make sure.

sage embossed potatoes

I’m in love with these beauties, they taste delicious and they’re insanely simple to make!

sage embossed potatoes

If I need to bring a dish to someones house, guess what? I’m bringing these!

sage embossed potatoes

Make them, you’ll be a rock star!

( The holidays are around the corner, follow me on Instagram to see what I’ll be making in my kitchen!)

Signature

Savory Squash and Brussels Sprout Flatbread

brussels sprout and squash flatbread

I can’t tell you how much I love making making flatbread pizzas, every body seems to love them and when I’m pressed for time I can whip one up in a few minutes. What I like about flatbread pizza is that you can make them so many different ways, actually using whatever you have on hand in your fridge. They bake up with a nice crispy crust that’s able to hold up to whatever you place on top, think leftover chicken, veggies, cheese, you don’t need much of each, actually less is more. Here’s some other ones I’ve made in the past.

I use lavash bread, there’s many different brands and you can find them at almost any large grocery store, I keep a couple of packages in my freezer at all times. Honestly, even if you take them straight out of the freezer they only take a few minutes to defrost, which is great for busy days and unexpected guests.

making squash puree

Last week I bought a butterkin squash at my farmers market, which is now officially closed for the season, sniff sniff.  They told me I should try it, that it was creamy and delicious, a cross between butternut squash and pumpkin. I loved it and would buy it again, to me it tasted like a more intense butternut squash and it had an amazing orange color, so fall like!

I decided to make a puree from it by first roasting it then scooping out the cooked pulp and smoothing it all out in my food processor, you could actually do this with any type winter squash, it’s nice to have on hand and I’ve been using it in a bunch of different things all week.

brussels sprouts and squash flatbread

For instance, I used some of the puree for the base of my flatbread, I put a couple of tablespoons into a little ricotta and spread it on as my first layer, it was a nice little twist and enhanced all the flavors of the other ingredients that I used on top.

My next layer was shredded mozzarella, then pre-roasted delicata squash rings, ending with shaved, pre- roasted brussels sprouts that were tossed in olive oil and parmesan cheese, both were leftovers in my fridge and when all put together it was out of this world good!

A few tips for the flatbread, brush olive oil on both sides, place on a baking sheet, top with ingredients and bake at 400 degrees for no more then 10 minutes, that’s it!

Want to see what I’m cooking up during the week? Follow me on Instagram here.

Signature

Warm Up with My Chunky Minestrone

chunky minestrone

What’s better than a steamy hot bowl of soup when the weather starts to cool down? A nice bowl of hot soup never fails to instantly warm me up on a chilly day. I love making a big pot and eating it all week for lunch or even having it for a light dinner. The thing about homemade soup is that there are no rules, you can add to it whatever you have on hand.

For me it always starts out with a heavy dose of vegetables, more variety than amount, one zucchini. a few carrots, a handful of peas, you get the picture, you don’t need a ton of each. I always have canned beans on my pantry shelf along with organic, low sodium chicken stock, as I write this I have seven boxes sitting on my shelf.

Don’t get me wrong I love making homemade chicken soup that has a rich, deep broth created from the bones of a whole chicken simmering on the stove for hours, but this is a quicker pot of soup that is just as comforting and nourishing and it’s chock full of chunky bite size vegetables and beans in a parmesan broth, and if you so desire, you can add in some mini meatballs and pasta, but you don’t have to, it can be strictly all vegetable.

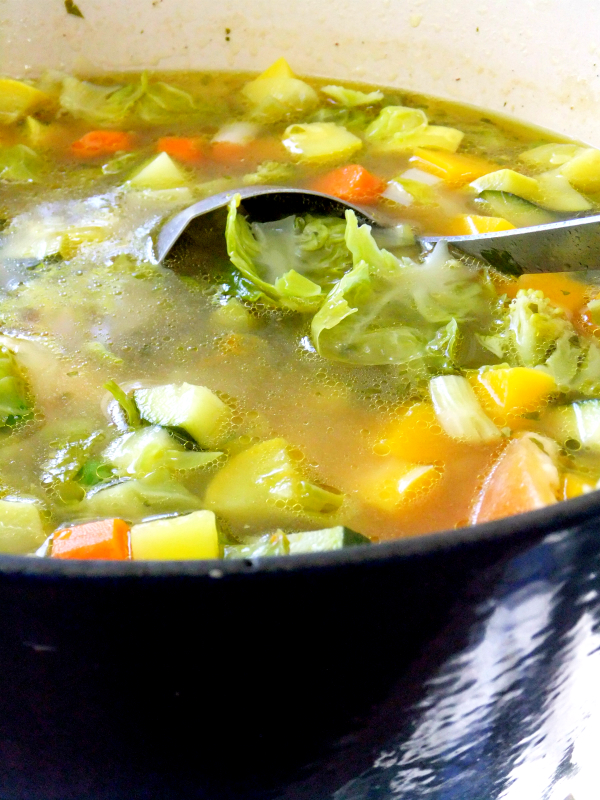
a pot of chunky minestrone

Everything gets put into the pot at the same time, no sauteing anything ahead of time, you can literally throw it all together, quick and easy!

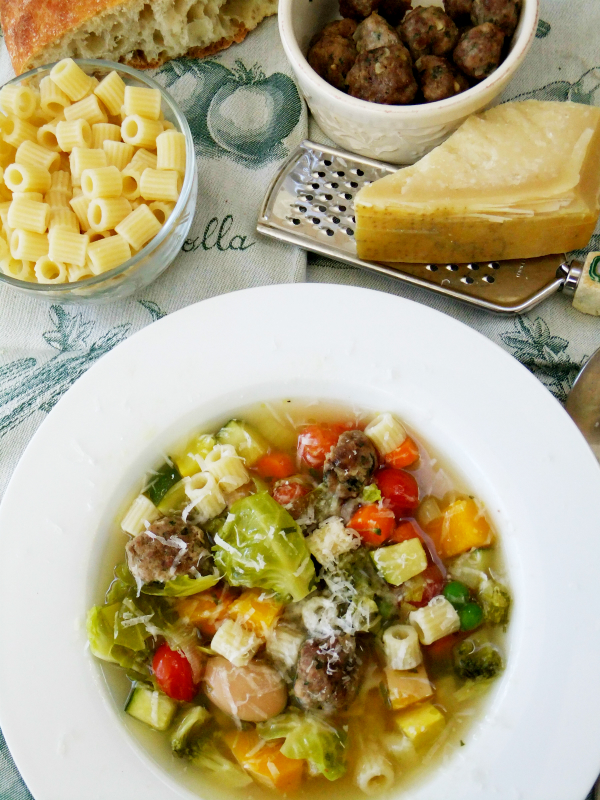
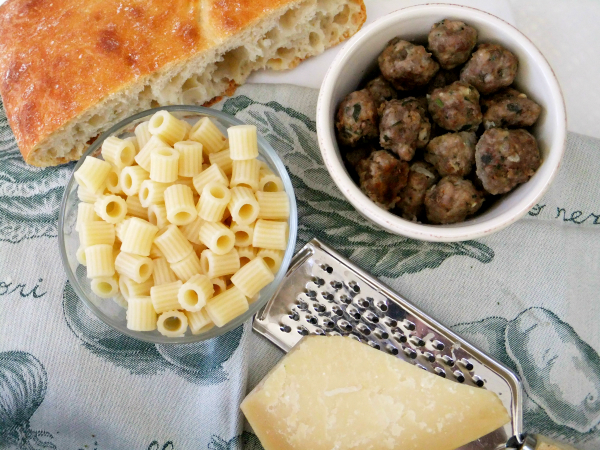
pasta, mini meatballs and cheese for minestrone

Since I make meatballs quite often around here I always roll up some mini ones to tuck away in my freezer during the fall and winter months, which is a good addition if you want to bulk up your soup. If I’m adding pasta, I always make it ahead of time and serve it on the side for those who want some added carbs, I never cook my pasta straight in the soup broth, I don’t like how it looks and tastes when it blows up and gets mushy, I prefer my pasta al dente.

Another thing you will always find in my freezer are parmesan rinds, I always save my own but mostly I pick up a couple of packages every time I go to my Whole Foods, very inexpensive, a couple of dollars for three or four in a package and usually they still have a lot of cheese attached, well worth the money, I use them all the time.

chunky minestrone soup

Please ditch those canned soups that are overly salty with ingredients you can’t identify, always make your own, your family will thank you.

chunky minestrone soup

Healthy and delicious, comfort in a bowl!

Follow me on Instagram, where I’m always cooking something up.

4.8 from 4 reviews
Chunky Minestrone
 
Chunky good for you glorious vegetable soup with beans and wonderful parmesan broth, mini meatballs and pasta, optional
Author:
Recipe type: Soup
Ingredients
  • Each ingredient is roughly 1½ cups each, cut into chunky bite size pieces.
  • broccoli florets
  • cauliflower florets, ( if i had it I would have used it)
  • yellow and green zucchini, a combo of both
  • leek
  • onion
  • carrot
  • peas
  • celery
  • butternut squash
  • brussel sprout leaves, or cabbage, or any greens of your choice
  • potato, ( I opted to double the butternut squash, but you can do both)
  • 15 cherry tomatoes
  • 3 large crushed garlic cloves
  • 5 tablespoons of olive oil
  • 1 can of cannelini beans, drained and rinsed
  • ½ can of butter beans, drained and rinsed ( butter beans are quite larger, if you can't find them do another bean of your choice)
  • a bunch of chopped parsley and some basil, or other seasoning you like
  • salt and pepper to taste
  • 2 parmesan cheese rinds
  • 2 handfuls or so of grated parmesan or romano to toss into the broth when finished after removal of rinds, taste to your liking.
  • broth or stock, enough to cover all the vegetables and then some, you want enough so that when it's stirred it's loose, I used organic, low sodium, chicken stock in a box.
  • OPTIONAL ADDITIONS:
  • mini meatballs, precooked
  • pasta of your choice, precooked
Instructions
  1. Throw everything into the pot, raw.
  2. Cover with broth, add spices and herbs.
  3. Simmer on low until veggies are cooked through but not mushy
  4. Turn off heat, remove cheese rinds.
  5. Add in grated cheese and stir, tasting for desired amount.
  6. Ladle into your bowl and top with cooked mini meatballs and/or pasta, optional


Signature

Butternut, Delicata, and Acorn Squash Gratin with Crispy Sage

winter squash gratin

Today I’m giving you a little inspiration for your Thanksgiving Day table, the holidays are right around the corner, so it’s time to start planning, can you believe it?

This deliciously creamy gratin combines three of my favorite winter squash, butternut, delicata and acorn.

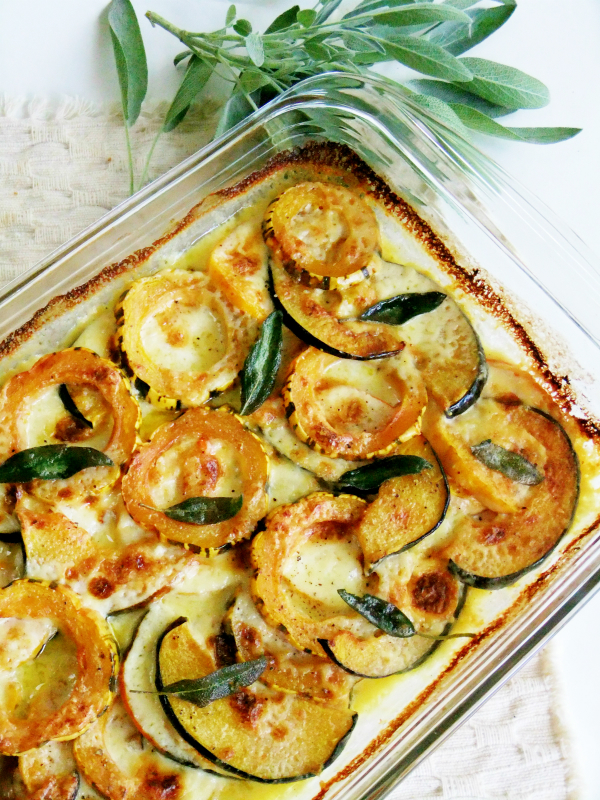
winter squash gratin

They sit nice and pretty in a parmesan and garlic cream sauce and are adorned with crispy sage leaves, you couldn’t ask for a better combination of flavors!

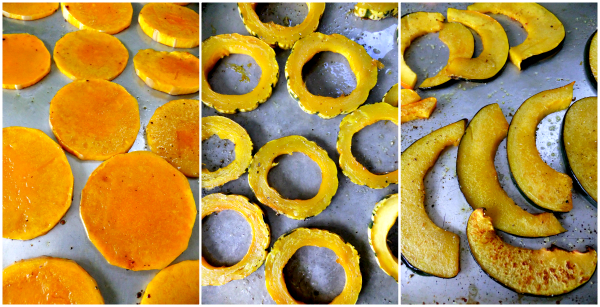
winter squash

Besides tasting over the top amazing,  I love the presentation that happens by using the different squash shapes together.

winter squash

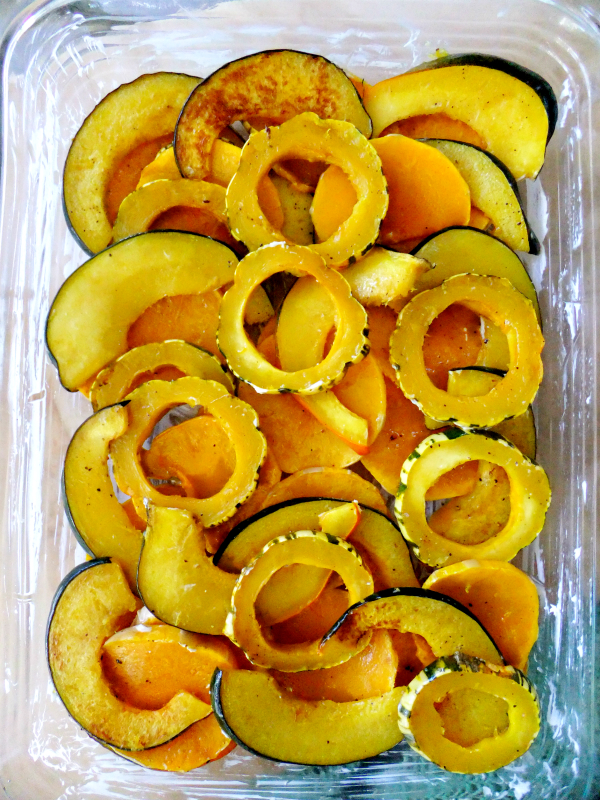
I pre-roasted my squash a little, then layered them into a buttered casserole dish.

winter squash gratin

The cream sauce is made ahead of time then carefully spooned all around the squash slices being careful to leave some squash peeking through, that’s what makes the presentation so pretty.

It’s a show stopper for the holiday season when we’re all allowed to indulge a little!

winter squash gratin

Wouldn’t this be dreamy sitting next to your Turkey this year?

Proud Italian Cook is on Instagram, follow me there to see what I’m cooking up daily!

5.0 from 4 reviews
Butternut, Delicata, and Acorn Squash Gratin with Crispy Sage
 
A winter squash gratin, the perfect side dish for the holiday season or just to impress your guests.
Author:
Ingredients
  • 1 butternut squash, neck part only, skin removed, then cut into rounds
  • 1 delicata squash, skin on, then sliced into rings, remove pulp and seeds
  • 1 acorn squash, skin on, remove pulp and seeds, quarter it then make slices,
  • cut all squash about ¼ inch slices, not too thick and not too thin
  • 2 cups, heavy cream
  • 2 handfuls of grated Parmigiano Reggiano
  • 2 finely grated garlic cloves, done on a microplane
  • ¾ stick of unsalted butter
  • 1 bunch of fresh sage leaves
Instructions
  1. I pre- roasted all the squash just to make sure it wouldn't be hard, on a baking sheet at 400 degrees, drizzled with olive oil, sprinkled with salt and pepper, just until al dente, where it still had a little bite.
  2. After they cool place squash into a buttered 13x9 casserole dish. (these first two steps can be done the day before and refrigerated overnight, before adding cream sauce.) If you do it the day before, take it out and get it to room temp, before adding sauce.
  3. TO MAKE THE CREAM SAUCE:
  4. In a small sauce pan on low flame, add butter and garlic, just until garlic is fragrant, not brown, then add cream, salt and pepper too taste.
  5. Simmer cream sauce just until the edges start to bubble, then turn off the heat and let it set up for a minute.
  6. Add the Parmigiano, stir well, then spoon the cream sauce all around the squash in casserole dish, leaving some of the squash exposed but spreading it all around and in between.
  7. Place casserole dish into a 450 degree oven until bubbly and nicely golden, keep checking.
  8. Garnish with crispy sage leaves, by melting a tablespoon or two of butter in a small pan, when butter is hot throw the leaves in and they will start to sizzle and get crispy, remove immediately.


Signature

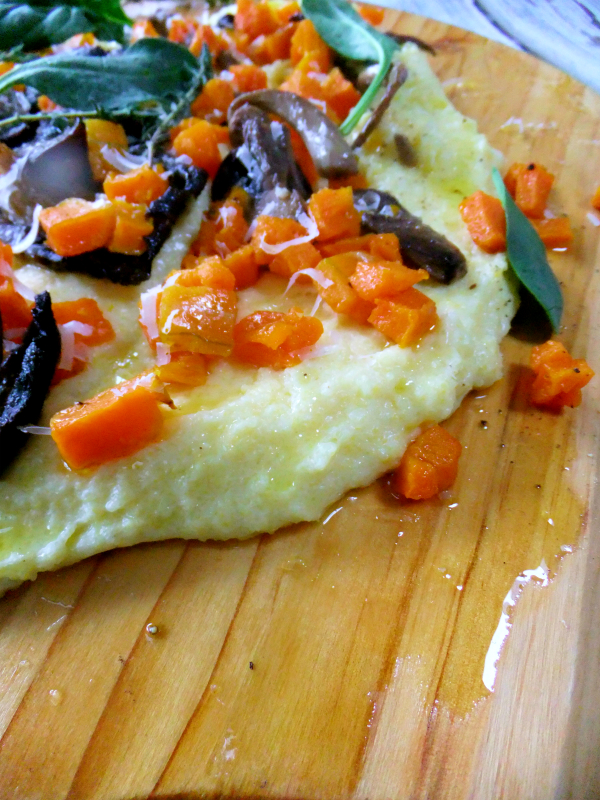
Polenta on a Board Topped with Butternut Squash and Mixed Mushrooms

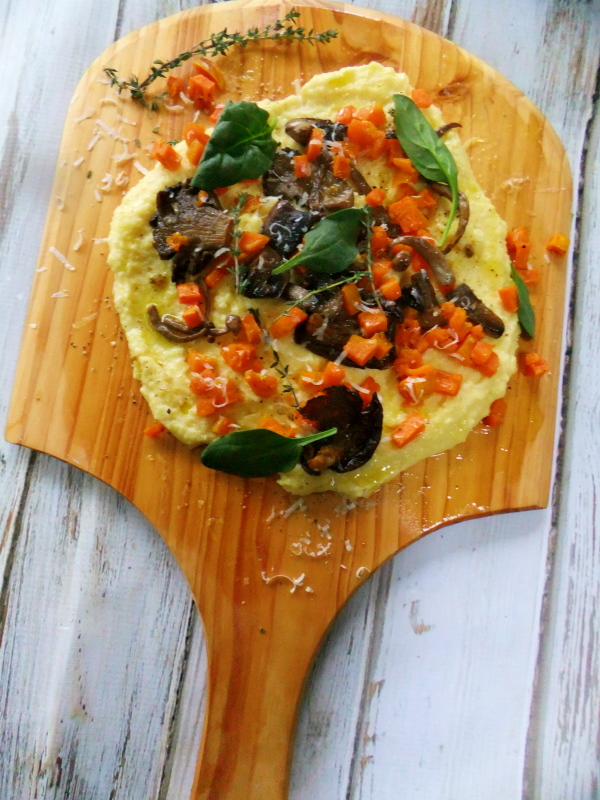
polenta with mushroom and butternut squash

The weather has officially cooled down and now we’re well into the fall season, comfort foods are slowly creeping into my kitchen, and a meal that I love making in this cooler weather is, creamy warm polenta topped with pretty much anything.

I’ve posted polenta several times on this blog, but this time I’m serving it on a wooden board, yes a board, it’s casual, rustic, communal and a fun way to eat it.

Cook up your polenta, make it nice and creamy, then immediately pour it onto a wooden board, spread it around then top it with almost anything you can imagine. It’s the perfect base for sauteed greens, a nice meaty red sauce, roasted veggies, a wild mushroom ragu, even poached eggs, the list is endless!

You can use any size wooden cutting board that you might have, or buy a designated polenta board that is either round or a very long rectangle, both can be placed in the center of a table for a big polenta party, depending on the size you can either double or even triple the recipe, or you can use a pizza peel like I did, which is a good size for a smaller amount.

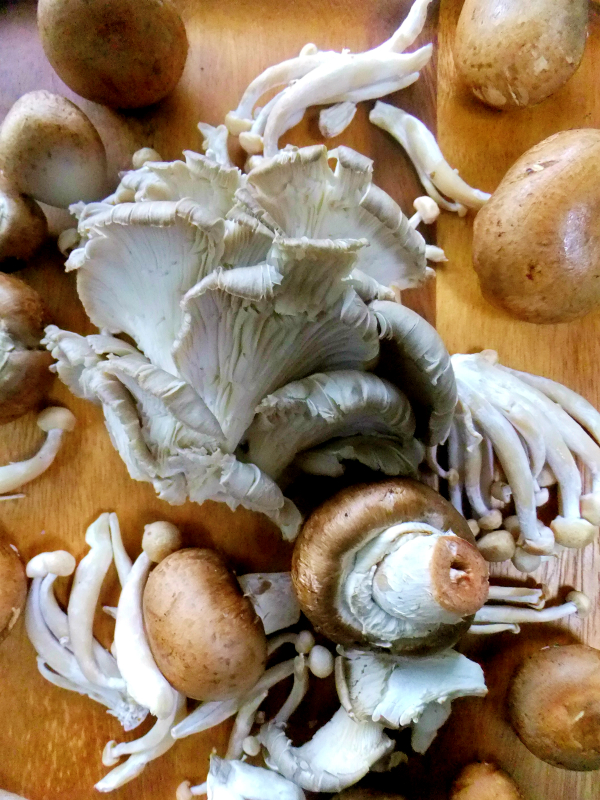
assorted raw mushrooms

I decided to top mine with oyster, crimini and beech mushrooms, I love the different variety of mushrooms I’m seeing all over.

roasted butternut squah

And of course butternut squash because they’re a match made in heaven!

roasted mushrooms with garlic and thyme

I roast both of the veggies ahead of the time and with the mushrooms I like to add some garlic and thyme.

polenta with mushroom and butternut squash

Place everything on top, put your board in the middle of the table, grab a spoon or a fork and dig in!

polenta with mushroom and butternut squash

Proud Italian Cook is also on Instagram, you can find me here.

5.0 from 2 reviews
Polenta on a Board Topped with Butternut Squash and Mixed Mushrooms
 
A casual and fun way to eat creamy polenta!
Author:
Ingredients
  • 1 small butternut squash, cut into a small dice, then tossed in olive oil and pre-roasted on a sheet pan at 400 degrees until lightly golden
  • assorted mushrooms of your choice, at least 1½ lbs. pre-roasted at 400 degrees with 3 chopped garlic cloves and a few sprigs of fresh thyme
  • 1 cup of quick cooking polenta
  • 4 cups of liquid, I like to use 2 cups milk and 2 cups broth
  • 1 teaspoon of salt
  • 2 handfuls of grated Parmigiano Reggiano
  • a little butter and olive oil
Instructions
  1. Put the liquid and salt into a heavy pot, get it to boiling then reduce heat to a low simmer and whisk in the polenta, then get a wooden spoon and get stirring until nice and creamy.
  2. Take it off the stove add in a tablespoon of butter, a drizzle of olive oil and the cheese, stirring until incorporated.
  3. Add salt and pepper to taste.
  4. Quickly spread onto your wooden board, then top with all your veggies.
  5. Drizzle more olive oil on top, and a little more grated cheese, serve immediately


Signature

Scenes from Chicago Gourmet 2015

Chicago Gourmet 2015

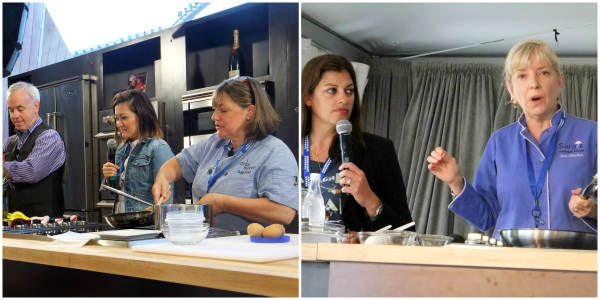
This past Sunday I attended Chicago Gourmet, presented by Bon Appetit and as usual it did not disappoint, beautiful weather again set the scene for the perfect day.

Chicago Gourmet is a culinary food fest, not only does it showcase some of the city’s finest chefs and restaurants, it’s jammed packed with seminars, live cooking demos, book signings, gourmet tastings of desserts and food galore.

On the beverage side there’s an abundance of wine, beer, cocktails and spirits, it’s definitely an event for adults only.

One could not possibly taste and drink everything they have to offer, you have to pick and choose what’s calling your name that day, but it’s sure fun trying!

Chicago gourmet 2015

Honestly, I can watch the live demos all day long, it’s so fun and time goes by so fast, the venue is great, you’re close and up front and you’re able to talk to the chefs before and after in a casual, relaxed atmosphere.

Chicago Gourmet 2015Chicago Gourmet 2015

There are tasting pavilions and exhibitors all around, you name it they have it, every cuisine you can think of and yes, there’s ever present lines, but they move pretty fast, especially with a glass of wine in your hands!

Chicago Gourmet 2015

You have to pace yourself, I never eat the bread, you would be stuffed in ten minutes!

Chicago Gourmet 2015

The sweets are insane, I could post a hundred photos!

Chicago Gourmet 2015

I love the vibe, the beautiful backdrop of Millennium Park, the food, the wine, the whole package!

Chicago Gourmet 2015

See you in 2016!

You can follow me on Instagram too!

Signature

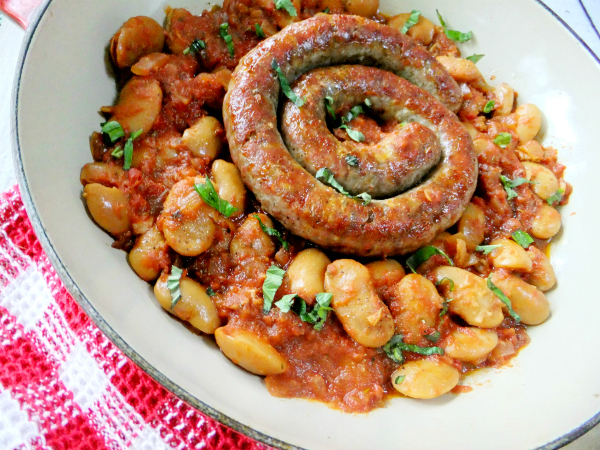
Corona Beans with Sausage

corona beans and sausage

Are you familiar with Corona beans? They’re a large white bean way bigger than cannellini, an old fashioned heirloom bean from Europe, Italy has a fondness for them. They’re big to begin with in the dry state but when you cook them they become huge, the picture doesn’t really show how big they get but I measured them to be about an inch and a quarter in their cooked state.

They have a nice creamy texture similar to a potato.

slow cooked corona beans

I picked up a bag at the Rancho Gordo store in the Ferry building in San Francisco last week on our vacation, it can be difficult to find Corona beans in the stores most of the time but online you should have no problem.

You will find many producers of these beans but Rancho Gordo is one of my favorites, In fact I love all their beans, and I’m not getting paid to say that!

I decided to go out and buy a new crock pot since I never used mine and gave it away to my daughter, I wanted to slow cook my Corona’s after I saw my friend Cathy make a pot of Greek Gigante beans, which is also a large white bean. She tossed all the ingredients into the crock pot including the dry beans, not pre-soaked, but dry.

I have to say I wouldn’t recommend tossing in dry Corona’s they took forever to cook and to reach that creamy point, it was close to twelve hours, so next time I would definitely pre- soak them overnight to get them started and reduce the simmering time, like I said these beans are huge and they’re not exactly the same type as the Gigante beans that Cathy used, so my recipe instructions will be slightly different than hers.

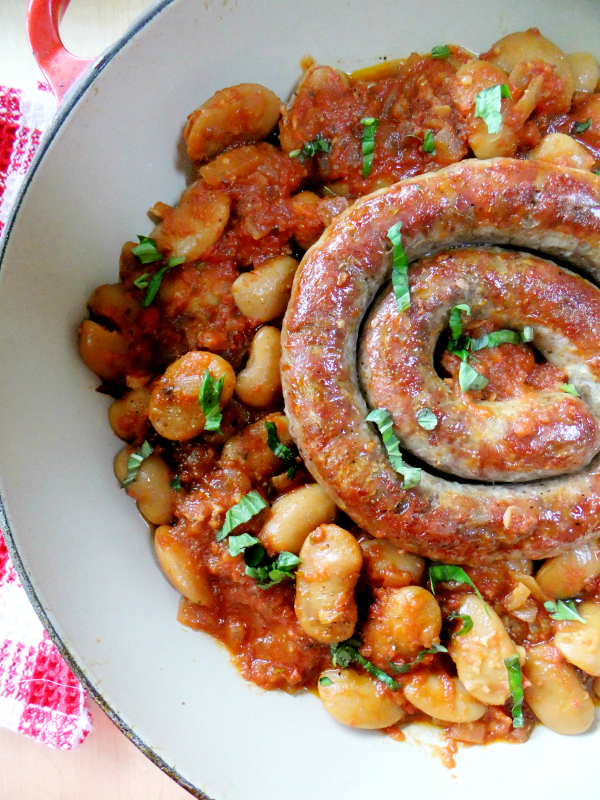
corona beans and sausage

This is my Italian version of pork and beans! Beans flavored with parmesan, garlic, onions, bacon, thyme, tomatoes and red pepper flakes then after they’re cooked, topped with a ring of the best Italian sausage you can buy, which will be pan seared and placed on top for serving. This is comfort food, stick to your ribs food, a welcome to fall!

corona beans and sausagecorona beans and sausage

You have to be patient, this isn’t a quick meal, you can make the beans the day before if you want either in the slow cooker or simmering on top of the stove, I guarantee your house will smell amazing and it’s definitely worth the wait!

Proud Italian Cook is also on Instagram, you can follow me here.

5.0 from 2 reviews
Corona Beans with Tomatoes, Bacon and Sausage
 
Giant delicious white beans called Corona. Slow simmered until nice and creamy, comfort food all the way!
Author:
Ingredients
  • 8 oz. dried Corona beans that have been soaked in water overnight for at least 8 hours, then drained
  • 3 oz. bacon, diced
  • 3 garlic cloves, minced
  • 1 medium onion, diced
  • 3 cups of chicken or vegetable broth
  • 1 cup of water
  • 1 14 oz. can of diced tomatoes or squished whole tomatoes
  • 1 or 2 parmesan rinds
  • a small handful of fresh thyme sprigs
  • a big pinch of red pepper flakes
  • 4 tablespoons of olive oil
  • salt and pepper to taste
  • 1 lb. cooked, pan seared Italian sausage to serve on top of beans when finished cooking
Instructions
  1. Place every single ingredient into a heavy pot or crock pot, simmer low and slow for hours, soaking the beans overnight will shorten the time. The true test for doneness is to taste at least 5 beans because beans all cook at different times.
  2. They should not be hard or have a crunch to the bite but rather they should taste creamy and soft like a potato.
  3. They could take anywhere between 3 - 6 or more hours depending on how high your flame is or how fast your crock pot takes.
  4. Keep tasting for salt, and remember they blow up, and the liquid will absorb them.
  5. Remember they should reach the creamy point!
  6. Serve them in pan with curved sides topped with the pre-cooked sausage ring.


Signature

Pacific Coast Highway Road Trip

california coast

Sorry no recipe today just a little recap of my recent California trip. We’ve always wanted to do a Pacific Coast Highway road trip and we finally did it this past week, now I can cross it off my bucket list.

We flew into San Francisco and started our journey there, check out my Instagram account for some of the food we ate and the sites we saw in the bay area.

We continued on our road trip all the way down to San Diego, stopping along the way, staying overnight in beautiful cities along the coast.

california coast

The views were breathtaking, stunning and amazing!

california coast

Sometimes a little scary, but oh so worth it!

pebble beach

We even drove through Pebble Beach, seventeen miles of beauty all around.

california sea gull

Even the sea gulls were in awe.

california scenes

We stopped and stayed at various places along the way on famous Highway 1, like Nepenthe, Monterey, Big Sur, San Simeon, Solvang, Santa Barbara, Malibu, Santa Monica, LA, Long Beach, Venice Beach, Manhattan Beach, Hermosa Beach, San Clemente, all the way down to San Diego.

It only takes about 8 hours to make the drive down to San Diego from San Francisco, we had seven days which gave us more than enough time to see and stay where ever we wanted.

Los Angeles tour

When we got to LA we went on a hop on hop off bus tour which gave us an overview of the city, we were free to get off and visit different touristy things as long as we wanted then hopped back on the bus when we were done, no worries about parking our car in all the different areas we wanted to see. I highly recommend doing that in a big city, it’s stress free!

chinese theater

We did so much it’s hard to show everything in a single post but let me just say I ate delicious, fresh seafood every single day! (Instagram)

If you’ve ever thought about taking a road trip down the PCH, I can just tell you, it’s worth every mile, so much to see, so much to do with gorgeous views.

Time to get back cooking in my own kitchen and some of the fall meals I can’t wait to make.

See you soon!

Signature

Whipped Ricotta with Slow Roasted Tomatoes

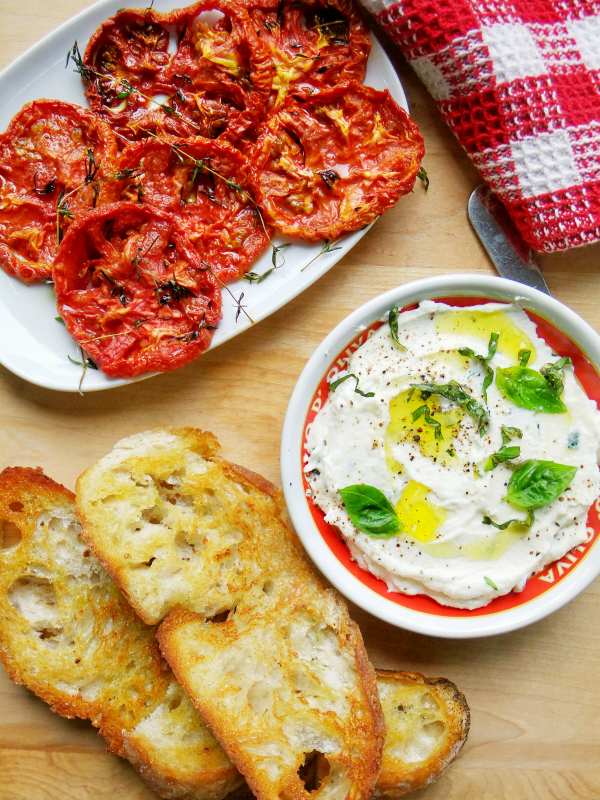
slow roasted tomatoes with whipped ricotta

Before all the beautiful summer tomatoes quickly disappear, promise me you’ll make this! This is like the grand finale of tomato season for me, because soon we’ll be into the cooler weather, fall type foods, but I guarantee come mid January you’ll be dreaming about this like I do.

This combination was meant to be together, like yin and yang, the perfect match.

Creamy, light, fluffy and decadent, whipped ricotta slathered onto extremely crunchy bread and topped with the most intensely flavored slow roasted tomatoes, I can barely talk, it’s that good!

Ingredients:  Great tomatoes, the best bread you can find and good quality fresh ricotta.

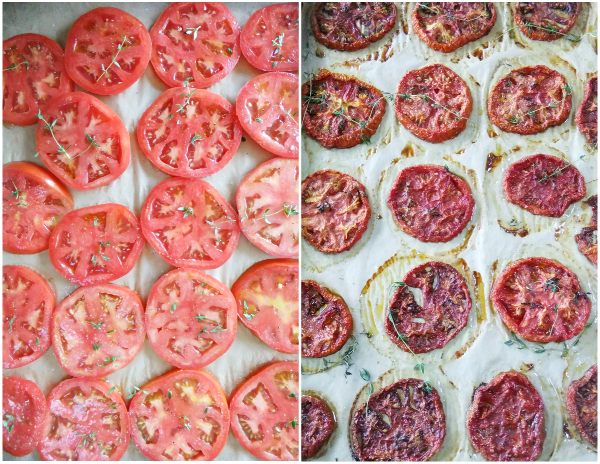
slow roasted tomatoes

Normally when I roast tomatoes I put the oven on 400, toss them with olive oil and quick roast for around 15 or 20 mins, but this is a different process, there’s nothing quick about it, you’ll have to give up your oven for at least four hours.

The slow process is exactly why they taste so darn special, sort of like the difference between quick frying onions verses the slow process of caramelizing them, there’s no comparison in taste.

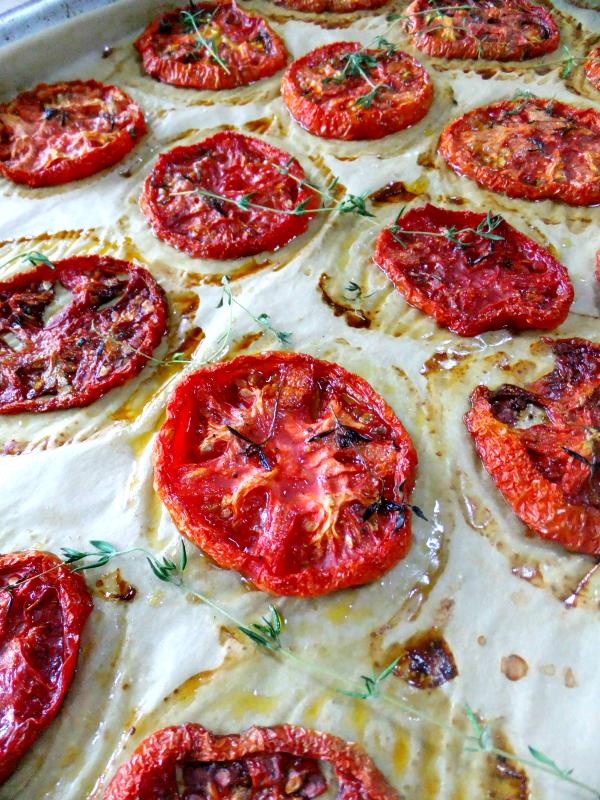
slow roasted tomatoes

You want to get them to the point where most of the moisture is gone but yet they’re still a little moist and limp.

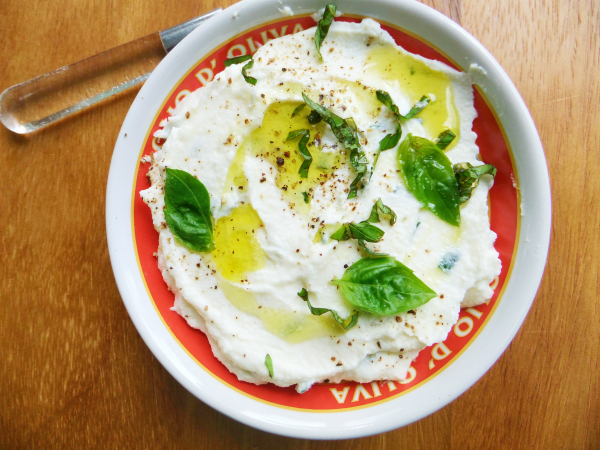
whipped ricotta

Now lets talk about the whipped ricotta, I like to call it Italian Hummus, you can dip it, spread it, whatever you like. I’ve been obsessing about it ever since I tasted droplets of it on top of a pizza this summer.

So simple to make, just place some good quality ricotta into a food processor or a mixer and blend it until it has a smooth and creamy almost fluffy consistency with no lumps at all, you might need a few drops of cream or half and half to help smooth it out. You can then finish it off by folding in some fresh herbs of your choice like, oregano, chives, basil, maybe a little parmesan cheese if you want, salt and pepper of course, and finally a nice drizzle of olive oil on top, just like hummus.  I used chives and basil in mine but it’s a blank canvas so make it your own.

crostini with whipped ricotta and slow roasted tomatoes

Pile it on some of the best bread you can find, toasted of course, then top it with those luscious tomatoes.

Honestly, you can make a meal out of this, it’s that good.

whipped ricotta and slow roasted tomatoescrostini with whipped ricotta and slow roasted tomatoes

One bite and you’ll be hooked!

5.0 from 5 reviews
Slow Roasted Tomatoes
 
Make this, it will change your life!
Author:
Ingredients
  • great tomatoes
  • fresh thyme
  • garlic infused olive oil
  • salt and pepper
Instructions
  1. Heat oven to 250 degrees.
  2. Slice tomatoes about a ¼ " thick, if cut too thin they will turn out like chips.
  3. Place slices on a parchment lined baking sheet.
  4. Brush each slice just on the top with olive oil that has been infused with one small crushed garlic clove.
  5. Sprinkle with salt and pepper but be easy on the salt because it intensify's as it roasts and you don't want it to taste overly salty.
  6. Spread fresh thyme leaves all over.
  7. Place in oven and roast at that temp for 1 hour then reduce oven temp to 200 until tomatoes lose most of their moisture but are not completely dried out.
  8. Mine took a total of 4 hours.
  9. Store them single layer in an airtight container, in the fridge.


Signature

Picnic Food Ideas for a Crowd

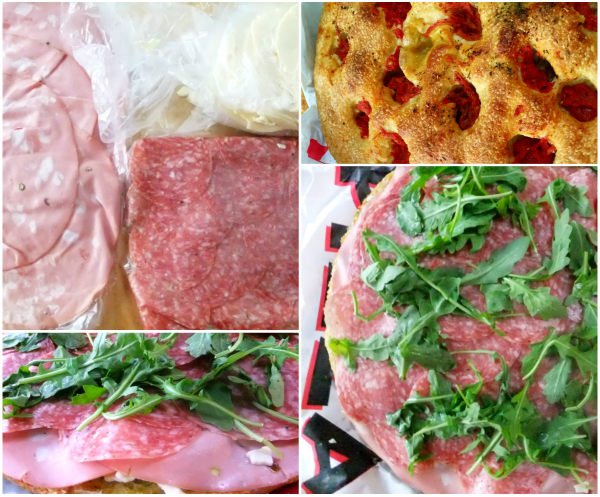
focaccia Italian sub

Labor Day weekend is fast approaching, the unofficial mark of summers end. If you’re going to a picnic or a family get together for your last hurrah, here’s a couple of things you can bring along and not worry about it spoiling from sitting around in the heat.

We recently had a big family picnic and although there were grills on site, we didn’t feel like grilling, so I was thinking what I could bring to share that would be big enough to feed a bunch of people, Italian sub sandwiches of course!

round focaccia

I decided I would switch it up this time and make them on focaccia bread, and although the picture may not show it well, these were huge, like the size of a 14 inch pizza.

Living in the Chicagoland area I’m fortunate to have access to many places where I can easily go and pick up some of these delicious breads, some are round, some are rectangle, all shapes would work for this, and of course you can always make your own.

focaccia Italian sub

I love this type of focaccia with the tomatoes stuck into it, it lends so much flavor to the sandwich but it does takes a little patience when slicing it in half horizontally.

You’ll need a small pairing knife and a large serrated knife. You’ll also want to make sure your focaccia is at least 1 1/2 to 2 inches thick. Use the pairing knife and score the center of the outside edge all the way around, this will just be your guideline so be careful not to cut into it too deep.

Then take the large serrated knife and SLOWLY cut through the focaccia, pressing on the top ever so slightly with your hand as you move back and forth until you reach the other side using your pairing knife marking as the guide, then gently separate the halves.

Italian sub ingredients

The sky’s the limit as to what you want to fill your subs with, I opted for swiping basil pesto on each side of the bread with a nice drizzle of olive oil all over, then I layered with slices of aged provolone cheese, mortadella, salami and a handful of arugula. Like I said before, the tomato focaccia has so much flavor so you really don’t need much more of anything else!

focaccia Italian sub

The best part is they make a great presentation on the table placed on a couple of round Party Store platters that I picked up.

I couldn’t cut them fast enough, needless to say they were a hit!

caprese pasta salad ingredients

I also brought along this Caprese Pasta salad which I like to make this time of year with the abundance of cherry tomatoes that still have their intense flavor.

I cooked my pasta the night before, ( 2 lbs.) cooled it down, drizzled it with olive oil and put it into a zip bag overnight and also cubed up a log and a half of fresh mozzarella cheese.

The morning of the picnic I quartered all my tomatoes, a t least 2 big containers, dowsed it all with olive oil, salt, pepper and fresh basil. Let it sit a bit so the juices can mingle, then tossed in your pasta and cheese adding more oil, basil and salt if needed.

caprese pasta salad

Both are easy to do, a nice presentation, and feeds a crowd, oh and of course taste amazing!


Signature

Zucchini Roll Ups with Ricotta and Summer Corn

zucchini roll ups with ricotta and summer corn

I’ve been taking full advantage of all the summertime produce I can get my hands on, soon it will be gone and we’ll move on to more cooler weather veggies, but I’m not ready for that yet.

Zucchini is still in abundance along with yellow squash and sweet corn which I pick up at the farmers market nearly every week.

I recently made some eggplant rollatini which I posted on my Instagram account last week, so I thought why not try it with zucchini!

zucchini roll ups with ricotta and summer corn

To put a little summer twist on it I mixed fresh corn into the ricotta, spinach and cheese filling and I’m so glad I did, we loved it!

ingredients for zucchini roll ups

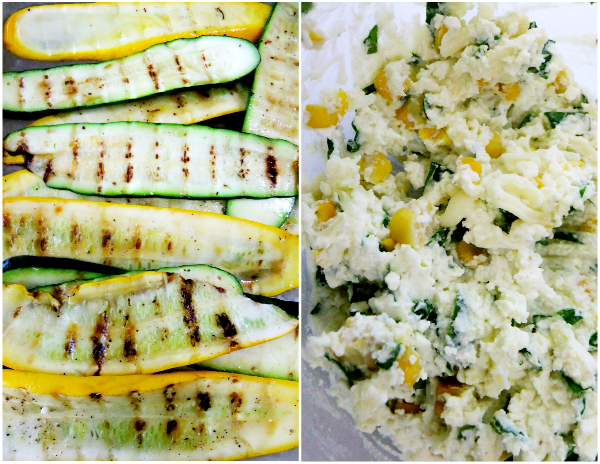
This is pretty easy to make so I’ll just tell you what I did. Slice your squash up fairly thin, you want to be able to roll it up, if it’s cut too thick you won’t be able to bend it easily. I used a grill pan inside to cook it down slightly on each side to get it limp enough to roll.

In a bowl I started out with a cup of well drained ricotta, the kernels of one ear of corn, a handful each of romano cheese, shredded mozzarella and fresh spinach that I chopped, you could sub out fresh basil for the spinach if you prefer.

I added 1 small smashed garlic clove, salt, pepper and an egg. Before you add the egg taste everything to your liking. Depending on how many roll ups you make, you might need to mix up a little more filling. Keep in mind you’ll only need a heaping tablespoon on each, that is if your squash ribbons are normal size and not huge.

zucchini roll ups with ricotta and summer corn

Roll them up, placing them seam side down into a pool of marinara sauce. I like to spoon a little extra sauce down the center of each roll so as not to cover the whole thing because I like seeing all the different colors peeking out. Bake uncovered for 15 minutes at 350 or until ricotta is heated through and set.

zucchini roll ups with ricotta and summer corn

Take a bite into some of the last days of summer using up the abundance of zucchini available with this healthy, easy and delicious meal!

Signature

Eight Years of Blogging and a Limoncello Tart

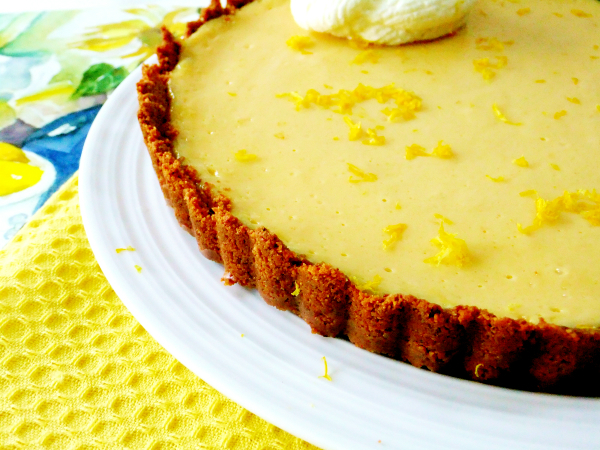
limoncello tart

It’s my blogiversary today, 8 years, I can hardly believe it! So I’m celebrating with a limoncello tart.

It’s been quite a while since I’ve made this tart, I think it’s been about three years. It’s crazy good and so easy to make, my kind of baking, nothing complicated about it.

limoncello

Recently I was lucky enough to receive two bottles of limoncello liqueur from Mama Agata’s Cooking School on the Amalfi Coast, ( it’s on my bucket list) to try out, of course I readily accepted!

We are huge fans of limoncello in my family, every holiday, special occasion and celebration includes some icy cold limoncello for toasting, my daughter likes to make a huge batch every year to give away for gifts, it’s a big undertaking, but so worth it.

limoncello tart ingredients

I knew as soon as it arrived I was going to make this tart to celebrate my eight year milestone, after all, it’s made from the beautiful lemons that grow on the Amalfi Coast, how special is that!

limoncello tart

Let’s talk a little bit about my eight years of blogging. Back in 2007 I asked my daughter to help me set up a blog, I was reading a bunch of blogs at the time and thought it would be fun to document my own recipes, it took her 15 minutes to get me up and running, the hardest part was me coming up with a name.

She set me up then walked out the door and said, ” you’ll be fine mom, just take a picture and talk about it” . Oh boy what a learning process it has been, especially with all the technical stuff that goes on behind the scenes.

My photos were hideous in the beginning, shooting with the flash on and under yellow lighting, what was I thinking? I often thought of changing them out now, but I never will, it is who I am, the good, the bad and the ugly, besides it’s nice to see a little progression over the years.

I thought by now I would get tired of blogging, but honestly I’m not, it still remains one of the best things I’ve ever done, I love the creative process and I’m always learning something new.

If you were to ask me what my favorite part of the process is I would have to say everything except writing out the actual recipe, I loathe that part! ( ha ha).  Sometimes I just stare at the computer and avoid writing out the recipe diverting my attention elsewhere.

I never was any good in math, my family and friends could attest to that, and don’t ask me to figure out a tip either!

Thanks for putting up with all my terms like, a pinch, a drizzle, a healthy dose, ovens vary so keep checking, taste it, add more or less, use whatever veggies you have on hand, I know it’s not very precise.

Today there are so many social media platforms, too many for this old girl, but I have to say, a new one that I do enjoy is Instagram, sharing some of your life with a series of pictures, it’s different than this blog, it’s more day to day. You can follow me there if you’re interested.

But over and above everything else, the fringe benefit of blogging all these years has been the friendships I’ve made, friendships with other bloggers and even readers of my blog, I appreciate all of you and in addition my family and close friends, and I just want to say thank you to each and every one of you!

So I’m still hanging around for a while.

blueberry sauce

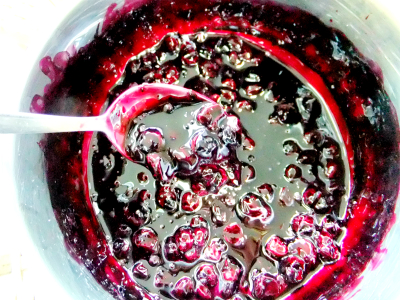
Now lets get back to that dreamy limoncello tart… You have to make this blueberry sauce to serve along side it so you can swipe each bite into it, it takes it over the top!

limoncello tart

Salute!

4.6 from 5 reviews
Eight Years of Blogging and a Limoncello Tart
 
Grab a bottle of limoncello and make this while you're sipping a little on the side.
Author:
Ingredients
  • 1 - 9" tart pan with removable bottom
  • 1-7 oz. bag of amaretto cookies, (for the crust)
  • 6 tablespoons of melted butter
  • 2 egg yolks
  • 1 can sweetened condensed milk
  • ¼ cup plus 2 tablespoons of limoncello liqueur
  • 2 tablespoons of lemon juice
  • 1 tablespoon of lemon zest
  • 1 pint of fresh blueberries
  • ¼ cup of sugar
  • a little limoncello to flavor berries when finish cooking down
Instructions
  1. Heat oven to 350 degrees.
  2. Melt butter
  3. In a food processor, whirl the package of amaretto cookies then pour in the melted butter and process until it all comes together.
  4. Pat crust into tart pan, place on a baking sheet and pre-cook crust for 5 minutes, then let it cool down.
  5. While crust is cooling, mix together the egg yolks, condensed milk, lemon juice, limoncello and the zest, blend with a hand mixer until creamy.
  6. Pour into prepared crust and bake 15 to 20 minutes more, it should be firmed up but not overcooked.
  7. While tart is baking pour berries into a small saucepan along with the sugar, keep stirring and cook down until it becomes a sauce, nice and thick.
  8. Add a little zest and limoncello to flavor it up a bit.
  9. Completely cool down the tart and the sauce and refrigerate both, both should be nice and chilled before eating, it needs to cool several hours so it cuts nice, or you can even make it the day before eating it.


Signature

Zoodle Pasta Pie

zoodle pasta pie

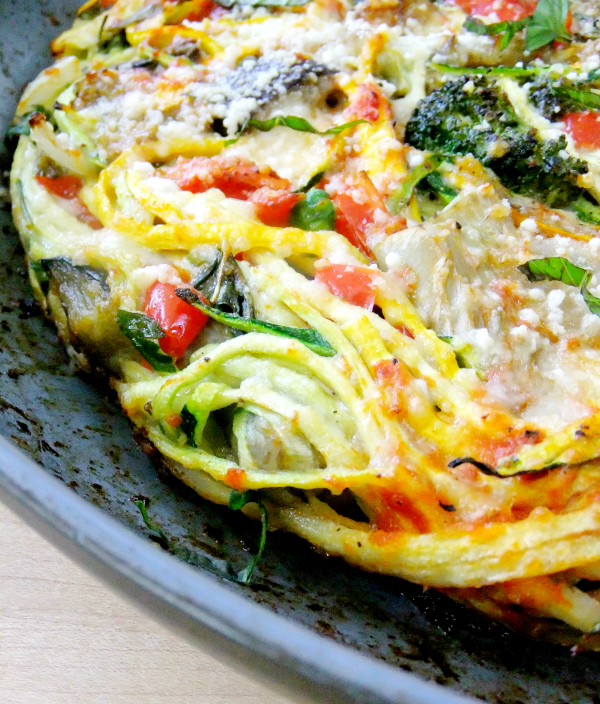
There’s not one strand of real spaghetti in this pie, it’s all made with zoodles, zucchini noodles, which are still all the rage, have you tried them yet?

Leftover veggies, strands of zucchini pasta, a couple of eggs, herbs and cheese form this savory pie, cut it into wedges, serve it alongside a salad and it becomes a satisfying and healthy meal!

pizza pasta pie

Just for comparison I wanted to show you my Pasta Pizza Pie,  in the photo above it’s made with real spaghetti strands and leftover veggies, each of these dishes are made similar, except this time I just switched out the pasta for zoodles.

zucchini zoodles

Zucchini season is peaking right now and this is just another fun way you can use some of it.

zoodle gadgets

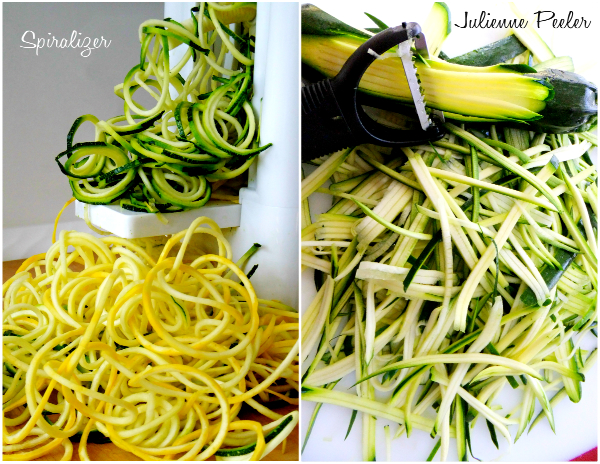
One of the ways that you can make zoodles is with a spiralizer, I love using  it because it makes continual strands that are nice and curly, this is the one I use, but sometimes I just don’t feel like taking out a big gadget and then having to clean it, so I’ll use my julienne peeler instead.

The strands aren’t as long and you don’t get that continuous curl, but when wilted down a bit you can’t tell much difference, check out this older post of mine, titled Faux Spaghetti, and see what I’m talking about..

zoodle pasta pie ingredients

Just use whatever veggies and herbs you might have on hand, you don’t need much, I used an eggplant, some mini red pepper rings, artichoke hearts, peas, broccoli tops and onion, again it was just small amounts.

zoodle pasta pie

The cheese will bind it all together and form the perfect zoodle pasta pie!

Follow me on Instagram!

zoodle pasta pie

Zoodle Pasta Pie
 
This is a take on a pasta pizza pie I made by just replacing the pasta with zucchini noodles or "zoodles" it's healthy, low carb and gluten free and it tastes amazing!
Author:
Ingredients
  • I used a 12" oven proof skillet
  • 4 or 5 zucchini, or a mixture of yellow squash and zucchini, turned into zoodles
  • leftover veggies of your choice, diced medium and pre-cooked or roasted
  • fresh basil and parsley
  • 2 beaten eggs
  • 2 small garlic cloves, minced
  • ½ small onion
  • parmesan or romano cheese, grated
  • 1 cup, mozzarella cheese, shredded
  • olive oil, salt and pepper to taste
Instructions
  1. Create your zoodles first, then place in a big bowl, add your beaten eggs, a generous handful of grated cheese, the mozzarella, herbs and cooked vegetables, gently toss and combine everything.
  2. Drizzle some olive oil on the bottom of skillet, saute onion and garlic
  3. Add the zoodle mixture and let the bottom set a bit until you see a golden color.
  4. Finish it off in a 400 degree oven, until cheeses melt and bind everything, convection roast if you have it.
  5. Let it rest before cutting it, I cut my wedges with a pizza cutter.


Signature

Creamy Lemon Kale Salad

creamy lemon kale salad

Sometimes you just want a good hearty salad to eat in the hot summer heat, especially when it’s made with some of your own fresh garden produce, in this case it’s a kale salad.

Yes, we over did it again with the kale, we grew too much this year!

My freezer is now stocked with kale leaves that I can break off and put into soups and stews in the dead of winter, I’ve given some away, made pestos, smoothies, you name it.

For salads, I like to pick the leaves when they’re nice and tender, wash it real good, remove the tough stems and then spin it dry, I then store a bunch in a big zip bag and keep it nice and cold in my fridge, ready to use when ever I want.

creamy lemon kale salad

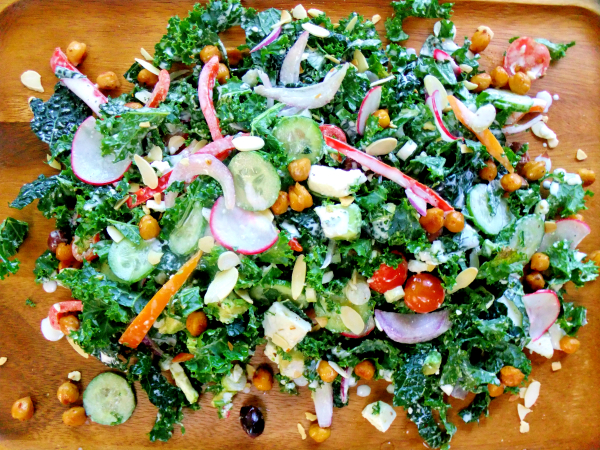
There’s no real recipe for this salad but the colorful, combo of ingredients I used were;

A mixture of curly and tuscan kale, chopped into bite size pieces, red and orange pepper strips, sliced cucumbers and radishes, olives, red onion, green onion, avocado, feta cheese, cherry tomatoes, toasted sliced almonds and roasted garbanzo beans.

creamy lemon kale salad

For the roasted garbanzo beans, just open up a can, drain well, toss with olive oil, granulated garlic, paprika, oregano, salt and pepper, then onto a rimmed baking sheet in a 400 degree oven, roast until crunchy and crispy, around 30 minutes.

creamy lemon kale salad

The creamy lemon dressing is so easy to make, I’m almost embarrassed to tell you…

Take a few heaping tablespoons of good mayo, add in 1 small garlic clove that has been grated on a micro plane, whisk in some real fresh lemon juice to thin it out and get a nice consistency, add salt and pepper to taste.

Spoon the dressing on top, toss and enjoy, that’s it!

Signature

Summer Tomato and Corn Tart

summer tomato and corn tart

Tomato season is finally here, and nothing compares to the taste of a summertime vine ripened tomato! We have such a short season here in Chicago and I look forward to making this tart each year when the tomatoes are at their peak!

summer tomato and corn tart

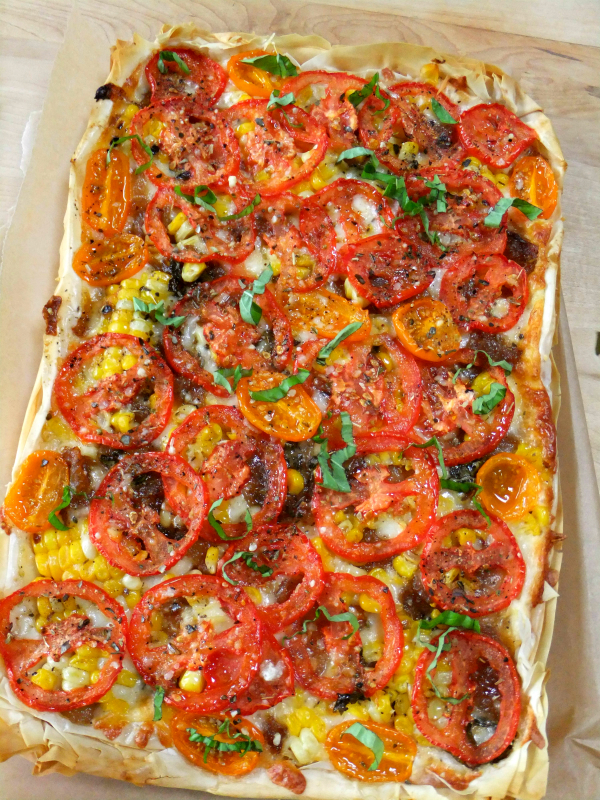
The base of this tart is made with phyllo dough, I like using a phyllo crust because it’s light, flaky and gives you a nice crunch with every bite, it’s also very easy to work with because it’s so forgiving, you could put a ripped piece down and no one would know the difference. I always have a box handy in my freezer, just follow the directions for defrosting before you want to use it.

Like I said, I prefer using phyllo dough for this tart, it seems to even lighten it up a bit, but in the past I’ve even used a pie crust and it was just as good, so feel free to use whatever kind of crust you like.

tomato and corn tart ingredients

Because really, it’s all about the other delicious ingredients. Along with some juicy ripe tomatoes I added caramelized onions, shredded mozzarella, fresh basil and planks of corn.

summer tomato and corn tart

This is the perfect summertime meal, add a green salad and you’re all set!

summer tomato and corn tart

I’ve made this twice already and intend to make it a few more times this summer, I hope you give it a try!

You can follow me now on Instagram for more cooking in my kitchen!

5.0 from 1 reviews
Summer Tomato and Corn Tart
 
Make this delicious tart when tomatoes and fresh corn are at their peak in the summer
Author:
Ingredients
  • tart pan with removable bottom, sprayed or brushed with olive oil, I used a 7 x 11, but you can use any size, just adjust the ingredients accordingly
  • 6 layers of phyllo dough adjusted to fit in the tart pan
  • 3 sweet onions, sliced, cooked down to a nice carmelization
  • tomatoes, sliced thin, preferably done on a mandoline, enough so you can overlap each piece, you can also use some cherry tomatoes cut in half to place in between the sliced tomatoes
  • shredded mozzarella,not the wet kind, enough to cover the bottom of the tart pan you use
  • 2 or 3 ears of steamed or grilled fresh corn, cooled and cut into planks
  • olive oil
  • dried oregano
  • fresh basil
  • grated romano or parmesan cheese
Instructions
  1. Prep all the ingredients first, cook down the sliced onions in a skillet drizzled in olive oil, low and slow until a deep caramelization happens, could take around 30- 40 minutes. Set aside.
  2. Have your tomatoes thinly sliced.
  3. Have your corn cut into planks and set aside.
  4. Have your mozzarella shredded and ready to go.
  5. When every thing is prepped, open up the box of phyllo and start to layer tart pan using one sheet at a time, spraying or brushing each layer all over with olive oil making sure to fit it into the pan placing the phyllo up the sides as well.
  6. When the 6 layers are complete, spread shredded mozzarella all over the bottom covering completely, sprinkle with grated romano or parmesan and some chopped fresh basil all around.
  7. Take a fork and place the caramelized onions all over the shredded mozzarella, you will probably have some extra.
  8. Place the corn planks all around.
  9. Top with the sliced tomatoes, overlapping each to cover the whole tart, you can also add some sliced cherry tomatoes if you desire.
  10. Drizzle the whole thing with olive oil and sprinkle dried oregano all over as well, plus salt and pepper.
  11. Place tart in a pre-heated 400 degree oven for around 30 minutes or until phyllo is nicely golden brown and you can see the mozzarella all melted down.
  12. Let it rest before removing the bottom and cutting, I use a pizza cutter to cut through the phyllo.
  13. Garnish with more fresh basil.


Signature

Plank Grilling with Fish

oak planked white fish

When you fire up the grill this summer don’t forget to throw on some fish, it makes for a nice light and healthy meal. I recently grilled a beautiful White Fish Filet on a Red Oak Plank.

oak planked whitefish

I’m a big fan of plank grilling, the wood infuses the fish with a delicious smoky flavor and it also keeps the fish nice and moist. The main thing to remember is to soak your planks at least two hours beforehand submerged in water to ensure there won’t be any flair ups on the grill.

I always grill my planked fish on indirect heat and cook it until opaque.

oak planked whitefish

There’s no real recipe, just keep everything simple. I brushed my filet with melted garlic butter, sprinkled it with paprika, then placed whole chives and fresh parsley leaves from my garden right on top, of course any herb combination would work as well, use whatever you like.
Take a few garden tomatoes, dice them up small, place in a bowl and add a few chopped herbs of your choice, add in some olive oil, salt and pepper and spoon it over the top while it’s cooking.

oak planked whitefish

All the juices mingle together along with the infused wood and create an amazing flavor!

salmon wrapped jumbo scallops

Here’s a brilliant idea that I can’t take credit for, Salmon Wrapped Jumbo Scallops, isn’t it pretty? I actually bought it like this, but it’s so easy to create yourself, which I’ll be doing  next time, or you might even want to ask your fishmonger to do it for you.

Three jumbo scallops with a strip of salmon wrapped between them and stuck on a skewer.

If you don’t want to stick them on a skewer, think about individually wrapping a strip of salmon all the way around each scallop, you can even use some thinner smoked salmon, why not?

This would be perfect for a nice intimate dinner party or special dinner, I think it’s really a pretty presentation.

salmon wrapped jumbo scallops

I cooked it on a cedar plank the exact same way I did the white fish, brushed with garlic butter, (no paprika) and then the tomato and herb topping. The slightly smoky cedar taste infused the salmon and scallops and it was a match made in heaven!

salmon wrapped jumbo scallops

Everything was so juicy and moist, I can’t wait to make it again, I hope you try it too!

Follow Proud Italian Cook on Instagram now!


Signature

Gnocchi with Brown Butter, Basil and Blistered Tomatoes

gnocchi with brown butter, basil and tomato

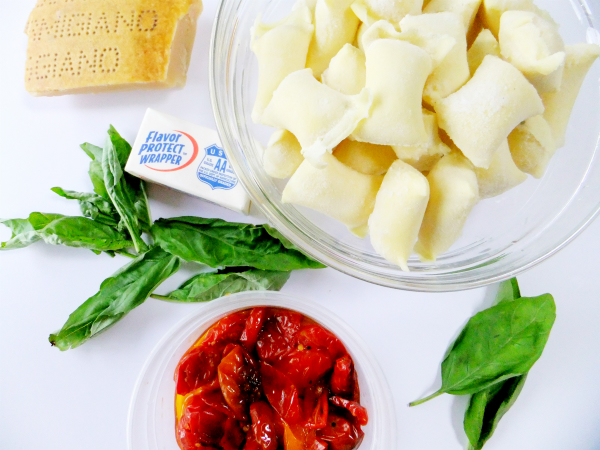
This is a summertime version of a brown butter sauce, no sage leaves used here, I’ll save that for the fall, instead I’m using fresh basil leaves tossed into hot, nutty tasting browned butter, just until crisp, then blistered cherry tomatoes complete with their juice get stirred in and around to complete the sauce.

It’s a killer combination, so quick and easy to make and the perfect flavor profile to top off your summertime pasta dishes.

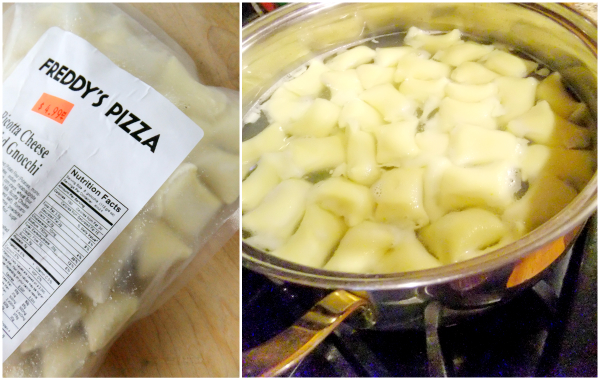
frozen ricotta gnocchi

I for one love it with gnocchi, I’m partial to ricotta gnocchi, it’s my favorite, little fluffy pillows of cheese that melt in your mouth!

I normally make my own (just omit the kale if you want them plain in the link I’ve given you)  but once in a while I’ll buy some from my favorite Italian market and keep a few bags handy in the freezer, it makes for a very quick dinner that I can whip up in no time.

This sauce is also amazing spooned over cheese ravioli, if you’re not a gnocchi fan.

gnocchi with brown butter, basil and tomato

Very simple components, the only thing you have to do is roast the cherry tomatoes ahead of time and have them ready to go.

brown butter and basil

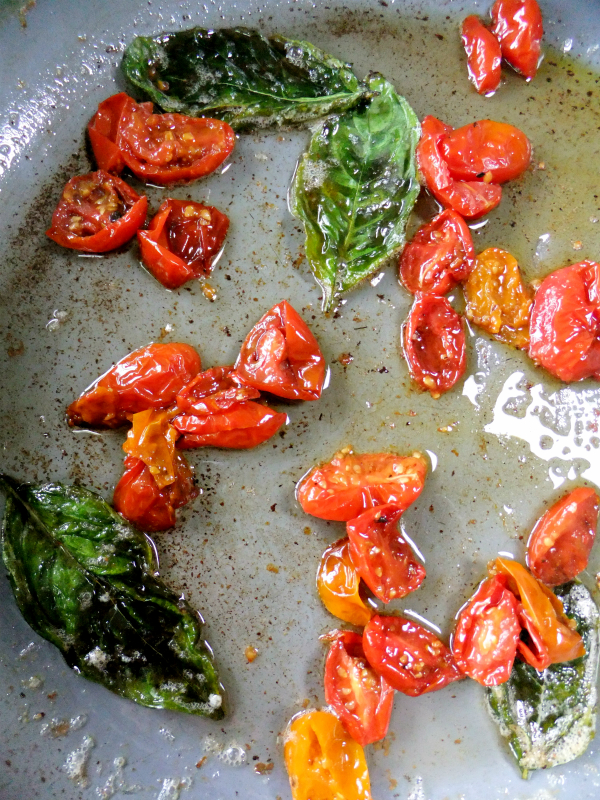
The basil leaves get frizzled and the juice of the tomatoes mingle nicely with the browned butter.

brown butter, basil and blistered tomatoesgnocchi brown butter, basil and tomatoes

Top it off with freshly grated Parmigiano Reggiano, I’m serious, every bite is to die for!

Proud Italian Cook is also on Instagram now, you can follow me here.

Gnocchi with Brown Butter, Basil and Blistered Tomatoes
 
The perfect summertime brown butter sauce to spoon over your pasta, using basil and blistered tomatoes!
Author:
Ingredients
  • 12 oz.to 1 lb of cooked ricotta gnocchi, with or without spinach, kale, or swiss chard added to the recipe,or just straight up plain or even cooked ravioli
  • 1 pint of colored cherry tomatoes, sliced in half and pre-roasted plus olive oil
  • ½ stick of unsalted butter
  • a good handful of fresh basil leaves
  • Grated parmesan for finishing
Instructions
  1. Roast the tomatoes beforehand, you can even do it a few days ahead and leave them in the fridge.
  2. Place sliced cherry tomatoes on a foil rimmed sheet pan, drizzle generously with olive oil, sprinkle with salt and pepper and roast at 375 until they blister and juices start to flow.
  3. Remove tomatoes and place into a bowl making sure to save and scrape all juices off the foil.
  4. Get your water boiling for the pasta, gnocchi takes only about 3 minutes, In the meantime start making your sauce.
  5. In a large skillet on top of stove heat butter on medium high until golden and starts to foam, toss in the basil leaves, let them frizzle for a second or two then stir in tomatoes and shut off the heat.
  6. Get your pasta into the pot, when gnocchi rise to the top gently scoop them out with a hand strainer and place them carefully into the skillet, spoon and make sure the sauce is all over them.
  7. Finish with the grated Parmigiano Reggiano.


Signature

Happy Fourth of July!

4th of July grillingsummer side salads

Have a safe and enjoyable weekend with good food, family and friends!

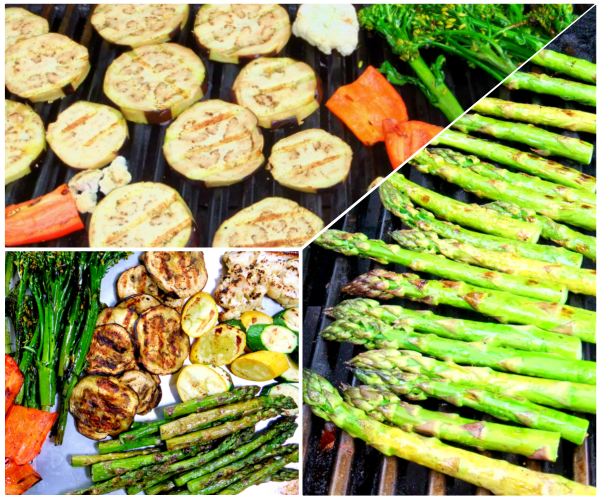
For a little inspiration, here’s a visual of summertime eats that I’ve made throughout the years, most recipes are found in my recipe index, feel free to email me if you want one in particular.


Signature

Fresh Watermelon Cake

watermelon cake

Here’s a fun and creative way to serve up your next watermelon, carve it into a “cake”!

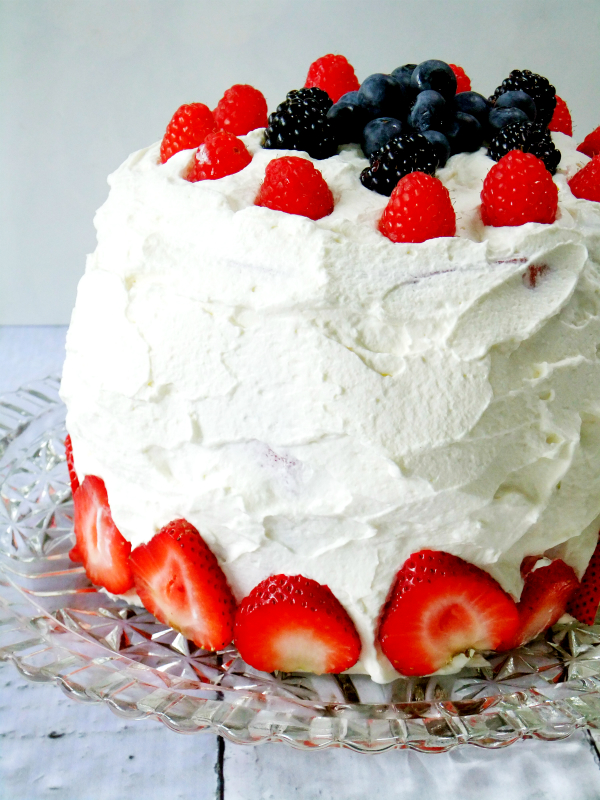
Who doesn’t love watermelon, it’s a summer staple usually always present at cookouts and parties. This “cake” is made with sweet refreshing watermelon that has been carved and shaped into a cake, it gets frosted with fresh whipped cream and is decorated with fresh summer berries, this could be the perfect red, white and blue cake for your Fourth of July party.

I’ve seen this done online and I couldn’t wait to try it myself, I was skeptical about putting the cream on a wet surface but all you do is pat the melon down really good with paper towels after it’s cut, and I was pleasantly surprised how easy and quick it was to put it all together.

I actually made this early in the morning, had it all frosted and garnished, stuck it in my fridge and pulled it out later in the evening and it was flawless, everything stayed in tact, in fact the cream set up so nice and firm and it was so easy to cut into nice wedges, even leftovers the next day were perfect!

watermelon

Find yourself a nice round seedless watermelon, you’re going to be cutting the top and bottom off so pick a size according to how many guests you’ll be serving.

ingredients for watermelon cake

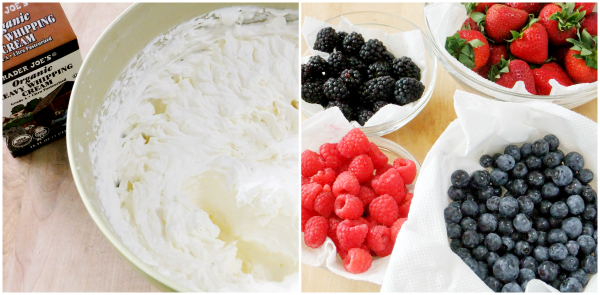
The first thing I recommend doing is whipping your cream, you want very stiff peaks and then refrigerate it, get it nice and cold. Have all your berries washed and ready to go. You can garnish your “cake” with whatever you want, berries, nuts, sprinkles, slivered almonds, coconut or other fruit of your choice, make it your own and be creative!

watermelon cake

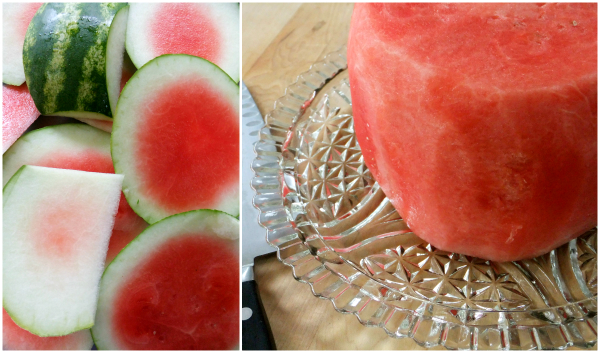
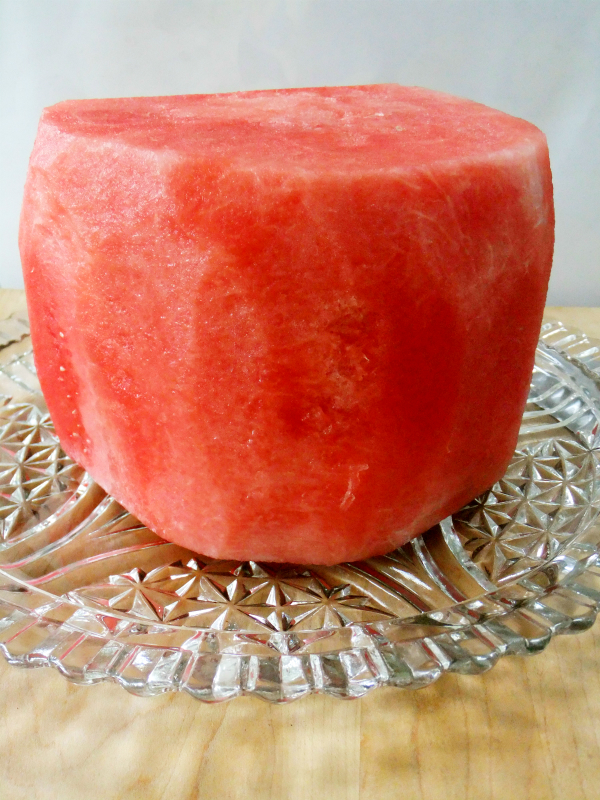
The trimming was easier than I thought, after you remove the top and bottom stand it upright and start slicing the dark outer green rind off all the way around and make sure you see none of the light green rind underneath showing either, take your time and start trimming and shaping it to look like a cake.

watermelon cake

When you’re done trimming it put it on top of the platter you’ll be serving it on, don’t worry it doesn’t have to be perfectly shaped.

watermelon cake

The whipped cream will hide all the imperfections and so will all your added fruit and garnishes.

watermelon cake

It’s unexpected, impressive and a guaranteed show stopper when you bring it out to the table and no baking required!

Happy Summer and Happy 4th!

Fresh Watermelon Cake
 
Refreshing, unexpected and a beautiful way to serve a watermelon, transformed to look like a cake. It's healthy and delicious too!
Author:
Ingredients
  • 1 whole seedless watermelon
  • 3 cups of heavy whipping cream ( you'll probably have some extra)
  • ½ teaspoon of vanilla
  • 2 tablespoons of confectioners sugar or other sweetener like stevia
  • assorted fresh berries and other garnishes of your choice like nuts, sliced almonds, coconut, sprinkles, etc.
Instructions
  1. First whip your cream with the confectioners sugar and vanilla, whip until you get nice stiff peeks, then refrigerate bowl.
  2. Wash and dry the whole watermelon.
  3. With a sharp knife slice the top and bottom off.
  4. Standing upright begin removing the dark green rind all around.
  5. Keep trimming the sides removing the light green rind underneath and trimming it into a nice cylinder shape.
  6. Wipe and pat dry the cylinder with paper towels to remove excess moisture.
  7. Place shaped and patted dry melon on serving platter.
  8. Spread cold whipped cream all over with a rubber spatula, top and sides.
  9. Garnish with berries or other things of your choice.
  10. At this point you can refrigerate it until ready to cut. I placed the whole platter into my fridge and didn't cover it, but if you had a cake plate topper that would fit over the top, that would be fine too but not necessary.
  11. If you have some of the "cake"remaining after cutting just refrigerate soon after so the whipped cream doesn't melt down, especially on a hot day.


Signature

Summer Carrot Ribbon Salad

summer carrot ribbon salad

Thin ribbons of rainbow colored carrots are the star in this salad, they add crunch and beautiful vibrant colors of purple, yellow and orange. This salad is perfect for a hot summer day, it’s garden fresh, healthy and light.

carrot ribbon salad ingredients

This is a different version of a rainbow carrot ribbon salad I made a couple of years ago, here.

This time I added crunchy radishes, Persian cucumber ribbons, red onion, yellow and red pepper strips, arugula, a handful of toasted hazelnuts, and for a little heat, thin slices of jalapeno.

carrot ribbon salad ingredientssummer carrot ribbon salad

I like to keep the dressing nice and light by either using a simple vinaigrette or one of my favorites, olive oil and fresh lemon juice whisked together with a little parmesan cheese or another favorite of mine I’ll post in the recipe section.

summer carrot ribbon salad

For a fabulous light summer meal add some grilled shrimp or fish on the side, then you won’t feel guilty about a nice sweet dessert!

5.0 from 1 reviews
Summer Carrot Ribbon Salad
 
A colorful,crunchy, light and healthy summer salad using the freshest produce of the season!
Author:
Ingredients
  • 1 bunch of rainbow carrots, made into thin ribbons using a vegetable peeler
  • ½ red onion, sliced into strips
  • 1 yellow and red pepper cut into strips
  • 2 or 3 Persian cucumbers, made into ribbons using a vegetable peeler
  • 8 radishes, sliced thin
  • a large handful of arugula or fresh spinach
  • 1 small jalapeno, thinly sliced ( optional)
  • a small handful of toasted hazelnuts, slightly crushed
  • CREAMY LEMON PARMESAN DRESSING
  • 3 heaping tablespoons of good mayonnaise
  • 3 tablespoons of lemon juice
  • 3 tablespoons of olive oil
  • 2 tablespoons of grated parmesan
  • a pinch of salt and cracked pepper
  • Whisk everything together, taste for seasoning.
Instructions
  1. Gently toss all salad ingredients into a bowl, place on a nice platter, then drizzle dressing over the top when ready to eat.
  2. LIGHTER LEMON PARMESAN DRESSING
  3. All ingredients as in the creamy version, minus the mayonnaise, whisk together and drizzle on top os salad ingredients.


Signature

Last Minute Cookout Sides

grilled veggie platter with red pepper feta dip

With Father’s Day right around the corner you might want to add a couple more side dishes to your menu if you’ll be having a cookout. Here’s a few inexpensive and simple to make ideas that are always a hit and look quite impressive.

grilled veggies

Nothing is more inviting than a big platter of grilled vegetables, it’s colorful, healthy and there’s something for everyone and they go with everything! I toss or brush my veggies with olive oil, salt and pepper then stick them on the grill, this all can be done the day before.

After they cool down I like to store my veggies in a large container in layers between sheets of foil, just get them to room temperature before serving.

roasted red pepper and feta dip

I like to serve them with a dip of some sort, one of my favorites is this Feta and Red Pepper Dip. It’s adapted from an old Cooks Illustrated recipe. So simple to make, everything goes into a food processor, the flavors are fantastic and go wonderful with the grilled veggies. (recipe below)

grilled veggies with red pepper feta dip

I grilled up some asparagus, broccolini, red pepper, cauliflower, eggplant, zucchini, yellow squash, and slices of red potatoes.

grilled veggies with red pepper feta diproasted garlic tomatoes

Another popular side are these Roasted Plum Tomatoes with Whole Garlic Cloves. 

I like using the plum tomatoes because you only need a couple on your plate, and they too go with everything. The thing that takes them over the top is the addition of whole roasted garlic cloves, they’re soft, sweet and when mingled with the oil and tomato juice, my oh my!

I roast the peeled garlic cloves ahead of time in a foil packet, just drizzle with olive oil, add salt and pepper and some herbs if you like. Fold up the packet, roast at 375 for around 45 minutes or until soft.

For the tomatoes, use 6 or 7 plums, cut in half lengthwise and placed in a shallow baking dish with 1/2 cup of olive oil, fresh thyme, rosemary, dried oregano, salt and pepper. Distribute the pre-roasted garlic all around and roast at 400 degrees until tomatoes start to burst and the juices begin to mingle with the oil. You could then finish it off by placing the pan under the broiler for a few seconds for a deeper color, but don’t walk away, keep watching. Garnish with fresh snipped basil.


grilled potato and asparagus napoleon

Here’s an oldie but goodie in my archives. Grilled Potato and Asparagus Napoleon, it’s layered with tangy goat cheese and grilled red pepper and garnished with balsamic glaze and olives, so easy to make and it tastes out of this world good!

grilled veggie salad

And last but not least, cut up those grilled veggies and toss them into a nice big Grilled Vegetable Salad,  you can’t go wrong with that!

Happy Grilling

5.0 from 1 reviews
Last Minute Cookout Sides
 
Feta and Red pepper Dip. Use this dip to enhance grilled veggies of all kind! Recipe adapted from Cooks Illustrated.
Author:
Serves: 2 cups
Ingredients
  • 8 oz. Feta cheese
  • 1 6 oz. jar of roasted red peppers, drained and patted dry
  • juice of ½ lemon
  • pinch of red pepper flakes
  • ¼ cup of olive oil
Instructions
  1. Blend everything into a food processor until mostly smooth.
  2. Pour into a bowl, drizzle with oilve oil and garnish with basil.


Signature

Spaghetti Squash “Cacio e Pepe” with Asparagus Ribbons

spaghetti squash cacio e pepe style with asparagus

This recipe is a little twist on the classic Roman dish, “Cacio e Pepe”, which in Italian means, cheese and pepper. It’s traditionally made with three main ingredients, pasta, Pecorino Romano and crushed black pepper, there’s a little debate on using butter or olive oil, I use a combination, and never are there any added vegetables to the dish.

It’s simple and easy and most definitely comfort food at it’s finest!

cacio e peppe with spaghetti squash and asparagus

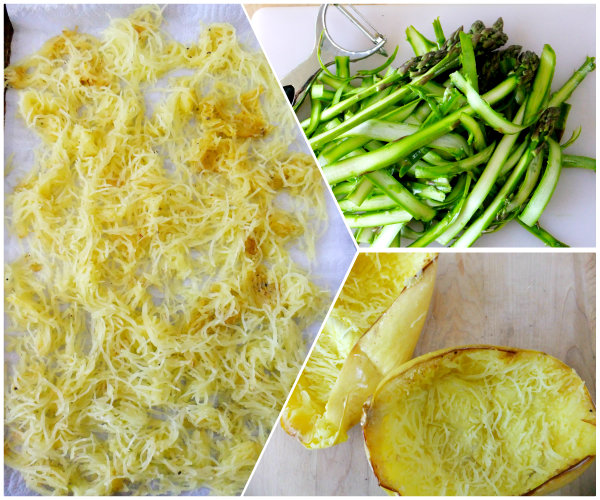
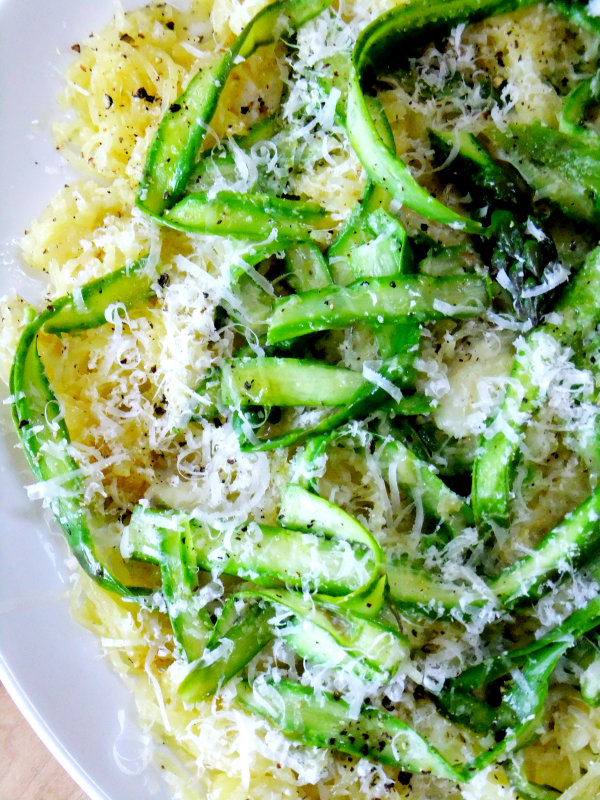
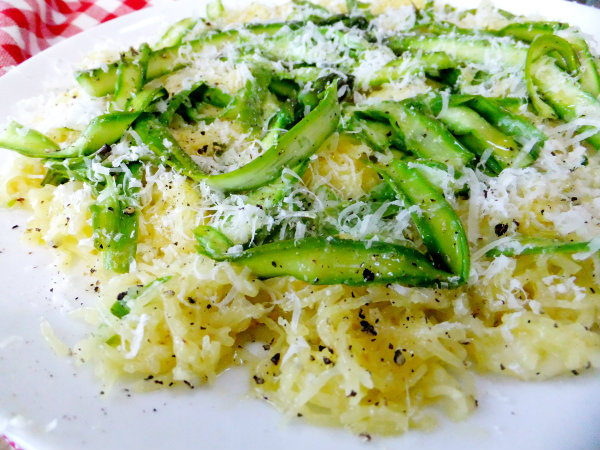
Like I said this is a twist on the classic, so in my version I decided to replace the pasta with wonderful spaghetti squash and for color and added depth of flavor I tossed in slightly cooked and wilted asparagus ribbons.

spaghetti squash cacio e pepe style with asparagus

The same bold and creamy flavor of the Pecorino Romano comes out and balances the spiciness of the coarsely crushed fresh peppercorns just like in the traditional version.

I repeat, crushed fresh peppercorns!

Please don’t use that stuff that’s been sitting on a shelf for ages and looks consistently the same when you sprinkle it on, it will ruin the dish.

spaghetti squash cacio e pepe style with asparagus

The asparagus is simply shaved with a vegetable peeler and then slightly wilted in a saute pan then scattered about all over the top.

spaghetti squash cacio e pepe style with asparagus

Remember, the cheese and pepper are the key ingredients in this recipe, so don’t be shy!

spaghetti squash cacio e pepe style with asparagus

I promise you won’t even miss the pasta!

5.0 from 2 reviews
Spaghetti Squash "Cacio e Pepe" with Asparagus Ribbons
 
A twist on the classic Cacio e Pepe replacing the pasta for spaghetti squash and adding some asparagus ribbons.
Author:
Ingredients
  • 1 medium to large spaghetti squash
  • 1 lb asparagus, on the thicker size, not thin,shaved with a vegetable peeler into ribbons
  • 2 tablespoons butter
  • 2 tablespoons of olive oil, plus extra drizzle for sauteing asparagus
  • ¾ cup of coarsely grated Pecorino Romano cheese
  • ¼ cup of finely grated Pecorino Romano cheese
  • Coarsely crushed fresh peppercorns, to taste. Don't be shy!
Instructions
  1. Preheat oven to 375, line baking sheet with parchment, cut spaghetti squash in half lengthwise and scoop out the seeds.
  2. Drizzle inside of each half with olive oil and season with salt and pepper. Place cut side down on parchment and cook until a knife goes through easily, be careful not to overcook.
  3. Let squash cool completely then shred with a fork to get long strands.
  4. Place squash strands on a paper towel to get the dampness out for a few minutes.
  5. Drizzle a saute pan with olive oil and place asparagus ribbons in tossing them until wilted and bright green. Remove so they can stop cooking.
  6. In the same saute pan add the 2 tablespoons of butter and the 2 tablespoons of olive oil, toss in the spaghetti squash strands and the ¾ cup of coarsely grated Pecorino, tossing gently until heated through and cheese starts to melt, also add in some cracked pepper while tossing. If it seems to thick add a couple of tablespoons of water to thin it out.
  7. Place on a platter, arrange asparagus ribbons all around and add the finely grated pecorino all over and more pepper.
  8. Finish off with a quick drizzle of olive oil.


Signature

Summer Chopped Veggie Salad

chopped veggie salad

Chopped salads are nothing knew, in fact if you did a search on the Internet you would see thousands of different variations. Crisp, colorful veggies tossed into a light vinaigrette, it just screams healthy and fresh!

chopped veggie salad ingredients

The vegetables you choose are up to you, in the past I’ve added things like peas, asparagus, carrots, radishes, raw zucchini, yellow squash and even jalapeno , I’ve added cheese, different herbs, but mostly I like to keep it pretty simple and above all colorful!

This time I added green and yellow wax beans, something I saw Martha do on one of her shows, it’s a great addition for the color and texture it gives, and I always use planks of fresh corn for the taste and visual.

Don’t get me wrong, this is not the quickest salad to make, you have to do some chopping, after all it is a chopped salad, but I find it therapeutic. Play some music, watch a TV show or just drift into your own thoughts, it will go by fast. You can chop all your veggies the day before then mix everything together the day of.


chopped veggie salad ingredients

This salad couldn’t be more perfect as a side to all your summertime cookouts or just make it and eat it for lunch for a few days plus there’s no mayo required, so that’s a good thing with the summer heat.

chopped veggie salad

Chop and then dress adding more or less, it’s up to you, be creative!

5.0 from 5 reviews
Summer Chopped Veggie Salad
 
A fresh summertime salad, all flavors condensed into one bite. No mayo required.
Author:
Ingredients
  • ½ pound of green beans cut into ¼ inch pieces
  • ½ pound of yellow wax beans cut into ¼ inch pieces
  • ½ can of garbanzo bean, drained and rinsed
  • 1 cucumber, seeded and cut into ¼ inch pieces
  • 2 ears of fresh corn
  • 1 yellow bell pepper, seeded and cut into ¼ inch pieces
  • 1 red pepper, seeded and chopped into ¼ inch pieces
  • 1 small red onion cut into ¼ inch dice
  • 4 or 5 tomatoes, seeded and diced into ¼ inch pieces
  • a handful each of fresh basil and fresh parsley, chopped
  • FOR VINAIGRETTE YOU WILL NEED:
  • olive oil
  • white balsamic vinegar or champagne vinegar
  • ½ minced garlic
  • dijon mustard
  • salt and pepper to taste
Instructions
  1. You need to blanch the beans for 2 minutes in boiling water, remove with slotted spoon and then place into an ice bath, then drain well, even wiping them down with paper towel until moisture is removed.
  2. Place corn in boiling water after beans for 5 minutes and also place into ice bath to cool down, when cool, cut corn into planks.
  3. Place everything into a large bowl, veggies, beans, herbs and toss to mix.
  4. In a small bowl whisk together, 2 ounces of olive oil, 2 ounces of vinegar, a dollop of dijon mustard, ½ minced garlic and salt and pepper to taste.
  5. This is just a general guideline, you can add more or less as needed to taste.
  6. Pour vinaigrette all over and toss!


Signature

Trofie Pasta with grilled shrimp, Cauliflower and Pesto

trofie pasta with pesto and shrimp

Trofie is a twisted pasta shape originating in Liguria, I love it because when you use it with pesto, basically any type of pesto, the sauce just clings to the shape and gets into all the grooves. I’ve used it with my parsley walnut pesto, kale and almond pesto and of course traditional basil pesto, and it’s all so good!
trofie pasta with pesto and shrimp ingredients

In the warmer months and with grilling season underway you can create a beautiful pasta dish with just a few ingredients and a pesto of your choice. I added grilled shrimp, grilled cauliflower and some fresh cherry tomatoes to mine.  If you have a source to buy a good quality pesto you can even do that, but I encourage you to make your own.trofie pasta

Cook pasta according to the package directions and reserve a little pasta water to loosen up the pesto a bit. Toss the pasta into a bowl and add some fresh sliced tomatoes, no need to cook them.

trofie pasta with pesto and shrimp

Start adding in your pesto, I start with a quarter of a cup at a time, tossing gently and coating the trofie pasta using the reserved water if needed.

Just to give you an idea, I used a pound of pasta, a pound of shrimp and a little over a half a cup of basil pesto loosened up a bit.Transfer everything to a pretty platter and top it off with the grilled shrimp and grilled cauliflower.trofie pasta with pesto and shrimp

A five ingredient meal that’s fresh, light and delicious!

(Proud Italian Cook is now on Instagram, follow along with me to see what I’m cooking up daily.)


Signature

Shrimp Risotto with Asparagus, Peas and Pepper Rings

shrimp risotto with asparagus, peas and peppers

Risotto really isn’t a difficult dish to make it just takes commitment, there’s stirring involved and you have to pay close attention, it’s a labor of love but the end result is so worth it and it ends up all in one pan!

You can make a simplified version any day of the week or you can jazz it up for a special occasion with impressive results.

Be creative, there are hundreds of variations to try, but make it your own using the flavor combinations that you like, you can never go wrong, the rice is your blank canvas.

ingredients for shrimp and vegetable risotto

Some of the basic rules for making a perfect risotto, besides stirring is to use a short grain rice like arborio or carnaroli, it’s going to give you that creamy texture and bite you’re looking for. Another essential is a good, heavy bottomed pan, never use nonstick!

Next, your going to need some hot broth simmering on the stove, then a little butter, olive oil, onion, cheese and wine, things you usually have stocked in your home and whatever veggies, herbs and proteins you want to add in.shrimp risotto with asparagus, peas and peppers

I used shrimp, asparagus, peas and mini peppers that I cut into rings. All veggies and shrimp were pre-cooked ahead of time and tossed in after the basic risotto base was made.

shrimp risotto with asparagus, peas and peppers

I could be happy with just the the veggies and creamy rice all by itself but the roasted shrimp takes it over the top!

They say your not suppose to mix cheese with seafood, well too bad, I broke the rules, because a little Parmigiano Reggiano never hurt anyone and besides it truly heightens the flavor of the whole dish, so go on and be a rebel!

Shrimp Risotto with Asparagus, Peas and Pepper Rings
 
A one pan meal that is simple, elegant, creamy and sophisticated
Author:
Ingredients
  • 1 quart boxed chicken broth, or homemade or vegetable if you wish
  • 1 cup of arborio rice, or other short grained rice
  • 1 lb. medium shrimp, peeled and deveined, fresh or frozen but patted dry
  • 1 lb. asparagus, fresh cut on the diagonal
  • 1 heaping cup of peas, frozen and defrosted
  • 1 small bag of mini peppers, red yellow and orange cut into rings
  • ½ onion, finely diced
  • ½ cup dry white wine
  • ½ to ¾ cup of freshly grated Parmigiano Reggiano
  • 2 tablespoons butter
  • olive oil
Instructions
  1. Foil line a rimmed sheet pan, drizzle with olive oil and roast shrimp at 4oo degrees until plump and pink, remove and set aside.
  2. Roast asparagus as well in seperate pan, drizzled with olive oil at 400 degrees, set aside.
  3. Defrost peas, set aside.
  4. In a small saute pan, stove top cook pepper rings until soft and slightly golden colored, set aside.
  5. In a heavy bottomed pan add 1 table spoon of butter and 1 tablespoon of olive oil then toss in the onion and cook until soft.
  6. Pour stock into a separate pot and start to heat up, when completely heated keep it on a simmer.
  7. On medium heat, toss in the rice and toast it up a bit, stirring and coating it in the butter and olive oil.
  8. Deglaze with the wine, stirring with a wooden spoon until completely dissolved.
  9. Start adding 1 cup at a time of the hot stock with pan still on medium heat stirring until liquid is absorbed, when pan starts to look dry add more broth 1 cup at a time.
  10. Stir, stir, stir while adding the hot broth, you might have a cup of broth leftover, or you might use it all depending on creamy result of rice.
  11. The end result should be a little soupy, creamy and the rice should have a little bite to it, al dente but not rock hard or mushy, you have to be the judge.
  12. Remove from heat, stir in remaining butter, and grated Parmigiano Reggiano.
  13. Toss in the roasted cooked shrimp and all juices on the pan and lastly add in the cooked vegetables.


Signature

Flatbread Pizzas

flatbread pizza with eggplant

Flatbread pizzas seem to be all the rage, have you noticed? They’re popping up on restaurant menus and wine bars all over the place. Sometimes you see them as appetizers to be shared or as a light lunch or dinner served with a salad, I’ve even seen them used for breakfast, either way they’re pretty popular right now.

flatbread

Flatbreads can be made without yeast which results in a crispy, cracker like crust, the kind I like the best and the kind I seem to find in most restaurants. Another version is by using pizza dough with yeast but rolling it out really, really flat.

You can make your own, there are plenty of recipes on the web, or you can buy a brand you like. Let me just say I have no affiliation with these brands what so ever, I just happened to come upon them while shopping.

The one shown above is a basic Lavash bread, you can find them all over, they work perfectly, they get really crispy and cook up fast.

But just recently I’ve bought a pre-made pizza dough, that’s what they call it at Trader Joes, they’re shaped into long rectangles, 2 in a package and usually in the bread isle, in my opinion it’s a flatbread and they are super good as well.

I think they’re great to have handy when company stops by, I always keep some in my freezer, they take minutes to defrost and they take 10 minutes to crisp up in the oven.

The toppings are endless! Just Google flatbread pizzas and you’ll see what I mean.flatbread pizza with eggplant

First brush each side of the flatbread with olive oil, straight from the package then place on a sheet pan and start layering your toppings.

For the above eggplant version I used shredded mozzarella then placed thin sautéed eggplant slices on top along with red onion, then into the oven it went for 10 minutes at 400 degrees, when it came out I brushed it with basil pesto, it’s fabulous and so easy and it’s wonderful served with a glass of wine!

flatbread pizza with eggplantflatbread pizza with eggplant

Serve with a salad and you have a completely satisfying meal!

flatbread pizza

This is another version that comes together really fast.

Saute up some shrimp in a pan with olive oil and garlic, set aside. Brush the top and bottom of the flatbread with olive oil, then brush top with basil pesto.

Add fresh mozzarella that has been torn all around, arrange shrimp on top then add dollops of roasted red pepper sauce.

Bake at 4oo until cheese melts and bread is crispy.


These flatbread pizzas are so good that I decided to make a breakfast version, sunny side up eggs plopped on top of the crispy  bread, and I have to say, this was super delicious!

So delicious that I decided to make this for breakfast to serve some overnight guests that were visiting, and they loved it and started making it when they got home.


sunny side up egg flatbread

Again the flatbread is brushed on both sides with olive oil, then swiped with basil pesto. Crack your eggs in little ramekins then gently pour it out onto the flatbread. I like to take torn, fresh mozzarella and place right near the edges of the egg whites, it keeps it from running all over and holds it together to form a little barrier.

I added a few cherry tomatoes and grated parmigiano cheese then baked in the oven 375 – 400 until the eggs are set, garnish with fresh basil.

Flatbread pizzas are a nice alternative to a heavier dough pizza, nice and light and perfect for entertaining this summer!


Signature

Seared Scallops with Pea Puree

seared scallops with pea puree

Here’s an impressive dish that takes maybe twenty minutes or so, and it tastes divine!

seared scallops with pea puree

Buttery rich perfectly seared scallops get placed on top of a pea puree flavored with garlic, shallots, a little cream and lemon zest, it’s ethereal!


seared scallops with pea puree

Each bite gets swiped into the dreamy sauce for the perfect explosion of flavors!seared scallops in pea puree

I have to thank my friend Stacey and Saveur for the inspiration for this dish, I will be making it again and again!

5.0 from 1 reviews
Seared Scallops with Pea Puree
 
An impressive dish, easy to prepare and tastes divine!
Author:
Ingredients
  • Dinner for two!
  • 8 large, dry natural scallops
  • 1 bag of frozen peas, 1 lb.
  • 1 cup of water or broth
  • ⅔ cup of half and half, or more if needed to loosen puree
  • 2 shallots, minced
  • 1 large garlic clove, crushed
  • 2 tablespoons, unsalted butter
  • olive oil for searing scallops
  • zest of 1 lemon
Instructions
  1. Add butter in a skillet over medium heat, add garlic and shallots and cook until soft.
  2. Add peas and 1 cup of water or broth and cook until sauce is reduced.
  3. Set aside 1½ cups of the cooked peas, keep warm
  4. Place the remaining pea mixture into a food processor, add the half and half, a pinch of the lemon zest and salt and pepper to taste.
  5. Pulse until you get a nice creamy consistency that you desire, I did not make mine completely smooth.You can add more cream if so desired.
  6. Place in a small sauce pan and keep warm.
  7. For the scallops, get your skillet nice and hot, do not use a nonstick pan.
  8. Salt and pepper your scallops and make sure they are dry.
  9. When pan is nice and hot drizzle olive oil on the bottom.
  10. Place scallops in pan and don't move them until you see a dark golden crust form.
  11. Flip them over when crust is formed, cook for 1 more minute, then remove.
  12. To plate spread pea puree on a plate, add scallops and sprinkle some of those reserved whole peas all around.
  13. Garnish with a little lemon zest on top or if your lucky to find some lemon flaked salt like I did, you can use that instead.


Signature

Spring Salad with Asparagus, Goat Cheese, lemon and Hazelnuts

spring salad with asparagus and goat cheese

I’ve been taking full advantage of asparagus season, my fridge is constantly stocked with those tender thin stalks. Besides just roasting them, which is a given, I’ve been putting them into frittatas, risottos, pasta dishes, tarts and a ton of salads.

In this salad today the asparagus is really the star. You give them a really quick roast to get them out of the raw state, slice them in half lengthwise, then gently toss into a hunk of honey infused goat cheese which has been loosened up a bit with a fresh lemon and olive oil dressing. Honestly, you could stop right there it’s that good!

But continue on please because we’re making a salad today.

spring salad ingredients

For the other ingredients you’ll want to build your salad around what’s in season, and being that its spring here I used a mixture of red leaf lettuce and a little arugula for spiciness, crispy radishes, fresh peas and fava beans, I added in some raw zucchini ribbons because I love the look and taste it gives to a salad, plus crunchy toasted hazelnuts.

spring salad with asparagus and goat cheese

Layer everything together rustic style onto a nice big platter and spoon more of the lemon and olive oil dressing all over.

spring salad with asparagus and goat cheese

For a special finish to this salad add generous shavings of Parmigiano Reggiano, it’s a must!

4.7 from 3 reviews
Spring Salad with Asparagus, Goat Cheese, lemon and Hazelnuts
 
A beautiful fresh salad that celebrates Spring!
Author:
Ingredients
  • 1 bunch of asparagus,on the thin side but thick enough to cut in half lengthwise.
  • 1 cup fresh peas, or frozen and defrosted
  • ½ cup of cooked and prepped fava beans, you could use frozen defrosted lima beans
  • 5 radishes, thinly sliced
  • 2 medium raw zucchini made into ribbons with a vegetable peeler, (no seeds)
  • ½ bunch of red leaf lettuce chopped bite size and a generous handful of arugula mixed together or combination of salad greens of your choice
  • 4 oz. of chevre goat cheese, I used the one with honey
  • the zest of one lemon, you can cut up a few slices for garnish after
  • ½ cup of toasted hazelnuts, slightly cracked open
  • shaved Parmigiano Reggiano for top of salad
  • extra lemons for dressing
  • olive oil
Instructions
  1. Roast your asparagus on a sheet pan drizzled with olive oil for maybe 5 or 10 minutes on 375 just until the raw taste is gone, you don't want limp asparagus they should still have a good bite to them, so keep checking. Cool them off and them slice them lengthwise.
  2. Make a lemon and olive oil dressing using 2 parts fresh lemon juice to 4 parts olive oil.
  3. In a bowl mash up your goat cheese and loosen it up with 2 tablespoons of the lemon dressing.
  4. Gently toss and coat sliced asparagus into the mixture, adding salt and pepper to taste.
  5. On a large platter assemble the greens, peas, fava beans, radishes, zucchini ribbons all over ending with the goat cheese coated asparagus on top.
  6. Sprinkle the toasted nuts all around.
  7. Spoon lemon dressing all around, as much as you think you need.
  8. Add shavings of Parmiggiano Reggiano on top.
  9. Garnish with a few lemon slices.


Signature

Chicken with Gorgonzola and Toasted Hazelnuts

chicken with gorgonzola and hazelnuts

Here’s a simple way to make your chicken breast go from ordinary to extraordinary, yes plain old chicken breast transforms into something intensely flavored and elegant looking all at the same time.

gorgonzola dolce

It all happens because of this cheese, Gorgonzola Dolce, have you tried it yet? It’s much more delicate than it’s cousin Gorgonzola Piccante, it’s sweeter and has a nice creamy texture and it melts like butter, it’s perfect for cooking.

chicken with gorgonzola and hazelnuts

Everything happens right on top of the stove, a little white wine, a couple of shallots and crunchy toasted hazelnuts complete the dish.


chicken with gorgonzola and hazelnuts

Add a side of couscous and maybe some roasted grapes, and before you know it you’ll have a meal worthy of a fine restaurant.

chicken with gorgonzola and hazelnuts

Home cooking turned up a notch!

(Proud Italian Cook is now on Instagram, follow along with me to see what I’m cooking up daily.)

5.0 from 1 reviews
Chicken with Gorgonzola and Toasted Hazelnuts
 
Gorgonzola Dolce transforms chicken into something extraordinary! Recipe adapted from 1,000 Italian Recipes
Author:
Ingredients
  • 2 boneless, skinless chicken breasts pounded down evenly if too thick
  • ⅓ cup flour
  • ⅓ cup white wine
  • 1 large or 2 small shallots finely chopped
  • 1 tablespoon butter
  • 1 tablespoon olive oil
  • Gorgonzola Dolce, 1 small wedge, rind removed and cut into thin slices
  • ¾ to 1 cup, TOASTED hazelnuts,cracked into chunky pieces ( you can use toasted walnuts also)
  • chives for garnish
  • salt and pepper to taste
Instructions
  1. Place flour, salt and pepper in a pie dish, dip chicken into flour mixture then shake off, you just need a very light dusting on each side.
  2. In a heavy skillet that has a lid melt the butter and olive oil together on medium heat.
  3. Add chicken and cook 3-4 minutes on each side until nicely golden, then transfer to a plate.
  4. Add shallots and cook for a minute then deglaze with white wine, add half the nuts into the sauce.
  5. Return chicken back into the pan and lay slices of Gorgonzola Dolce on top'.
  6. Reduce heat to low, place lid on top and let the cheese melt slow, keep checking until it is al melted but not dripping down into the pan, you want all the cheese to remain on top of the chicken.
  7. Add remaining toasted nuts on top of cheese topped chicken.
  8. Garnish with chives.


Signature

Special Occasion Side Dish

special occasion side dish

I wanted to do an update on a side dish that I’ve been making for years, in fact I did a post on this way back in 2008. It’s an old family recipe and it would be a wonderful side dish to your Easter table this Sunday, it goes great with ham, pork, lamb or any roast you might be having.

I’ve also made it many times as a side next to a baked pasta of some sort, like lasagna, stuffed shells, manicotti, you get the picture, it goes pretty much with everything!

It’s the combination of veggies that make it taste so good, there’s Italian flat beans, yellow beans, artichoke hearts, asparagus and believe it or not lima beans, yes lima beans, they seriously make the dish along with some crispy fried bacon bits and garlic flavored olive oil.

You can use a combination of fresh and frozen vegetables, it all works!

Happy Easter

5.0 from 2 reviews
Special Occasion Side Dish
 
Make this for a special occasion, your guests will thank you!
Author:
Ingredients
  • ½ lb of fresh Italian flat beans or green beans of your choice, steamed
  • ½ lb of fresh yellow beans, steamed
  • 1 lb of fresh asparagus, steamed
  • 1 small bag of frozen lima beans, defrosted
  • 1 bag of frozen artichoke hearts, defrosted
  • ½ lb of meaty bacon cut into small chunks
  • garlic flavored olive oil, ( a must)
  • extra olive oil
  • salt and pepper to taste
Instructions
  1. In the dead of winter I have made this using all frozen vegetables but I prefer the combination of fresh and frozen.
  2. In a deep saute pan, cook up your bacon until nice and crispy, if there's too much fat in the pan, drain it off but leave the crispy bits and add in some of that garlic olive oil.
  3. Toss in all the vegetables and then it's pretty much taste as you go to your liking, more garlic olive oil, regular olive oil, salt and pepper, there's no set measurements with the flavorings, it's all according to taste!


Signature

Easter Italian Rice Pie with Rum Soaked Raisins

Easter Italian rice pie Italian Rice Pie or Torta di Riso is a traditional Easter dessert, it’s a sweet pie and there are many versions of it, each family has their own. Mine is filled with creamy ricotta and mascarpone cheese, flavors of vanilla and orange, cooked arborio rice and rum soaked raisins. The dough is traditionally made with a pasta frolla but I’ve seen it made with just about everything, a typical shortcrust pie dough, either homemade or storebought, puff pastry and even made without a crust. I prefer phyllo dough for mine because I love the crispy crunchy texture it brings to the pie plus it goes so well with the creamy inside, and did I mention, it’s easy!

Easter italian rice pie ingredients The filling comes together quickly if you use your food processor, you just dump every thing in and give it a whirl!

The makings of an Easter Italian rice pie The only thing that needs to be made ahead of time is the rice, I cooked it the day before and refrigerated it and the raisins need ample time to soak in some warmed up rum, you want them nice and plump!

The food processor makes the filling nice and smooth, then all you have to do is stir in the rice and raisins.

I love how free form phyllo is, and it’s so forgiving, no matter how it looks before you bake it, it always comes out beautiful!

Easter Italian rice pie Isn’t she pretty?

Easter Italian rice pie You have to be patient when it comes out of the oven, let it come to room temperature then sprinkle powdered sugar all over.

Now she looks even prettier!

Easter Italian rice pieEaster Italian rice pie It’s creamy, custard like with a nice texture from the cooked rice, it’s crunchy, flaky and I have to admit, the rum soaked raisins make it! I should have added a little more…

Easter Italian rice pie Buona Pasqua!

4.7 from 3 reviews
Easter Italian Rice Pie with Rum Soaked Raisins
 
A traditional Easter rice pie made with phyllo and rum soaked raisins.
Author:
Ingredients
  • 2 cups of well drained dense fresh ricotta cheese
  • ⅓ cup mascarpone cheese
  • ¾ cup powdered sugar, plus extra for dusting
  • 5 eggs
  • 1½ cups of cooked arborio rice
  • ½ to ¾ cup golden raisins
  • ½ cup of rum liquor
  • 2 teaspoons pure vanilla extract
  • 1½ tablespoons orange zest
  • 6 or 7 sheets of phyllo
  • ½ stick of melted unsalted butter
Instructions
  1. Preheat oven to 375F
  2. Cook the rice the day before or early in the day by placing 1 cup of dry arborio into 4 cups of milk, cook until tender with a little bite, then drain off all the leftover milk, cool down and refrigerate.
  3. Place golden raisins in a small bowl, pour rum on top, heat in microwave until warm not boiling then take out and let them sit for about an hour, then strain off extra rum.
  4. In food processor blend together the powdered sugar, ricotta, mascarpone, eggs, vanilla and zest until smooth, pour into a bowl and stir in the rice and raisins. ( you'll have some rice leftover).
  5. With the melted butter lightly brush a 10 inch x 1½ deep pie dish.
  6. Start layering your phyllo sheets over the bottom and up the sides leaving an over hang all around. Each phyllo layer needs to be brushed with the melted butter.
  7. When layering is complete pour the filling mixture into the pie dish on top of phyllo.
  8. Fold up the sides that hung over, you don't have to completely cover the top, it looks nice if you can peek through.
  9. Bake 45 minutes or until a knife comes out clean.
  10. Dust with powdered sugar when it comes to room temperature.
  11. For leftover pie, refrigerate, but then bring it to room temp when you want to eat it again for optimal flavor.


Signature

Springtime Pasta

springtime pasta Today I can officially say that spring has arrived, I’m so happy to be done with winter and heavy comfort foods, it’s time to lighten up! Today I’m sharing with you a fresh and fabulous pasta dish, it’s nice and light to welcome in the season, and it’s easy to make.

springtime pasta ingredientsSpring vegetables are making their way into the stores right now so feel free to incorporate some of your own favorites into this dish. I chose pencil thin asparagus, a variety of gorgeous colored baby carrots, artichoke hearts, zucchini and fava beans.

The carrot and zucchini ribbons were made with a simple vegetable peeler, you could substitute fresh baby peas instead of the fava beans if you like, and replace the fresh for frozen artichoke hearts if you don’t want to do all that prep work.

The light fresh tomato sauce is what ties everything together, it’s simply roasted cherry tomatoes with a bit of garlic and olive oil. The roasting process makes the tomatoes burst and ooze juice that happily gets to mingle with the garlic. Now who wouldn’t want to toss their pasta into that?

fettuccine For this recipe I chose a nice fettuccine, I think the curly strands look pretty with the zucchini and carrot ribbons.

springtime pasta Freshly grated shards of Parmigiano Reggiano tossed in and on top of the pasta enhances all the flavors above and beyond.

springtime pasta Wouldn’t you like to twirl your fork into this goodness?

springtime pasta Happy Spring!

5.0 from 3 reviews
Springtime Pasta
 
A fresh and lightened up springtime pasta dish
Author:
Ingredients
  • 12 ounces of dry fettuccine, cooked al dente
  • 2 pints of various colored cherry tomatoes, sliced length wise
  • 2 small garlic cloves, crushed finely
  • 1 or 2 medium zucchini, made into ribbons
  • 1 bunch of colored carrots, made into ribbons
  • 1 bunch of pencil thin asparagus, each piece cut into three sections
  • ½ cup of fava beans prepped and peeled, can substitute peas
  • 1 cup of quartered artichoke hearts
  • Parmigiano Reggiano shards, a generous amount to taste
  • olive oil
Instructions
  1. Heat oven to 350 degrees.
  2. Place cherry tomato halves and garlic into a glass pan or a baking sheet lined with foil, add salt and pepper and roast until tomatoes burst and start to shrivel and caramelize, about 25 minutes.
  3. Make sure juice does not burn off ,as it's important to remember all oven temps vary, so keep watching. When tomatoes are done, set aside.
  4. In a large saucepan add a good drizzle of olive oil and add the zucchini and carrot ribbons, just sauteing until they start to limp.
  5. Add in the artichoke hearts, favas, and asparagus, toss gently and saute for a minute.
  6. Add the roasted tomatoes and all the juice, then toss in gently all the cooked pasta.
  7. Garnish with lots of Parmigiano Reggiano.


Signature

Spring Vegetables in Parmesan Lemon Cream Sauce

spring vegetables in parmesan cream For seven years in a row Whole Foods Market has been celebrating the King of Cheeses, Parmigiano Reggiano. This past weekend all Whole Foods across the country simultaneously “cracked” and sampled an 85- pound wheel of authentic Parmigiano Reggiano.

Did you know that every wheel at every Whole Foods Market is aged for 24 months? This is the best age in terms of taste and texture, in fact it cannot even be called Parmigiano Reggiano until it’s aged at least 12 months.

It has a rich distinctive flavor, it’s creamy, nutty, salty and savory all in one, and a little goes a long way!

They asked me if I wanted to join in the celebration, and of course I said yes. I always keep a hunk of of Parmigiano Reggiano as a staple in my kitchen, a good risotto just doesn’t taste the same without it and I can’t imagine not using it in my butternut squash gnocchi and ravioli.

It’s a great addition in many of my salads, sometimes just by simply grating large shards on top, and it goes without saying that it highlights many pasta dishes, in fact just last weekend I made a baked pasta dish with a tomato cream sauce, and honestly the Parmigiano Reggiano took it over the top, don’t get me wrong I love my Romano, but it wouldn’t have done it justice, and that’s how I feel about it, when I want a special finish to a dish that I’ve made, I always reach for Parmigiano Reggiano.

So to celebrate I wanted to make something that would showcase this special cheese and since spring is literally around the corner I decided to incorporate some of my favorite springtime veggies, lovely artichokes, fava beans, skinny asparagus and baby zucchini, and bathe them in a lemony parmesan cream sauce!

Parmigiano Reggiano Keep in mind Parmigiano Reggiano has a distinctive tan colored rind that’s pin stamped repeatedly all over, by this you will know it’s the real deal.

Parmigiano Reggianospring vegetables So on with the recipe! I used a shallow pan, 8×11, and just 1 1/2 inches deep, you want the veggies to peek out of the sauce, it gives a nicer presentation instead of them all piled on top of one another in a deep pan. You might have to double or triple the sauce ingredients depending on the size of your pan and amount of vegetables you use.

I filled my pan single layer with sliced baby leeks, skinny asparagus, artichoke hearts, fava beans, baby zucchini and sugar snap peas, but you can use any combination of spring vegetables you like.

All the vegetables are pretty much pre-cooked and ready to go. I roasted the zucchini, asparagus and leek slices in the oven until crisp tender. The sugar snap peas were blanched for 4 minutes and of course the artichokes were cooked ahead of time, you could use frozen artichoke hearts if you want, but I wouldn’t use canned. The fava beans were bought and pre-cooked, all I needed to do was peel the skin off, that was easy and save alot of time.

spring vegetables in parmesan cream Heavy cream, nutty Parmigiano Reggiano along with lemon zest and mint is a match made in spring veggie heaven!

spring vegetables in parmesan cream This would be a wonderful side dish to your Easter table!

5.0 from 3 reviews
Spring Vegetables in Parmesan Lemon Cream Sauce
 
The amount of sauce ingredients I used was for my 11x8 inch pan, 1½ deep, use your discretion and double or triple the amount if using a larger pan.
Author:
Ingredients
  • Assorted spring vegetables of your choice, precooked, placed single layer in a shallow pan, I used leeks, artichoke hearts, sugar snap peas, skinny aspragus and baby zucchini and fava beans.
  • 1¼ cups Parmigiano Reggiano cheese, freshly grated
  • 1½ cups, heavy cream
  • zest of 1 lemon
  • fresh mint
  • salt and pepper to taste
Instructions
  1. In a small sauce pan add the heavy cream and simmer just until it starts to bubble along the edges,
  2. ( this is a very important step), then remove from stove and toss in half of the zest and half of the grated Parmigiano Reggiano, stir gently.
  3. Spoon the cream sauce over and around all the vegetables.
  4. Sprinkle remaining cheese all over.
  5. Bake in 400 degree oven, uncovered until cheesy sauce sets and is thickened.
  6. If you want a little golden color, place pan under the broiler for a couple of minutes but please keep checking, don't walk away!
  7. Garnish with remaining zest and mint leaves, and a little more Parmigiano Reggiano wouldn't hurt.


Signature

Muffaletta Pinwheel Steaks

muffaletta pinwheel steaks


You’ve heard of the famous muffaletta sandwich haven’t you? A giant sandwich made in a large round hollowed out loaf of Italian bread that’s filled with cured meats, cheese and a tangy and most delicious olive salad.

Today I give you a skirt steak filled with the same things, rolled up and tied and cut into individual pinwheel steaks.

muffaletta pinwheel steak ingredients The main character in this recipe is the olive salad, which is a mixture of Italian pickled vegetables and various olives all chopped together and tossed with olive oil, you can either make your own or buy a good quality version at a local Italian deli, living in the Chicago area I have access to good olive salad and giardiniera all around me.

Make sure your deli meats and cheese are sliced really thin because you’re going to be rolling up all the layers together, I used prosciutto, hot capicola, mortadella and a nice melting provolone.

pinwheel steak This is a recipe my friend Paula told me about, she actually saw it on the Rachael Ray show and couldn’t wait to make it either, for some reason it intrigued me. Basically with pinwheel steaks you can stuff them with whatever you want, I think next time I’ll just use the olive salad with some roasted red peppers, spinach leaves and provolone, but if you want even more inspiration just look on the Internet, you’re bound to see a ton of different versions.

This recipe calls for a skirt steak but I’m sure flank steak would work as well, I asked my butcher for the longest piece he had and for him to tenderize it for me, which he happily did.

muffaletta pinwheel steaks Put a little plastic wrap on your counter then lay the steak on top and start layering.

muffaletta pinwheel steaks End with the layer of provolone cheese on top and then it’s time to roll everything up!

muffaletta pinwheel steaks Roll it up nice and tight and secure with butchers twine then cut into individual steaks, you can get three or four pinwheels from a pound and a half of meat.

muffaletta pinwheel steaks I browned one side then finished it off in the oven.

muffaletta pinwheel steaks


Serve a little salad on the side and you’re good to go!

5.0 from 3 reviews
Muffaletta Pinwheel Steaks
 
Recipe adapted from Rachel Ray
Author:
Ingredients
  • 1 long piece of skirt steak about 1½ lbs. tenderized if possible
  • 3 cloves garlic, chopped
  • 1 tablespoon chopped fresh rosemary
  • 1 cup of parsley leaves
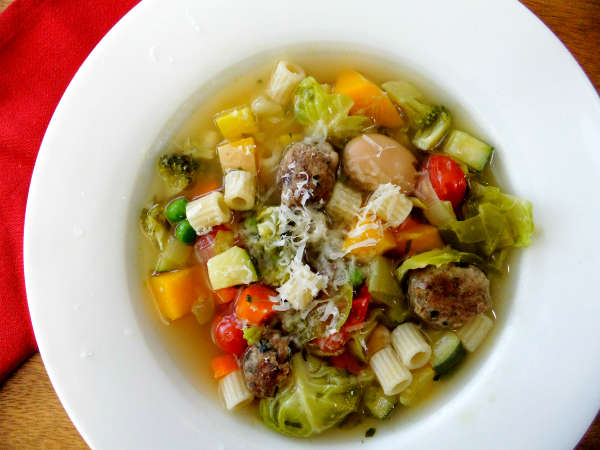
  • ½ cup of shaved parmesan cheese
  • ¼ lb each of prosciutto, hot capicola, mortadella and provolone. (Note) You will have extra leftover
  • olive oil
  • salt and pepper
  • For the olive salad, either purchase a large good quality bottle at an Italian deli or make your own using a 1 cup of pitted olives and 1 cup of giardiniera chopped together in a food processor with added olive oil.
Instructions
  1. Lay a sheet of plastic wrap on your counter, place meat on top, season with salt and pepper.
  2. Drizzle with olive oil, add the chopped garlic, rosemary, parsley and sprinkle olive salad all over top then add the shaved parmesan.
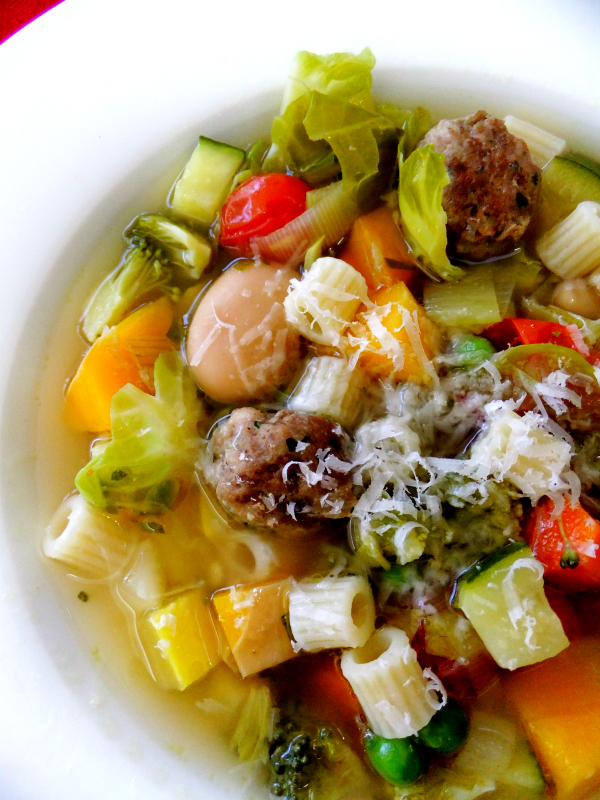
  3. Layer meats and end with the provolone cheese on top.
  4. Roll up tight starting on the short end.
  5. Secure with butchers twine, tie in the middle first then tie on both sides of the center, I got 3 big steaks from my 1½ lbs. of meat.
  6. Then cut slices between the twine.
  7. Brown on 1 side for a few minutes in an ovenproof saute pan then place into a hot 400 degree oven to finish cooking, mine took about 7 or 8 additional minutes.
  8. This would work great on an outdoor grill.


Signature