Butternut Squash Gnocchi with Sage and Brown Butter

squash gnocchi

Thanksgiving isn’t all about the turkey, yes turkey is all well and good, but to me Thanksgiving is all about the sides! One of my favorite sides are these butternut squash gnocchi.

I’ve been serving them for years at my Thanksgiving table. I normally make them a week or two ahead of time and have them tucked in my freezer until turkey day.

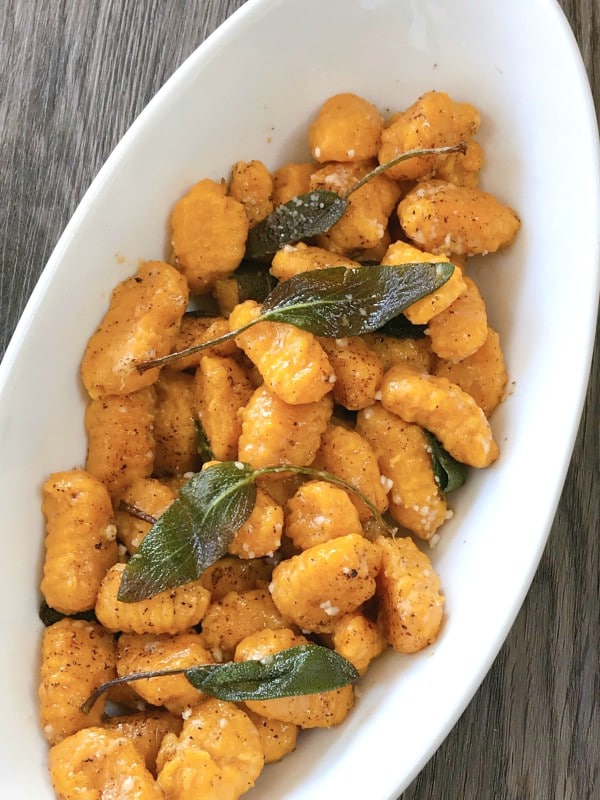
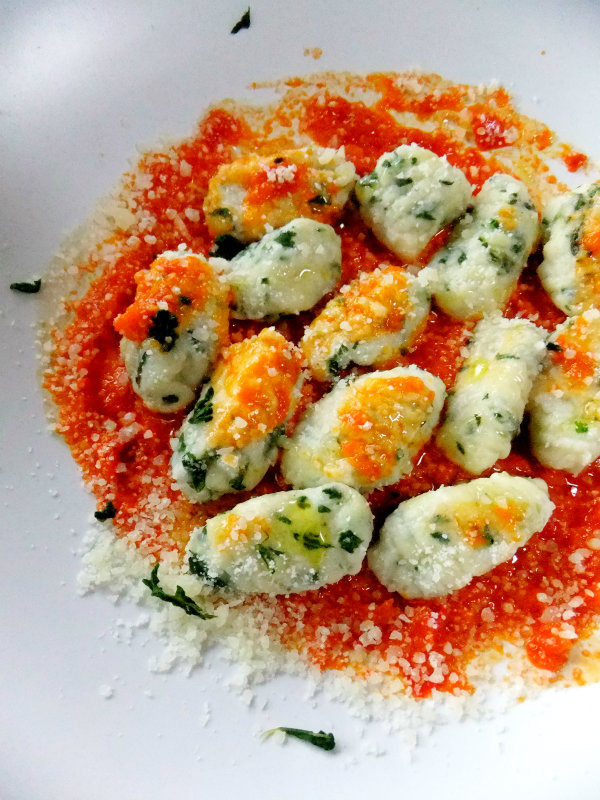
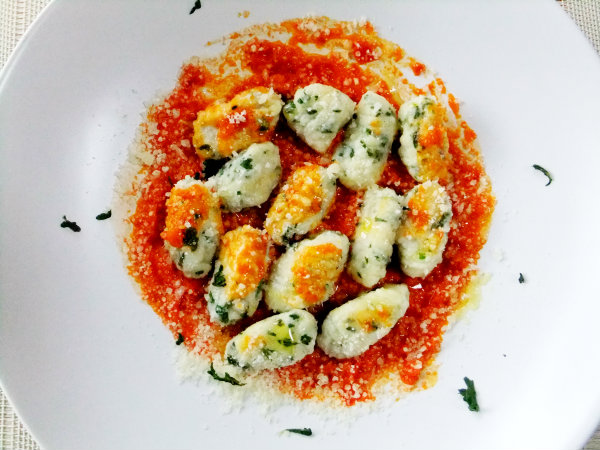
They may be small in size but not in flavor, they’re slightly sweet with the rich flavor of parmesan cheese running through every tender bite.

roasted squash

You start out by roasting your squash, roasting the squash adds to the depth of flavor, when tender and soft cool it down and then scoop out the pulp.

Next you’ll toss it into a food processor until it becomes nice and smooth without any lumps.

forming gnocchi

What I’ve learned over the years is that after processing the squash you’ll see that the squash holds onto some moisture, so a good thing to do is to toss the pureed squash into a sauce pan and cook it down until you see the moisture disappear, maybe five or ten minutes. When you cook some of the moisture out you won’t have to keep adding flour, which in turn could make them too heavy and doughy.

Then you’ll want to make sure to cool the mixture down completely before you start mixing in the flour and other ingredients.

NOTE: I always test my gnocchi before I form all of them. I boil a few just to see if they stay together, this will ensure you that your mixture is sturdy enough and they won’t fall apart and become mushy in the water. Sometimes you might have to add a little more flour. This is a very important step!


making gnocchi

No doubt making gnocchi is a labor of love but I can tell you it’s worth every bit of the time it takes, and remember you can make them ahead at your convenience.

butternut squash gnocchi

There is no ricotta or potato added to these gnocchi, it is straight up butternut squash that’s permeating  throughout these tender bundles.

boiled gnocchi

Gnocchi take very little time to cook, always place them into salted boiling water, as soon as they float up to the top they’re basically done. Never ever pour them into a big strainer, you need to hand scoop them out like shown in thee picture above. Gnocchi are very delicate.

pan of gnocchi

A quick toss into toasty brown butter flavored with frizzled sage, if you want you can add a touch of pasta water to loosen the sauce up a bit.

Brown butter sauce is the perfect compliment to these delicious gnocchi!

Thanksgiving plate

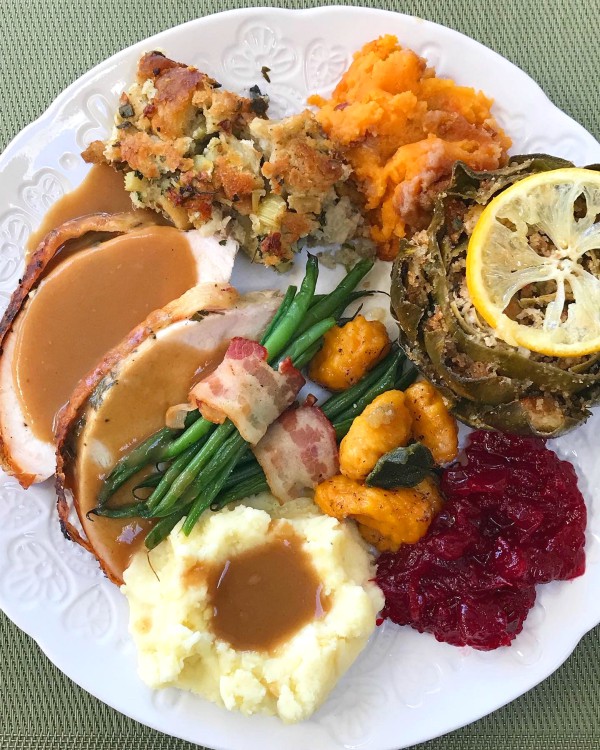
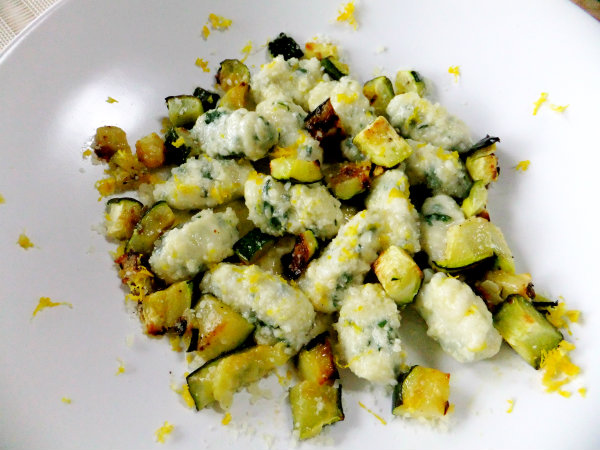
My Thanksgiving plate from years past where’s there’s always room for the butternut squash gnocchi, and I should say that the leftovers are just as good the next day!

5.0 from 1 reviews
Butternut Squash Gnocchi with Parmesan, Sage and Brown Butter
 
Butternut squash with hints of parmesan in every tender bite!
Author:
Ingredients
  • FOR THE GNOCCHI
  • 1 large butternut squash, around 3 lbs. roasted then pureed to yield 2 cups
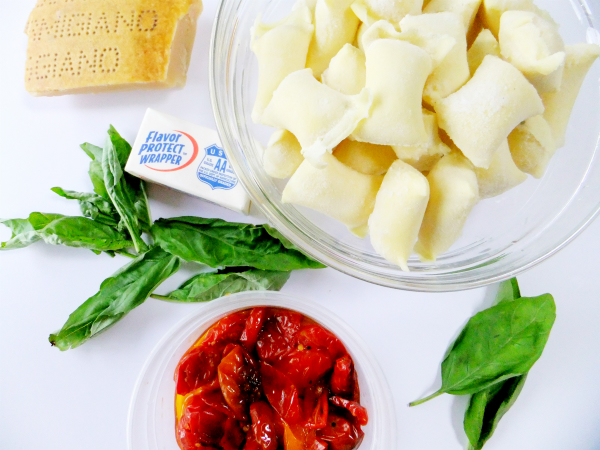
  • 1 heaping ½ cup of grated Parmigiano Reggiano plus extra for garnish
  • 1 large egg, whisked
  • 1 teaspoon, salt
  • pinch of black pepper
  • 2 plus cups of all purpose, unbleached flour
  • FOR THE BROWN BUTTER SAUCE
  • 1 stick of unsalted butter
  • a handful of fresh sage leaves
Instructions
  1. Carefully cut the squash in half lengthwise, scoop out the seeds, drizzle each half with olive oil, salt and pepper and place onto a parchment lined baking sheet, cut side down, at 375 until tender and the tip of a knife goes through easily 40 minutes or so.
  2. Scoop the flesh of the squash out and place it into a food processor, puree until completely smooth with no lumps.
  3. Place pureed squash into a sauce pan on medium heat, stirring often to evaporate any moisture that might be showing up in the mixture.
  4. Next cool down that mixture completely, so place the pan into the fridge until completely cooled .
  5. Now you’re ready to start forming the gnocchi.
  6. In a bowl add the pureed squash with parmesan cheese, salt, pepper and egg.. Then add the flour little by little into the mixture and work together by hand. It will be very sticky, you might need to add more flour, or even less, just judge by the feel of the dough, you have to be able to roll it.
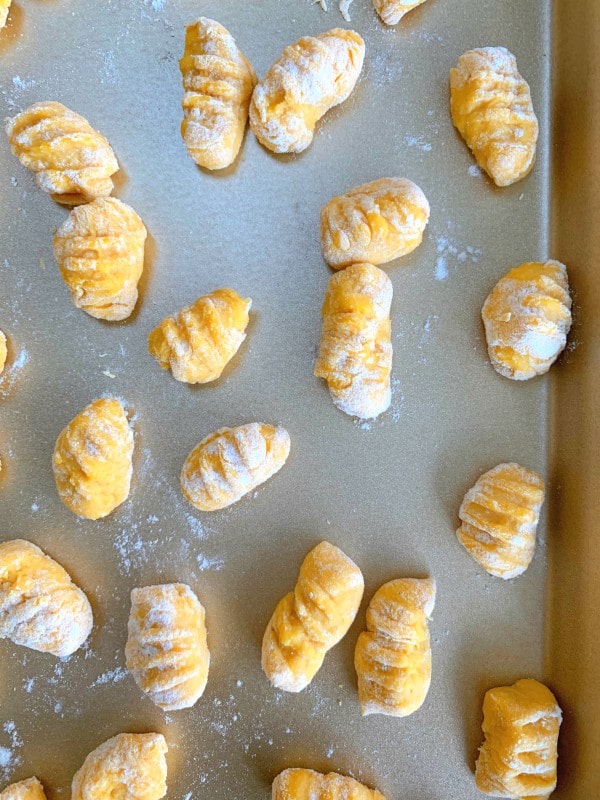
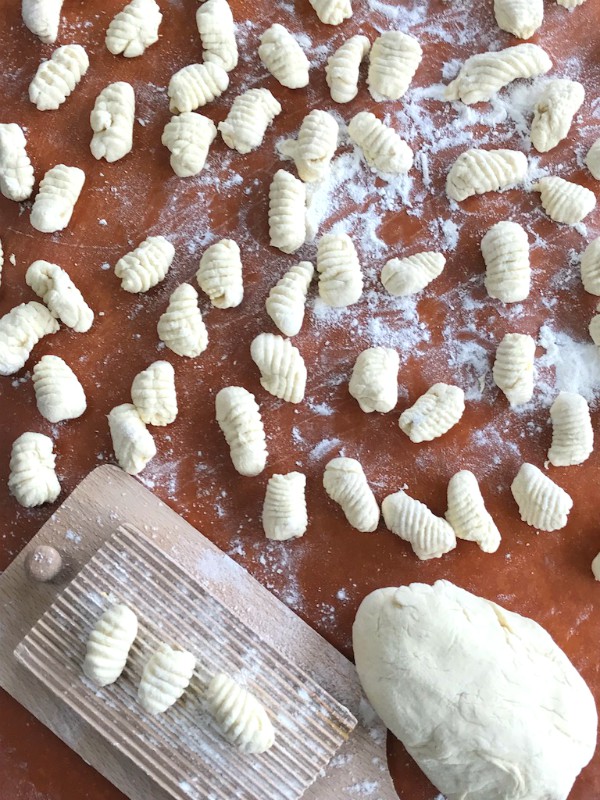
  7. Once smooth, flour the work surface, Divide dough into 6 pieces and then roll each piece into a long strip, about ½ inch wide. Cut the strip into ½ inch pieces.
  8. Using a gnocchi board, a fork, the back of a grater or just as is, to create ridges. Place each piece on floured wax paper and repeat with the rest of the dough.
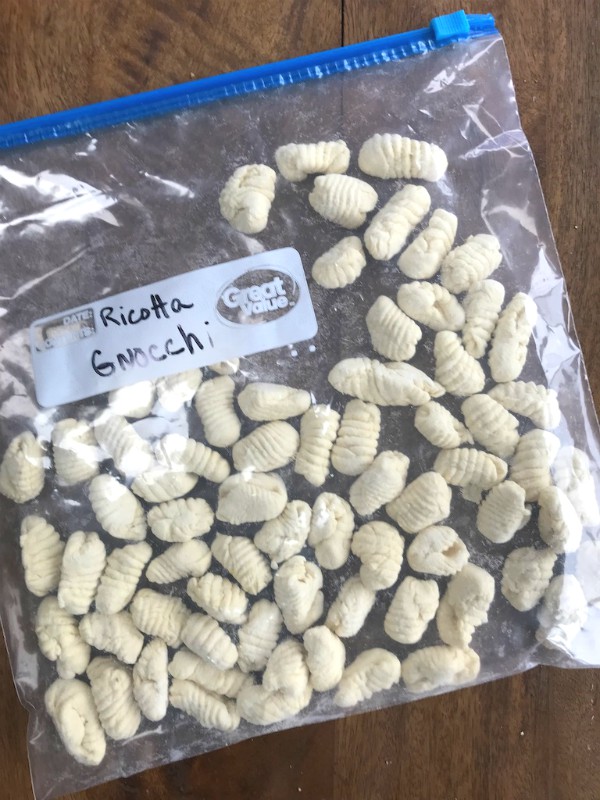
  9. At this point you can freeze them in single layer until solid frozen then place the gnocchi into zip lock bags until ready to use.
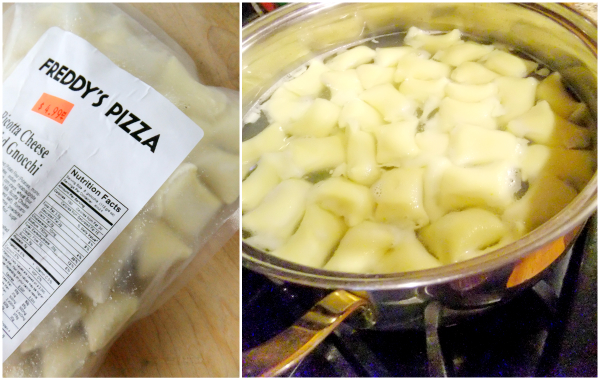
  10. When ready to eat, have a large pot of salted water going, when boiling add the frozen gnocchi, (don't let the water boil so so hard, lower it a bit) when they float up to the top, they’re pretty much done, but you can test one to make sure. Always take them out of the water with a hand strainer like a Chinese spider, never pour them into a big strainer, gnocchi are delicate.
  11. You don't ever want your gnocchi to blow up and over cook, they should have a little bite to them.
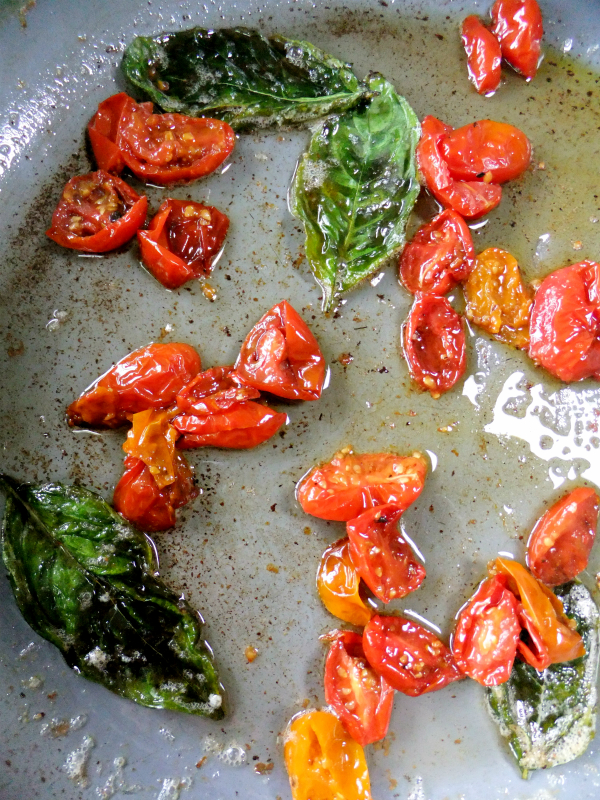
  12. While the gnocchi is in the water cooking make your brown butter sauce by melting the butter over medium heat, when it starts to to smell nutty and turn golden brown toss in your sage leaves and let them fizzle.
  13. Take your gnocchi from the water with a hand strainer, gently and place them into the brown butter sauce, tossing till covered, If you want to loosen the sauce up a bit, add a little pasta water, then add more parmigiano.
  14. They're ready to eat now!


Signature

Pan-Fried Ricotta Gnocchi with Asparagus and Peas

pan-fried ricotta gnocchi

Pan-fried ricotta gnocchi is golden and crispy on the outside and soft and pillowy on the inside. Ricotta creates such a light and dreamy homemade gnocchi, which I much prefer over the potato version.

This recipe is great for spring, it’s light and doesn’t require a heavy sauce of any kind because it’s tossed together with fresh tender asparagus, peas, parmesan cheese, lemon zest and olive oil and it pairs perfectly with the soft and crispy bite of the pan-fried gnocchi. ricotta gnocchi

Some people think that making gnocchi is intimidating, but actually it’s easier than you think, and there’s absolutely no comparison to tasteless store bought, at least the ones I’ve tried.

Making them yourself is totally worth the effort and within no time you’ll get the hang of it, and they don’t have to be so picture perfect, that’s the special quality of making them homemade.


If you buy your ricotta from a good Italian deli like I do you’re usually going to have some liquid in the container when you bring it home, that needs to be drained really well to achieve a good gnocchi dough, in fact I think it is key.


I like to drain my ricotta in a strainer over a bowl that I keep in my fridge overnight, when your ricotta is nice and cold the dough comes together beautifully, if the ricotta is warm or room temperature it tends to be more sticky and you’ll keep adding more flour which in turn makes your gnocchi heavier, and we don’t want heavy gnocchi do we? We want it nice and fluffy.ricotta gnocchi


Whenever I make gnocchi I never serve them on the same day, I actually prefer to freeze them ahead of time and for some reason I think they cook up better from the frozen state, but one very important thing that I do before I freeze them is to boil up a couple just to make sure they don’t come apart, if they do, I’ll add a little more flour to the dough, just a little at a time. Then retest a couple more until they’re perfect, intact little dumplings holding together nicely in a gentle boil.

Gnocchi take only a few minutes to cook, toss them into a rolling gentle boil with salted water, give them one good stir, let them rise to the top and boil for an additional 1-2 minutes, scoop them out with a wide hand strainer. Never pour them directly into a strainer for fear they might break, you must be gentle and handle with care.

For the pan-fried version you scoop them out of the water and immediately toss them into a skillet with a mix of butter and olive oil letting them get slightly crispy golden on each side.

If you’re going through the trouble of making homemade gnocchi you might as well make a double batch like I do, you’ll be glad you did and besides it’s nice to have a stash set aside in your freezer, some for pan-frying and some for boiling and tossing into your favorite sauce.pan-fried ricotta gnocchi

I’m in love with this dish, it’s perfect for springtime, easy enough to make mid week and elegant enough to serve at a dinner party.pan-fried ricotta gnocchi

Pan-fried ricotta gnocchi gives you a little different take on the traditional boiled gnocchi, and the texture of the gnocchi holds up really well to the spring veggies you’re highlighting, but either way you choose to prepare it you can’t go wrong.

Follow me on Instagram where you can see what else I’m cooking up during the week.

5.0 from 2 reviews
Pan-Fried Ricotta Gnocchi with Asparagus and Peas
 
Author:
Ingredients
  • FOR THE RICOTTA GNOCCHI
  • 1½ cup of drained ricotta, nice and cold
  • ½ cup of grated Parmigiano Reggiano or Pecorino Romano
  • 1 beaten egg
  • 1 teaspoon of salt and a few grinds of black pepper
  • 1 cup or so of unbleached all purpose flour
  • VEGETABLE TOSS
  • 1 bunch of tender asparagus, chopped small like pea size but leaving the pretty tips on
  • 1 cup of frozen, defrosted peas
  • zest of 1 lemon
  • 2 finely chopped garlic cloves
  • olive oil for drizzle
  • a knob of butter
  • more Parmigiano for garnish
Instructions
  1. PREPPING THE VEGGIES
  2. In a separate skillet, drizzled with olive oil, toss in your chopped asparagus, garlic and defrosted peas, sauteing until nicely al-dente, then set aside.
  3. FOR THE GNOCCHI
  4. Place ricotta, grated cheese, salt and pepper into a bowl, whisk egg then add in.
  5. If ricotta is lumpy, which it usually is, take a hand mixer on low to break up the lumps and just to incorporate all the ingredients.
  6. Then fold in flour, little by little, you might need less or you might need more, but dough should come together quickly and it will feel slightly sticky.
  7. Lightly flour your finger tips and a board.
  8. Cut off a chunk then roll it into a round snake, then cut off bite size pieces.
  9. Leave as is or make indention's with a gnocchi board or the tines of a fork.
  10. At this point you can freeze them single layer, then once frozen place them into zip lock bags, they stay good for a month.
  11. WHEN READY TO COOK THE FROZEN GNOCCHI
  12. Toss them into salted boiling water, let them float to the top and cook maybe another minute or so, then scoop them out carefully with a hand strainer, like a spider.
  13. For pan-fried, drain them first then crisp them up in an additional skillet with a good drizzle of olive oil and a small knob of butter, turning them until they crisp up golden on each side.
  14. Then incorporate the precooked veggies you had set aside together with the golden crisp gnocchi.
  15. Place them onto a platter adding more grated cheese of course, more olive oil and scatter the lemon zest all around.
  16. Happy Spring!


Signature

Gnocchi with Brown Butter, Basil and Blistered Tomatoes

gnocchi with brown butter, basil and tomato

This is a summertime version of a brown butter sauce, no sage leaves used here, I’ll save that for the fall, instead I’m using fresh basil leaves tossed into hot, nutty tasting browned butter, just until crisp, then blistered cherry tomatoes complete with their juice get stirred in and around to complete the sauce.

It’s a killer combination, so quick and easy to make and the perfect flavor profile to top off your summertime pasta dishes.

frozen ricotta gnocchi

I for one love it with gnocchi, I’m partial to ricotta gnocchi, it’s my favorite, little fluffy pillows of cheese that melt in your mouth!

I normally make my own (just omit the kale if you want them plain in the link I’ve given you)  but once in a while I’ll buy some from my favorite Italian market and keep a few bags handy in the freezer, it makes for a very quick dinner that I can whip up in no time.

This sauce is also amazing spooned over cheese ravioli, if you’re not a gnocchi fan.

gnocchi with brown butter, basil and tomato

Very simple components, the only thing you have to do is roast the cherry tomatoes ahead of time and have them ready to go.

brown butter and basil

The basil leaves get frizzled and the juice of the tomatoes mingle nicely with the browned butter.

brown butter, basil and blistered tomatoesgnocchi brown butter, basil and tomatoes

Top it off with freshly grated Parmigiano Reggiano, I’m serious, every bite is to die for!

Proud Italian Cook is also on Instagram now, you can follow me here.

Gnocchi with Brown Butter, Basil and Blistered Tomatoes
 
The perfect summertime brown butter sauce to spoon over your pasta, using basil and blistered tomatoes!
Author:
Ingredients
  • 12 oz.to 1 lb of cooked ricotta gnocchi, with or without spinach, kale, or swiss chard added to the recipe,or just straight up plain or even cooked ravioli
  • 1 pint of colored cherry tomatoes, sliced in half and pre-roasted plus olive oil
  • ½ stick of unsalted butter
  • a good handful of fresh basil leaves
  • Grated parmesan for finishing
Instructions
  1. Roast the tomatoes beforehand, you can even do it a few days ahead and leave them in the fridge.
  2. Place sliced cherry tomatoes on a foil rimmed sheet pan, drizzle generously with olive oil, sprinkle with salt and pepper and roast at 375 until they blister and juices start to flow.
  3. Remove tomatoes and place into a bowl making sure to save and scrape all juices off the foil.
  4. Get your water boiling for the pasta, gnocchi takes only about 3 minutes, In the meantime start making your sauce.
  5. In a large skillet on top of stove heat butter on medium high until golden and starts to foam, toss in the basil leaves, let them frizzle for a second or two then stir in tomatoes and shut off the heat.
  6. Get your pasta into the pot, when gnocchi rise to the top gently scoop them out with a hand strainer and place them carefully into the skillet, spoon and make sure the sauce is all over them.
  7. Finish with the grated Parmigiano Reggiano.


Signature

Gnocchi with Swiss Chard and Ricotta

swiss chard and ricotta gnocchi As soon as there’s a chill in the air I have the urge to make gnocchi, I don’t know why, but I  just do. So on a cool, dark, dreary Sunday I whipped up a batch.

I’m partial to ricotta based gnocchi instead of the potato ones, they’re light as a cloud and melt in your mouth plus you can get a batch together in no time at all.

making Swiss chard gnocchi This time I wanted to add some Swiss chard to mine, I still have a ton growing in my garden and since I’ve done kale gnocchi before I’d thought I’d try it with chard.

You don’t need a bunch of chard because a little goes along way. Rinse it really good then blanch it for a few minutes, the key thing to remember is make sure you squeeze out all that excess water because you don’t want super wet greens added into your dough.  I use my potato ricer for squeezing, it works wonders!

making gnocchi Making gnocchi isn’t difficult, it’s all about how that dough feels, you don’t want a sticky dough, it can be slightly tacky but that’s about it. Make sure to drain your ricotta, some deli ricotta can be very wet so you’ll want to make sure to drain it really good, otherwise you’ll be adding too much flour and your gnocchi will tastes like lead!

Add your flour a little at a time, you might need more or less than the recipe calls for, you’ll know by the feel of it.

swiss chard gnocchi A simple marinara always goes well with gnocchi but this time I added a little roasted red pepper puree into mine, ( roast a couple of red peppers then puree them with a little olive oil in a food processor) and we loved it even more, it was a match made in pillowy cloud heaven!

swiss chard gnocchi I also tossed some into a warm garlic butter sauce using just two tablespoons of butter, one small chopped garlic clove and the juice and zest of one lemon, I added diced and roasted zucchini along with freshly grated parmesan cheese, delish!

The main thing to remember is that the sauce is just a compliment, the gnocchi is always the star of the show!

My Ricotta Gnocchi recipe can be found HERE, just replace the kale with Swiss chard.

Signature