
Since it’s the holiday season with Christmas around the corner and New Years right behind I decided to make a seafood risotto with lobster, scallops and shrimp, why not, it’s the holidays and besides, this would be perfect for any special occasion.

So I took out my special risotto pot which I got as a gift, it’s made of heavy stainless with a wide bottom, but of course any heavy bottom pot will do. I love making my risotto in it.

I got all my ingredients all together, I decided to use Prosecco instead of white wine I thought it would pair well with the seafood and give it an extra special touch. I wasn’t sure if I was going to use parmesan cheese or not, I normally do in all my risotto’s but after it was done and I tasted it I felt there was no need for it at all so it’s your call on whether or not you want to use some.
Also for the first time in my life I broke down a whole cooked lobster strictly because I wanted those claws for garnish on my risotto, when in doubt watch a YouTube, I did and it was easy to figure out after seeing it, I basically just used the tail and claws.

First I got my stock going in a separate pan, I bought some seafood stock and enhanced it with the peeled shrimp shells, after it simmered for a while I strained it real good and I was ready to begin making the risotto.
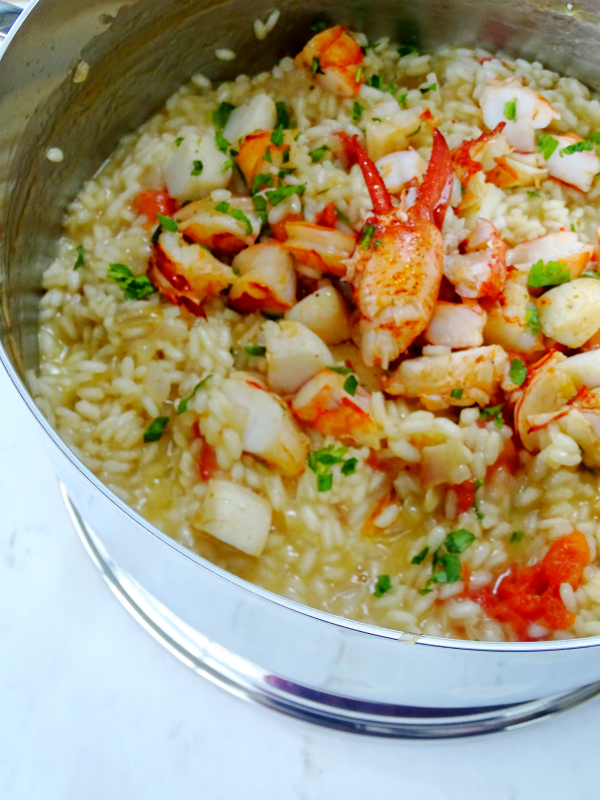
When all the stock was absorbed I just folded in my chopped seafood and dinner was good to go!

This was by far one of the best risotto’s I have ever made, creamy and perfectly cooked and very impressive!

- Serves 2
- 1 pre-cooked whole lobster using the claws and tail
- 8 shrimp, peeled and deveined
- 6 large scallops
- all seafood should be pre-cooked and diced into chunks
- 1½ quart of seafood stock, either store bought or make your own by simmering water with shrimp and lobster shells, onions, celery, peppercorns and a little thyme, then straining twice.
- 1 cup arborio rice
- 2 large shallots
- ¾ cup of Prosecco or white wine
- 1 cup of canned or fresh diced tomatoes, drained of wet liquid
- parsley
- olive oil and butter
- Cook the shrimp and scallops on a foil lined sheet pan, drizzle seafood with some garlic infused olive oil and a small handful of chopped parsley, roast at 425 degrees until pink and translucent, maybe 10 minutes, let it rest.
- Break down your whole lobster tail, removing the shell from the claws so they stay in tact, remove the shell from the tail and cut into chunks, place all the lobster meat into the juices of the cooked shrimp and scallops on the sheet pan.
- Place a knob of butter and a good drizzle of olive oil into the bottom of the risotto pot.
- Add shallots and cook until they soften.
- Add rice, stirring until coated and hot.
- Deglaze with the Prosecco or white wine.
- When liquid is absorbed then start adding your simmering warm seafood stock, one ladle at a time, stirring until it gets absorbed, then add another ladle full.
- Keep flame on medium heat and continue adding warm stock and stirring until absorbed and rice reaches a tender and slightly al dente bite, you'll know when it's ready.
- Turn off heat, add another knob of butter, a little olive oil, the drained chopped tomatoes and parsley, then stir to incorporate and finally add in your chopped seafood.
- Put the lid on and let it rest for 1 minute.
- When plating top each plate with one claw, garnish with more parsley


 I’m Marie, a wife, mother, mother-in-law, and gramma of two beautiful girls. My passion is food, clear and simple but especially Italian food, hence the name of my blog, Proud Italian Cook. I want you to feel right at home here so grab a cup of coffee, I’ll get the pastries, take a look around and enjoy your visit! {


