Sorbetto di Limone Dressed Up in a Frozen Lemon Shell

sorbetto di limone

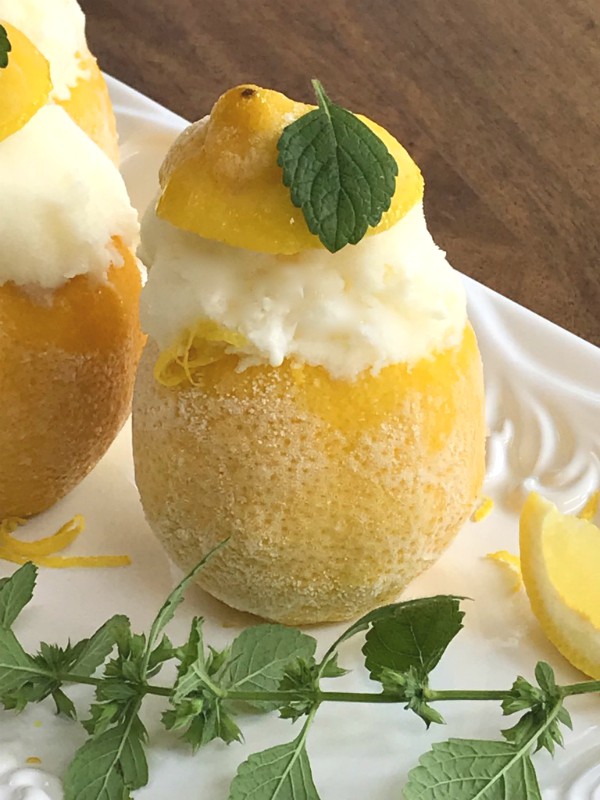
Sorbetto di Limone, or lemon sorbet is one of the most refreshing desserts to serve on a hot summer day.

This version is so easy to prepare because no ice cream maker is required, just purchase a quality, store bought lemon sorbet and whirl it up in a food processor together with dreamy mascarpone cheese.

The mascarpone gives the sorbet a wonderful creamy texture that goes so well with the sweet and tart lemon flavor of the sorbet.

What makes this version a little extra special is that it’s presented and served in a frozen lemon shell, yes, it’s a little more prep but so worth it for it’s impressive presentation.

I’ve posted before about this lovely marriage of the lemon sorbetto and the mascarpone cheese before but it’s my first time presenting it in a frozen lemon shell.

lemon shells

Let me first say that all this prep, every step for this recipe can be done days ahead and I recommend you doing that. You’ll want to give yourself at least three days ahead of time, but with that being said it’s prepared and ready to go on the day you’ll be serving it, just grab it right out of the freezer.

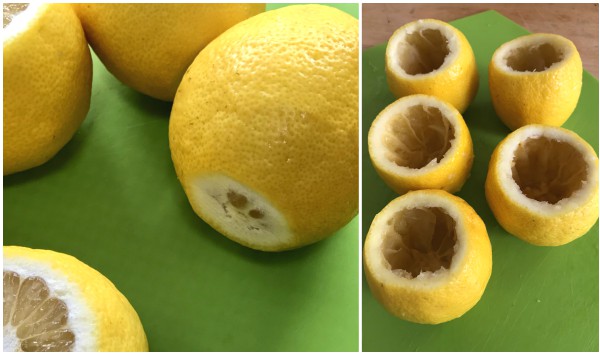
To prep the lemon shell look for larger sized lemons, if they’re too small you’re not going to have enough room to stuff it and believe me you’ll want all that goodness inside.  Cut the tip off the top of the lemon where the point is and set that aside.
lemon shells

Make a tiny slice off the bottom of the lemon because you want them to sit flat, being careful not to cut the bottom completely off. Next take a small pairing knife and cut around the flesh and scoop it out as best you can with a spoon or a grapefruit spoon, ( you can strain the juice and pulp and save it for later use) then take a lemon reamer and ream it out so the insides are nice and smooth.

Now you want to freeze the lemon shells along with all the tops that you cut off. Place them into a container single layer, cover and freeze hard.
 

lemon sorbetto

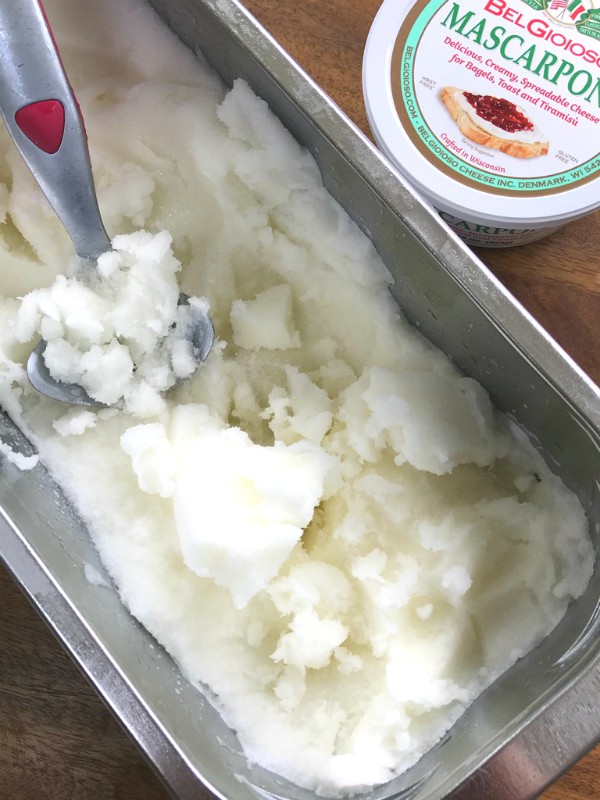
Let the sorbet and the mascarpone sit out on the counter for a while before you start the blending together, then the mix will go into a food processor.

lemon sorbetto with mascarpone

After the mascarpone and the lemon sorbetto have been blended together nicely without any lumps, feel free to add some lemon zest for more flavor, the mixture will be on the melted side so it has to go back into the freezer to get nice and frozen again, at least overnight.

sorbetto di limone

An elegant dessert that’s simple, light and so refreshing!

sorbetto di limonesorbetto di limone

Present this either on individual pretty plates or fancy martini glasses for an extra “WOW” from your guests.

Follow me on Instagram to see what else I’m cooking up during the week.

5.0 from 2 reviews
Sorbetto di Limone Dressed Up in a Frozen Lemon Shell
 
Can be, and should be made days before serving it.
Author:
Ingredients
  • 1 pint lemon sorbetto/sorbet
  • 6oz. mascarpone cheese
  • lemon zest
  • large lemons, cleaned and scrubbed
  • mint leaves for garnish
  • NOTE;
  • This recipe can be doubled, tripled or what ever according to how many lemons you have and how deep your shells are. I always make extra because its nice to have it in the freezer.
Instructions
  1. PREPARING THE LEMON SHELLS
  2. Cut a third off the top of each lemon where the point is, save the tops.
  3. Slice a shallow cut on the bottom so it can sit up straight and flat being careful not to cut through to the inside.
  4. Hollow out each lemon with a pairing knife then scoop out with a spoon then use a lemon reamer to smooth it out inside, reserve pulp and juice for something else.
  5. Put them single layer into an airtight container and into the freezer they go until nice and hard along with the tops. ( Remember, this can be done days ahead)
  6. PREPARING THE SORBET MIX;
  7. Take your sorbet out of the freezer and set it on the counter so it can defrost and soften a little.
  8. The mascarpone can be close to room temp for easy no lump blending.
  9. In a food processor place the sorbet and the mascarpone, give it a whirl until it's nice and smooth.
  10. Place back into a container, add the zest and freeze it until hard again, overnight or longer is good.
  11. FILLING THE SHELLS
  12. When both things are nice and frozen just fill the shells with the sorbet mix and place the tops back on, at this point you can put them back into the freezer in a covered container until ready to serve.
  13. Serve them on pretty individual plates or martini glasses, garnish with one mint leaf on top.

 

Signature

Summer Stone Fruit Clafoutis

stone fruit clafouti

Clafoutis is a rustic French dessert and it’s the perfect way to showcase seasonal stone fruits. This is the time of year when peaches, plums, nectarines, apricots and cherries are in abundance and peak condition. I can’t think of a better way to feature those summer stone fruits.

This delicious dessert comes together quickly, tossing all the ingredients into one bowl then mixing or blending the batter together until nice and smooth. The end result when baked will be a light, rich and custardy texture.

stone fruit

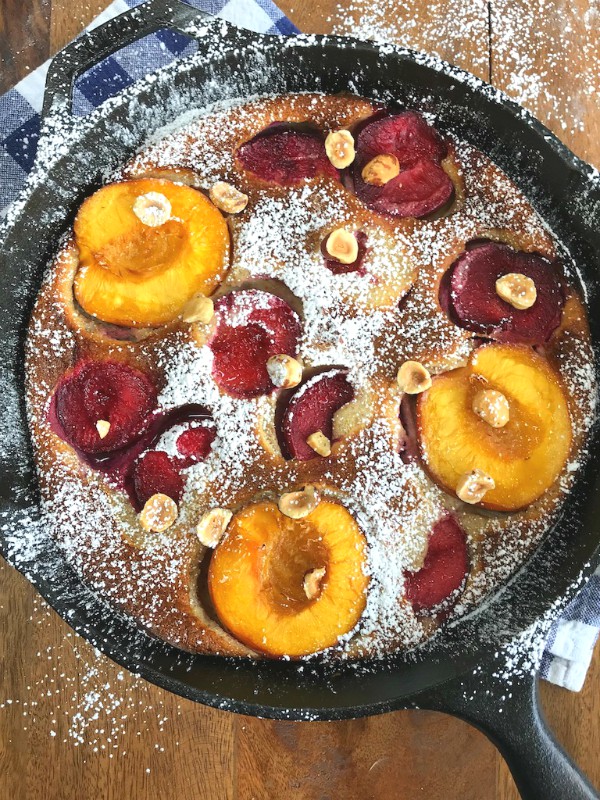
I used plums and nectarines in mine but feel free to use any combo of stone fruit that you like, just cut the fruit in half and remove the pits.

stone fruit clafouti

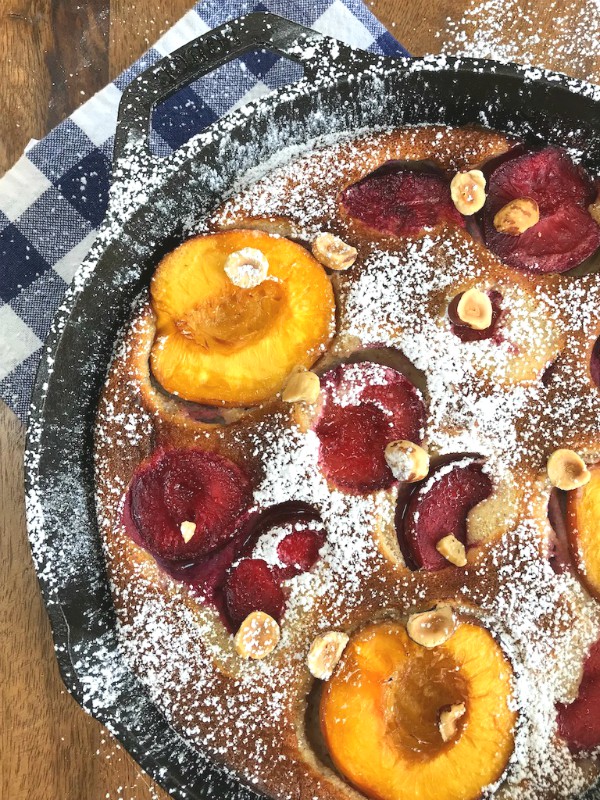
I personally like leaving the halves in tact, I like the way it looks visually but slicing the fruit and arranging them in the batter is pretty as well, I also like using a cast iron pan because of the heat retention and when it bakes you get nice crusty brown edges.


stone fruit clafouti

When it comes out of the oven it will look puffy but let it rest because it needs to deflate and settle down all around the fruit, you can serve it warm or cooled down completely, then pretty it up with some powdered sugar and toss on some nuts!

stone fruit clafouti

You can slice it or scoop it out of the pan, you can eat it as is or you can top it with whipped cream, ice cream or a dollop of mascarpone like I did.

stone fruit clafouti

Don’t be intimidated, this is one of the easiest desserts to make, you can be creative with whatever stone fruit you decide to use and forming it into your own rustic look.

Summer Stone Fruit Clafoutis
 
Author:
Ingredients
  • 10" cast iron skillet or casserole dish
  • 1 tablespoon butter
  • fresh stone fruit, pitted, halved or sliced, a mix of your favorites such as nectarines, cherries, plums, apricots or all of the same kind, enough to fit into the bottom of a 10 inch skillet, maybe a pound or a little less depending what kind of fruit you use.
  • 1 cup heavy cream
  • 3 large eggs
  • ½ cup all purpose flour
  • ½ cup sugar
  • 1 teaspoon, vanilla
  • ½ teaspoon almond extract
  • 1 teaspoon, salt
  • powdered sugar for sprinkling
  • nuts for garnish, hazelnuts or slivered almonds
Instructions
  1. Heat the oven to 400F
  2. Butter the skillet sides and bottom.
  3. In a blender or bowl add the cream, eggs, sugar, vanilla, extract and salt and flour then wizz it until it's nice and smooth.
  4. I prefer mixing the batter in a blender because it comes out nice and smooth, but a hand mixer will work as well, just make sure there are no lumps.
  5. Gently pour the batter into the buttered skillet then gently place your stone fruit all around.
  6. Put it into the oven for 10 minutes at 400F then reduce the temperature to 375F until it's deep golden on the edges.
  7. Oven's vary so keep checking but mine took about 45 minutes.
  8. Remove it from the oven and let it sit for a good 15 to 30 minutes, it will deflate and settle around the fruit.
  9. sprinkle with the powdered sugar and toss your nuts around.
  10. Scoop or cut a slice and serve as is or with ice cream, whipped cream or mascarpone.


Signature

Zucchini Ribbon Rolls with Tapenade, Spinach and Parmesan Cheese

zucchini ribbon rolls

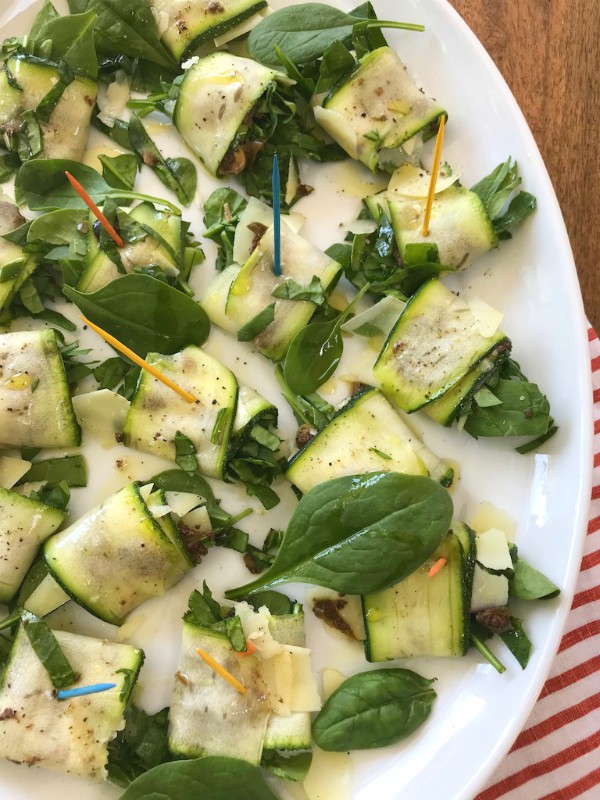
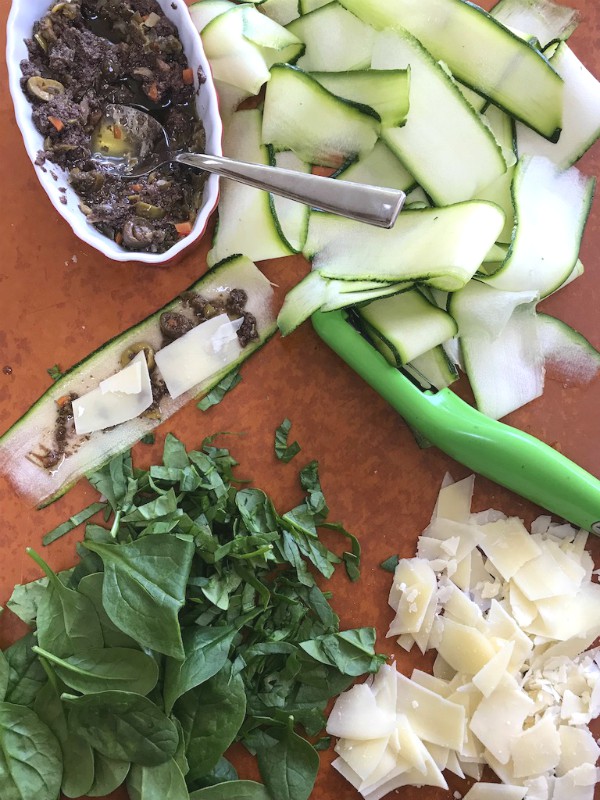
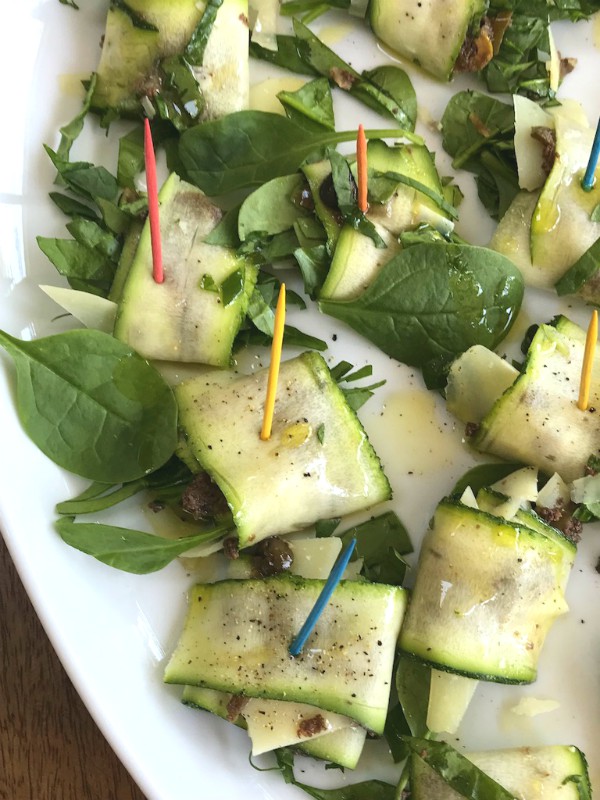
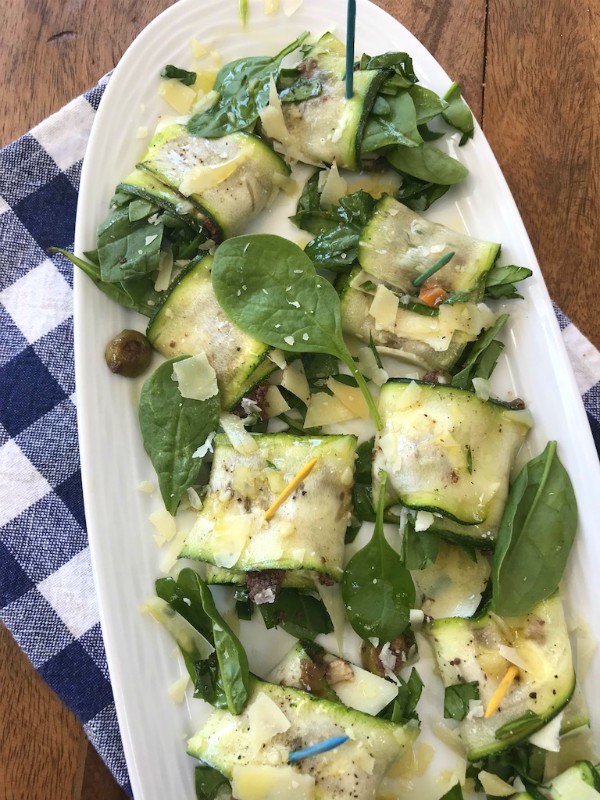
Zucchini ribbon rolls are such a wonderful summer appetizer, snack or side dish to make when zucchini is in abundance. Delicate ribbons of zucchini smeared with olive tapenade, shaved parmesan and shredded spinach. It’s a combination that packs a punch in flavor, yet it’s so fresh and light.

I actually saw this recipe in a Sunset magazine that I was reading on a plane coming home from vacation and I couldn’t wait to make it.

zucchini ribbon rolls

It’s super easy to make, no cooking involved just create your ribbons of raw zucchini by using either a mandoline or a veggie peeler as I did. Purchase a good quality jar of olive tapenade, shave up a pile of parmesan cheese and shred some raw baby spinach.

zucchini ribbon rolls

I’ve made these twice already and each time they quickly disappeared off of the platter, they’re just perfect for your next summer party. You can prep everything ahead but I actually like the way they taste after sitting for an hour, the zucchini softens slightly and all the flavors really mingle together.

zucchini ribbon rolls

Drizzle the top with the best olive oil you have so it can seep into these delicious little rolls to enrich the flavor even more.

For another version you might want to smear the zucchini ribbons with your favorite pesto, think basil, arugula, spinach or even sun-dried tomato to name a few, but the possibilities are really endless!

zucchini ribbon rolls

Enjoy these while the bounty of zucchini is upon us!

Follow me on Instagram to see what else I’m cooking up during the week.

Zucchini Ribbon Rolls with Tapenade, Spinach and Parmesan Cheese
 
Recipe adapted from Sunset Magazine July 2018
Author:
Ingredients
  • zucchini, ends trimmed and made into ribbons with either a mandoline or veggie peeler
  • parmesan cheese, shaved
  • baby spinach leaves, cut into thin ribbons
  • store -bought tapenade
  • olive oil
  • black pepper
Instructions
  1. Lay the ribbons on a flat surface, then smear each ribbon with tapenade.
  2. Place the parmesan shavings on the top.
  3. Put a generous pinch of the shredded spinach at the end of each slice.
  4. Roll up starting from the spinach end and close with toothpicks if you like.
  5. Place them on a platter, drizzle with olive oil, sprinkle with black pepper and scatter more cheese around.
  6. NOTE:
  7. Find zucchini that are wide enough so that when you make the ribbons you'll have some good surface to spread your ingredients on, so small ones wouldn't work. Also when making your ribbons, when you reach the seeds, turn the zucchini and keep peeling, do not use the seeded part for your ribbons.


Signature