Blackened Shrimp with Citrus Salad

blackened shrimp with citrus salad

We’re still in the doldrums of winter here in the midwest and I feel like I’ve had my fair share of comfort foods already, and lately I haven’t been inspired to keep on making them. Even though spring is still a good month away, I’m ready for something lighter and brighter!

In comes this salad of blackened shrimp with citrus, it’s hearty enough, light enough and it’s enhanced by all the bright winter citrus that’s still available, it’s a wonderful combination of sweet and heat.
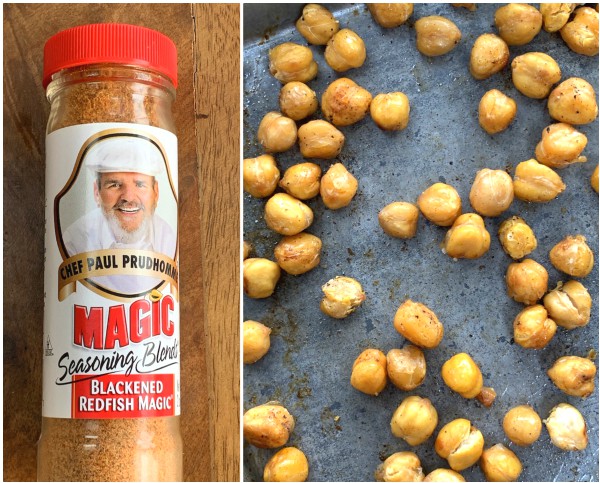
roasted chickpeas

I took the easy route and bought a good blackened seasoning for my shrimp which I tossed with olive oil and pan seared.

For added creaminess and crunch I roasted a can of chickpeas to toss in with the salad.

citrus

Segments and slices of winter citrus are tossed in throughout the salad as well as some of the slices for garnish. I chose cara cara and blood oranges for mine.
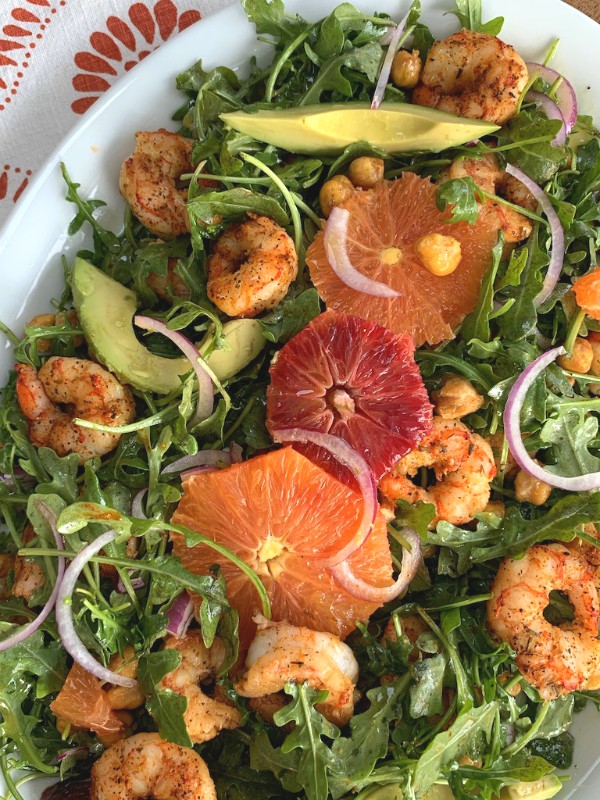
blackened shrimp with citrus salad

Creamy avocado, red onion and arugula for the greens all balance out perfectly with the spicy blackened shrimp, sweet and juicy citrus and the roasted, crunchy chickpeas.

blackened shrimp with citrus salad

A simple citrus vinaigrette to drizzle all over makes for the perfect dressing for this blackened shrimp with citrus salad, I hope you give it a try it’s a nice little break from all that winter comfort food.

Follow Proud Italian Cook on Instagram to see what else I’m cooking up during the week.

Blackened Shrimp with Citrus Salad
 
Author:
Ingredients
  • 1 lb. shrimp, cleaned and de-veined and patted dry
  • winter citrus, I used cara, cara and blood orange, triangle segments from slices and some slices whole, maybe 3 depending on how big they are
  • blackened seasoning (storebought is fine)
  • 5 oz. box of arugula
  • 1 can of chick peas, rinsed, drained then set on a paper towel to dry off
  • 1 avocado, sliced
  • ½ red onion, cut in half moons
  • some spices for roasting chickpeas
  • CITRUS DRESSING:
  • 1 part orange juice
  • 1 part white balsamic
  • 3 parts olive oil
  • 1 dollop djon mustard
  • 1 small garlic clove, grated on microplane
  • salt and pepper
  • Shake in a jar until incorporated, add more or less to your liking, ( you'll have more than enough, leftover dressing keeps well in the fridge)
Instructions
  1. Roast your drained and dried chickpeas in a 400 degree oven tossed with olive oil, granulated garlic, salt and pepper and a touch of paprika until crispy, set aside. ( You probably will not use the whole can, more likely just half)
  2. For the shrimp grab a zip bag, place the shrimp inside with your blackened seasoning and olive oil to coat, adjust seasoning to your taste.
  3. Heat up a skillet nice and hot then sear your shrimp on both sides until pink, remove and set aside.
  4. In a big bowl add the arugula, sliced avocado, red onion half moons and some of the citrus segments plus a handful of roasted chickpeas.
  5. Toss gently with dressing until well coated.
  6. Place salad onto a large platter and distribute the blackened shrimp all around, adding more citrus and chickpeas all over.
  7. Garnish the top with a few slices of citrus and spoon more if the dressing all around.
  8. Eat immediately


Signature

Strawberry Tiramisu (without raw eggs)

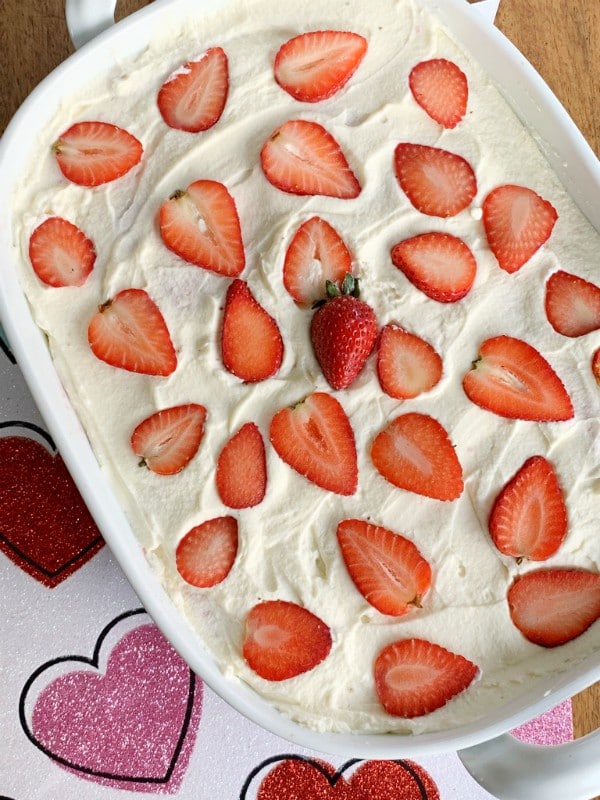
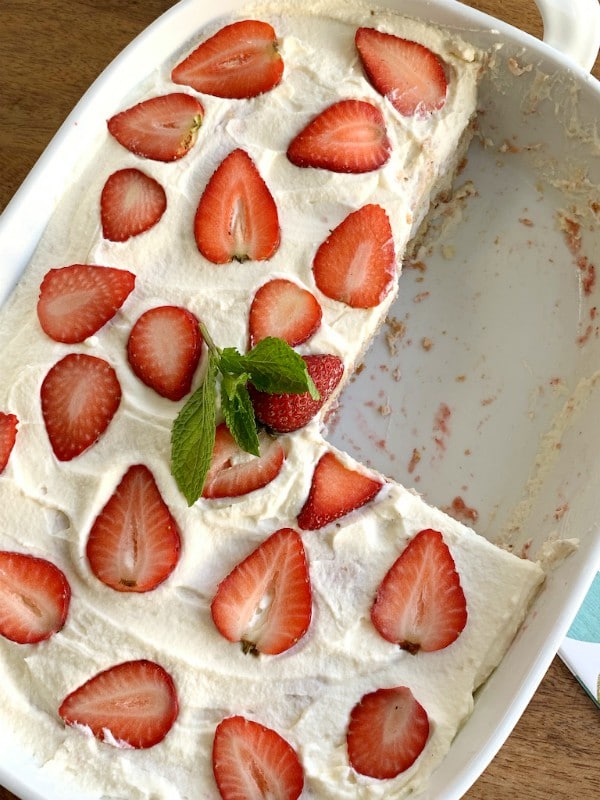
strawberry tiramisu

Strawberry Tiramisu is a twist on the famous classic dessert which contains raw eggs and coffee, this one has neither. It’s a variation where strawberries, creamy mascarpone and whipped cream reign supreme and it’s absolutely delicious!

This dessert is perfect for Valentines Day which is right around the corner, a romantic date night with your special someone, or it can be doubled up and made for your next party.

It’s an easy to assemble, no-bake dessert which can and should be made the day before so all the flavors can meld together in pure harmony.


strawberry tiramisu ingredients

Seek out the freshest and juiciest strawberries you can find, I always buy extra just in case I don’t like the way some look after I bring them home, ripeness is key to the over all flavor in this strawberry tiramisu.

You’ll also need some heavy whipping cream, magical mascarpone cheese and Savoiardi lady fingers which are the crunchy kind not the soft ones.

strawberry tiramisu

For best results stick with an 8×8 or 9×9 inch serving dish or something similar so you’ll have enough ingredients to make 2 layers, of course if you want to double the recipe go with a larger vessel.

strawberry tiramisu

The first layer is the lady fingers that have been soaked in strawberry juice, not quickly dipped but soaked well enough before they fall apart, this will give you the moisture that is needed for the cake.

Next you’ll spread the cream mixture all over the lady fingers and on top of that sliced strawberries scattered all over the top, then you’ll repeat everything one more time.


strawberry tiramisu

As I said before this dessert tastes best made the day before which makes it easy on the host because dessert will be done in advance, all you have to do is pull it out of the fridge and put the coffee on.

strawberry tiramisustrawberry tiramisu

Feel free to add in some liqueur like Kirsch, Framboise to your pureed strawberry juice for an adult version, I had some raspberry liqueur that I used in mine, but if you’re making it kid friendly it’s just as good without.

I hope you make this easy and luxurious dessert for your next party or date night in.

Follow me on Instagram to see what else I’m cooking up during the week!

5.0 from 2 reviews
Strawberry Tiramisu (without raw eggs)
 
Author:
Ingredients
  • 3lbs. fresh, ripe strawberries ( you're going to have extra for sure) 2 full cups will be chopped and pureed in a food processor, some will be sliced for layers and a few whole for optional decorating of the top
  • Savoiardi lady fingers, the crunchy kind, 24 in a package, you'll probably only use one pack but again I always buy an extra package just in case
  • 2 cups heavy cream
  • 8 oz. mascarpone cream, room temperature
  • ¼ cup to ½ cup powdered sugar
  • 1 or 2 tablespoons of granulated sugar (optional)
  • 1 teaspoon vanilla
  • 2 tablespoons liqueur like raspberry, Kirsch or Framboise (optional)
  • ½ cup water
  • mint leaves for optional garnish
Instructions
  1. You'll need a 9x9 inch serving dish or something similar and it should be deep enough to hold two layers. Optional bowl might be a smaller trifle dish.
  2. TO MAKE STRAWBERRY JUICE FOR DIPPING LADY FINGERS
  3. Place 2 full cups of chopped strawberries into a food processor with ½ cup of water and puree until nice and smooth, taste and see if you think it's sweet enough, if not add a tablespoon or 2 of granulated sugar, at this time you can add in the option of a liqueur if you want, taste again adding the amount to your liking. Pour dipping mixture into a small deep dish wide enough so lady fingers can fit while soaking.
  4. TO MAKE THE CREAM MIXTURE
  5. In a bowl add the 8 oz. of mascarpone cheese and with a hand mixer beat until it smooths out.
  6. In same bowl add the 2 cups of heavy cream, the vanilla and the ¼ cup of powdered sugar, blend and beat until it thickens up like a firm whipped cream.
  7. SLICED STRAWBERRIES
  8. Thinly slice up enough strawberries to top the cream mixture on each layer all around
  9. READY FOR ASSEMBLY
  10. One by one soak lady fingers in the strawberry puree, turning and coating each side thoroughly not just a quick dip.
  11. Place single layer on the whole bottom of your serving dish.
  12. Now spread about half of the cream mixture on top of the strawberry soaked ladyfingers making sure all is covered.
  13. Place the thinly sliced strawberries all around the cream mixture.
  14. Repeat next layer with the soaked lady fingers followed by the cream mixture spread all over and then with the sliced strawberries scattered all around.
  15. You can be creative how you want to decorate the top maybe even using some whole strawberries.
  16. Wrap serving dish in plastic wrap and stick it in the fridge overnight for optimal results.
  17. Cut squares or scoop out when ready to serve.
  18. Enjoy!


Signature

French Bread Pizzas Kicked-Up a Notch!

french bread pizza

When was the last time you had a french bread pizza? Back in the day they were pretty popular, some of you might remember the frozen ones you could buy and heat up for a quick dinner, they still sell them but they’re pretty basic with lots of unknown ingredients.

It’s so easy to make your own, grab a nice baguette, get creative and customize it with whatever toppings you want, add some sauce and cheese and you’re good to go!

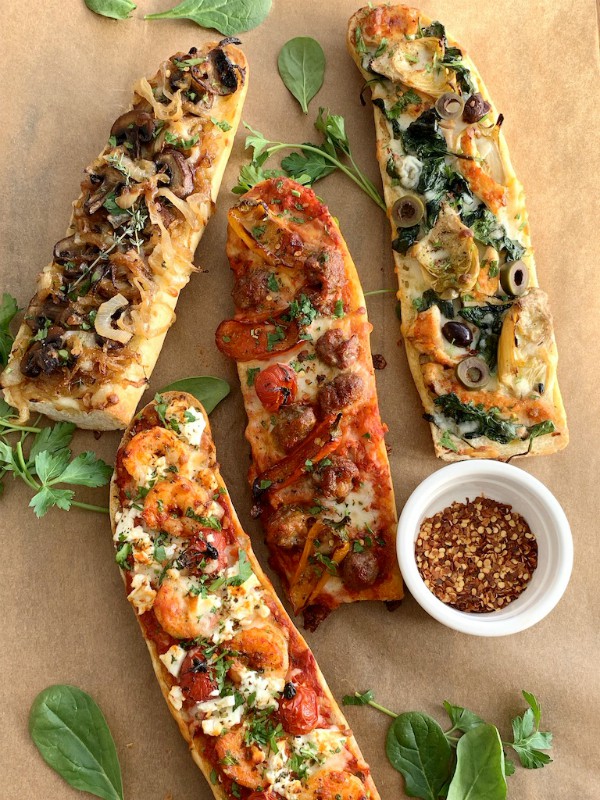
Times have changed and now it’s fun to go a little gourmet with your french bread pizzas. Here’s a few ideas that might give you some inspiration and maybe something you might want to serve up at your upcoming Super Bowl party this weekend.

french bread pizza

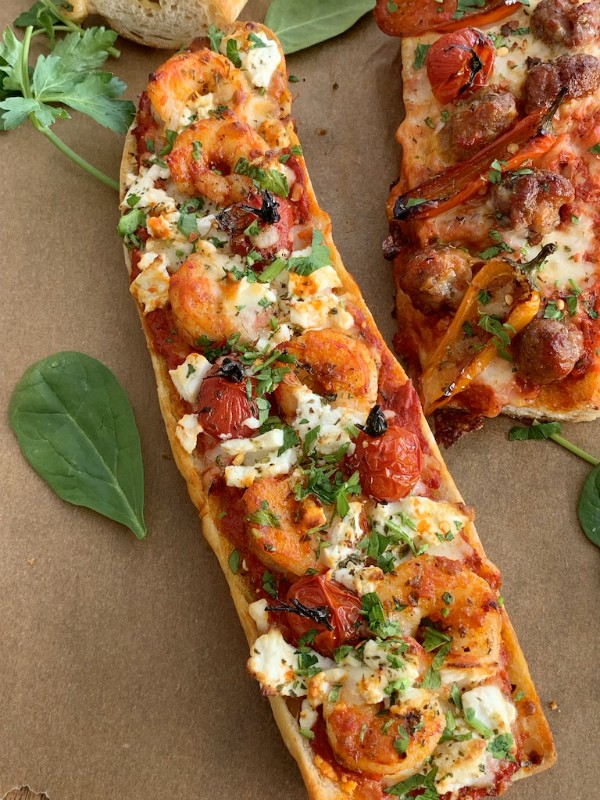
You’ll want to have all your toppings prepped and ready to go, you can even use leftover veggies and protein you might have in the fridge. Here I swiped my bread with a red pepper sauce then added some roasted shrimp, roasted tomatoes, feta, a little shredded mozzarella, oregano and parsley.

french bread pizza

The crispy crust makes every bite super scrumptious!

french bread pizza

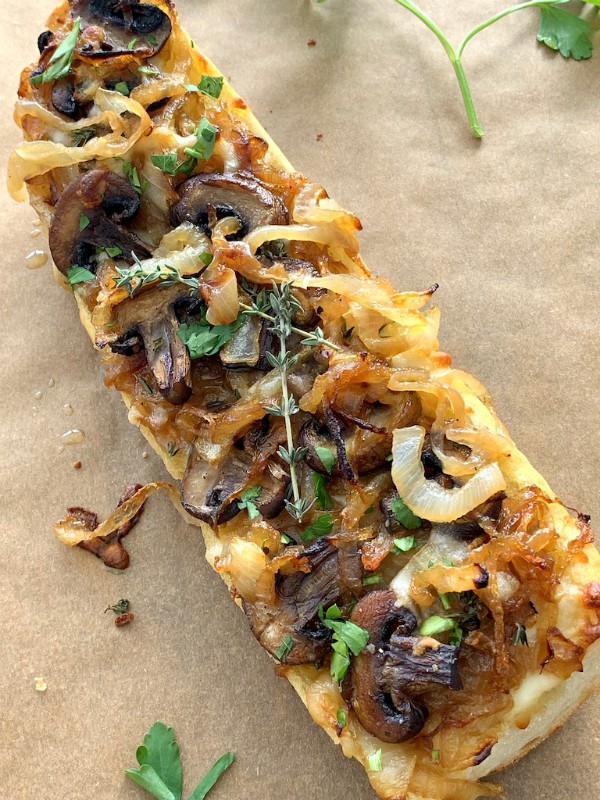
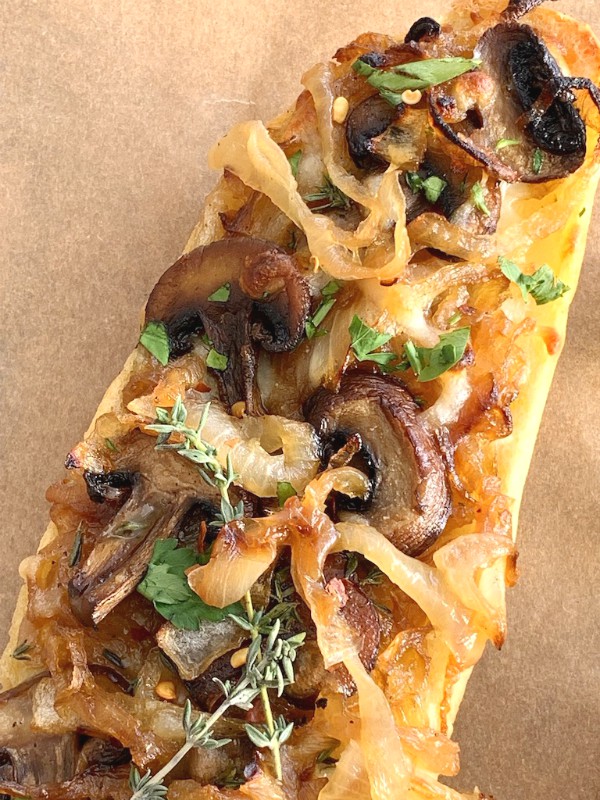
For another version I placed shredded mozzarella on top of the bread, added caramelized onions, roasted mushrooms, parsley and thyme.

french bread pizza

One of my favorites!

french bread pizza

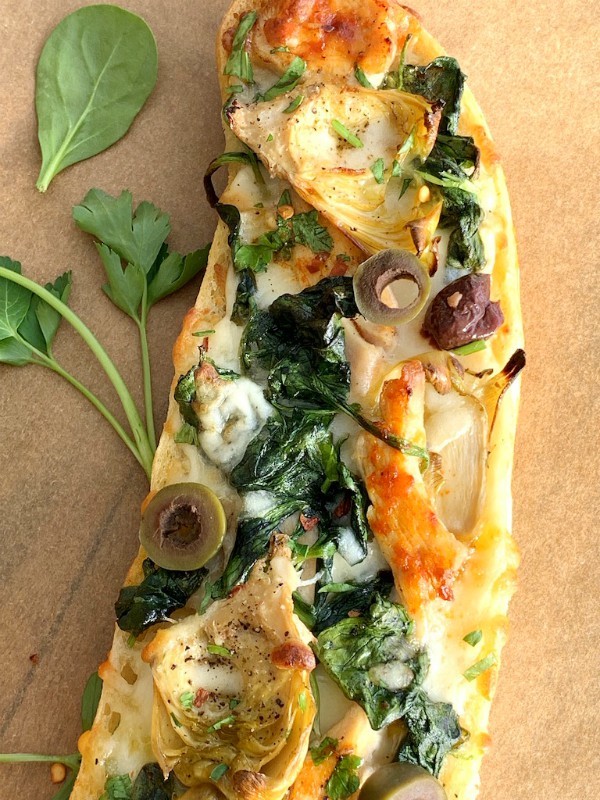
I had some leftover chicken so I added that to the base of shredded mozzarella, then tucked in some jarred artichokes hearts, fresh wilted spinach and olives.

french bread pizza

Top them off with a drizzle of olive oil, place on a parchment lined baking sheet in a 400 F oven for around 15 minutes or so, you’ll know when they’re done because the top will be golden, the cheese melted and the crust nice and crispy.

french bread pizza

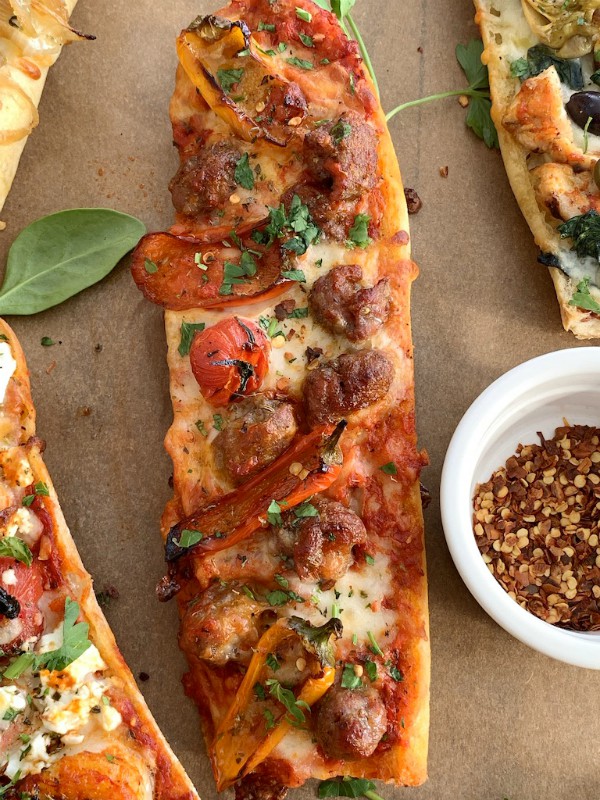
Of course I had to make one with cheese, sausage and peppers. The sausage and peppers were already pre-cooked, so again I swiped the bread with a red pepper sauce then added shredded mozzarella, sausage and peppers.

french bread pizza

Don’t forget to garnish your french bread pizzas with fresh and dried herbs, red pepper flakes and a drizzle of good olive oil, salt and pepper.

french bread pizza

This is the perfect party food, get a sharp knife and make slices for everyone to share, perfect for game day. It’s also a quick and very economical weekday meal for your family, kids can make their own with their favorite toppings and you can go ahead and kick it up a notch for yourself, and everyone will be happy!

Follow me on Instagram to see what else I’m cooking up during the week.

Signature