Perfect Baked Stuffed Clams

baked clams

Typically when we’re at an Italian restaurant and there’s baked clams on the menu we order them. Baked clams are the perfect starter to a nice Italian meal.

clams

Have you ever wanted to make them at home? They’re very easy to make and personally I like them much better home made. They’re a lovely appetizer for a special meal. I recently made a full tray of baked stuffed clams for Christmas Eve, and not one of them were left, they really go fast, in fact I could have made more but then no one would have eaten anything else! New Years Eve is almost here, so grab a bottle of wine and start your party off with a tray of delicious baked stuffed clams.

So much flavor packed into one bite, the stuffed clams are tender and sweet, the breading crispy, cheesy, zesty, garlicky, I could go on and on, but let me show you how easy it is to make them.

clams soaking

First of all whenever you buy clams and they say they’re cleaned just ignore that, you’re going to find sand in there and they will be gritty if not soaked and drained a few times.

I had five pounds of fresh clams that I picked up at Costco. I let them soak in cold water for around twenty minutes in a strainer with a bowl underneath so I can see any sand that comes out when I drain them. It usually takes three times of soaking and draining.

Then give each one a gentle scrub and discard the broken shells with exposed clam, I had three, trust me you’ll always have some to discard, so count for a few bad ones when buying them.
steamed clams

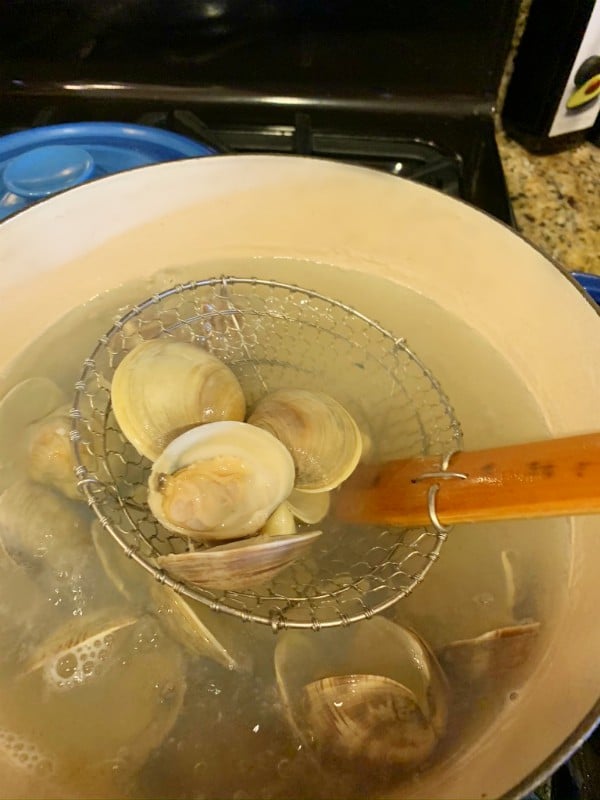
Next you’ll want to poach or steam your impeccably cleaned clams in a liquid of water, white wine, some garlic cloves and a bay leaf, letting them simmer in a covered lid on the pot scooping them out as they open, one by one. If doing a large amount don’t overcrowd them do half at a time or get another pot going.

Place the steamed opened clams into a bowl so they can cool down. The best thing about this method is that you don’t have to do any shucking to the raw clams, this makes the whole process so easy! Once they cool down just wiggle off the top of the shell so you have an open half shell, how easy is that!

cleaned clams

Some clams have that little rubbery black thing attached that you see above, it’s part of the neck, just snip it off with a pair of scissors, it takes a second.

prepped clams

For five pounds of clams I ended up with forty five clams on the half shell. A few were broken and a few never opened up when they were steamed, those have to be discarded as well if that happens.

Place you half shells on a foil lined sheet pan drizzled with olive oil. At this point if you were making them for a crowd you could prep this all the day up to this point and then refrigerate and proceed with the stuffing the next day.

You can stuff the clams before your guests arrive so you’re ready to place them into the oven when everyone is ready to enjoy, you want to eat them hot.

clam filling

The stuffing recipe will be below, I recommend making your own breadcrumbs if possible, but if not buy some good quality ones that are plain because you’ll be flavoring them up yourself.
stuffed clams

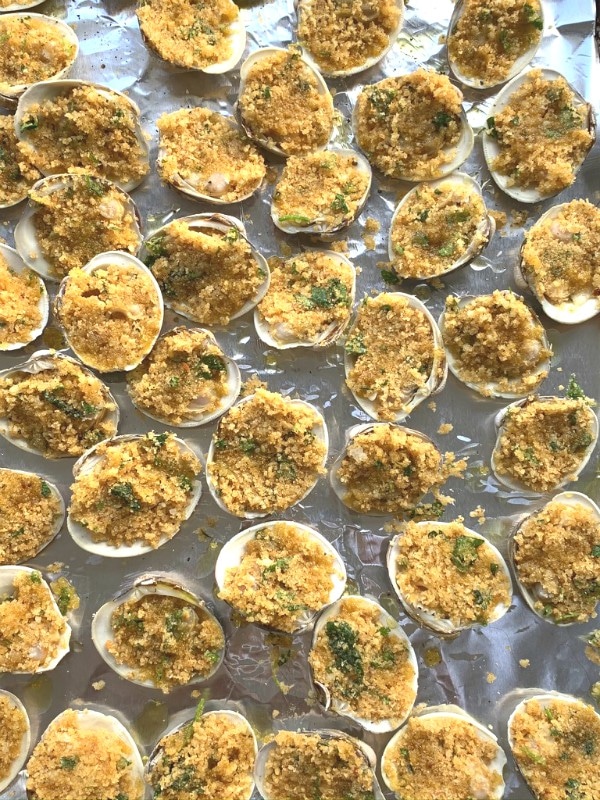
Each clam gets about a heaping teaspoon of stuffing.

stuffed clams

Then a quick drizzle of olive oil over top of each stuffed clam and into the oven they go to bake, you can also add somee clam juice and a touch of white wine.


baked clams

A light crispy bite with a ton of flavor that enhances the tender clam below!

baked clams

Serve it with a little hot sauce and lemon slices on the side, I promise, you’re going to love these!

Follow me on Instagram to see what else I’m cooking up during the week.

5.0 from 2 reviews
Perfect Baked Stuffed Clams
 
Refer to step by step on blogpost
Author:
Ingredients
  • 5 lbs. fresh, little neck clams could yield 4 dozen depending on size and discards, cleaned, scrubbed and sand removed as outlined in blogpost
  • POACHING LIQUID
  • water, 1 cup white wine, a few whole garlic cloves, a bay leaf and a small bunch of parsley, just enough to cover the clams.
  • FILLING
  • 2 cups homemade or good quality bread crumbs
  • 4 tablespoons each of unsalted butter and olive oil
  • zest of 1 lemon
  • 3 or 4 garlic cloves grated on a microplane
  • a handful of chopped parsley
  • ½ cup of grated pecorino romano cheese
  • salt and pepper to taste
  • lemon for garnish
  • hot sauce optional
  • bottled clam juice and a little wine for liquid at the bottom of the pan, (optional).
Instructions
  1. Clean clams according to step by step on blog post
  2. Steam clams as stated in step by step on post.
  3. Prepare the half shells as pictured in post for a visual.
  4. In a small saucepan, melt butter and olive oil together.
  5. Stir in grated garlic and simmer until it's infused but not golden or dark.
  6. In a bowl add the breadcrumbs, zest, cheese, parsley, salt and pepper, mix together then pour in the melted oil/butter with garlic mixture and stir together until it looks like wet sand, if too dry add more melted butter and olive oil.
  7. Fill each half shell with a heaping teaspoon of the stuffing mixture and place them onto a foil lined sheet pan.
  8. Drizzle the tops with olive oil and place into a pre-heated 450 degree oven for around 8 minutes, you cqn add. some clam juice, white wine and a little butter to the bottom of the pan as well, it's optional.
  9. They should be medium golden brown when finished, also nice and crispy.
  10. Serve immediately with lemon slices and hot sauce on the side.

 

Signature

Christmas Tree Shaped Cheese Ball

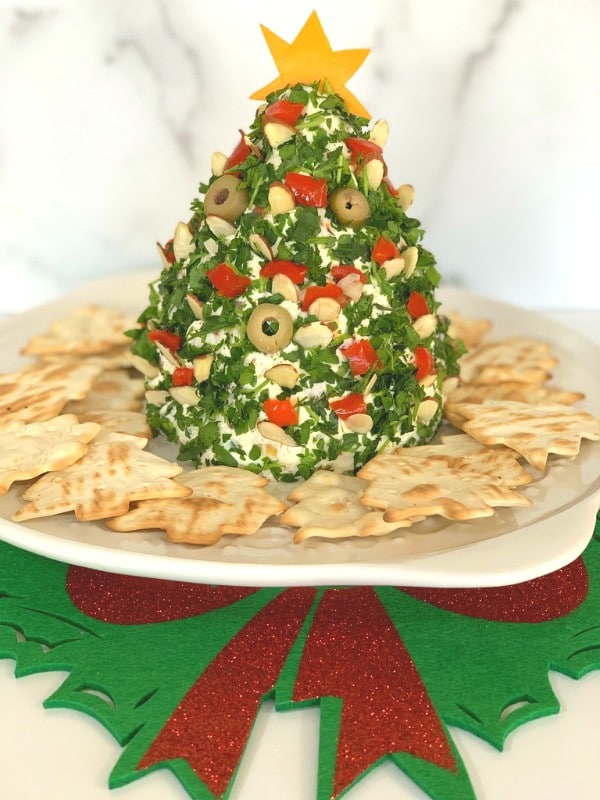
cheese ball

Cheese balls, they’re the perfect party food! You can make them into the shape of a round ball, a log, I’ve seen them shaped as footballs, pumpkins, birds, reindeer, snowman I could go on and on.

Since we’re deep into the holidays right now I made this festive looking cheese ball that’s shaped into a Christmas tree.

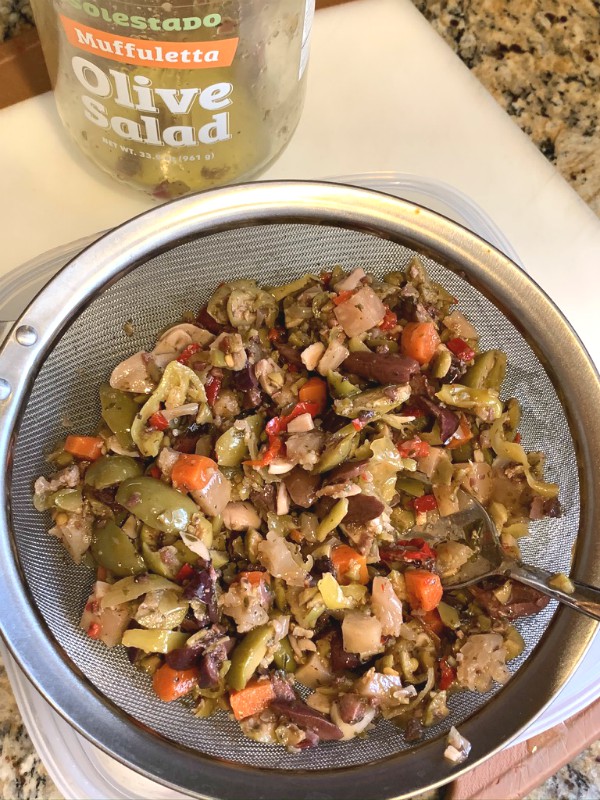
muffuletta salad

The key ingredient in this cheeseball is muffuletta salad, it comes in a jar and it’s pretty easy to find. Jars may vary ingredients but normally they’re filled with things like Kalamata and green olives, red peppers, cauliflower, carrots, garlic, capers and some spices. If you can’t find muffuletta salad you can sub in an olive salad which is similar and just as good.

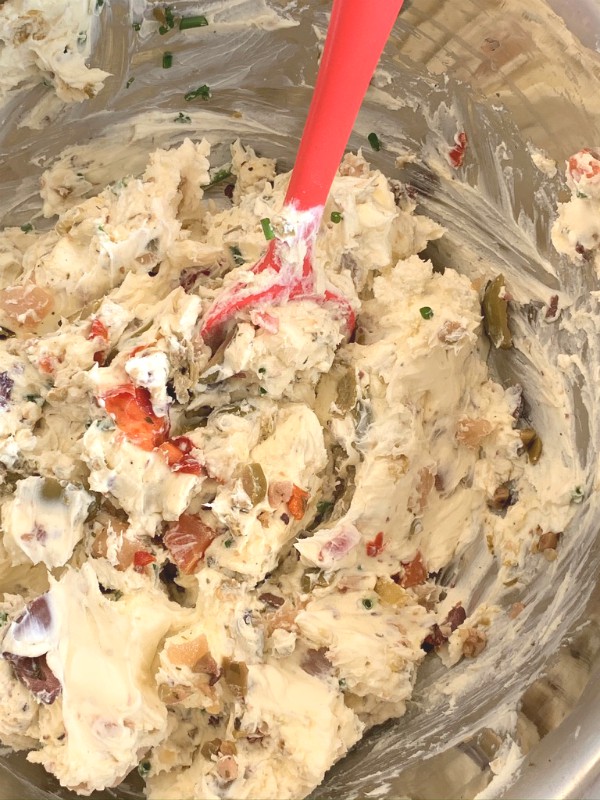
cheese ball ingredients

You’ll want to drain the salad of any excess oil really well, then add it to a mix of cream cheese and mascarpone.

Honestly when all is blended together there’s no need to add anything else except some fresh chives if you like.

cheese ball mixturecone shape cheese ball

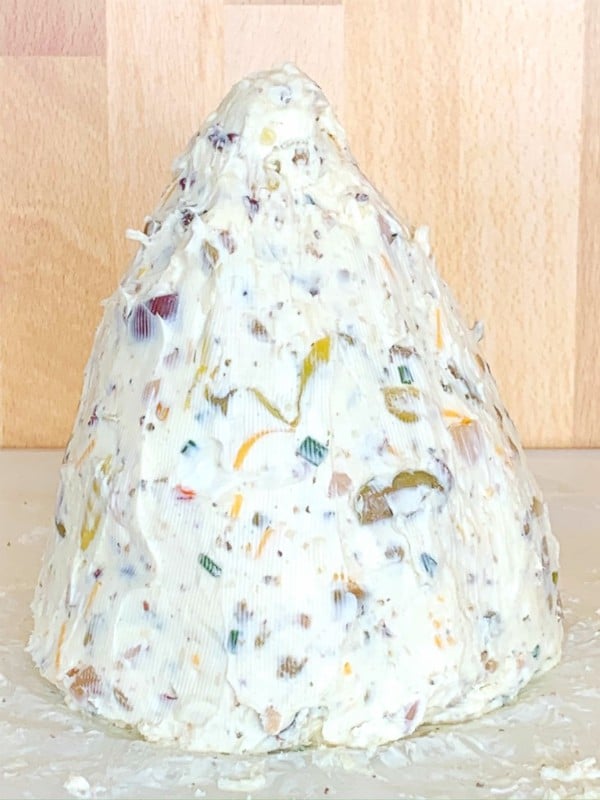
After everything is blended together shape it all into a cone for your “tree”.

Cover loosely with plastic wrap and place it into the fridge for a few hours so it can harden up again. Then you can fine tune your tree with an offset spatula to shape it better and make it smooth all around when it comes out of the fridge.

tree shaped cheese ball

Press chopped parsley onto the cone shape to make it look like a tree, then begin to decorate it by added nuts, peppers or whatever your creative mind wants to do, there’s no set rules, make it your own.

xmas tree cheese ball

I placed a star on top made of cheddar cheese, just do it freehand. At this point if I loosely drape it with plastic wrap it can sit in my fridge for a couple of days ahead to serve at a party and it will be just fine.

One thing to keep in mind is that you’ll want to serve this cheese ball with fairly sturdy crackers to hold up to the dipping, flimsy crackers just won’t do.

Start your holiday party off with this festive Christmas tree cheese ball, it’s a showstopper, it’s fun to eat and you and your guests will love it!

Christmas Tree Shaped Cheese Ball
 
Author:
Ingredients
  • 2 8oz, packages of full fat cream cheese, room temp
  • 1 16oz, container of mascarpone cheese, room temp
  • 1 heaping cup of muffuletta salad or olive salad, drained well of excess oil
  • 3 tablespoons of FINELY grated cheese like cheddar or mozzarella
  • salt and pepper to taste
  • snipped chives, optional
  • chopped parsley, enough to go around the "tree"
  • 1 piece cheddar cheese to make a star shape
  • almond slices, chopped red peppers and whatever else you want to decorate your cheeseball tree with
Instructions
  1. Combine the mascarpone, cream cheese, grated cheese along with the muffuletta salad and chives into a large bowl.
  2. With a hand mixer on low speed blend everything together.
  3. Taste for seasoning or if you want to add more of something else.
  4. on a small cookie sheet or tray place a sheet of wax paper down and then plop the cheese mixture onto that.
  5. Place plastic wrap over your hands and start to form the cone as best you can. Check your hight and width.
  6. Keep the formed cone shape on the pan and place the whole thing into the fridge loosely covered with plastic wrap and let it harden for a few hours or even overnight if you want.
  7. Remove from fridge and on the same tray press in the chopped parsley all over your cone.
  8. Decorate it with the nuts and peppers and make sure you cut out a star with cheddar cheese for the topper.
  9. If loosely draped with plastic wrap this can stay in the fridge for a couple of days before serving.
  10. When ready to serve place a large spatula underneath the tree and lift it onto your serving platter.
  11. Scatter sturdy crackers all around.
  12. Enjoy!


Signature

Italian Anisette Cookies for Christmas

anise cookies

Sweet childhood memories seem to come up often when people see these Italian Anisette cookies on a platter at Christmas. These cookies are inspired by my mother in law who made them every year for her family. Just the scent of them baking brings back warm memories.

baking cookies

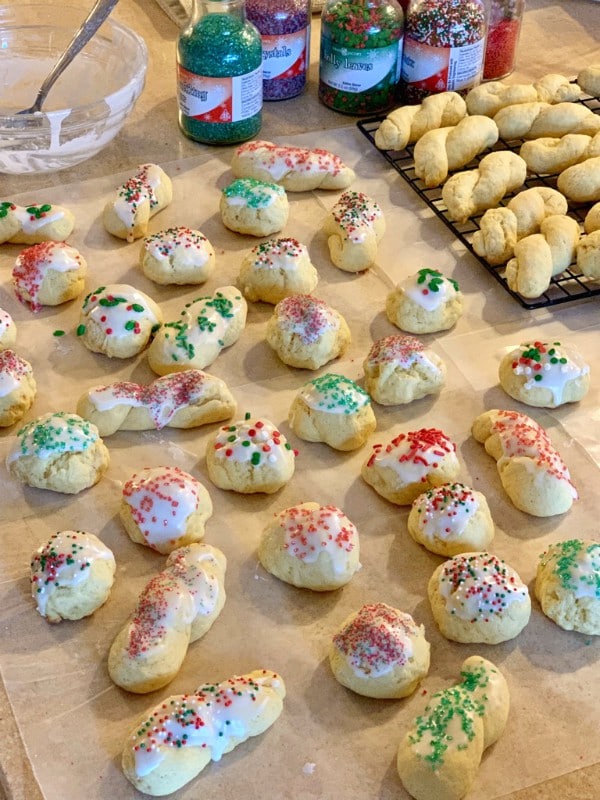
Anisette cookies have a soft interior with a warm licorice-like flavor of anise. You can form the dough into balls, braided knots and even rings. The shiny frosting can also be flavored with a little anise and then sprinkled with your favorite nonpareils. You can definitely have fun with all the different holiday sprinkles that are available this time of year to make them look very festive.

frosting cookies

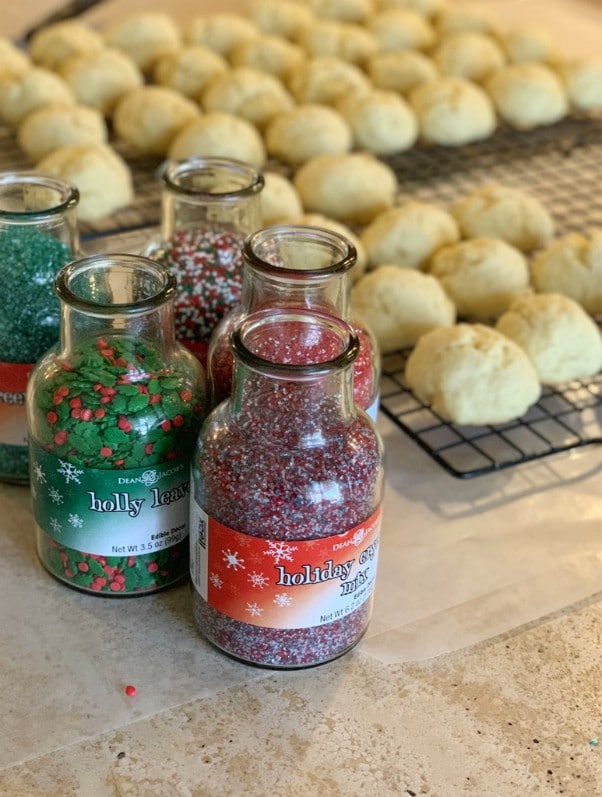
These cookies will stay light in color when baked but have a nice golden brown bottom with some characteristic cracks on top.

anisette cookiesanise cookies

This recipe is adapted from the Cooking with Nonna website, sadly none of my husbands family had a complete recipe of their moms cookies but I knew this would be as close to hers as any, and it was.

I doubled the recipe because you’ll want to make a bunch like I did and I changed up the way the cookie gets mixed because it was one less step for my lazy self, and I’m happy to say it all worked out!

xmas cookies

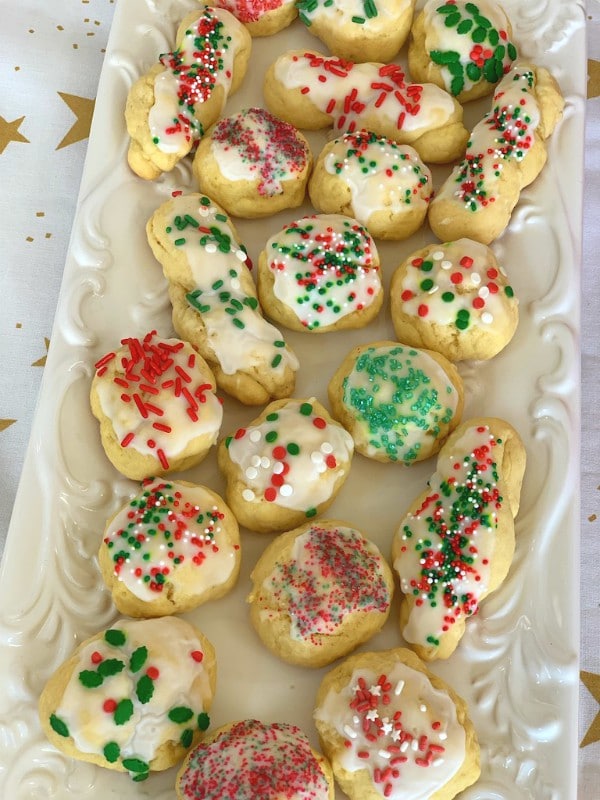
Placed on a pretty platter these anisette cookies scream Christmas!

christmas cookies

They’re simple to make and the perfect addition to your holiday cookie trays.

Christmas cookies

Grab a cup of coffee, tea or espresso and enjoy this Italian cookie classic this holiday season, you still have plenty of time to make them!

5.0 from 1 reviews
Italian Anisette Cookies for Christmas
 
Adapted from The Cooking with Nonna website.
Author:
Ingredients
  • COOKIE DOUGH
  • 5 cups all purpose flour, un-bleached
  • 6 large eggs
  • 2 cups confectioner's sugar
  • 1 cup unsalted butter, softened
  • 2 tablespoons plus 1 teaspoon baking powder
  • 2 tablespoons anise extract
  • 1 tablespoon vanilla extract
  • pinch of salt
  • ICING
  • 3 cups, confectioner's sugar
  • 6 tablespoons half and half or cream, adjusting if you need a little more or less. Icing should have a nice flow when stirring it with a little thickness but not runny
  • 1 teaspoon anise extract ( or if you prefer another extract like lemon, almond or orange)
  • nonpareils for decorating
Instructions
  1. Preheat oven to 350 degrees and place parchment paper onto rimmed baking sheets.
  2. In a separate bowl add the flour, baking powder and salt and whisk until incorporated.
  3. In a large mixing bowl with your electric hand or stand mixer (preferably a stand mixer with paddle) add the softened butter and confectioners sugar, beat on medium speed until well combined.
  4. Add the eggs one at a time along with the extracts, beating until all is incorporated.
  5. Lower the speed and add in all your dry ingredients a cup at a time, dough ball will form and pull away from side, the dough will be sticky.
  6. Form your balls either from a rounded teaspoon or a small cookie scoop which I used. Remember you can roll your dough and form them into a knot or a ring if you like as well.
  7. Keep them 2 inches apart on the lined baking sheet and pop them in the oven for 12 minutes total, bottoms will be golden and tops still pale with some cracks.
  8. Transfer to a wire rack to cool completely.
  9. MAKING THE ICING
  10. Stir together in a bowl the confectioners sugar, extract and half and half.
  11. Dip or brush the tops of the cookies into the icing then immediately add your sprinkles ( over a bowl so they don't fly all over your kitchen).
  12. Let the icing dry completely on a rack before you store the cookies away.
  13. NOTE;
  14. You can bake these ahead of time and freeze if you don't frost them, I would recommend frosting them just a day or two ahead before you'll be serving them, otherwise the frosting won't look as nice and fresh.


Signature