Fettuccine with Roasted Tomatoes and Burrata

roasted tomato fettuccine

This is the time of year that I really look forward to eating this special pasta dish, it’s made with fettuccine, roasted cherry tomatoes and burrata cheese, simple with few ingredients. Honestly there’s just nothing like it, the taste is so fresh and light with dreamy burrata melted throughout!

cherry tomatoes

Once I start seeing these gorgeous cherry tomatoes on the vine in the markets I shop at, I’m hooked and I know exactly what I’m making with them.

roasted tomatoes

I’ve been making this dish for years, I’m always switching up the type of pasta that I use, I even made it with zucchini noodles in the past, equally delicious!

This time I wanted to use fettuccine, I’ve also made it with short mostaccioli, rigatoni many times and a springy shaped pasta as well, it really doesn’t matter what shape you use just pick your favorite.

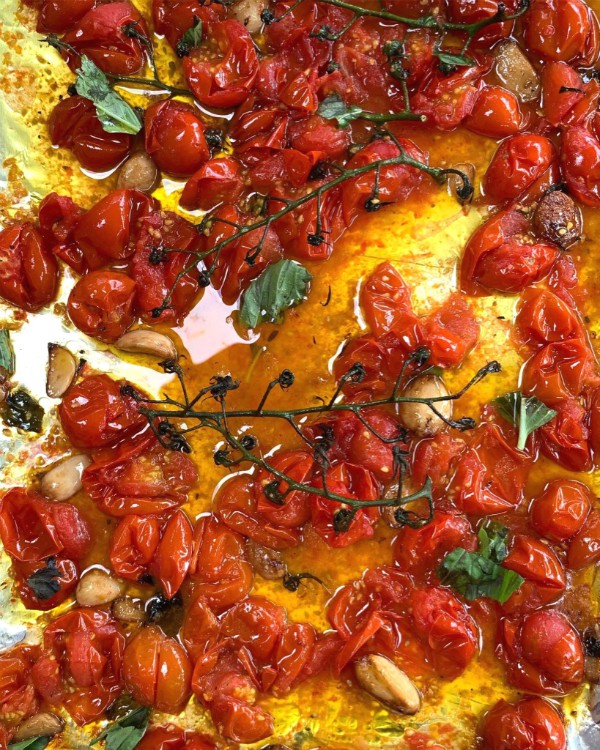
What does remain the same is how the tomatoes get roasted. Always on a rimmed cookie sheet lined with foil. The foil will insure that none of the juices get dried up or evaporated on the pan.

Sometimes I leave the tomatoes whole and sometimes I cut them in half, there’s always garlic added, usually shaved, lot’s of olive oil drizzled all over, salt, pepper and torn basil.

The tomatoes are roasted in a 400 degree oven until they start to blister and burst open. If the tomatoes are whole I just prick them in the middle of the roasting process so the juices can burst out and mingle with the olive oil, all those flavors together become your sauce for the pasta.

roasted garlic

Like I said most of the time I add shaved garlic, but if I prepare in advance I also like using roasted garlic as well.
roasted tomatoes

Just squeeze out a bunch of the roasted cloves and add it into the tomato mix while roasting, then before you toss in all those wonderful juices onto your cooked pasta, smash the cloves first so that the garlic flavor can release into the sauce even more, it’s extremely delicious!

roasted tomatoesroasted tomato fettuccine

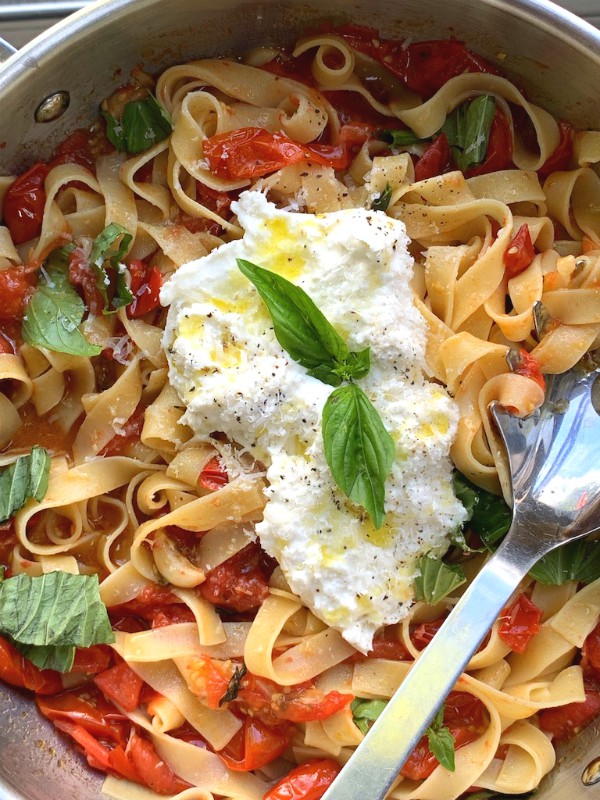
When your pasta is cooked, place it into your serving vessel, scrape down every bit of the juice that accumulated in the pan, garlic and all and toss it all together.

To finish it off and bring this dish to the ultimate of flavor, break open one or two balls of burrata cheese and place it on top of the pasta.

Just a quick drizzle of olive oil all over and a nice grating of Pecorino or Parmigiana and of course extra torn basil all around, and you’ll have one heck of a meal!

Simple and delicious!

Follow me on Instagram to see what else I’m cooking up during the week.

Signature

Scallop Risotto with Spring Vegetables

scallop risotto

Many people are nervous about making risotto but I’m here to say don’t be! Making risotto is super easy, it just requires your constant attention and a little bit of time.

This scallop risotto is great for springtime entertaining, it’s filled with tender bay scallops, sweet peas, zucchini and the brightness of lemon, it’s elegant and easy to make.

risotto ingredients

When I make risotto I like to have all my ingredients set out, prepped and ready to go, it makes the flow of things go much faster.

making risotto

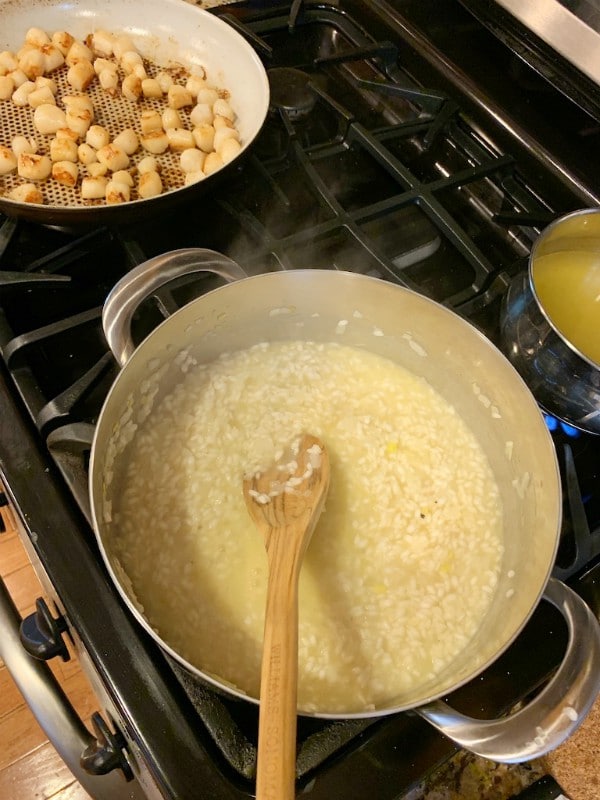
The scallops are cooked on one side only then, they don’t take long at all, then folded into and finished off in the warm risotto, of course you can substitute any other seafood you like such as shrimp if scallops aren’t your thing.

Bay scallops are the ones used here, they’re smaller and easy to find. No need to use the larger more expensive sea scallops in this dish. The bay scallops are perfect for this risotto, they’re sweet, buttery and delicate and bite size  and with the hint of lemon zest throughout it’s flavor perfection!

scallop risotto

Fold the scallops gently into the cooked risotto reserving some for garnish on top.

scallop risotto

If you haven’t made risotto yet I encourage you to do so, especially this scallop risotto with spring vegetables, I promise you’ll be in love with every decadent bite!

Follow me on Instagram to see what else I’m cooking up during the week.

5.0 from 1 reviews
Scallop Risotto with Spring Vegetables
 
Author:
Ingredients
  • 1 lb. bay scallops, patted dry
  • 1¼ cups short grain arborio rice
  • 1 quart chicken stock
  • 2 medium zucchini, small diced and precooked in sauté pan with olive oil until golden ( may substitute chopped asparagus)
  • 1 cup peas, frozen or fresh
  • ½ onion, diced
  • 2 cloves garlic, minced
  • 1¼ cups shredded Parmigiano Reggiano
  • ¾ cup white wine
  • handful of chopped parsley
  • butter and olive oil
  • zest of 1 lemon
Instructions
  1. Have all your ingredients ready to go.
  2. Heat all the stock in a separate pan.
  3. Use a heavy bottomed pan to make and stir the risotto in so it doesn't burn.
  4. Add a knob of butter and drizzle olive oil at the bottom of the pan on medium heat.
  5. Add the onions and garlic, stirring to translucent.
  6. Toss in the rice and stir to coat for around 2 to 3 minutes
  7. Add the white wine, stirring until rice absorbs it..
  8. Add stock in 1 cup at a time, stirring constantly until it absorbs, then repeat with another cup of hot stock.
  9. In the meantime, heat a separate sauté pan until hot, add a little butter and toss in the bay scallops, don't turn them, let them cook for 2-3 minutes, set aside.
  10. Keep stirring and repeat adding stock 1 cup at a time until the rice absorbs the liquid and tastes al dente but not crunchy and hard. ( there might be a little stock leftover).
  11. Remove risotto pan from heat, add a tablespoon of butter, lemon zest and all of the grated cheese and stir until combined.
  12. Fold in the cooked zucchini and peas being gentle when tossing and most of the cooked scallops, reserve some for garnish.
  13. Put a lid on for 1 minute, so everything can meld together.
  14. Add chopped parsley and spoon into bowls.
  15. Garnish with a drizzle of olive oil and the reserved scallops for garnish.
  16. Serve immediately and enjoy!


Signature

Ditalini Timbale with Spring Vegetables

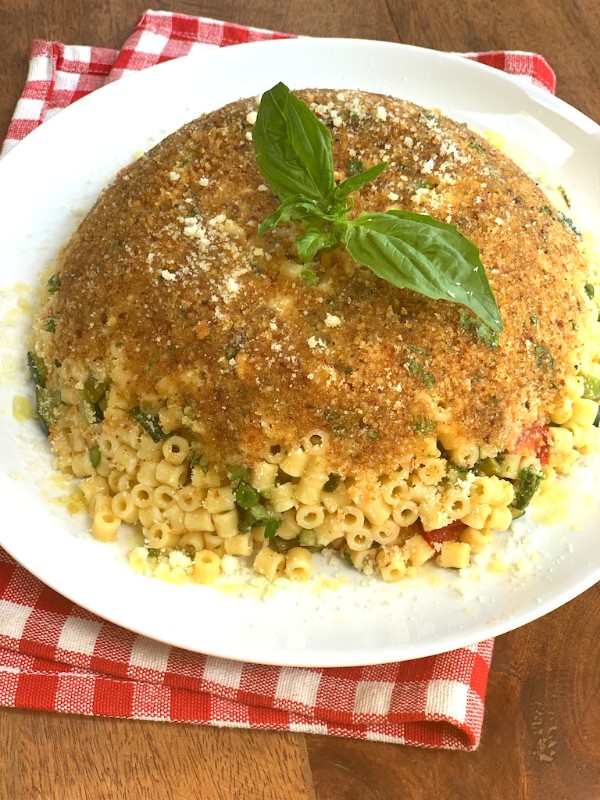
ditalini timbale

In case you’re wondering what a timbale is, think of it as a mold. Food can be cooked inside it or food can be placed inside it to form the shape of the mold, that’s what I did in this recipe with my ditalini shaped pasta timbale.

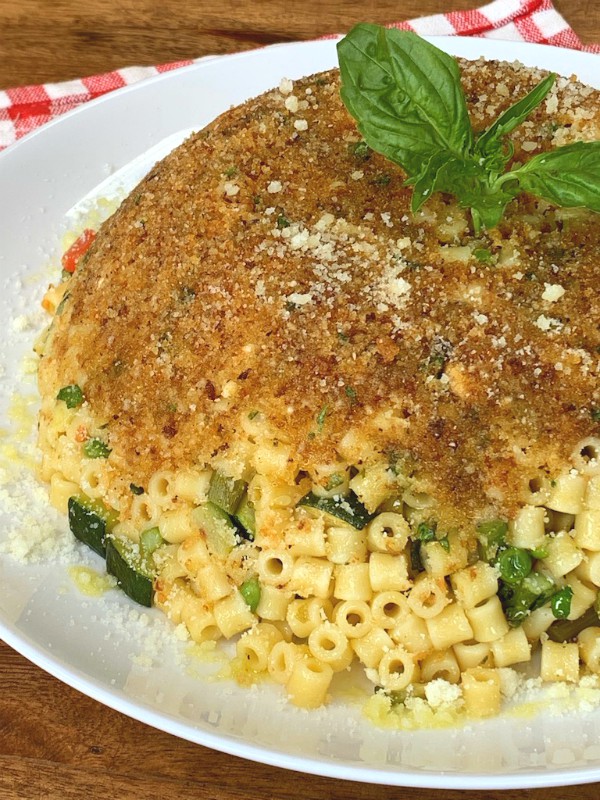
ditalini timbale

Cooked ditalini along with some of my favorite spring veggies like asparagus, zucchini and peas get folded into the mix together, then pressed into a bowl lined and coated with toasted breadcrumbs, after it cools down a bit it takes the shape of a dome.

It’s a fun way to serve up a pasta dish and it’s a nice presentation on your buffet table.

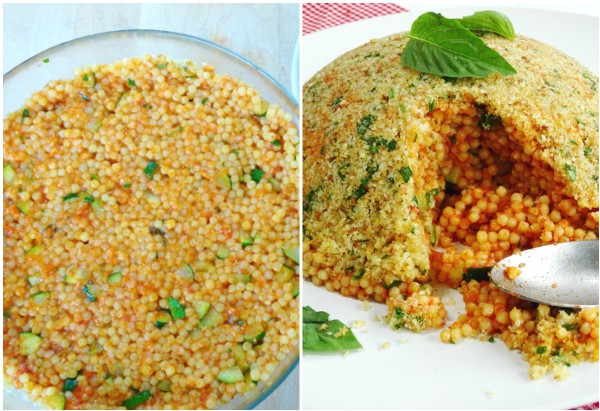
timbale

I posted a similar pasta timbale a few years ago using smaller pastina shaped pasta, see how it’s pressed tightly into the bowl? You’re going to want to do the same thing with this version using the ditalini shape.

Small pasta shapes work best for this recipe so you can be as creative as you like by picking your favorite shape. You can add in some marinara  as I did in my previous post or not, add veggies like I did or even meat if you choose.

ditalini timbale

Cookout season is upon us with many outdoor picnics and BBQ’s coming up, this is the perfect side dish for you, no need to worry about it sitting out on the table because it’s delicious and safe at room temperature.

Easy to make with a fun presentation and it tastes really good!

4.0 from 1 reviews
Ditalini Timbale with Spring Vegetables
 
You can very the amounts of the ingredients, change things up to your liking and be creative!
Author:
Ingredients
  • 1 lb. ditalini pasta or other small pasta of your choice
  • 2 zucchini, diced small
  • ½ lb. chopped asparagus
  • a good sized handful of peas
  • 6 or 8 cherry tomatoes quartered
  • ¾ cup grated pecorino romano, ( or Parmigiano Reggiano) plus extra for breadcrumb mix and garnish
  • 2 garlic cloves, grated
  • 1 heaping tablespoon butter
  • 1 cup good breadcrumbs
  • fresh basil and parsley
  • olive oil
Instructions
  1. In a skillet drizzle 2 tablespoons of the olive oil, add 1 grated garlic clove and over medium heat, saute till golden then pour in the breadcrumbs stirring until lightly toasted, 3 to 5 minutes. remove from heat, let it cool then add ¼ cup each of parsley and around 2 tablespoons of grated cheese, then drizzle 2 more tablespoons of oil, toss and mix.
  2. Brush a round bowl with olive oil, mine was 9 inches.
  3. Press breadcrumb mixture along the sides and bottom of the bowl evenly. Set aside. ( you might have some mix leftover)
  4. In a large skillet on high heat add a couple of tablespoons of olive oil and then toss in the zucchini until you see it crisp up a bit, then toss in the rest of the veggies, asparagus, peas and tomatoes along with the other grated garlic clove. Keep stirring and watching it only takes a few minutes, then set aside.
  5. Boil your pasta according to package directions, don't overcook it then let it drain.
  6. When drained, toss it into a different bowl and add the heaping tablespoon of butter and the ¾ cup of grated pecorino, stirring fast till it melts and gets "sticky".
  7. Fold in all of the veggie mixture, some chopped parsley and basil, check taste for salt and pepper.
  8. Spoon the finished pasta mixture into the breadcrumb lined bowl, evenly distribute it along the sides and bottom, pressing down lightly so it's nice and tightly packed in.
  9. Let it rest for 15 minutes.
  10. Un-mold it onto a nice platter and decorate with basil, parsley and a little more grated cheese.
  11. Enjoy!


Signature