Citrus Vanilla Biscotti With Pistachio

spring biscotti

These citrus and vanilla biscotti have just the right amount of sweetness with lots of crunch, a nice treat when you want a little something with your coffee or tea.

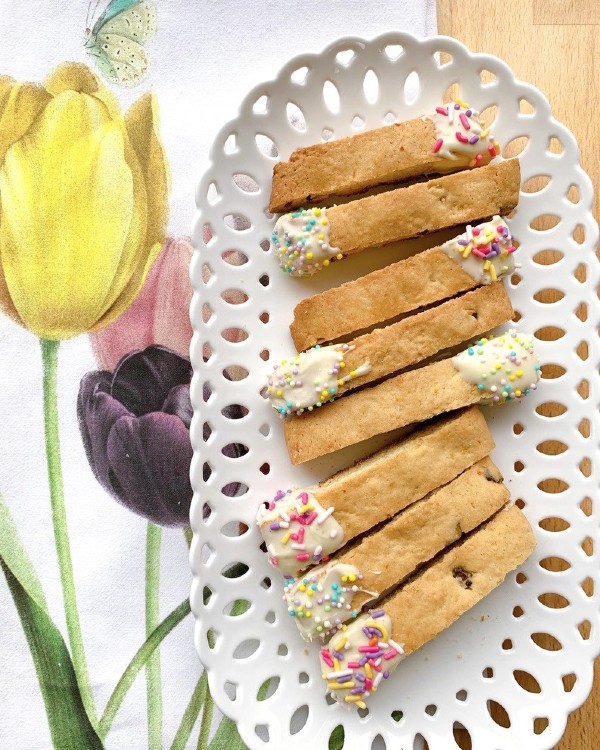
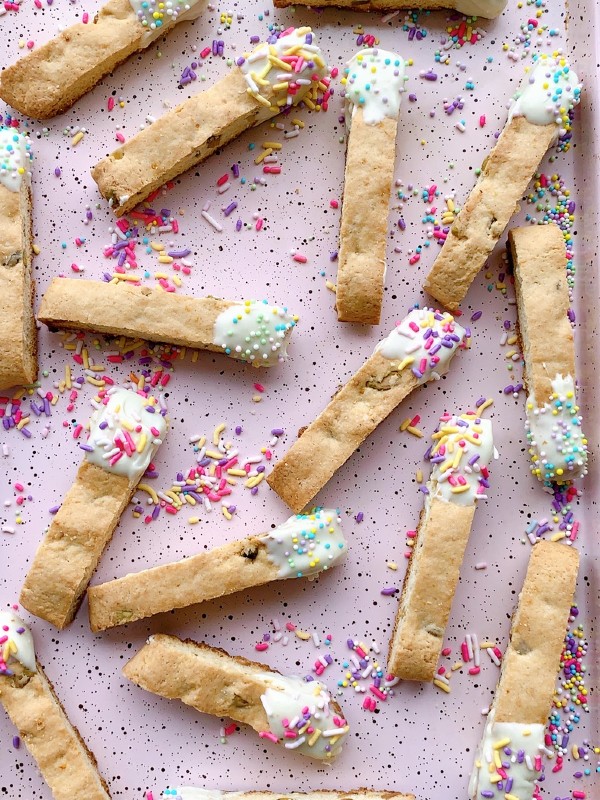
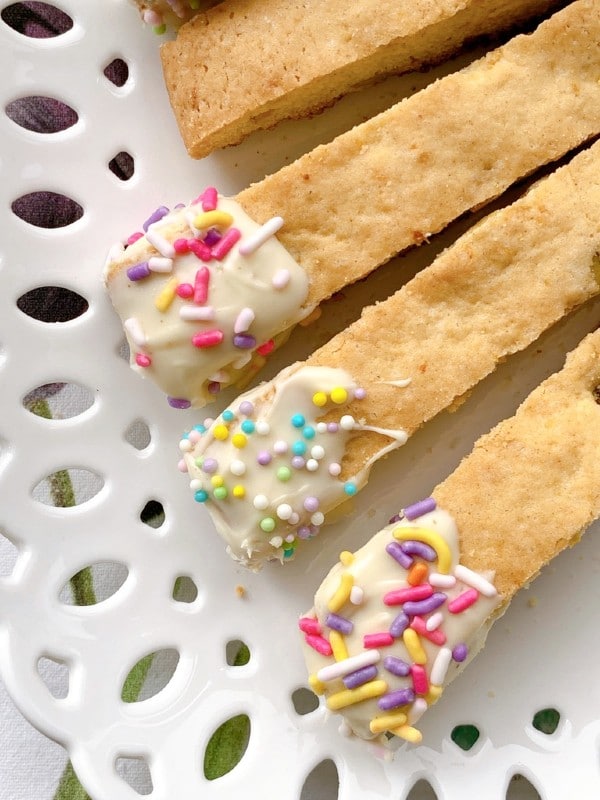
They’re light and satisfying, a nice seasonal change with the citrus and you can eat them plain, drizzle with a lemon glaze ( which is really good) or if you want to fancy them up, dip the ends in white chocolate and add some sprinkles for a nice colorful spring treat.

sliced up biscotti

You can also switch up the nuts that you use, I chose pistachios but slivered almonds would work as well, or just eliminate them if you’re not a nut lover.

cut biscotti

If you’re a dunker leave them plain like this and dunk away! I on the other hand am not a dunker, I prefer some crunch and frills.

decorated biscotti

Biscotti are sturdy, they pack well and stay fresh for a long time so they’re also great for gift giving too.

platted biscotti

Who wouldn’t enjoy this for an afternoon treat?

citrus vanilla biscotti

Get the coffee going!

5.0 from 1 reviews
Citrus Vanilla Biscotti With Pistachio
 
Spring and summer Citrus vanilla biscotti, you'll want to keep a stash of these!
Author:
Ingredients
  • 2 cups flour
  • 2 eggs
  • ⅔ cup sugar
  • 6 Tablespoons room temperature unsalted butter
  • 1½ teaspoons of baking powder
  • pinch of salt
  • 1 teaspoon each of lemon, orange and vanilla extract
  • zest of.1 orange and 1 lemon
  • ⅓ cup of pistachios or slivered almonds (optional)
Instructions
  1. Heat oven to 350º Line a baking sheet with parchment.
  2. In a large bowl cream together the butter and sugar, add the eggs, extracts and zest.
  3. In a small bowl whisk the flour, salt and baking powder, then incorporate that to the wet ingredients.
  4. Fold in the nuts if using.
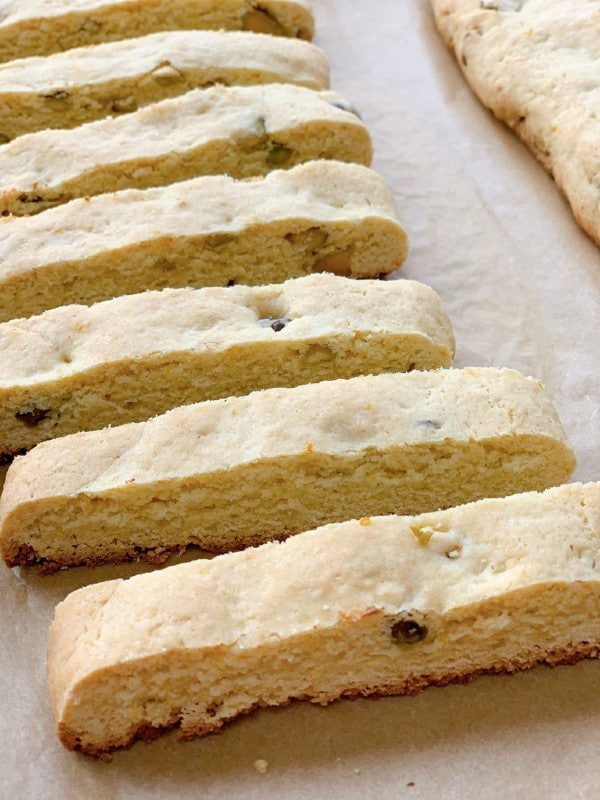
  5. Form two logs right on the parchment around 3x12 then pat them down to ¾ of an inch thick.
  6. Place into the oven for 25 minutes, then remove and let them cool completely.
  7. Turn oven down to 325 degrees.
  8. Then make slices with a serrated knife and stand them straight up on the baking sheet.
  9. Bake an additional 30 - 35 minutes according to your liking.
  10. You can eat them plain like that, or dip the ends in melted white chocolate, adding sprinkles, or finish them with a drizzle of lemon glaze made with 1 cup of powdered sugar and the juice of fresh lemons to reach the right consistency.


Signature

Baked White Fish With Vegetable Salsa

veggie salsa on baked fish

Here’s a quick, easy, go-to meal you can make mid week or anytime. Baked white fish topped with a delicious and super flavorful vegetable salsa.

After you’ve chopped up your veggies for the salsa you’ll have dinner on the table in minutes!

flounder filets

I used flounder in this recipe because I came across some nice fresh filets, flounder is a delicate fish with tender flakes, but honestly any white fish will do.

Cod is a wonderful substitution as well as grouper, halibut and sole to name a few.  If the fish is more thick and dense your going to have to adjust the cooking time a little, but other than that the delicious results will be the same.

vegetable salsa

The vegetable salsa is the shining star of this dish, the bright colors and vibrant flavors make whatever fish you use really shine.

uncooked fish

fish ready for the oven

Just generously cover the uncooked filets all over with the salsa and then let the oven do it’s magic.

baked fish

The flavors will all meld together in great harmony.

baked whitefish

Such a light, healthy, colorful and good for you meal, enjoy!

5.0 from 1 reviews
Baked White Fish With Vegetable Salsa
 
A quick, colorful and intensely flavorful fish dish.
Author:
Ingredients
  • 1½ lbs. white fish filets of your choice such as cod, flounder, sole, grouper
  • FOR THE VEGETABLE SALSA
  • 1 small zucchini, diced small
  • ½ red onion, diced small
  • ½ each of a yellow and orange pepper, diced small
  • a good handful of pitted mixed olives, slightly chopped
  • a good handful of sliced grape or cherry tomatoes
  • 2 garlic cloves, minced
  • a handful chopped parsley
  • olive oil
  • paprika
  • lemon wedges
Instructions
  1. Place all your chopped vegetables into a bowl, add the parsley, garlic, everything for the salsa, then drizzle in enough olive oil to make it a loose consistency, salt and pepper to taste.
  2. Place your filets into a glass baking dish that has been drizzled with olive oil.
  3. Salt and pepper the filets and give them a light sprinkle of paprika.
  4. Generously top the filets with the vegetable salsa, covering the fish all over, add in a few lemon wedges.
  5. Place into a 400 degree pre-heated oven for 15-18 minutes.
  6. NOTE: I used flounder which is more delicate and less dense, but if using a thicker fish adjust the time accordingly.


Signature

Shrimp Oreganata With Homemade Breadcrumbs

stuffed shrimp

Shrimp Oreganata is a super flavorful, Italian American baked seafood dish. What’s nice about this dish is that it can be prepared ahead of time and it only takes a few minutes to bake. It’s perfect for a party, midweek meal or just a great seafood option when you need one.

Shrimp oreganata can be the ultimate appetizer or served as a main along with a salad or vegetables of your choice or just pair it with some pasta, you can’t go wrong.

breadcrumbs

What I feel takes this recipe to another level is making your own breadcrumbs by using up leftover chunks of bread you might have around.  In my house it most certainly is a baguette, crusty Italian bread, ciabatta, or I’ve even used sourdough, good bread really makes a difference here it’s so much better than store bought which is too finely ground with no flavor.

It’s a simple procedure to make your own, take your chunks of bread and whirl it in a food processor into small chunks, then spread it onto a baking sheet single layer, bake til light golden at 350 degrees F. tossing and checking them and making sure they’ve also dried out.

After they’ve cooled down you can either place them back into the food processor and whirl to your desired crumb size, or put them into a zip lock bag and tap the bag a little with a rolling pin to get your desired size, that’s what I did.

breadcrumb mix

The breadcrumbs are then seasoned well and drizzled with olive oil which will eventually create a delicious golden and crunchy crust on top of the shrimp.

butterflied shrimp

Speaking of shrimp, don’t waste your time using small shrimp, only large or jumbo will do. I used the large size for this and I prefer buying deveined with the easy peel so I can leave the tail on. Side note: I usually buy mine at Whole Foods.

It’s also important to butterfly the shrimp because as you can see above it leaves you with a nice flat area to pack on your seasoned oreganata breadcrumbs.

To butterfly shrimp, make sure they’re cleaned and deveined, take off the shell up to the tail but leave the tails on. Use a knife and slice along the back curve starting from the head area but don’t cut all the way through, then open it up like a book.

stuffed butterflied shrimp

Bake them on a foil or parchment lined sheet pan drizzled with olive oil, then drizzle a little more on each stuffed shrimp before placing them into a pre-heated 425 degrees F. oven for maybe 10 minutes or so depending on the size of the shrimp.

platter of shrimpshrimp oreganato

Serve immediately and enjoy every bite!

Shrimp Oreganata With Homemade Breadcrumbs
 
Author:
Ingredients
  • 1 dozen large or jumbo shrimp, in the shell
  • 2 cups homemade breadcrumbs (as stated in post)
  • 2 Tablespoons of very soft, room temp unsalted butter
  • ½ cup, chopped parsley, (more for garnish)
  • 2 finely chopped garlic cloves
  • 3 tablespoons, grated cheese
  • pinch of red pepper flakes, (optional)
  • oregano or Italian seasonings
  • zest of 1 lemon
  • olive oil
  • salt and pepper to taste
  • lemon wedges and parsley for garnish
Instructions
  1. Peel, devein and butterfly the shrimp leaving the tails on, then pat them down of any moisture, (directions are in the post).
  2. Drizzle a little olive oil on the shrimp along with a small sprinkling of salt and pepper.
  3. In a small bowl add the bread crumbs, butter, garlic, zest, parsley, red pepper flakes and grated cheese, mix well.
  4. Drizzle olive oil into the mixture until you see a wet sand look, then taste for seasoning to your liking.
  5. Pre-heat the oven to 425 degrees F. then line a sheet pan with foil or parchment, drizzle lightly with olive oil.
  6. Top each shrimp with a good amount of the seasoned breadcrumbs.
  7. Place shrimp on sheet pan, drizzle them with a little olive oil and bake around ten minutes or so more or less according to your oven and size of shrimp.
  8. Don't overcook them, place on a platter garnished with lemon wedges and parsley and serve immediately.


Signature