Ravioli for a Crowd!

I’ve been in party mode and haven’t really cooked “normal” for a while, so I thought I would share with you how I prepped for a recent party I had for 26 with the main course being 200 homemade ravioli.
Homemade ravioli holds a special place in my heart because I can remember my mom and aunt making them together when my cousins and I were very young, white sheets covering dining room tables and beds, filled with drying ravioli. Today I make them a little different, no more drying on sheets, instead they go right into the freezer after they’re made.

All the ravioli were made a few days before and tucked away in my freezer ready for the big day, we made two different versions, meat and cheese.

Because I would be cooking so many ravioli at one time, there was no way I wanted to be boiling them while my house was filled with people, so I opted to make them the night before, something I’ve never done.

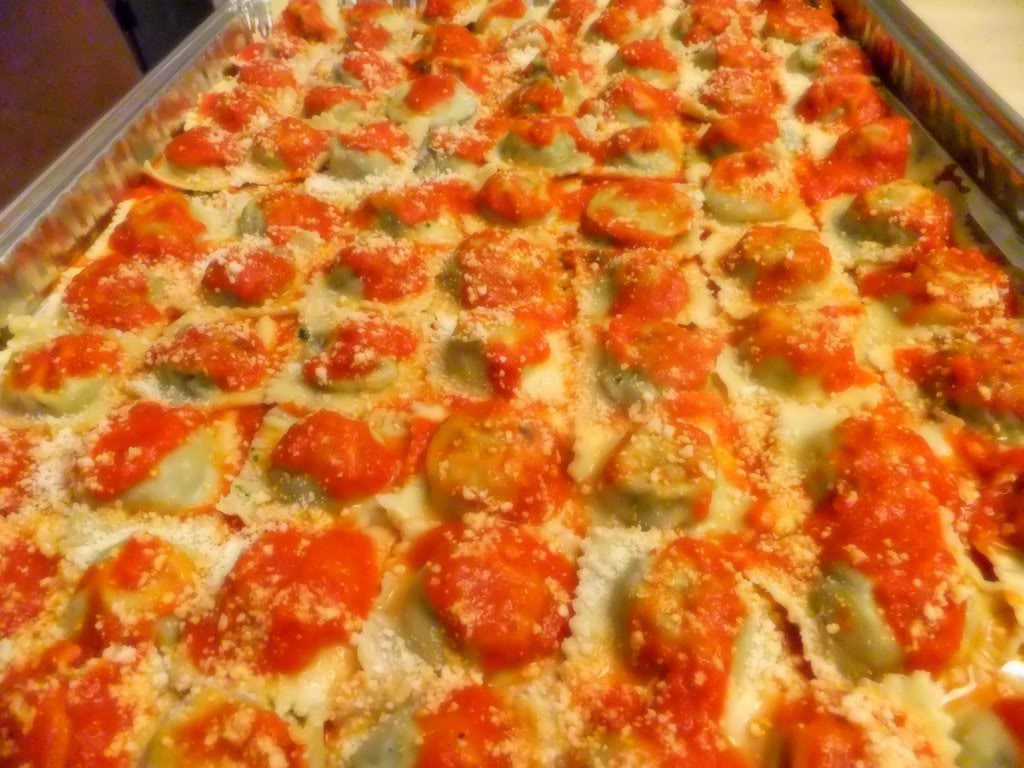
During the week prior to my party I went to a local restaurant supply store and bought commercial size heavy duty foil sheet pans, they were perfect to lay my ravioli on in a single layer.
They were huge and covered my whole oven rack, and even though I don’t have a commercial size oven I made them fit by slightly folding up the sides.

All my sauce was cooked ahead of time so assembling was pretty easy. After spreading sauce all over the bottom of the sheet pans I placed my slightly undercooked ravioli on top, single layer, placing more sauce on top. After they cooled down I sprinkled grated Pecorino on top and covered the pans with heavy duty aluminum foil and placed them in my second fridge, ( it’s older and has bigger shelves).

The day of the party I took them out of the fridge and got them to room temperature and with the foil still on, I baked them for only 15 minutes in a 350 oven until warmed through, after they were done I dolloped more warmed sauce on top and they were good to go! For a big crowd this was the perfect way to make them, no hot boiling pots all over the place, all that was done in advance.

Thanks to my family, all my dear cousins and their families for such a fun night!
So if you ever doubted cooking ravioli ahead of time for a large crowd like I did, no worries because it was a complete success!

Buon Appetito!
Signature

What I did on my Thanksgiving week vacation!

I had a wonderful dinner with family!

I attended afternoon tea at the Peninsula Chicago in honor of my niece.

The setting was gorgeous, the minute you walk in you feel the elegance!
It was especially beautiful because of all the Christmas decorations they had up, the tree was stunning in warm colors of reds and golds.

Live music filled the air as we sipped on our teas and

ate our goodies. The service was wonderful and they were happy to replenish our plates!
A great experience and a fun thing to do if you’re in Chicago with your girlfriends.

I learned how to make Bietole from a master, my daughter -in -laws nana.
This woman is well into her 80’s and shes a spitfire in the kitchen, she puts us all to shame!
Bietole is basically swiss chard that is sauteed with lots of garlic and oil.

The sauteed chard is then placed on a pasta dough with enormous amounts of Pecorino romano, more garlic and olive oil then rolled up jelly roll style and baked. It’s so simple with just a few ingredients but the taste is out of this world!

Then to top off the week I spent a day at my house making ravioli with my cousin and sister-in-law for a party we’re having this weekend, the music was blasting, there was flour everywhere! We were even going to crack open a bottle of wine but opted for coffee instead since it was only 9:00 in the morning!

We ended up making 200 total, a combination of both meat and cheese.
I highly recommend a day of pasta making with family or friends, it’s a great way to spend a day!
Buon Appetito!

Signature

Making Pizzelle

Recently I bought a pizzelle maker and I couldn’t wait to break it in. I felt very ambitious and had visions of making all different flavors like anise, chocolate, citrus, cinnamon, orange and rum, almond and some even dipped in chocolate and then into nuts, oh yes and sprinkles for the kids!

Well I didn’t get all that far because making pizzeles are very time consuming!
I have a close friend Jean who can make these in her sleep! Pretty much every event in life like holidays, parties, funerals, or just a few girls getting together you can always count on Jean to bring her pizzelles.

Pizzelle making is a true labor of love, you have to be patient, something I need to work on when baking or making cookies!

I followed the recipes that came with my pizzelle maker because they’re all basically all about the same, flour, butter, eggs, sugar and the flavorings of your choice. After I did one batch I was pretty much done! I called Jean for advice and she gave me some good tips, like don’t be in a hurry, allow a couple of hours, sit down and watch TV while you’re making them.
My recipe said to drop a tablespoon of batter behind the center of the pattern, I did that and they were too big, batter was oozing out the sides and running into each other, I was ready to give up they looked terrible!
Jean said to use a heaping teaspoon of the batter ( which comes out pretty thick) and place it in the center, I did what she said and they turned out great!

I’ve always loved the the designs on pizzelle irons, they make beautiful crispy wafer cookies and always look gorgeous set out on a platter.

Right now I’m hiding these in a big tin and plan to bring them out as part of our Thanksgiving Day dessert. I made traditional anise flavor and chocolate ones as well.

I made the sprinkled variation for my two granddaughters simply by taking the heaping teaspoon of dough and rolling it into a bowl of sprinkles right before you place the ball of batter onto the iron.
My advice is to do the sprinkle ones last so that you won’t find any tiny sprinkles on your other flavors.

My oldest granddaughter was off of school the day I made these so she taste tested a few and gave me thumbs up all the way, so did her dad!

Jean says don’t put the powdered sugar on until the day you’re going to eat them, if you have a cool place store them in a can, they last for weeks and still stay crispy, no need to freeze.

Here’s the basic recipe with variations:


6 eggs** 1 cup of sugar** 1 cup of melted butter** ( Jean says she prefers using oil and stopped using butter a long time ago because they turn out better, she uses canola oil) **2 teaspoons vanilla** 3 cups flour** 1 tablespoon baking powder**


( For anise flavor add 1 teaspoon of anise seeds and 2 teaspoons of anise extract) if you use pure anise oil, use much less like 1/2 teaspoon it’s very potent.


( For chocolate flavor add 1/2 cup of cocoa powder)


Melt butter  If using, and set aside. Beat eggs and sugar until light yellow, 2-3 minutes. Add butter or oil, vanilla or other flavorings. Beat until blended. Sift together the ingredients, fold until just blended, add remaining flour and fold again until just incorporated.


Heat pizzelle iron, place 1 heaping teaspoon of batter in center of pattern. Bake until golden brown, about 30-40 seconds. Remove and cool on a rack. Repeat with remaining batter. This could make six dozen depending on how deep your grooves are on your iron. ( Jean triples this, if you’re going to do it you might as well make a bunch!)
Have fun!


Signature