Cedar Planked Grilled Portobellos Stuffed with Summer Veggies

I normally use grilling planks for salmon or scallops but this time I thought I would try using vegetables, in particular big “meaty” portobellos!
Make sure you buy natural untreated wood that is free of chemicals, strictly sold for cooking, You wouldn’t want to use just any old type of wood from a hardware store, it could be very toxic!

 There are various cooking woods on the market, some of my favorites as well as the cedar are maple, cherry, alder, apple and mesquite just to name a few.

Just make sure you soak them submerged and weighted down in water for at least 2 hours before placing them on your grill, otherwise they will just burn up and you don’t want that.

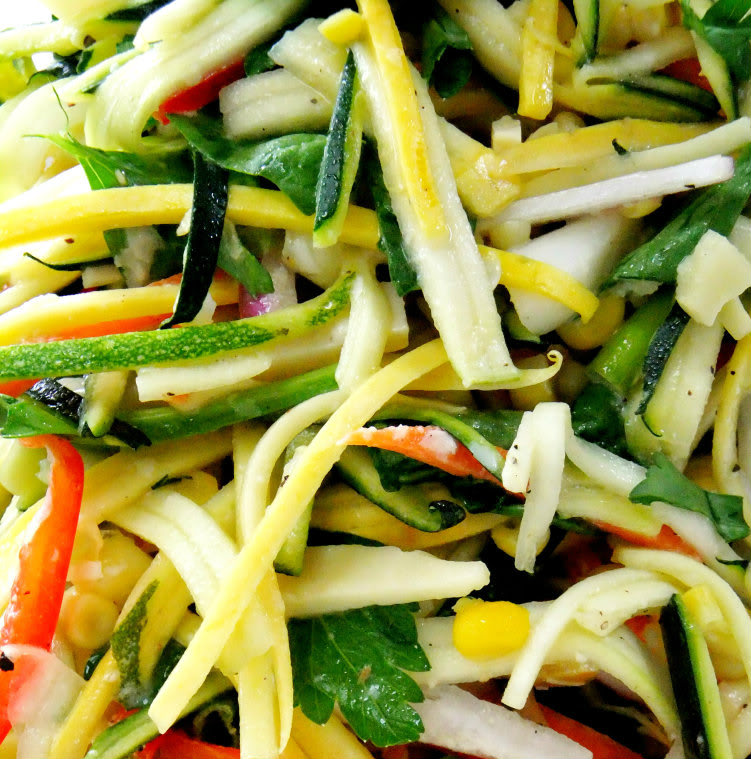
While your wood is soaking you can be grilling up your veggies. I used yellow squash, zucchini, corn, and red, yellow and orange peppers. They were tossed with a little olive oil, salt and pepper then placed on the grill.

For the mushrooms, the gills and stems were removed, this will give you a nice flat surface for stuffing.

 Brush your mushrooms on the bottom with olive oil and only place them on the grill for 2 to 3 minutes just to get grill marks, caps up. Remove and let them cool completely. If moisture appears just pat with a paper towel.
 Remember, only grill them for a couple of minutes, they will continue to cook on the plank.

I filled my caps with shredded asiago cheese but you could use just about any cheese you want.  Now it’s time to layer your veggies making sure you can see all the different colors. Sprinkle a tiny bit of cheese on top then stick them on the plank!
Try to keep your grill temperature around 350, as their cooking you’ll hear the wood cracking a bit and the sweet smell of the cedar will fill the air.

 The cheese will melt underneath and the veggies will become a little more golden, mine took a good 15 minutes.

Garnish with fresh grilled corn, basil and a drizzle of olive oil.

 The portobellos were infused with a delicate smoky flavor that was so delicious and enhanced all the vegetables.

Trust me, you will love this!

Signature

Pasta Pizza

Last week when it was unbearably hot I threw this dinner together in minutes.
After looking into my fridge for something to make I remembered I had this small container of leftover angel hair pasta with veggies that I had made a couple of days before.
Instead of just reheating in my microwave I turned it into a “pizza”!
My leftover veggie pasta was made with, zucchini, yellow squash, eggplant, peas, artichoke hearts and cherry tomatoes, all were roasted beforehand and then tossed into hot angel hair pasta adding olive oil, fresh basil and grated romano cheese.
To create the “pizza” I just added 2 beaten eggs and more grated romano cheese right into the  leftover container, mixed it together, then poured the pasta mixture into a hot skillet that was drizzled with olive oil.
 When it turns golden on the bottom, place a plate on top of the pan and flip the “pizza” over to the other side and let it cook until golden and set, then slip it out on to your serving plate.
 Garnish with more basil and grated romano.
Cut into wedges and serve this with a nice salad, some crusty bread and a nice cold glass of your favorite wine and your dinner is good to go!

Who knew leftovers could taste so good!

Signature

Party Dipping

I want to share with you two of my favorite dips that I often make for parties.  The one above is a Pineapple Cream Cheese Dip I found over a year ago from The Healthy Foodie blog, I would give you the link but it keeps saying potential virus so I’m not going to give it to you.
Anyway, I just loved the presentation and it tastes really good too. Trust me you’ll get a lot of ooohs and aaahs when you bring this out!
It’s so simple to make, Just get a fresh pineapple and cut off the top, now split the top in half so it will lay flat. You just need the top, save the pineapple for eating later.
I’ve since tweaked the recipe a little, here’s my version.In a bowl add 2 blocks of softened cream cheese, reduced or full fat, whatever you like.
1/4 each of a red, green and yellow pepper, small diced.
1/2 cup of sliced black olives from a can, I just chopped them up.
1/2 of a large piece of celery, finely diced.
2 or 3 small green onions, finely diced.
2 tablespoons of parsley, plus salt and pepper to taste.
A heaping 1/4 cup of crushed canned pineapple, drained
2 heaping tablespoons of crushed pecans.
Stir everything together tasting for the correct seasoning adding more of the ingredients if you so desire. Now cover and refrigerate the mixture for a couple of hours, you can make this all the day before if you want.
When you are ready to assemble, plop the mixture on to your serving platter and shape it into a barrel, now go get the top of the pineapple that you previously cut and place it on top.
I used about 70 pecan halves, nice ones, not cracked. It sounds like a lot but I just bought an 8 ounce bag of raw pecan halves at Trader Joes and still had some leftover.
Place them all over in rows on top and along the sides.
You can serve this with your favorite crackers or baby carrots, it feeds a crowd!
You can even make the cream cheese mixture up to 3 days before, I’ve done it and  it tastes even better because all the flavors come together.
Now this is my absolute, go to, hands down, favorite appetizer dip! Rosemary Olive Oil Pita Strips with Tuscan White Bean Dip. I can’t tell you how many times I’ve made this for a party, the recipe comes from my friend Jean, you can make a ton for practically pennies!
The bean dip has flavors of garlic, parsley, and lemon all swirled with olive oil.
The pita chips are made my taking a piece of pita bread, cutting it in strips then snipping the tops off and separating the top from the bottom.  Then each strip is individually brushed with dried rosemary and olive oil then baked. You could make them up to 3 weeks ahead.I did a blog post on these a while back, here’s the link to the recipe on that page and here is the recipe on this post.

ROSEMARY OLIVE OIL PITA CHIPS WITH TUSCAN WHITE BEAN DIP: (Thanks Jean!)
First thing you do is soak some dried rosemary ( not fresh) in a bowl of extra virgin olive oil, you’ll be using this mixture for brushing on the pita’s. Let it soak for a good hour or so.
**1 15oz can of drained and rinsed cannellini beans.
**1/4 cup of fresh Italian parsley
**2T fresh lemon juice along with and the grated lemon peel of one lemon
**1 garlic clove
**salt and pepper
**1/3 cup of olive oil
Put everything in a food processor and stream in the olive oil until nice and creamy. So easy!
For the pita chips, buy a bag of fresh pita’s, take each pita and cut them into long strips, you should get six to 8 strips per pita. Now snip off the tips to square them off, and separate. After separation you should have around 16 individual chips then per pita. ( see why I say it makes a ton!) Brush each strip with the rosemary olive oil mixture on the rough side of the pita, the inner side, place on a baking sheet, sprinkle with kosher salt and bake in a 400F oven for about 7-8 minutes, or until golden brown. Let them cool on a rack, then place them in your cookie tin for storage.
NOTE: I would suggest not to put any rosemary in the dip at all, just the parsley, otherwise it would be too overpowering, the freshness of the zest, lemon juice, parsley and garlic is a great compliment. Feel free to double, triple, or whatever the recipe. I made 8 bags of pita with 6 cans of beans for my son and DIL’s baby shower!!!
Print Friendly
I hope you try these summer appetizers for your next party!


Signature