
Eggs in combination with veggies have produced many a meal in my house for breakfast, lunch and dinner over the years and it’s still evolving. It’s still evolving because the variety of veggies are endless and because eggs can be prepared in so many different ways.
Take for example this crispy egg with leftover garlicky rapini, I’ve eaten this for breakfast, lunch and dinner, I always make extra rapini so I can make this combination. If you never had a crispy egg before just google “how to make a crispy egg” there’s a certain technique to it and the result will give you a souffled white with lacy, crispy edges and a nice runny yolk. I like to top mine with red pepper flakes, oregano, black pepper and salt.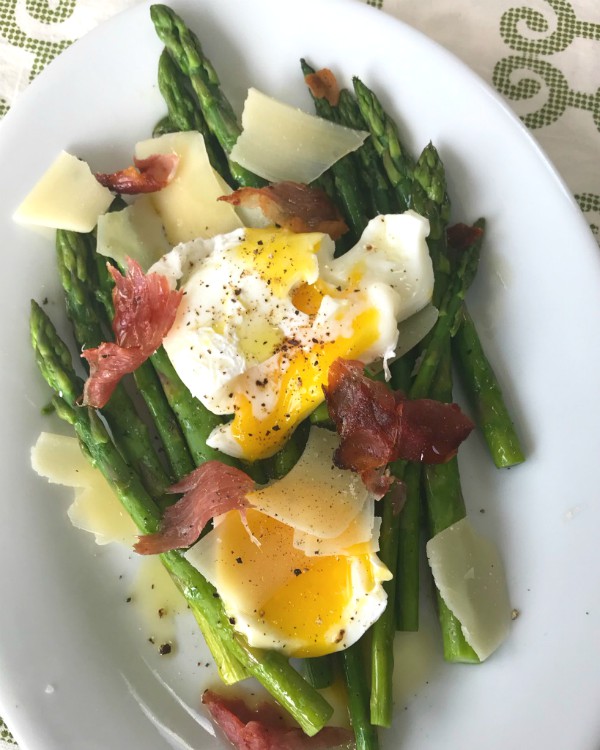
Here’s a winning combination fit for a fancy breakfast or brunch, a poached egg on a bed of roasted asparagus with crispy prosciutto and shaved parmesan, the creamy yolk when broken open oozes out and mingles with all the flavors, it’s heavenly!
Peppers and eggs, I seriously grew up on this as a kid, the best sandwich ever with Italian bread, a great lunch or dinner with a salad on the side.
This is a favorite of mine, a recipe from Ina Garten, it’s her herb-baked eggs and it’s wonderful for a lazy Sunday morning. You can make this in individual gratin dishes like Ina, or as I did, all in one pan. My twist on it is to add in some artichoke hearts, a perfect addition I think to the creamy herbs and cheese, but make sure you have some toasted, crispy bread for dipping.

This caprese omelet can be a staple for you this summer made with fresh mozzarella, garden basil and summer tomatoes, nice for brunch and a light dinner..
It’s spring here in Chicago and I love making my Spring Vegetable Frittata with Brie, with tender zucchini, asparagus and peas. I can go on and on about frittata’s they’re a staple. They’re not just for breakfast or lunch either, frittata’s make the best dinner with a side salad and crusty bread of course.

Pressed for time? You can always make this for dinner, Eggs in Purgatory, the way I make it has evolved over the years but here’s my basic recipe.
You can use chunky tomatoes or straight up marinara as I did above but I always add in some vegetables and herbs, here I added haricot verts with a few olives.
My clean out the fridge frittata with a little bit of this and a little bit of that like broccolini, mushrooms, red pepper and fresh mozzarella. It doesn’t’ take a lot of ingredients to put a meal on the table, a couple of mushrooms, a handful of broccolini and a red pepper sliced around some bruised spots creates a nice meal.

The other day I sliced rainbow colored cauliflower into “steaks” and roasted them, basically I only get two or three nicely shaped slices from a head of cauliflower because I cut them an inch thick, the leftover florets can then be tossed into a frittata of course!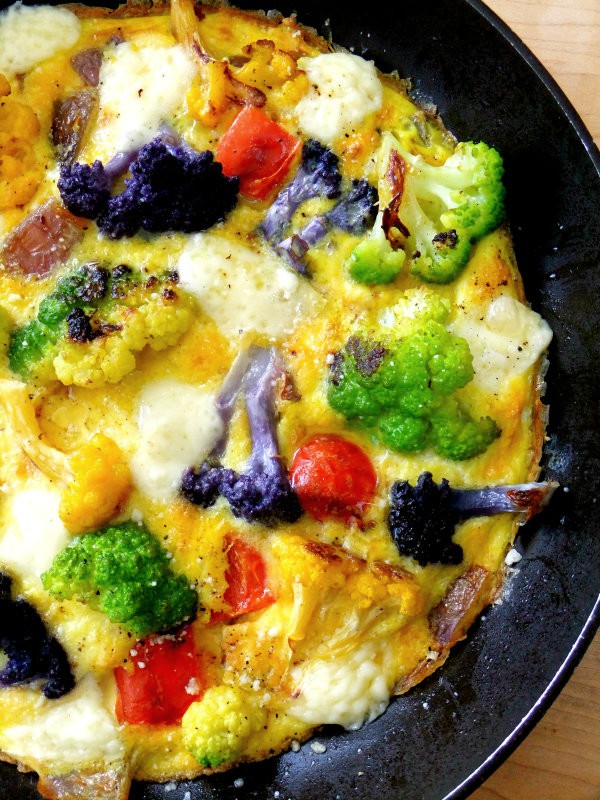
Like this one, so delicious and colorful too..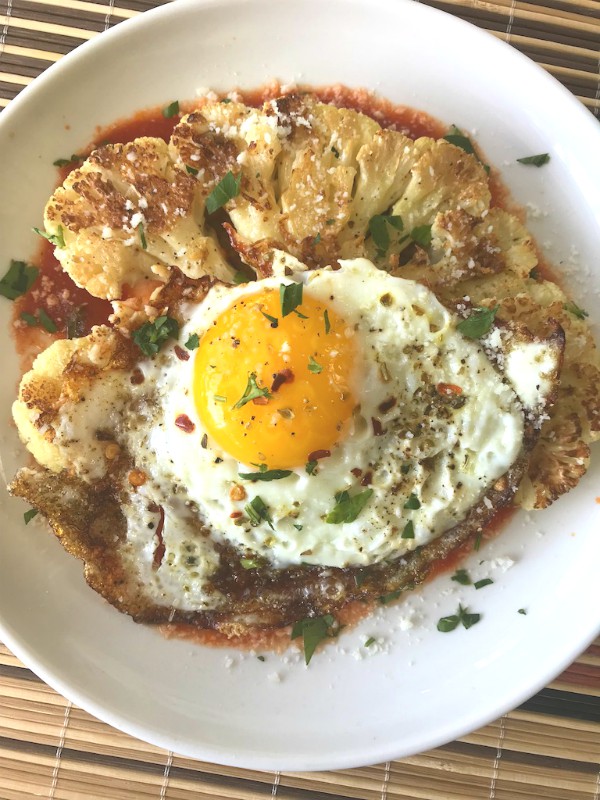
And lastly my version of “steak and eggs“. A crispy egg perched on top of a roasted cauliflower steak sitting in a pool of marinara, healthy, hearty and delicious and perfect for breakfast, lunch or dinner.
Endless meals can be made with veggies and eggs, these are just a few of my favorites. Go for what’s in season and just let your creative juices flow!
Follow me on Instagram to see what else I’m cooking up during the week.


 I’m Marie, a wife, mother, mother-in-law, and gramma of two beautiful girls. My passion is food, clear and simple but especially Italian food, hence the name of my blog, Proud Italian Cook. I want you to feel right at home here so grab a cup of coffee, I’ll get the pastries, take a look around and enjoy your visit! {


