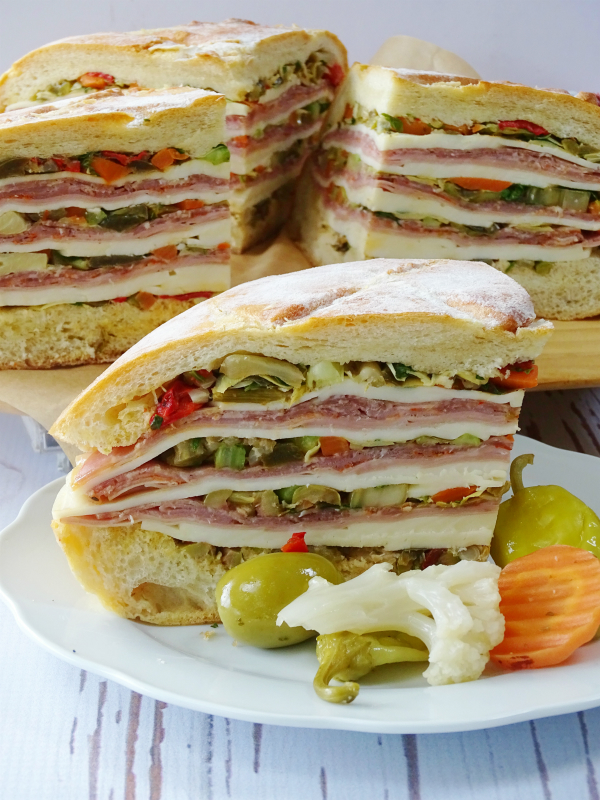
 The muffuletta is an Italian sandwich that originated among the Italian immigrants of New Orleans, it’s a mighty, hefty sandwich that has only has three very important components, bread, a spicy olive salad and Italian charcuterie.
 With Super Bowl coming up next weekend I thought this might be the perfect addition to your game day snacking table, but if not, please keep this in mind for summertime, it’s great for picnics and get-togethers.
 Don’t skimp on quality when making your muffuletta you want to make sure you have the best bread you can find, a round loaf is traditional, along with fresh meats and cheese. For my muffuletta I went with a good salami, some mortadella, a spicy capicollo and a picante provolone, all sliced thin, but feel free to use your favorite cuts.
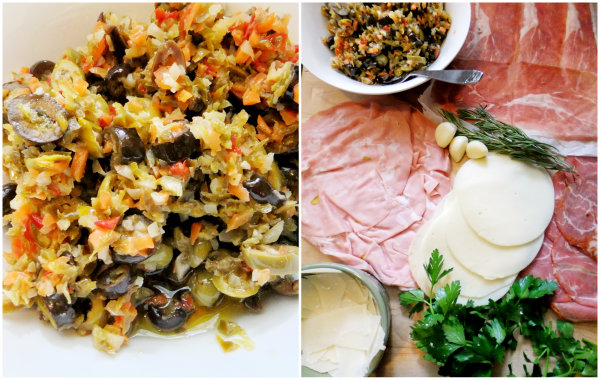
 The main component is really this olive salad, you can either make your own or buy a muffuletta mix from a good Italian deli/store. I do a mixture of both, I buy a mix but add fresh ingredients into mine, but basically the salad consists of, Italian black and green olives, and a giardiniera mix of different veggies. In addition I like to add roasted red peppers and artichoke hearts to mine and always fresh chopped celery, parsley, oregano and good olive oil.
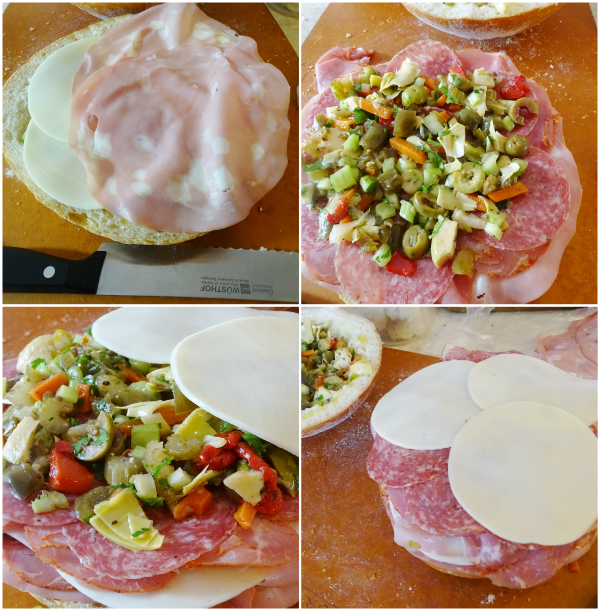
 It’s very simple to make, don’t be intimidated! Slice your round loaf horizontally then pull out some of the dense inside of the bread because you need room for all that filling to fit inside, save those insides for fresh breadcrumbs.
Spread that delicious olive salad all over the bottom and top portions of your sliced bread, then it’s all about layering.
 I like to put the cheese down first over the olive salad, it seems to cover it nicely and gives you a nice base for your layers, then go from there. I added olive salad in between some of my layers but you don’t have to, you can just have it on the top and bottom.
 When you’re done layering, wrap it tightly in plastic wrap and weigh it down, this is important because it will help distribute all the flavors together nicely. As you can see I used my heavy cast iron pan and added some cans on top to weigh it down even more.
Let it sit for two hours before unwrapping and cutting into it, don’t let it sit overnight because the bread might become soggy from the oils, you want to keep your bread nice and crusty.
 Then cut it into wedges and enjoy! I cut mine quite big for the picture but honestly a small slice is better when serving other things along side it, it’s so densely filled that you couldn’t possibly eat such a huge wedge unless this was your only main course. It’s definitely a show stopper and it also feeds a crowd!
- 1 10 inch round Italian bread
- olive salad, either a mix like I used, which I added more to, or you can make your own.
- ½ lb each of mortadella, salami and capicollo or meats of your choice. ( you might have extra left over)
- 1 lb or slicing provolone or a mixture of mozzarella and provolone
- olive oil
- WHEN MAKING YOUR OWN OLIVE SALAD, you will need;
- a cup or more each of Italian black and green olives, chopped
- a jar of vegetable giardiniera that has carrots, cauliflower and celery, drained and chopped
- a jar of marinated artichoke hearts, drained and chopped
- a jar of roasted red peppers, drained and chopped
- fresh parsley, 1 garlic clove and fresh crunchy celery and oregano
- toss everything into a bowl and mix well together with good olive oil
- IF USING A JARRED MUFFULETTA MIX
- I always add fresh chopped celery, roasted red peppers, fresh parsley and artichoke hearts. I also drain the jars and add my own good olive oil to the mix.
- Cut your bread horizontally and pull out some of the dense bread inside.
- Fill each side, the top and bottom of the cut loaf with the olive salad.
- Start to layer your meats and cheese, I start with cheese, adding olive salad in between the layers if you want
- When finished layering, put the top of the bread on and wrap in foil or plastic wrap.
- Compress the sandwich by weighing it down with a heavy pan filled with heavy cans.
- Let it sit for at least 2 hours before cutting but never overnight because the bread will become soggy and lose its integrity.
- Cut into small wedges for a crowd with other snacks or lager wedges for more of a main course.


 I’m Marie, a wife, mother, mother-in-law, and gramma of two beautiful girls. My passion is food, clear and simple but especially Italian food, hence the name of my blog, Proud Italian Cook. I want you to feel right at home here so grab a cup of coffee, I’ll get the pastries, take a look around and enjoy your visit! {


