Stuffed Artichokes Italian Style Step By Step

stuffed artichokes

The holidays are coming and I can’t think of a better recipe to be posting right now. As a kid stuffed artichokes were always a part of our holiday dinners or special celebrations. Throughout the years I’ve kept that tradition going making them for my own family as well as my husbands. Stuffed artichokes are one thing that’s always requested on the menu.

Thanksgiving food plate

This is a picture of last years Thanksgiving day plate and there’s my stuffed artichoke proudly displayed as one of my sides, I can make a meal of just that, but hey it’s the holidays and its time to splurge!

artichokes

The hardest thing about making stuffed artichokes is searching and seeking out good ones, I definitely go on a search and seek mission to find the best. It usually go to a few different stores or call ahead and talk to the produce guys who can assure me they will set aside a fresh case for me when they arrive.

You’re looking for fresh, firm artichokes with no signs of being discolored, dried or shriveled up.
prepping artichokes

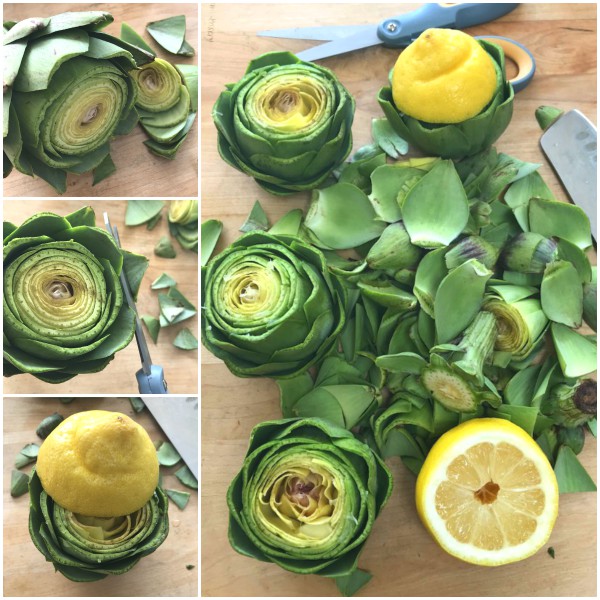
I always say stuffed artichokes are a labor of love, especially when making them for a crowd. No doubt about it, there’s going to be prep involved and it can be time consuming if you’re making a bunch but hopefully this step by step will help ease the process because it’s sure worth it in the end like all good things.

Step 1: Slice off the bottom stem so it can sit upright nicely in a pan, then pull off any lower leaves that look gnarly.

Step 2: Take a very sharp knife or even a good serrated knife and slice off the top third where the artichoke comes to a point.

Step 3: Grab your scissors and snip off the tips of the remaining leaves as pictured above, then open the leaves gently and give it a good rinse.

Step 4: Rub the entire cut area with a fresh lemon to prevent discoloration.

steaming artichokes

I to do a two step method, first steaming the artichokes unstuffed, then into the oven to bake for a while stuffed.

Place them in a sturdy bottomed pot which has a lid and fill it with water half way up to the chokes.

Into the pot I add some roughly chopped garlic cloves, lemon slices, salt, pepper and a drizzle of olive oil on each artichoke. Doing this gives them a nice flavor and the olive oil helps tenderize the leaves and the bonus is that the flavored steaming liquid can be used again at the bottom of the baking dish when they go into the oven to bake, this will help prevent them from drying out. 

steaming artichokes

Depending on how many I’m making I might have a couple of pans going at the same time, but keep in mind this part can be done ahead of time, like the day before.

You’ll know their done when you can tug at a leaf and it comes right off with ease. Be careful not to overcook them where the artichoke just flops open and almost falls apart, it needs to be intact. Keep in mind it’s still going to be put into the oven.

When finished steaming take them out, drain the liquid from the chokes and let them cool completely on a rimmed baking sheet. At this point you can place them in the fridge overnight and continue the second part of the process the next day if you choose to do that, but remember to reserve the steaming liquid.breadcrumb stuffing
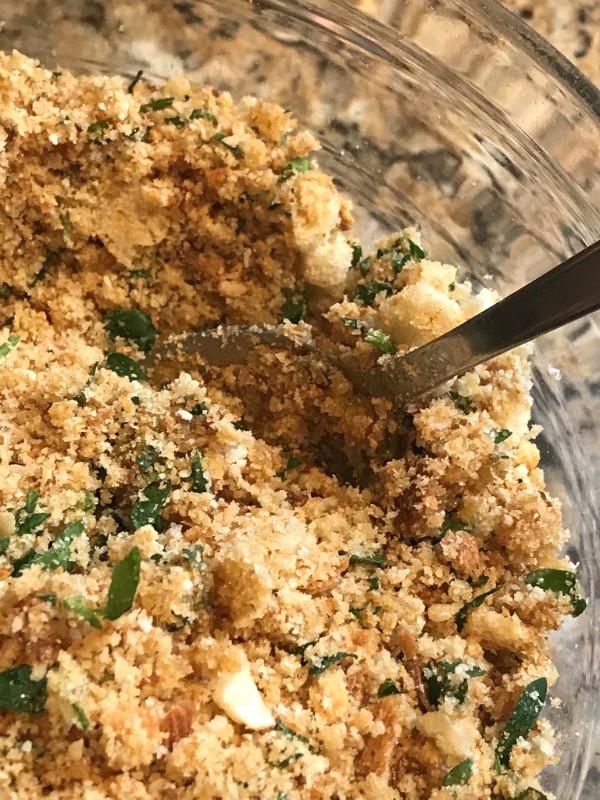
In the meantime you’ll want to mix up your stuffing. One thing I like to point out is that I don’t like using bread crumbs that are super processed in a can and almost look like powder. I have however made my own or have mixed them with a good quality bread crumb that is unseasoned. FYI, I do like Whole Foods in house breadcrumbs, you’ll find them in the bakery section they’re very good with a nice, course texture like homemade.

I must confess I don’t really measure out the stuffing mixture because it will all depend on how much stuffing you personally like to fill them with and how many artichokes you’re making,  but here’s a rough estimate.

Grab a bowl and add your breadcrumbs, start with maybe three cups, then add a good amount of grated pecorino romano cheese, a generous cup or so (I never use parmesan), add some garlic that is finely grated on a microplane about 3 cloves, then lemon zest and a nice bunch of chopped fresh parsley, taste it for salt and pepper adjusting the seasonings to your liking. Then drizzle olive oil onto the mixture until it feels like wet sand.

If you need more, make more, if you made too much put it in a container and keep it in the freezer.


prepping artichokes

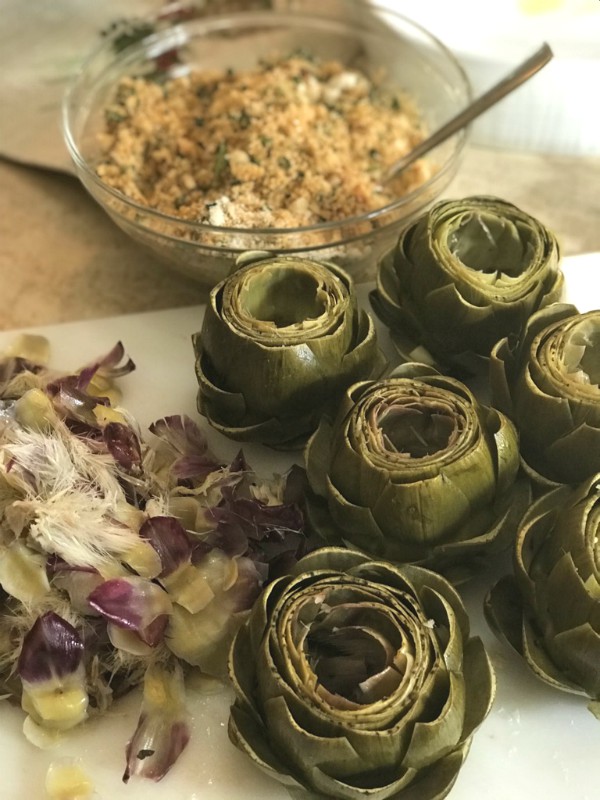
Are you still with me? Don’t bail your almost there! Now lets talk about the inner spiny choke. Back in the day when I first got married and made these I never removed the choke, I just stuffed them as is. But over the years I much prefer removing all that un edible mess before I stuff them. This is another reason why they are a true labor of love, but in the end it will be a much more pleasant eating experience.

Now because you have them pre-cooked and cooled down, even done the night before like I mentioned, the spiny choke is super easy to remove with either a grapefruit spoon or just a plain spoon.

It’s truly worth the effort. I just sit at my table with the TV on or some music going and take my time removing all of it, right above the precious and coveted heart which you leave in tact.

prepping artichokesstuffing artichokes

While you’re sitting in the same spot with the music or TV going start to stuff them, take your time and spread out each and every leaf gently adding a bit of  the bread crumb stuffing to each. I just use a teaspoon and go around and fill each one as well as the center. I’ll be the first to admit it’s time consuming, but again so worth it!stuffed artichokes
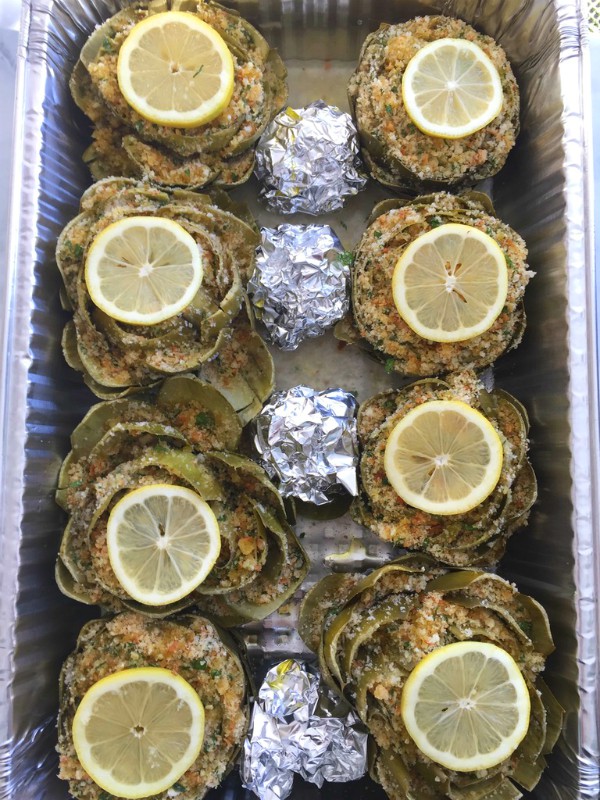
There are a couple of different ways to nestle them into a pan, I like them to have room, some artichokes are really large, I like using those big foil pans if making a bunch. Sometimes I place balls of tin foil in between so they don’t fall over if I don’t have enough to help them stand up straight.


stuffed artichokes

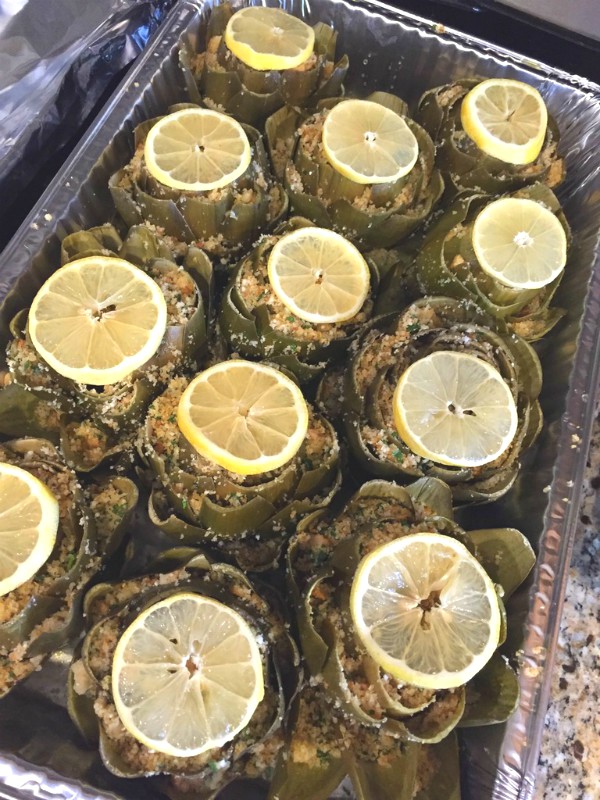
To finish them off  for the last phase of baking, drizzle each stuffed artichoke all over with olive oil then place a thinly slice of lemon on top of each one.

Next spoon some of that steaming liquid that was saved on the bottom of the pan, then cover the whole pan with heavy duty foil.

Place the covered pan into a 375F. oven for about 30 minutes, and that’s it! But to be absolutely sure peek underneath the foil and grab a leaf or two to test it out. The stuffing should be nice and moist with a slight crunch and the artichoke nice and tender.
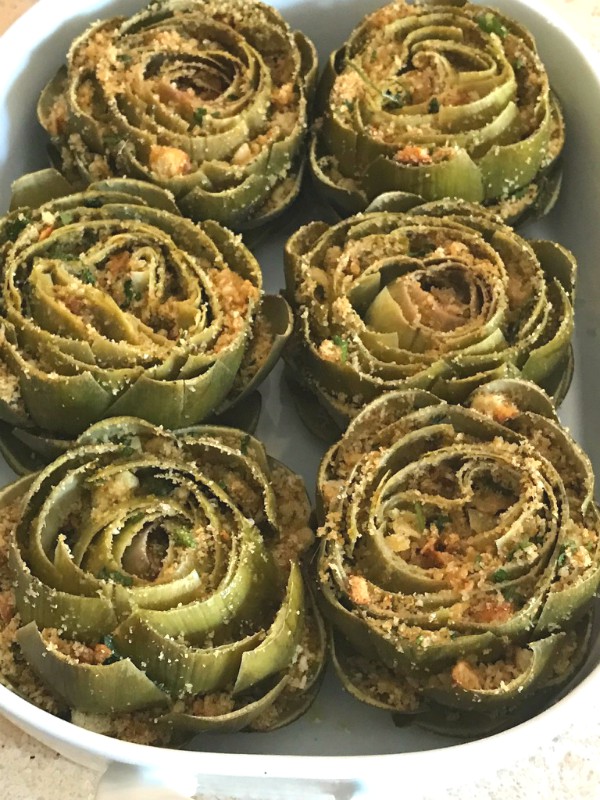
 

stuffed artichokes

It doesn’t matter how many you make the process is the same, stuff each leaf.

stuffed artichokes

Add lemon slices, liquid and bake.

stuffed artichokes

If you have leftovers or give some away no worries they’re excellent the next day or two after, just warm them up and enjoy!
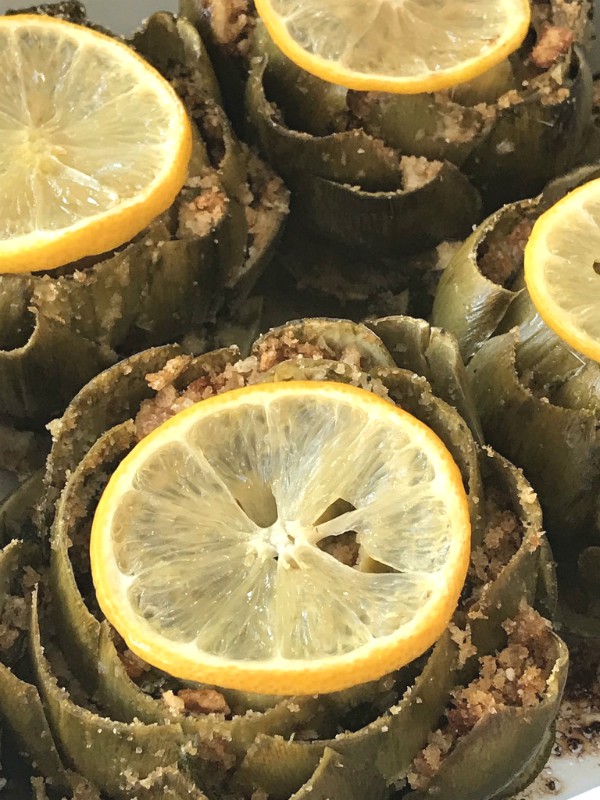
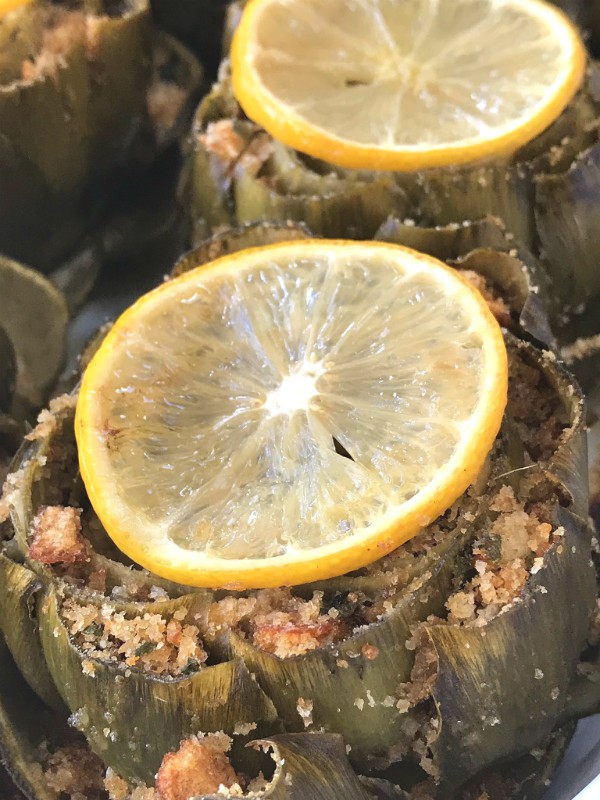
stuffed artichokesstuffed artichokes

Honestly you could just leave me in a corner with one of these beauties and I’m a happy camper, let the festivities begin!

Follow me on Instagram to see what else I’m cooking up during the week.

Signature

Italian Wedding Soup with Escarole and Mini Meatballs

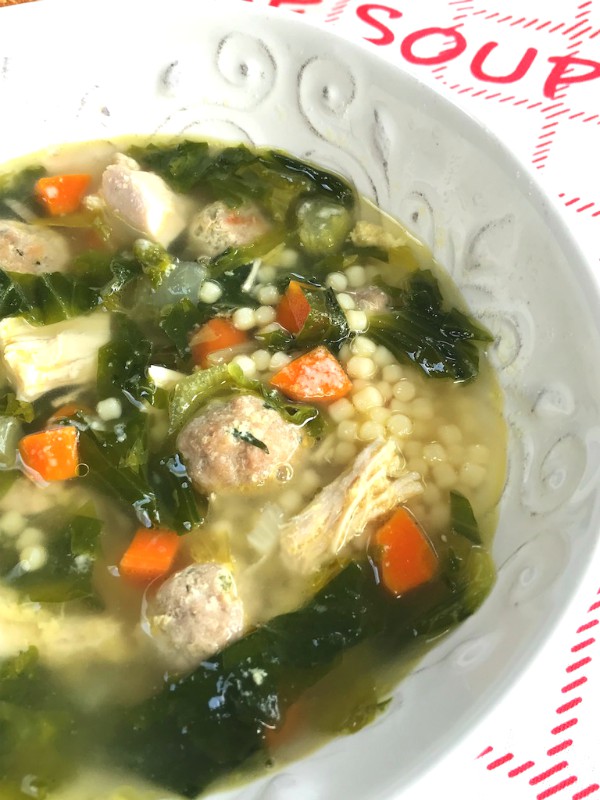
Italian wedding soup

Soup season is here and there’s nothing more comforting than coming in from the cold and warming up to a nice big steamy hot bowl of homemade soup, it’s good for the soul and good for the senses.

Certain soups evoke memories of the past and this is the one for me, Italian wedding soup. As a kid I just called it meatball soup, what kid doesn’t love cheesy flavored meatballs and teeny tiny pasta floating around in a big bowl!

There are so many versions of Italian wedding soup some by adding or subtracting different ingredients, and over the years I’ve even done that myself but the one thing that is constant and stays the same are those tiny little meatballs.

turkey meatballs

Flavoring up your meatballs is the key to this recipe, I’m talking garlic, onions, egg, parsley and a very healthy dose of grated pecorino romano cheese. You could also choose to add breadcrumbs but I don’t, I think it makes the tiny meatballs too dense, in my opinion you get a much lighter meatball without it. Just make them ahead of time so they’re ready to go.

My preferred meat to use is either ground turkey or chicken, since I’m using a chicken stock as the base anyway it makes sense, but I’ve also made it with beef as well, no rules here, choose whatever meat you like.

When I’m making the broth from scratch I’ll shred up some of the chicken and add it into the soup as well.

chicken stockclear broth

The shot right above shown with the spoon inside the bowl was done with a boxed, low sodium , organic chicken broth and straight up ground chicken for the meatballs with the same ingredients as stated in the recipe below. It’s quick, easy and tastes just as amazing!

I’ll be the first to admit that I’m not the kind of girl who always has homemade stock in the freezer, I don’t always have the time and patience but I admire those that do. I think it’s because I like my broth to look nice and clear so I have to strain it a couple of times to get to that point. It does require some patience and time but it’s truly worth it if you do it.

I do however have a well stocked pantry of organic, low sodium boxed broth. Word of advice, if you’re going to make this with your homemade stock, do it ahead of time and have it ready to go.

In this recipe I used a combination of both, I do like the enriched flavor that the simmering homemade stock gives the soup plus I like to add in some of that shredded chicken anyway, so it’s a win win situation, but I always make such a large amount and I never have enough stock so I’m always adding my good quality, store bought stock into the mix.

So you can use all homemade stock, a combination of both or all good quality store bought. Trust me there’s so many flavors that mingle together, either way it all works out in the end.

Italian wedding soup ingredients

I also used escarole as my choice of greens but any hearty green will do, kale, chard or spinach as well. My favorite pasta to use is acini di pepe, little round and couscous shaped, but again any small pasta of your choice will do, anelletti pasta works well too, the kind that looks like spaghettiO’s

True confession, I never boil my pasta in the broth of the soup, I don’t like it when the pasta blows up and gets mushy, so in my house it’s always cooked on the side.

Then one last essential ingredient is cheese rinds. Have you ever used them before? Save all your cheese rinds of parmigiano or pecorino, but make sure some of the cheese is still attached because when thrown into your soup the rind will soften and the flavors of the cheese will infuse throughout the soup, it’s magic!

making soup

Then it’s a matter of sautéing your veggies, adding the broth and cheese rind and letting that simmer until the rind starts to melt.

meatballs

Add in your cooked meatballs  and shredded chicken and the very last thing is your greens.

Italian wedding soupItalian wedding soup

Add some of your cooked pasta into the bowls and ladle all that goodness on top, then sprinkle with a bit of grated cheese and a quick drizzle of olive oil.

Italian wedding soup

cooked pasta

As I said I love making the pasta on the side, this way it doesn’t blow up in the broth and get mushy, it always has a nice bite to it when I add it in.


Italian wedding soup

It’s hearty, healthy and made with love, true comfort food!

Follow me on Instagram to see what else I’m cooking up during the week.

5.0 from 3 reviews
Italian Wedding Soup with Escarole and Mini Meatballs
 
Author:
Ingredients
  • 2 quart boxes of good quality stock or homemade stock or a combination of both
  • 2 chicken breasts, bone in skin on, cooked in the homemade stock, cooled and shredded, optional
  • MEATBALLS
  • 1 lb. ground turkey, chicken or beef
  • 1 egg
  • ½ small onion and 2 garlic cloves grated on a microplane
  • ½ cup, grated pecorino cheese
  • a good handfull chopped parsley
  • salt and pepper to taste
  • SOUP
  • 1 heaping cup each of chopped carrots, onions and celery
  • 3 smashed garlic cloves
  • 1 big bunch escarole, chopped or greens of your choice
  • 1 or 2 cheese rinds (with some cheese attached)
  • parsley
  • grated pecorino romano
  • PASTA
  • 1½ cups dry small pasta like acini di pepe or anelletti shaped, cooked according to package then rinsed with cold water and set aside in a container
Instructions
  1. I used a combination of home made stock and good quality store bought.
  2. For the homemade stock I used;
  3. bone in skin on chicken breasts with enough water in the pot to cover, about 2 quarts, then add ½ onion or leek, 1 carrot, 1 celery, 3 garlic cloves, salt and pepper to taste.
  4. Simmer until the chicken starts to fall off the bone.
  5. When stock is finished remove breasts let them cool and shred the chicken. Also strain the broth really good either with a fine mesh strainer or through cheesecloth until it's nice and clear.
  6. For the MEATBALLS mix together your ground meat, egg, garlic, onion, parsley, pecorino, salt and pepper until nice and incorporated.
  7. Roll into small 1 inch balls, place on a parchment lined baking sheet and into a 375F oven for 15 minutes, you can do this a day or two ahead. (You can also cook them stove top.) Prepped and ready to go.
  8. In a big heavy bottomed stock pot drizzle the bottom with olive oil and a dab of butter.
  9. Add all the veggies to the pot, carrots, onion, celery, garlic, when softened pour in your stock.
  10. When stock is hot add in your cheese rinds and then simmer partially covered.
  11. When you see the rind start melting and cheese bits start to fall off, stir and taste for seasoning and adjust.
  12. Add in your cooked chicken, if using it, and all the cooked meatballs and some fresh chopped parsley.
  13. Continue simmering.
  14. Remove rinds and add in all the chopped escarole or other greens of your choice.
  15. Stir and turn off the heat, then I always add in some grated pecorino romano for added flavor, a good handful.
  16. To serve grab a bowl, add some cooked pasta if so desired, ladle the finished soup on top, making sure to get a little bit of everything, more cheese and a drizzle of olive oil.


Signature

Tuscan Apple Cake

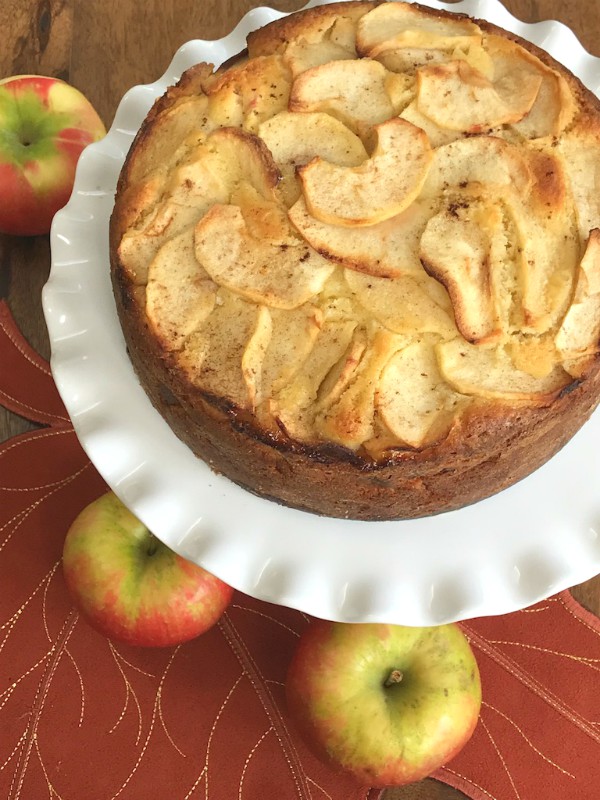
tuscan apple cake

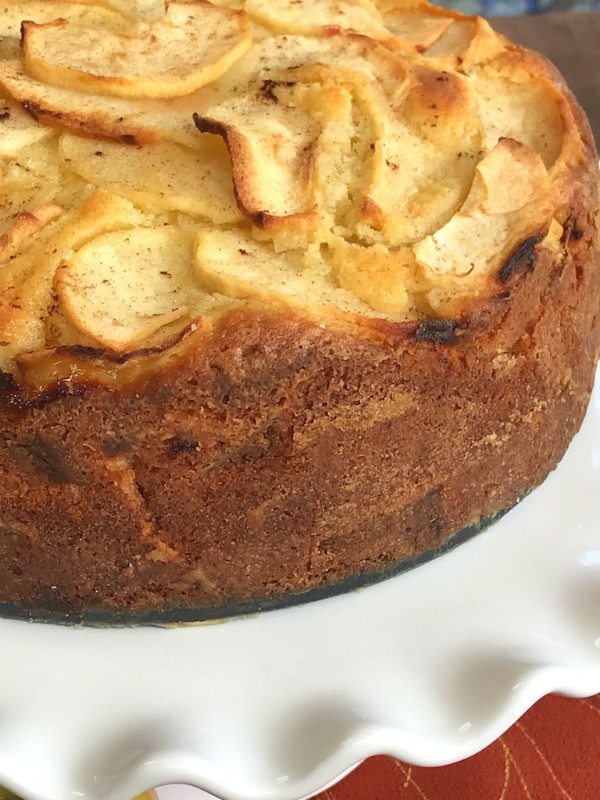
Tuscan apple cake, also known as torte di mele, is a rustic and simple Italian dessert filled with fresh sliced apples. The cake has a nice dense texture with a buttery crumb that picks up the added flavors of your choice.

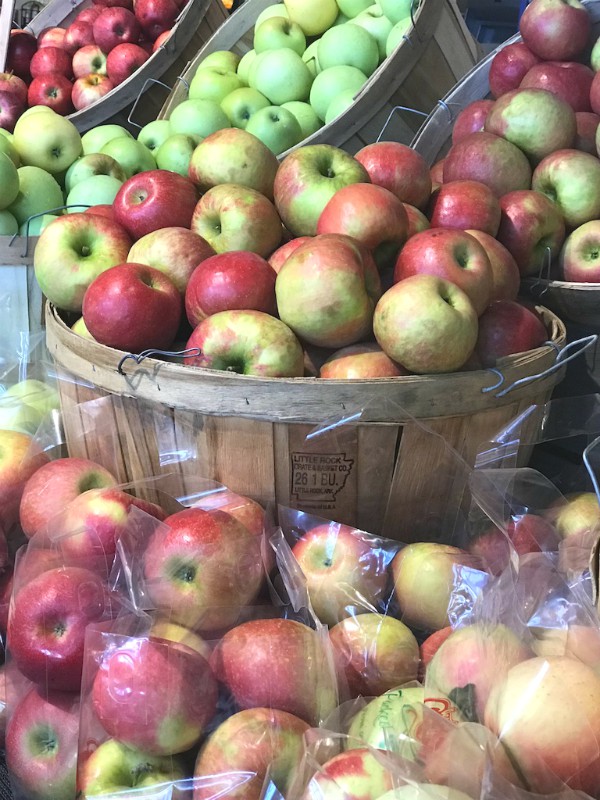
apple display

Right now it’s apple season where I live and they are in abundance, so pick whatever apples suit your fancy for this recipe, it’s all good.

To me the most important thing to remember when making a tuscan apple cake is to flavor the cake itself. Because the crumb has such a hearty texture it can take on nice bold flavors such as lemon zest, vanilla, a touch of cinnamon and my favorite addition along with the others is Amaretto liquer.


tuscan apple cake

I made my cake in a spring form pan but you can also use a square or round baking dish, just keep it to an eight or nine inch size.

tuscan apple cake

This is the perfect “coffee cake” for me and for anyone else that enters my home, no fancy ingredients just pure deliciousness!

THE RECIPE WHEN FIRST POSTED HAD TWO MISTAKES, IT HAS BEEN CORRECTED

Follow me on Instagram to see what else I’m cooking up during the week.

5.0 from 3 reviews
Tuscan Apple Cake
 
Author:
Ingredients
  • 6 apples of your choice, 2 will be diced and the rest will be thinly sliced, peeled and cored for all and lightly tossed with a touch of lemon juice to prevent discoloration
  • 2 cups all purpose un-bleached flour
  • 4 eggs
  • 8 Tablespoons of butter, 7 will be melted while reserving 1 tablespoon for dotting the top ot the cake
  • 1 cup, sugar
  • ⅓ cup milk
  • 2 teaspoons baking powder
  • zest of 1 lemon
  • 1 teaspoon vanilla
  • 2 Tablespoons amaretto liquer (optional) sub almond extract if you prefer but just ½ teaspoon
  • a pinch of salt
  • a pinch of cinnamon
  • lemon juice to prevent apples from discoloration
  • extra butter to prepare the pan
Instructions
  1. Heat oven to 350 degrees
  2. Butter and dust with flour a 9 inch spring form pan.
  3. Place the prepared pan onto a rimmed baking sheet.
  4. Melt the 7 tablespoons of butter in a small saucepan, let it cool then add the milk, zest, vanilla and optional amaretto or almond extract.
  5. Whisk together the flour, cinnamon, baking powder and salt.
  6. In a large mixing bowl mix eggs and sugar together until light and creamy, a few minutes.
  7. Add the flour mixture and beat until it's incorporated, then add the cooled milk with all the flavorings.
  8. When everything is well mixed fold in the diced apples.
  9. Pour apple batter into prepared pan.
  10. Arrange remaining thinly sliced apples all around covering the top (you probably will have some apple slices left over depending on their size) then give it a light sprinkle of sugar all over as well as a tiny bit of cinnamon.
  11. Dot the cake top with the tablespoon of reserved butter.
  12. Bake for somewhere between 60- 70 minutes, keep in mind if you by chance use an 8 inch springform pan it will take longer to bake because it will be deeper.
  13. Mine took 70 minutes in a nine inch but keep in mind ovens do vary, so my advice keep watching!
  14. Apples should be golden brown and cake should be barely moist when tested with a toothpick.
  15. Let it rest and cool down for at least 15 minutes before you pop the spring.
  16. ENJOY!
  17. UPDATE: If you want to reverse the apple arrangement, I've done it by folding 4 diced apples into the batter, with 2 thinly sliced to cover the top, it all works.


Signature