January is the month that everyone wants to do a reset in the eating department, we’ve enjoyed all our goodies during the holidays and now it’s time for some healthier eating.
If eating salmon is on your regular meal rotation I encourage you to change things up and make these salmon cakes instead of the usual filets.

If you’re a salmon lover these cakes will soon win you over. Tender, juicy chunks of salmon on the inside, lightly crunchy on the outside with no heavy fillers that mask the actual salmon taste and oh so flavorful, they are amazing!

The reason these salmon cakes are so scrumptious is that they’re made with fresh salmon, not canned, it really makes a big difference in taste and over all texture. If you check out some recipes on the Internet you’ll find that many salmon cakes are made with cooked, fresh salmon. I prefer forming them in the raw state, like you would a burger, I feel they retain their juiciness that way.

The added ingredients which are vegetables are diced small, sautéed then mixed into the fresh chopped salmon. You can do this all ahead of time getting your prep work done because they take no time at all to cook.
Stick with wild caught salmon rather than farmed, I can always find it available here. I once discussed this topic with my fish monger at Whole Foods because they do sell farm raised there, but he went into deep length saying that their farm raised salmon is sustainable and ethical and raised the right way so that might be another option for you.

After the sautéed veggies cool down they get gently mixed into the salmon along with some added spice and binding agents with no need for eggs.

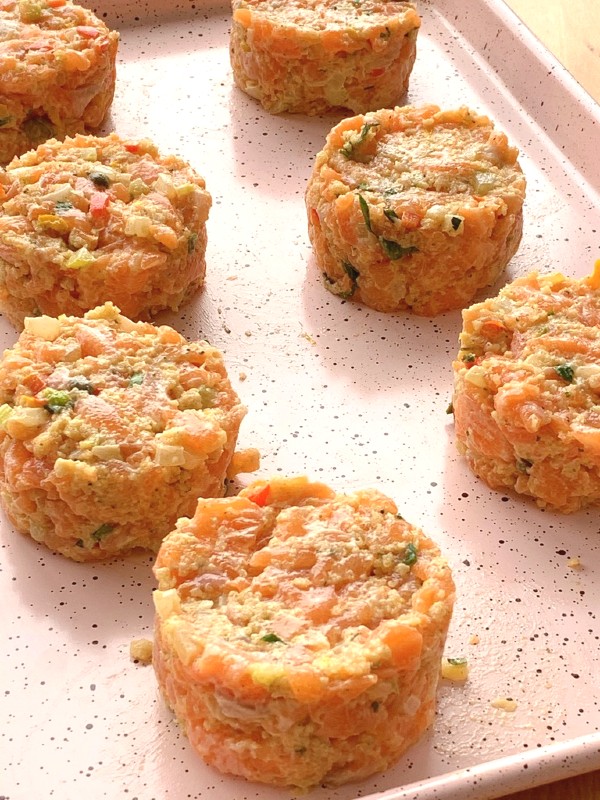
A key tip is to form all the salmon cakes then refrigerate them for at least 2 hours, even overnight if you wish. This firms them up and they’re able to keep their shape when cooked. I would not recommend forming them and cooking immediately, they won’t be sturdy enough.

I like to use a three inch biscuit cutter that I have to form the salmon cakes. I place the form on the pan I’m going to stick in the fridge, spoon the mixture inside filling to an inch deep, press it compact then I lift the biscuit cutter right off and a perfect shape is formed.

After they’re chilled they lift off easily with a spatula.

I like to crisp up the top and bottom on the stove top first, then finish them off in the oven.

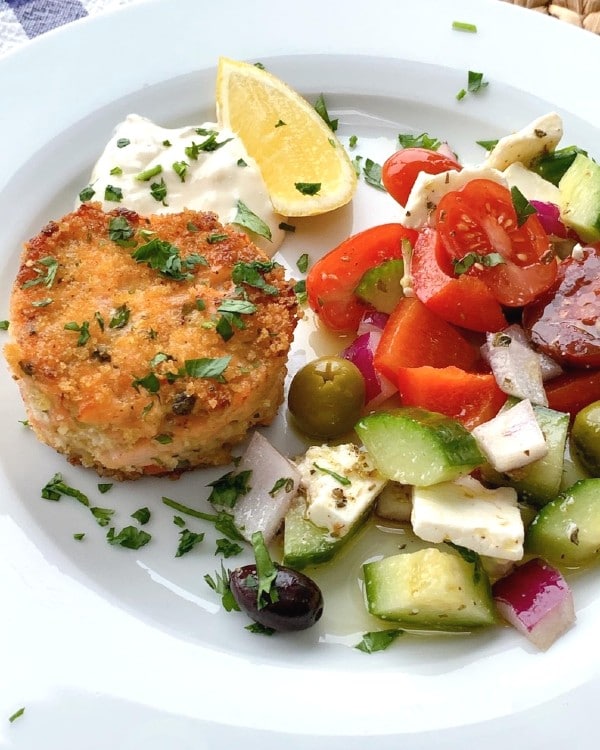
All you need is the a little tartar sauce, a squeeze of lemon and a nice salad on the side and you’re on your way to a healthier and very tasty January!
- 1-1/2 lbs. fresh salmon or 4 filets, skin removed. hand chopped into small chunks ( I was able to make 7 cakes with that amount)
- 1 celery stalk, small dice
- ¼ onion, small dice
- 2 green onions, sliced small
- 2 small mini red peppers or half of a large red pepper, small dice
- 1 yellow mini pepper or ¼ of a large, small dice
- zest of 1 lemon
- 1 tablespoon capers, rinsed
- a pinch of cayenne
- ½ teaspoon Old Bay seasoning
- 1 large garlic clove, chopped fine
- 1 heaping tablespoon chopped parsley
- ⅓ cup full fat mayo
- ⅓ cup panko bread crumbs and a little extra to coat the top and bottom of the cakes
- 1 heaping tablespoon of Djon mustard
- olive oil
- salt and pepper
- Drizzle the bottom of a small sauté pan with olive oil and toss in all the diced veggies, onions, peppers, celery and garlic, cooking until translucent. Turn off heat and let them cool down completely.
- Into a bowl add the chopped salmon, the cooled down veggies, the mayo, zest, breadcrumbs and Djon and a little salt and pepper to taste.
- Gently toss well to incorporate ingredients.
- Form your salmon cakes into 3x1 inch deep patties. Note: I use a biscuit cutter to form mine as stated in the post.
- Refrigerate the salmon cakes for at least 2 or more hours for best results, I would not form and then cook them right away.
- When it's time to cook, heat the oven up to 450F.
- Drizzle the bottom of an oven proof skillet with olive oil.
- Pour some panko breadcrumbs on a flat plate and press the bottom and top of each salmon cake into it then into the heated skillet.
- When each cake is lightly golden on each side place the oven proof skillet into the oven and finish it off, anywhere to around 6 or 8 additional minutes, oven vary so you be the judge.
- Serve with a squeeze of lemon and tartar sauce, or an aioli of your choice.
- NOTE; I had some leftover and the next day I heated them at 350 just until warm and they were still great.

 I’m Marie, a wife, mother, mother-in-law, and gramma of two beautiful girls. My passion is food, clear and simple but especially Italian food, hence the name of my blog, Proud Italian Cook. I want you to feel right at home here so grab a cup of coffee, I’ll get the pastries, take a look around and enjoy your visit! {


