Pesto Pappardelle Pasta with Zucchini Ribbons

pesto pappardelle pasta

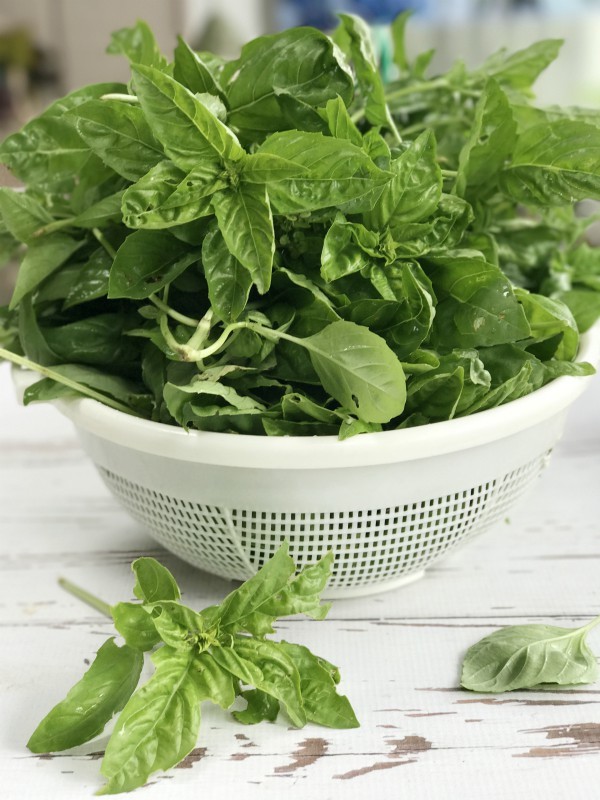
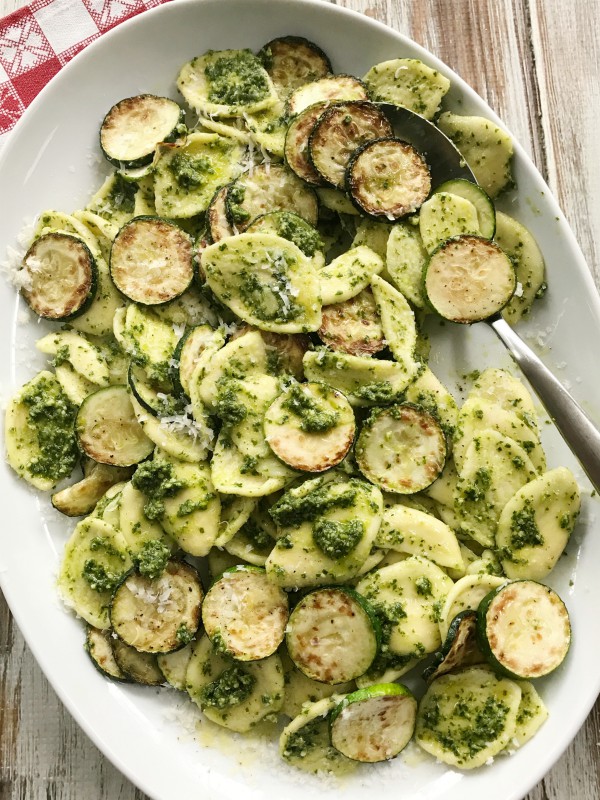
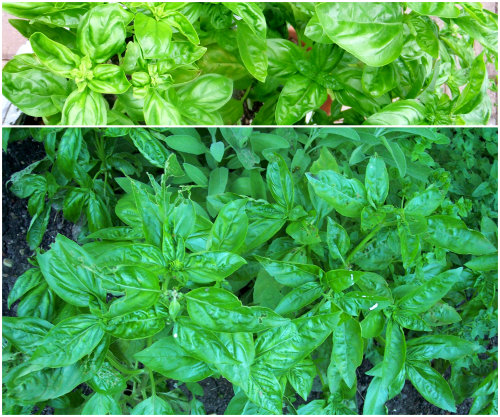
I love this time of year when I can walk outside into my back yard and pick enough fresh basil to make a batch of pesto. Usually the first time that I make pesto I immediately have to cook up some sort of pasta with it, there’s nothing like freshly made basil pesto swirled into warm pasta, perfection at it’s best!

zucchini ribbons and pappardelle pasta

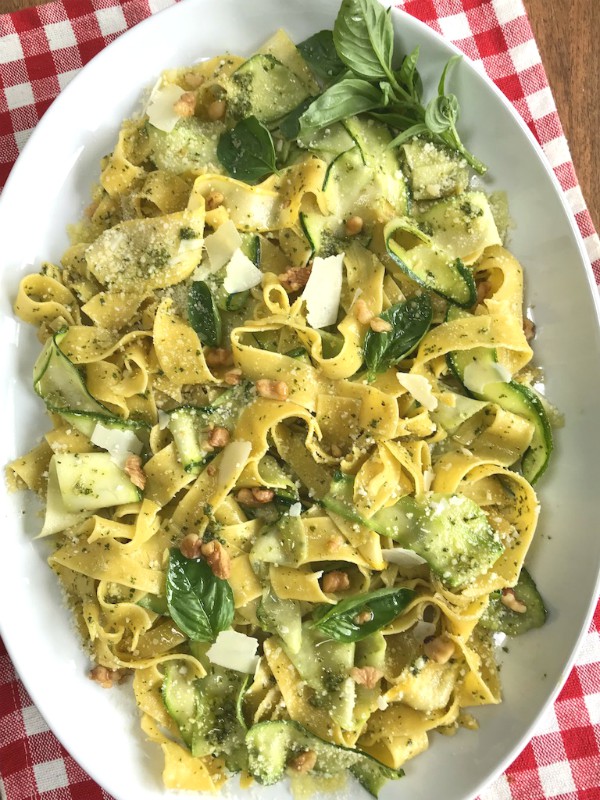
I decided on making pappardelle pasta this time, pappardelle is a large, broad and flat noodle and it goes really well with the addition of some zucchini ribbons  tossed into the warm pasta at the end. The long, wide zucchini ribbons mimic the pappardelle and adds a nice touch to the freshly made pesto.

A vegetable peeler is a great tool to use when making zucchini ribbons and it’s easy to do, but just make sure you keep turning the zucchini when you reach the seeds like I did, shown in the above photo.

home grown basil

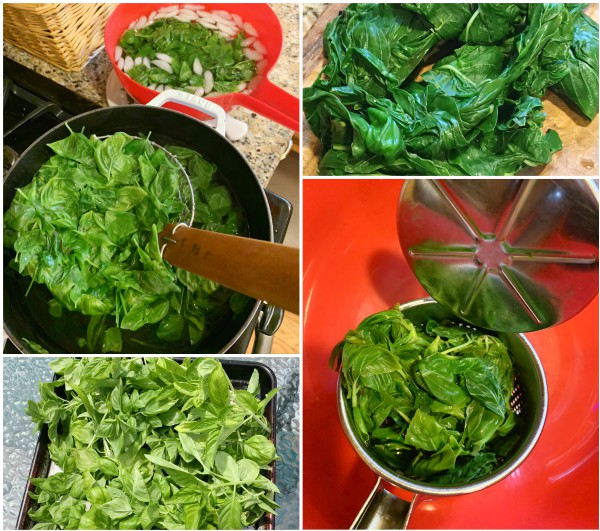
To make the basil pesto gather up the best leaves you can find, ones that are unblemished.

making basil pesto

A tip I learned a long time ago was to blanch the basil in boiling water for just fifteen seconds then immediately plunge it into cold ice water to shock it and stop the cooking process. By doing this the pesto will stay a nice bright green color, it won’t oxidize and have that dark green color on top which is not so visually appealing.

After you scoop the leaves out of the water make sure you give them a really good squeeze, removing as much water as you can. Another tip I learned a while back was to use a potato ricer for squeezing out the water, it works wonders, the handle comes down and it easily pushes all the excess water through the holes beneath, but if you don’t have a ricer just wrap it up in a tea towel and twist it until it’s nice and dry.

basil pesto ingredients

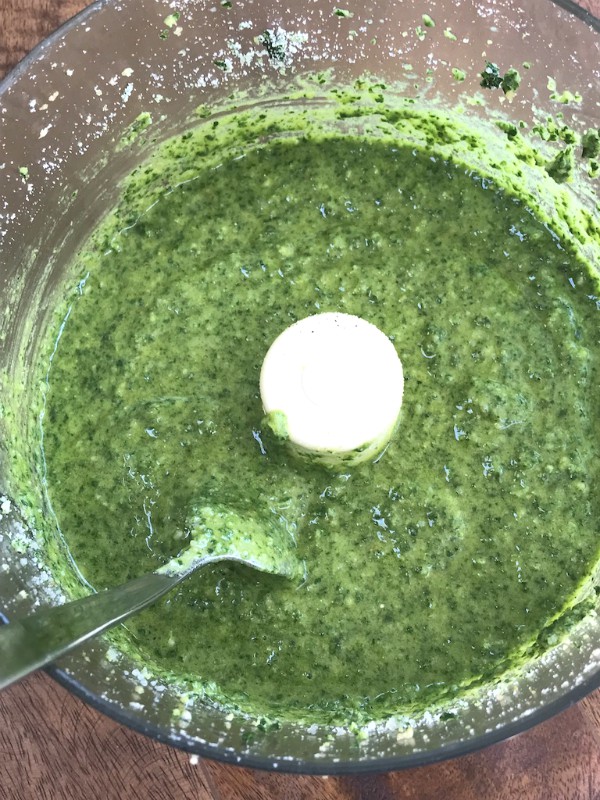
Freshly grated Parmigiano Reggiano is a must for a quality tasting pesto as well as a bit of garlic, good olive oil and lightly toasted walnuts. I stopped using pine nuts a while ago it’s hard to find descent ones and the price is outrageous, plus I have really come to love it with the toasted walnuts anyway.

basil pesto

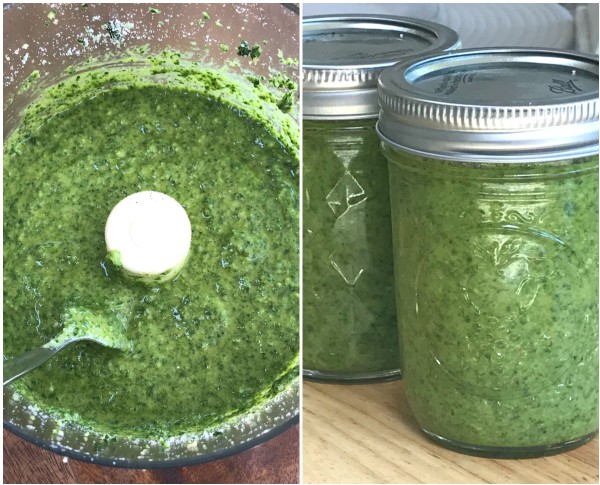
I like using a food processor to make my pesto it’s quick and easy and then I store it in the fridge using glass jars, pesto also freezes really well.

pesto pappardelle pasta

No need to cook the zucchini ribbons at all you just toss them raw right into the warm, strained pasta that has been tossed with the fresh basil pesto.

pesto pappardelle pasta

This is such a fresh and vibrant tasting pasta dish to make when basil is in abundance this time of year, it’s even good cold as a salad with some grilled chicken or shrimp.

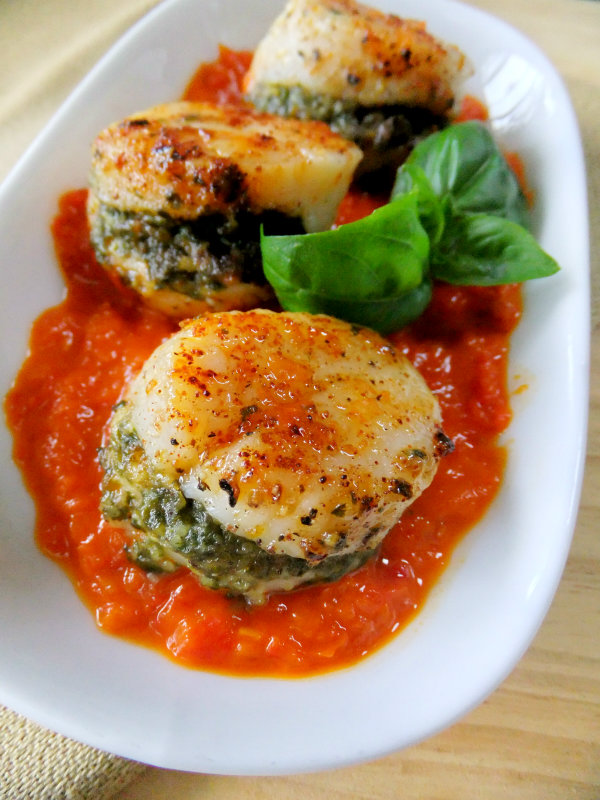
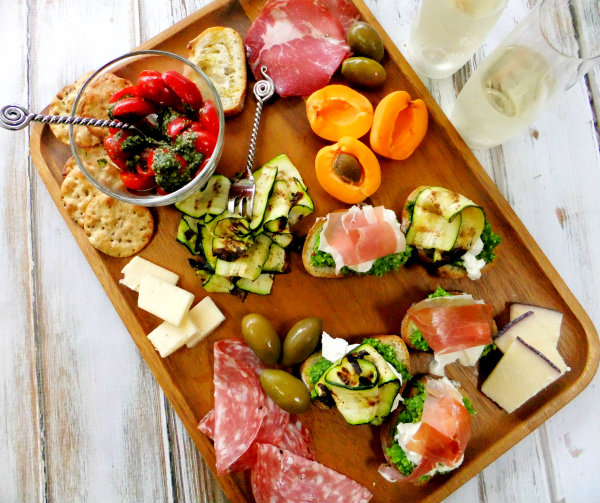
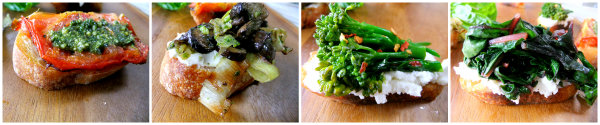
Don’t stop at only pasta though fresh pesto can be slathered on just about anything, use your imagination and get creative!

Follow Proud Italian Cook on Instagram to see what else I’m cooking up during the week.
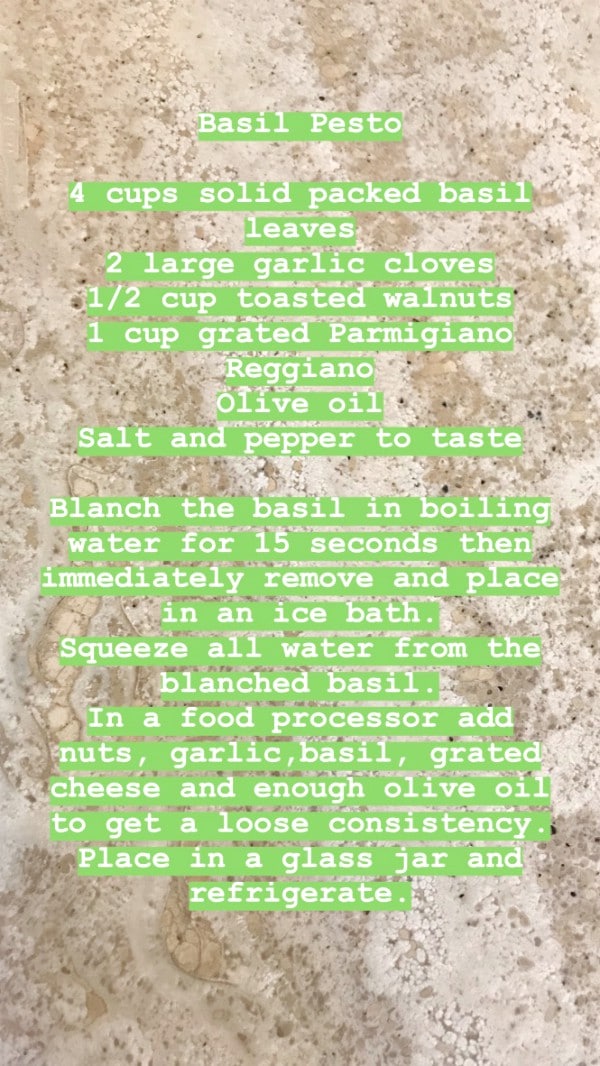
5.0 from 3 reviews
Pesto Pappardelle Pasta with Zucchini Ribbons
 
Author:
Ingredients
  • BASIL PESTO
  • 4 cups of solidly packed basil leaves, unblemished and washed
  • 2 large garlic cloves
  • ½ cup toasted walnuts
  • 1 cup grated Parmigiano Reggiano
  • olive oil
  • salt and pepper to taste
  • FOR THE PASTA
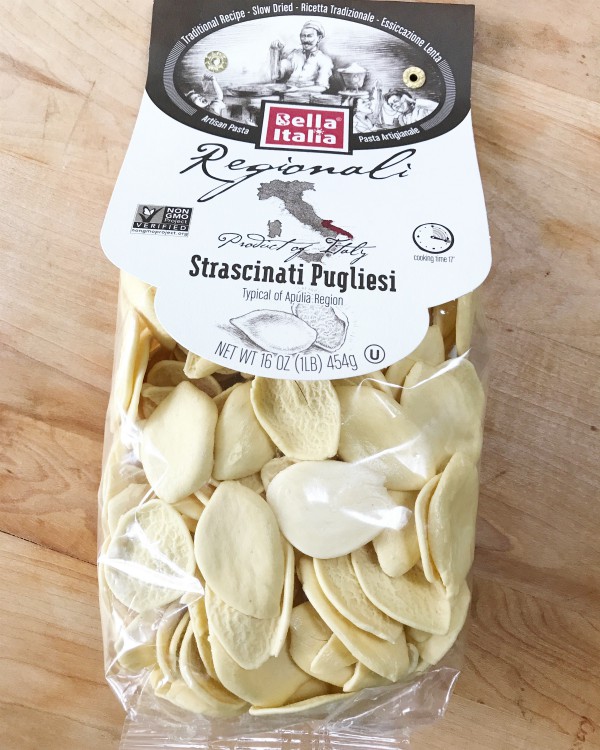
  • ½ lb. pappardelle pasta
  • 2 zucchini and 1 yellow squash or 3 zucchini, medium sized made into ribbons with a veggie peeler
  • basil pesto, no measurement just enough to coat the warm pasta to your liking
  • a few basil leaves, toasted walnuts and grated cheese for garnish
Instructions
  1. TO MAKE THE PESTO
  2. Blanch the basil in boiling water for just 15 seconds.
  3. Immediately remove, scoop out with a spider and place into an ice bath to stop the cooking.
  4. Squeeze out all the water from the blanched basil.
  5. In a food processor add the nuts, then garlic and basil and grated cheese, combine.
  6. Now while the processor is running stream enough olive oil down the shoot until you get a nice loose consistency.
  7. Place into a glass jar and refrigerate until ready to use, I got a little over 2 pints.
  8. Pesto stays well in the fridge for at least 3 weeks or in the freezer for over a month.
  9. TO MAKE THE PESTO PAPPARDELLE PASTA WITH ZUCCHINI RIBBONS
  10. Cook pasta according to directions al'dente, reserve a little pasta water if need be for incorporating.
  11. Scoop out and place into a large bowl.
  12. Add in enough pesto to your taste and liking, if it seems to thick loosen it up with some of the warm pasta water you reserved.
  13. Toss in the raw zucchini ribbons while the pasta is still hot, tossing and coating with the pasta and pesto.
  14. Arrange everything onto a nice platter.
  15. Add some small basil leaves, some toasted walnuts, extra grated cheese and a drizzle of olive oil all over for garnish.
  16. Enjoy!


Signature

Refections on 10 Years of Food Blogging

basil potted plant


One of my greatest pleasures during the summer months is to have fresh basil growing all over my backyard, some in planters and pots and some in the ground. Basil is my hands down absolute favorite herb, just the smell of it makes me happy. I often have a big bouquet of it sitting on my kitchen island.

It’s my go-to herb and I use it in too many dishes to mention here. Making fresh basil pesto is another summer pleasure of mine, I’m happy when I know I have a stash packed away in my freezer as well as my fridge, especially when I pull a jar out in the dead of winter.
fresh basil


Talking about basil brings me back to the very first post I wrote on this blog written August 15, 2007. Yes, this August will mark my tenth year of Proud Italian Cook, I honestly can’t believe it’s been ten years, where did the time go? One thing I know for sure is that the older I get the faster time flies by.

I didn’t know a thing about starting and maintaining a blog back then I just knew I wanted to do it. I was reading a small group of blogs at the the time and I thought what a fun hobby and a nice visual way to document my own recipes for family. With the help of my daughter we got it up and running then little by little I started to learn the technical aspects, how to actually take pictures, write something and post it. It was a huge challenge for me because my brain has a problem comprehending technical issues, and I made a ton of mistakes.

The first time I hit “publish” I was so stressed out, what was I thinking? I have no clue what I’m doing here, this is way over my head. If anything went wrong behind the scenes I would be in pure panic mode until it was fixed, my poor husband had to deal with me through it all.

Sometimes I look back on older posts of mine and I cringe at my writing and pictures of food where I used my flash. Apparently I use to write with caps quite often, I guess I really wanted to get my point across. The grammar police would have a field day with my writing, I still have issues with commas and exclamation points! (see what I mean).

The best perk of blogging and one I never even thought existed back then was the community of people that I would virtually meet along the way, some even face to face, bloggers and followers who share the same passion as I do. They have been a source of encouragement and support and have inspired me with all they do as well as their positive comments, and for that I am eternally grateful.

It’s fair to say that if I never started my little food blog, my world would be a very different place.


making pesto


Yes, things are quite different in the blogging world today since the time I first started, it’s not as small and personal as it use to be, social media outlets are rapidly changing. Sometimes I wonder if the blog platform will still be relevant for the next generation, things like snapchatting keeps them very busy. Over the years I have seen blogs come and go, maybe it just wasn’t fun anymore, too much competition or worrying about ranking and SEO, if that’s the case I would agree, quit, the joy is gone.

Having a blog is a major commitment and time consuming and you certainly wouldn’t want to waste your precious time if it felt like a burden. On the flip side if you enjoy it, find your niche, add good content, tell a story and speak in your own true voice, your honesty will shine through and people will connect and want to follow you, and in my case throw in a good recipe every now and then.


basil pesto


I feel like I’m evolving in my old age, I very recently went from a PC to a Mac which has been like learning a whole new language to me, I’ve stepped out of my comfort zone big time so I feel I’m challenged daily now until I get the hang of it, in fact this will be is my first post using my Mac, I hope it turns out when I hit publish!pasta


I love being on Instagram, it’s a visual short and sweet tidbit of my daily doings, cooking, family, life, so I’m going to continue with that, and if you care to follow me there just click here.

I’ve also made some short videos on my blog with a 14 year old future computer genius friend of mine, we had fun doing it and learned a ton of things, so I’ll be doing more of that.

I never realized when I started this blog that August 15th was Julia Child’s birthday so maybe it was meant to be, plus I’ve always loved her quote, “People who love to eat are always the best people”.basil pesto pasta

So for now since I’m still having fun I’m just going to slide right into the next decade. To be continued…

Signature

Pesto Stuffed Scallops

pesto stuffed scallops I can honestly say I went a bit overboard in planting basil this year so I’ve been very busy making lots of pesto, but to me nothing tastes better than fresh homemade pesto! Every time I’ve bought pesto from a store I was so disappointed, it’s either way too garlicky or has a weird fake taste, so I prefer to make my own. Homemade pesto is so easy to make yourself and you can whip up a huge batch because it freezes perfectly. Just think how nice it would be to pull out a container of your pesto in the dead of winter and plop a dollop in a nice bowl of hot soup.

I also use it on my eggs, frittatas, grilled veggies, fresh tomatoes, meats, crostini, pastas and I especially love it with fish of all kinds. Have you ever tried smearing pesto on top of a beautiful piece of salmon and then baking it? It’s so flavorful, moist and delicious! I also love it on grilled shrimp and scallops. Here’s my pesto recipe.

I never thought of actually stuffing a scallop with pesto until I came across an article that Mark Bittman wrote which gave me the inspiration to make my own and another good excuse to use my homemade pesto.

pesto stuffed scallops It’s ridiculously simple to do, but you must use the large sea scallops and not the small bay ones. Just take a sharp knife and make a horizontal slit in the middle being very careful not to cut all the way through, you want your scallop butterflied, then put a small teaspoon of pesto inside. Salt and pepper your scallops then place them into a saute pan ( not a non stick)  that’s been heated on medium heat with a little olive oil. Cook 2 to 3 minutes on each side being careful when your turning them over. That’s it!

pesto stuffed scallops I placed mine into a pool of warm roasted red pepper sauce, but you could also use a light marinara sauce just as well. The flavor combination is dynamic!

pesto stuffed scallops

I served this as a main course with fresh green beans and summer corn but it would also be wonderful as an appetizer to start off your meal.

It’s simple, healthy, quick to make and the summery basil pesto takes it right over the top! Now pour a glsss of cold Sauvignon Blanc and you’re good to go!


Signature

Summer Crostini with Garden Pestos

crostini with garden pestos Now that summer is in full swing there’s usually always something to harvest daily from our veggie garden, some days it’s just a few stalks of kale or swiss chard, a tiny bunch of broccolini or a few cherry tomatoes. Nothing yet to make a huge meal from, but perfect for making small bites!

garden basil One thing I do have an abundance of right now are fresh herbs, the rain just exploded their growth. Basil, mint, thyme, rosemary, parsley, sage and tarragon are growing all over the place and I feel so guilty if I don’t use them all!

garden herbs I was recently gifted with some garlic scapes, (thanks Julie and Ken) so I thought making a few different pestos would be the perfect way to start using up all my bounty.

homemade garden pestos So I made my trusty Basil Pesto, and tried out two new ones, Pea and Mint, and Garlic Scape and Kale Pesto. If you use your food processor you can whip these up in no time! Pesto’s are so versatile you can put them in and on just about anything, pastas, grilled meats, soups, pizzas, veggies, fish, omelettes, I could go on and on, I even throw some in when making egg salad!

crostini with garden pestos Another fun way to eat up your pestos is to slather some on top of  crostini. Crostini are thin slices of toasted bread drizzled with olive oil and garnished with  endless possibilities. By adding  in your favorite charcuterie, grilled veggies, various cheeses, good olives, fresh fruit, etc. you can create an elegant antipasti, lunch or dinner, just don’t forget the wine!

crostini with garden pestos I was in love with this recipe the minute I saw it, a crusty piece of bread topped with pea and mint pesto, creamy Burrata cheese and a slice of prosciutto, this is to die for, it’s a meal in itself! The only thing I changed up in the recipe was the cheese, I used grated parmesan for mine.

If you don’t want to use meat try some thinly sliced grilled zucchini to replace it.   Again, I repeat, to die for!

crostini with garden harvest Here are some other ideas for crostini using up whatever you might have growing in your gardens.

crostini with garden harvest Roasted tomato slices topped with basil pesto***** Mascarpone cheese topped with garlic scape and kale pesto, roasted mushrooms, leeks and thyme*****

Ricotta topped with garlic and red pepper sauteed broccolini***** Goat cheese topped with garlic and red pepper sauteed swiss chard*****

crostini with garden harvest It’s all good! Small bites, big flavor, simple and sophisticated!

Garlic Scape and Kale Pesto
 
Ingredients
  • 2 garlic scapes cut in chunks
  • 2 cups kale, stems removed
  • ⅓ cup toasted almonds or walnuts
  • ⅓ cup grated romano cheese
  • pinch of red pepper flakes
  • salt and pepper to taste
  • olive oil
Instructions
  1. In a food processor add garlic scapes, nuts and kale, pulsing until chopped up fine.
  2. Add in cheese, red pepper and salt and pepper, process until incorporated.
  3. While machine is running, pour olive oil down the tube until you get a loose consistency.
  4. Cover and refrigerate.


Signature

Roasted Vegetable Strudel and A Farewell to the Garden

I can’t believe how brave I’m getting with phyllo dough, I used to be so afraid to use it, but after my last post I realized just how forgiving it really is. It’s so easy to patch it up if you make a mistake and you’d never even see your blooper after it’s all baked up.

In my last post I made a “pie so this time I decided to make a “strudel”, a roasted vegetable strudel. It was amazingly easy to make and it tasted phenomenal!

Roast your vegetables ahead of time, I used 2 zucchini, 1 large eggplant, 1 large red pepper, 1 small onion, 3 garlic cloves and a half a bag of frozen artichoke hearts. Dice the veggies, drizzle with olive oil, S&P and roast at 425F until tender and golden.

The most important thing I can say about using phyllo is to keep it covered with a damp cloth as you go layering it. For this recipe I used 6 sheets, I did not drench them in melted butter either, instead I sprayed olive oil over each sheet with my olive oil mister as well as a sprinkling of grated romano cheese on each layer.

When you reach the 6th sheet spread your vegetables all over leaving about a 2″ border all the way around. Scatter your favorite cheese combination on top of the veggies, I used fresh mozzarella, grated fontina, asiago and romano. Fold up the border ends over the vegetables then carefully roll up starting up on the longer side until it becomes into a log.

I sprayed olive oil on top of the log along with grated cheese and black pepper and baked it for around 20 minutes at 400F until golden.

Let it cool down a little before you slice into it. This was so good I can’t wait to make it again! You can really choose any veggies you like as well as cheese. I served a little dipping sauce made of leftover marinara and roasted red peppers that I swirled in my food processor! What a great combination!

Yesterday I went out and grabbed everything that was left in my garden, the last of my tomatoes and the rest of the kale, the weather is definitly changing here dipping down to the 40’s at night.

I gathered all my beloved basil and picked the very best leaves for my pesto, I will miss you!

Buon Appetito!

Signature

Time to Make the Pesto!

Our basil this year was the best ever! It was so nice to have it available whenever I needed it this summer, but now that the nights are getting cooler I thought it was time to cut it down and make some pesto before it starts to shrivel up because that would be just too sad!

UPDATE!
Since I wrote this post back in 201o I thought it would be nice to do an update on my beloved basil, it is now 2020, ten years later and I’m still going strong with my love for all things basil!

basil plants
My husband is still the gardener and he’s the one that grows it for me every year. We use to grow it in the ground but now we grow it in pots and the quality and taste seems even better!
picking basil
I make pesto many times during the season, I also freeze it, recently I bought some cubed silicone ice cube trays which I fill with my finished pesto, when totally frozen I then pop the cubes out and stick them into a container and tuck it back into the freezer. I can’t wait to defrost some to use in the dead of winter!
pesto ice tray

I personally do not like when pesto starts to turn brown, but years ago I found that just by blanching the leaves into boiling water for less than a minute and then submerging them quickly into ice water keeps their vibrant green color.

It’s been said that you can’t freeze pesto with the cheese in it, I’ve done it both ways and I see no difference, so I freeze mine completed with the cheese.

prepping pesto

So after picking the leaves off the branches I wash them first then get a pot of water boiling. When the water is boiling blanch the leaves for less than a minute, then into ice water which you will then squeeze dry.

An excellent tip I got years ago from a fellow blogger was to squeeze the water from spinach using a potato ricer and so I thought why not squeeze the water out of the blanched basil the same way using a potato ricer, and let me tell you it works like a charm!

When I’ve purchased store bought pesto’s in the past I find them way too garlicky or just too oily for my taste, but when you make your own you can add or subtract any of the amounts that you put into it. My advice is keep tasting it as you go along mixing it to get the right balance for you.

processor pesto

I stopped using pine nuts years ago, they’re just too expensive and then there was that whole “pine mouth” thing going around where badly produced pine nuts if eaten would take away your sense of taste and I didn’t want that to happen, so toasted walnuts it is, and you know what we love the flavor!

pesto ingredients
Good cheese like Parmigiano Reggiano,or even Pecorino Romano I have used, quality olive oil, fresh garlic and toasted nuts is all you need to make a fabulous basil pesto.

Delicious folded into warm pasta, so much flavor! Great with meats, salads, veggies, seafood and sauces, basil pesto is so versatile!

pesto recipe

Remember to keep tasting it, you might want to add more cheese, oil, salt, garlic or nuts whatever suits your own taste buds

ANOTHER TIP:

If you have an over abundance of basil leaves like I do you might want to try Lidia’s way of preserving them.

“Pluck the whole leaves and set them in a small paper cup, fill with water until the herb is submerged, then freeze. When frozen solid, pop the block of ice with the embedded herbs out of the paper cup and into a ziplock bag. The herbs, once the ice melts will be fresh and ready to use.”
 I hope you will give this a try it was so simple to do and you can pack quite a few leaves into the paper cups, another way to preserve your beautiful basil bounty!

Signature